
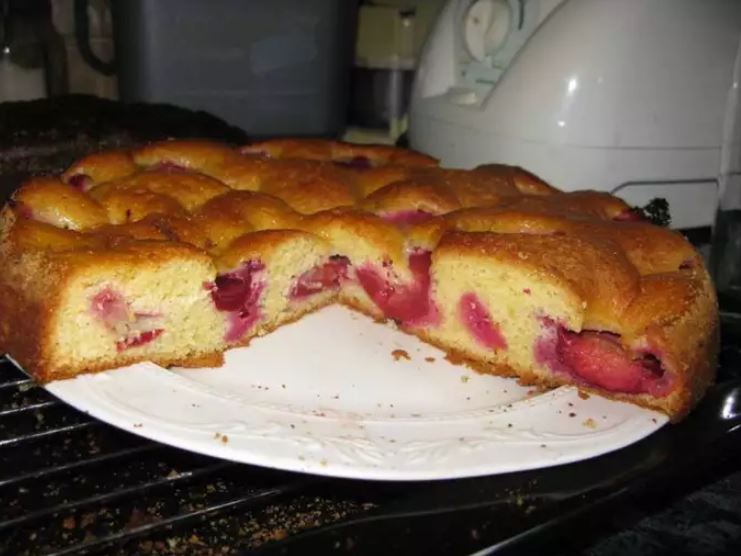
My Heavenly Simple Plum Cake: A Rustic Summer Joy
Is there anything more gorgeous than a basket of fresh summer plums? Their deep purple blush is a promise of sweet, tangy flavor I just can’t resist. One afternoon, with a heap of beautiful plums on my counter and a craving for something cozy, I decided to bake. No fuss, no fancy steps—just a simple, buttery cake to cradle those juicy gems. The result was pure magic. This Heavenly Simple Plum Cake is my go-to when I want a dessert that feels both elegant and utterly homey. It whispers “summer” and shouts “comfort” all at once.
The Story Behind Plum Cake
Plum cakes have roots in many European kitchens, especially in Germany and Austria. They often appear in late summer and early fall, making the most of the harvest. Traditionally, they might be more like a crust-less pudding or a yeasted dough. My version is a modern, easy twist—the classic American butter cake. It’s designed for simplicity, letting the fruit shine. I think of it as a friendly bridge between a dense fruit crumble and a light, fluffy cake. It’s perfect for today’s busy baker who still wants a taste of tradition.
Why You’ll Love This Plum Cake Recipe
You will adore this recipe for three big reasons. First, the flavor is a perfect dance—the cake is sweet and tender, while the plums bring a bright tartness. Second, it’s incredibly forgiving. Even if your plum slices aren’t artistically arranged, the cake will bake up beautifully. Third, it fills your home with the most welcoming aroma of butter, sugar, and warm fruit. It feels like a hug. It’s the kind of recipe that makes you look like a seasoned baker, even if you’re just starting out.
Perfect Occasions for this Stone Fruit Delight
This cake is a versatile star! Serve it at a casual weekend brunch with coffee. Bring it to a picnic—it travels well. It’s a lovely, light finish to a family dinner. I love taking it to potlucks because it always gets compliments. It’s also my secret weapon for last-minute guests. When you need something impressive but quick, this Heavenly Simple Plum Cake is your answer.
Ingredients for Your Stone Fruit Delight
- 1 cup all-purpose flour
- 1 teaspoon baking powder
- 1/4 teaspoon salt
- 1/2 cup unsalted butter, softened
- 1 cup granulated sugar
- 2 large eggs
- 1 teaspoon vanilla extract
- 8 plums, pitted and sliced
- Powdered sugar for dusting (optional)
Handy Substitution Options
Don’t have plums? No problem! This cake welcomes other stone fruits. Try using:
- Apricots: They are smaller, so you might need 10-12. Their flavor is less tangy and more floral.
- Nectarines or Peaches: Slice them similarly. Their juiciness is amazing.
- Frozen Plums: If fresh are out of season, use thawed frozen slices. Pat them dry a bit first.
- For the Flour: A gluten-free all-purpose blend often works well for a 1:1 substitution.
- For the Sugar: You can reduce granulated sugar to 3/4 cup if your plums are very sweet.
How to Make Your Heavenly Simple Plum Cake
Step 1: Prep Your Pan and Dry Ingredients
Start by preheating your oven to 350°F (175°C). This ensures a steady, even bake. Grease an 8-inch cake pan well. I like to line the bottom with a circle of parchment paper too—it guarantees a clean release later! In a medium bowl, whisk together your flour, baking powder, and salt. Watching the white flour mix with the tiny baking powder granules is your first little kitchen ritual. This blend will give your cake its lift and structure. Set it aside.
Step 2: Cream the Butter and Sugar
In a larger bowl, place your softened butter and granulated sugar. Using a hand mixer or a sturdy spoon, beat them together until they become pale, fluffy, and light. This takes about 3-4 minutes. The mixture will look like creamy clouds. This step is crucial! It traps air, which helps make the cake tender. Pro tip: Your butter should be soft but not melted. It should indent easily when you press it.
Step 3: Incorporate Eggs and Vanilla
Add your first egg to the butter-sugar cloud. Beat it in fully until the mixture is smooth again. Then add the second egg and do the same. Finally, pour in that teaspoon of vanilla extract. The rich, warm scent of vanilla will start to fill your kitchen. Now your batter is rich, glossy, and ready for the final flour addition.
Step 4: Blend in the Dry Ingredients
Gradually add your whisked dry ingredients to the wet batter. I usually add it in three parts, mixing gently with a spatula after each addition. Mix just until the flour is incorporated and no dry streaks remain. Over-mixing can make the cake tough, so be gentle! The batter will be thick, smooth, and beautifully golden.
Step 5: Arrange the Plums and Bake
Pour your batter into the prepared pan. Spread it evenly with your spatula. Now, take your sliced plums. Arrange them on top of the batter in any pattern you like—circles, rows, or just a happy jumble. Let some slices sink in slightly and others peek out. They will create a stunning top. Slide the pan into your preheated oven. Bake for 40-45 minutes. The cake will turn a gorgeous golden brown, and the plums will become soft and juicy. Chef’s tip: For extra flavor, sprinkle a tiny pinch of cinnamon over the plum slices before baking.
Step 6: Cool, Dust, and Serve
Once a toothpick inserted in the center comes out clean, your cake is done. Remove it from the oven. Let it cool completely in the pan on a wire rack. This patience prevents a crumbly disaster. Once cooled, run a knife around the edge and invert it onto a plate. A final dusting of powdered sugar through a sieve gives it a magical, snowy finish. Then, slice and enjoy!
Timing Breakdown
This Heavenly Simple Plum Cake respects your time.
- Prep Time: 15 minutes (includes slicing plums)
- Cook Time: 40-45 minutes
- Cooling Time: At least 30 minutes (very important)
- Total Time: Approximately 1 hour 30 minutes
My Chef’s Secret for the Best Plum Cake
My secret is in the plum slices. Don’t slice them too thin! Aim for slices about 1/4-inch thick. Thinner slices might dry out or disappear into the cake. Thicker slices hold their shape and burst with juicy flavor in every bite. They also create that beautiful, textured top that makes this cake so rustic and inviting.
A Little Extra Plum Info
Plums belong to the same family as cherries and peaches. There are over 2,000 varieties! The ones perfect for baking are often called “prune plums” or “European plums.” They are a bit denser and less watery. But for this cake, any ripe, firm plum you find at the market will work beautifully. Their color deepens as they bake, creating a stunning contrast.
Necessary Equipment
You don’t need fancy tools.
- 8-inch round cake pan (springform works too)
- Mixing bowls (one medium, one large)
- Whisk
- Hand mixer or sturdy wooden spoon
- Spatula
- Measuring cups and spoons
- Wire cooling rack
How to Store Your Plum Cake
Short-Term Storage: If eating within 2 days, simply cover the cooled cake loosely with plastic wrap or keep it under a cake dome at room temperature. The plums’ moisture keeps it pleasantly soft.
Refrigerating: For longer storage up to 5 days, place the cake in an airtight container and refrigerate. The cold will firm up the texture. Let a slice sit at room temperature for 15 minutes before eating to restore its tenderness.
Freezing: This cake freezes well! Wrap the whole cake or individual slices tightly in plastic wrap, then in foil. Freeze for up to 2 months. Thaw overnight in the refrigerator and then at room temperature before serving.
Tips and Advice for Success
- Use room temperature eggs and butter. They blend much more smoothly.
- If your plums are very tart, sprinkle about 2 tablespoons of sugar over them after arranging on the batter.
- Don’t skip the parchment paper lining. It really is a lifesaver for easy cleanup and perfect presentation.
- If the cake browns too quickly on top, you can loosely tent it with aluminum foil for the last 10 minutes of baking.
Presentation Tips for Your Delight
Make your cake a centerpiece!
- Serve on a simple white plate with a dusting of powdered sugar and a fresh mint leaf.
- Add a dollop of lightly sweetened whipped cream or a scoop of vanilla ice cream on the side.
- For a brunch, slice it into smaller pieces and arrange on a pretty tiered stand.
- Drizzle a little honey over each slice just before serving for extra shine and flavor.
6 Healthier & Fun Alternative Recipes
Love this idea but want to tweak it? Here are six delightful variations.
- Whole Wheat Plum Cake: Substitute all-purpose flour with whole wheat flour. It adds a nutty depth and more fiber. The texture will be slightly denser but still delicious.
- Reduced-Sugar Plum Cake: Cut the granulated sugar in the cake to 1/2 cup. Use very sweet plums. The fruit’s natural sugars will shine, making a less sweet but still satisfying dessert.
- Gluten-Free Plum Cake: Use a trusted 1:1 gluten-free all-purpose flour blend. Ensure your blend contains a binder like xanthan gum. Results are wonderfully similar.
- Vegan Plum Cake: Replace butter with vegan butter or coconut oil. Use a flax egg (1 tbsp ground flax + 3 tbsp water per egg) or a commercial vegan egg substitute. The cake will be equally moist.
- Plum and Almond Cake: Add 1/2 cup of finely ground almonds to the dry ingredients. Replace 1 tbsp of flour with 1 tbsp of almond flour. This adds a marvelous, rich flavor.
- Spiced Plum Cake: Add 1/2 teaspoon of cinnamon and 1/4 teaspoon of cardamom to the dry ingredients. This gives the cake a warm, aromatic twist perfect for fall.
If you’re looking for more easy, fruit-forward desserts, you must try my Summer Berry Cobbler for a burst of mixed berries. For a classic that never fails, my Perfect Apple Crisp is a family favorite. Chocolate lovers will adore this One-Bowl Chocolate Zucchini Cake, which is secretly healthy. And if plums inspire you, this Plum Jam Recipe is a wonderful way to preserve their flavor.
Common Mistakes to Avoid
Mistake 1: Using Melted or Cold Butter
This happens when we’re impatient! Butter that’s melted won’t hold air when creamed with sugar. Butter that’s too cold won’t blend smoothly. Both lead to a dense, flat cake. How to avoid it: Soften butter by leaving it out on the counter for 30-60 minutes before baking. It should be cool to touch but easily indented with a finger. That’s the perfect “softened” stage.
Mistake 2: Over-Mixing the Batter After Adding Flour
We often mix to make sure everything is combined. But over-mixing once flour is added develops the gluten too much. This makes the cake tough and chewy, not tender. How to avoid it: Add dry ingredients in batches. Mix with a spatula just until you see no dry flour pockets. A few tiny lumps are okay—they will dissolve during baking.
Mistake 3: Not Letting the Cake Cool Before Removing It
The cake is so tempting when warm! But trying to remove it from the pan too soon can cause it to break or crumble. The structure needs time to set as it cools. How to avoid it: Patience is key. Let the cake cool in its pan on a wire rack for at least 30 minutes. Then, run a knife around the edge and gently turn it out.
Mistake 4: Slicing Plums Too Thin or Too Thick
Extremely thin slices can almost dissolve into the cake, losing their identity. Very thick slices might not cook evenly and can make the top lumpy. How to avoid it: Aim for uniform slices about 1/4-inch thick. This gives the perfect balance of visible fruit and juicy texture.
Mistake 5: Underestimating the Baking Time
Because the top looks set and golden, we might think the cake is done. But the center under the juicy plums can remain wet. How to avoid it: Always use the toothpick test. Insert it into the center of the cake (between plums if possible). It should come out with just a few moist crumbs, not wet batter. If wet, bake 5 more minutes and check again.
Choosing quality ingredients always makes a difference. For understanding nutrition and quality, checking food labels on your flour and butter can be a helpful habit. And if you love baking cakes as much as I do, you’ll find tons of inspiration in my collection of other simple cake recipes.
Frequently Asked Questions
Can I use other fruits besides plums in this cake?
Absolutely! This cake base is wonderful with many stone fruits. Apricots, nectarines, peaches, and even cherries work beautifully. Just make sure to pit and slice them appropriately. The baking time might vary slightly if the fruit is very juicy (like peaches). Always do the toothpick test to confirm it’s done. The cake’s buttery flavor pairs well with both tart and sweet fruits, making it a versatile recipe for any season you have fresh fruit available.
My cake came out dense. What did I do wrong?
A dense cake usually points to a few common issues. First, check your butter. Was it properly softened, not melted or cold? Second, you might have over-mixed the batter after adding the flour. This develops the gluten and creates a tougher texture. Third, ensure your baking powder is fresh. Old baking powder loses its power and won’t lift the cake properly. Finally, measure your flour correctly. Spoon it into the measuring cup and level it off. Packing flour down adds too much and leads to density.
Do I have to use an 8-inch pan? Can I use a 9-inch?
You can use a 9-inch pan, but the results will be different. The cake will be thinner and will bake faster, likely in 30-35 minutes. The plum layer will also be more spread out. I prefer the 8-inch pan because it gives a taller, more substantial slice with a better balance of cake to fruit. If you use a 9-inch, keep a close eye on the baking time and check for doneness earlier to avoid over-baking.
Can I make this plum cake ahead of time?
Yes, you can! This cake is great for making ahead. Bake it completely, let it cool, and store it airtight at room temperature for up to 2 days. The flavors actually meld and improve slightly overnight. For longer storage, refrigerate it for up to 5 days. You can also freeze it as described. Making it ahead is perfect for parties—it takes the pressure off day-of baking and allows you to focus on other preparations.
Why do the plums sometimes sink into the cake?
Some sinking is normal and actually lovely—it creates pockets of fruity goodness inside. But if they sink completely, your batter might be too thin. This can happen if the butter was too soft or melted, or if you under-measure the flour. Ensuring a thicker, properly creamed batter will help the plums stay more on top. Also, arranging them gently on top rather than stirring them in helps maintain their position.
Is it necessary to dust with powdered sugar?
It’s not necessary, but it’s a beautiful finishing touch! The powdered sugar adds a subtle extra sweetness and a pretty, professional look. It also slightly balances the tartness of the plums. If you prefer a less sweet cake or want to showcase the natural color of the plums, you can skip it. A dollop of whipped cream or a simple berry sauce are other gorgeous alternatives for serving.
Can I add spices to this plum cake recipe?
You can absolutely add spices! It’s a wonderful way to customize the cake. A half teaspoon of cinnamon added to the dry ingredients is a classic choice. Cardamom or nutmeg (about 1/4 teaspoon) also work beautifully with plums. For a fall vibe, try a pinch of allspice. Just mix the spice into your flour blend before adding it to the wet ingredients. This ensures even distribution throughout the cake.
What’s the best way to slice plums for this cake?
The best way is to halve the plum first, remove the pit, and then slice each half into even slices, about 1/4-inch thick. I like to slice from the outer edge towards the center, keeping the shape of the half. This gives you attractive, crescent-shaped slices. If the plum is very large, you might get 4-5 slices per half. Uniformity helps them bake evenly and look pretty on top of the cake.
My cake is browning too fast on top. What should I do?
If the top is getting dark brown before the center is cooked, your oven might run hot, or the pan is too close to the top element. Simply take a piece of aluminum foil and loosely tent it over the cake pan. Do this about halfway through baking if you notice rapid browning. The foil will shield the top from direct heat, allowing the inside to finish cooking without the top burning. It’s a simple rescue trick!
Can I use margarine instead of butter?
I strongly recommend using real unsalted butter. Butter provides flavor, moisture, and structure that margarine often can’t match. Margarine can sometimes contain more water and less fat, which might alter the texture and taste of your Heavenly Simple Plum Cake. For the best, richest result, butter is the key. If you must substitute, use a high-quality vegan butter stick designed for baking, not a soft tub margarine.
Your Simple Slice of Summer Heaven
That’s all there is to it! This Heavenly Simple Plum Cake is a testament to how uncomplicated baking can bring the greatest joy. It celebrates the fruit, respects your time, and delivers a stunning, delicious result. Every time I bake it, I remember that summer feeling—the abundance, the warmth, the simple pleasures. I hope you bake it, share it, and savor every bite. Happy baking!
Equipment
- Grand bol
- Fouet
- Spatule
- Moule à gâteau de 20 cm
- Papier sulfurisé
Ingredients
- 1 tasse farine tout usage
- 1 c. à café poudre à lever
- 1/4 c. à café sel
- 1/2 tasse beurre non salé, ramolli
- 1 tasse sucre granulé
- 2 grands œufs
- 1 c. à café extrait de vanille
- 8 prunes, dénoyautées et tranchées
- q.s. sucre glace pour la décoration
Instructions
- Préchauffez votre four à 175°C et graissez un moule à gâteau de 20 cm, en tapissant le fond de papier sulfurisé.
- Dans un bol moyen, mélangez la farine, la poudre à lever et le sel ; mettez de côté.
- Dans un grand bol, crémez le beurre ramolli et le sucre granulé jusqu'à ce que le mélange soit pâle et moelleux (environ 3-4 minutes).
- Ajoutez un œuf au mélange beurre-sucre et battez jusqu'à obtenir une texture lisse, puis ajoutez le deuxième œuf et l'extrait de vanille, en mélangeant jusqu'à obtenir une bonne consistance.
- Incorporez progressivement les ingrédients secs à l'aide d'une spatule, en mélangeant juste jusqu'à ce qu'il n'y ait plus de traces de farine.
- Versez la pâte dans le moule préparé et disposez les tranches de prunes sur le dessus selon votre motif désiré.
- Faites cuire au four pendant 40-45 minutes ou jusqu'à ce qu'un cure-dent inséré en ressorte propre.
- Laissez le gâteau refroidir dans le moule sur une grille avant de le retourner sur une assiette et de le saupoudrer de sucre glace.
Notes
Nutrition

Hi, I’m Olivia Parker, the founder of BakingSecret.com and a lifelong lover of all things sweet and homemade. I grew up in a small town in Oregon, where the smell of fresh cookies in my family’s kitchen sparked my passion for baking. Over the years, I turned that passion into a mission: to help home bakers feel confident, inspired, and creative.
After studying food science and working in several artisan bakeries across the U.S., I decided to create a space where everyone from beginners to seasoned bakers can find reliable recipes, expert tips, and a warm, welcoming community. BakingSecret.com is my way of sharing the magic of baking with the world. When I’m not testing new recipes, you’ll find me exploring farmers’ markets, collecting vintage cookbooks, or perfecting my sourdough technique.