
You know that feeling when a dessert is so good it makes you close your eyes and just… pause? That’s my Cocada Cake. It’s the kind of treat that starts conversations at my dinner table. Everyone wants the recipe. It’s not just a cake; it’s a fluffy, moist, coconutty celebration that feels like a hug from the inside. Today, I’m sharing my tried-and-true family version—the one that never fails to get empty plates and happy smiles.
The Sweet Story of Cocada Cake
Cocada is originally a classic Latin American and Brazilian confection, a sweet made from coconut and sugar. Turning that into a cake? Pure genius! My first taste was at a friend’s backyard party years ago. I was hooked. The traditional candy is delicious, but this cake version takes it to a whole new level of comfort. It’s a beautiful blend of simple ingredients creating something extraordinary. The modern “bolo de cocada” combines a delicate sponge with a luscious, creamy coconut filling. It’s a testament to how home cooks love to play and make traditions their own.
Why You’ll Fall in Love With This Cocada Cake
Let me count the ways! First, the texture is magical—light, airy cake layers soaked in milk, paired with a silky, rich coconut cream. It’s a party in your mouth. Second, it’s impressive but not impossibly hard. The steps are straightforward. Third, that coconut flavor is front and center but not overwhelming. It’s tropical, sweet, and utterly comforting. It’s the perfect dessert to show off your baking skills without spending all day in the kitchen. Trust me, this cake has a way of making people feel special.
The Best Moments for a Cocada Cake
This cake is a star at any gathering! It’s perfect for birthdays, bringing a taste of the tropics to the celebration. I love serving it at summer barbecues—it’s a refreshing finish after grilled foods. It’s also my go-to for holiday dinners when I want something different from the usual pies. A simple Sunday family lunch? Absolutely! A slice of this Cocada Cake with a cup of coffee turns an ordinary afternoon into a sweet little ritual. It’s a versatile crowd-pleaser.
Gathering Your Ingredients
Let’s get everything on the counter! Most items are pantry staples, which is another reason I adore this recipe.
For the Cake:
- 6 large eggs, at room temperature
- 1 cup (200ml) of granulated sugar
- 300ml of hot milk
- 2 cups (using the same 200ml cup) of all-purpose wheat flour
- 1 tablespoon of chemical (baking) powder
- 1/2 cup of grated coconut (I use unsweetened)
- Butter and flour for the pan
For the Filling & Soaking:
- 2 cans (395g each) of sweetened condensed milk
- 1 box (200g) of table cream (crema de leche) or heavy cream
- 1.5 cups of milk, plus 200ml extra for soaking the cake
- 2 tablespoons of corn starch
- 100g of grated coconut
- 200ml of coconut milk
Handy Substitutions
Don’t sweat it if you’re missing something! Here are easy swaps:
- Table Cream: An equal amount of heavy cream or full-fat sour cream works perfectly.
- Grated Coconut: You can use sweetened shredded coconut flakes. Just note the filling will be sweeter.
- Coconut Milk: In a pinch, use more regular milk and add a teaspoon of coconut extract for flavor.
- Wheat Flour: For a gluten-free Cocada Cake, use a reliable 1-to-1 gluten-free flour blend.
Making Your Dreamy Cocada Cake
Roll up your sleeves, put on some music, and let’s bake! The process is as enjoyable as the result.
Step 1: Whip Those Eggs to Perfection
First, preheat your oven to 350°F (180°C). Grab your mixer and crack in the 6 eggs. Beat them on high speed for a good 5-7 minutes. You want them to be very pale, thick, and tripled in volume. The ribbon stage is key here—when you lift the beater, the batter should fall back into the bowl in a thick ribbon that holds its shape for a few seconds. This air is what gives our cake its beautiful lift. With the mixer still running, gradually rain in the sugar. Let it beat for another minute to fully incorporate.
Pro tip: Room temperature eggs whip up much higher and faster than cold ones! Pull them out about an hour before you start.
Step 2: Gently Bring the Batter Together
Now, we need to be gentle to keep all that lovely air. Reduce your mixer speed to the absolute lowest setting. Alternately add small amounts of the flour and the hot milk. Start and end with the flour. I add about a third of the flour, then a third of the milk, and repeat. Mix just until you see the last traces of flour disappear. The batter will be thin and liquidy, and that’s exactly right!
Step 3: Fold and Bake
Turn off the mixer. Sprinkle the tablespoon of baking powder and the half cup of grated coconut over the batter. Now, use a flexible spatula and fold gently. Use a broad, sweeping motion from the bottom up until everything is just combined. Don’t overmix! Pour this beautiful batter into your prepared pan (greased, floured, and lined with parchment paper). Smooth the top and immediately place it in the preheated oven. Bake for about 30-35 minutes.
Chef’s tip: The classic test is the toothpick test. Insert it into the center of the cake; it should come out clean or with a few moist crumbs. If it’s wet, bake for a few more minutes.
Step 4: Create the Luscious Coconut Filling
While the cake bakes and cools, let’s make the star—the filling! In a medium saucepan, combine the condensed milk, cream, 1.5 cups of milk, and cornstarch. Important: Do this with the heat off. Whisk it really well until the cornstarch is completely dissolved and no lumps remain. This prevents a lumpy filling. Now, turn the heat to medium. Cook, stirring constantly with a wooden spoon or whisk. You’ll feel it start to thicken. Keep stirring! Once it’s bubbling and thick like pudding, add the 100g of grated coconut. Cook for another minute. Reduce the heat to low and stir in the coconut milk. Cook for just 2 more minutes. Pour it into a bowl, cover the surface directly with plastic wrap (to prevent a skin), and refrigerate.
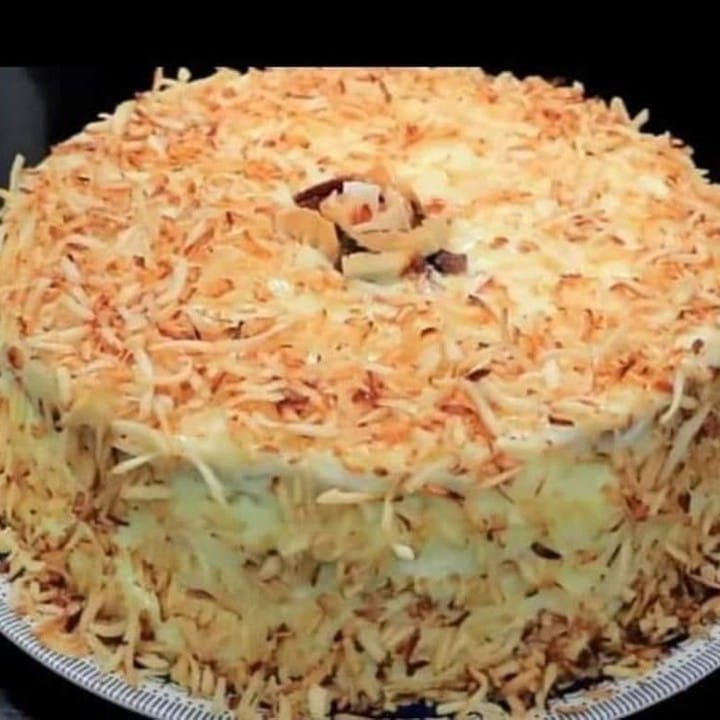
Step 5: Assemble Your Masterpiece
Once the cake is completely cool, run a knife around the edges and turn it out. Use a serrated knife to carefully slice it horizontally into three even layers. Place your first layer on a cake plate or stand. Drizzle it generously with some of the 200ml of plain milk. This keeps it incredibly moist. Now, spread a generous amount of the cooled coconut filling over this layer. Sprinkle some extra toasted grated coconut on top. Place the second cake layer on top and repeat: milk soak, filling, coconut sprinkle. Top with the final cake layer. Now, use the remaining filling to cover the top and sides of the entire cake. Create a beautiful, rustic swirl with your spatula. Finish with a final flourish of toasted coconut all over.
Timing It Perfectly
| Task | Time |
|---|---|
| Preparation (mise en place) | 20 minutes |
| Cake Baking Time | 30-35 minutes |
| Cake Cooling Time | 1 hour |
| Filling Prep & Chill | 20 minutes prep + 1 hour chill |
| Assembly & Decoration | 15 minutes |
| Total Time (approx.) | 2.5 hours |
The Chef’s Secret for an Unforgettable Cocada Cake
Here’s my little secret: toast your grated coconut before adding it to the filling. Just spread it on a baking sheet and pop it in a 350°F oven for 5-8 minutes, stirring once, until it’s golden brown. This simple step unlocks a deep, nutty, caramel-like flavor that makes the entire cake taste more complex and special. It adds a wonderful texture contrast, too!
Fun Fact: The Power of Coconut
Did you know coconut is technically a drupe, a type of fruit, not a nut? The “meat” we grate is the solid endosperm. In many tropical cultures, every part of the coconut is used, making it a symbol of resourcefulness. In our cake, it provides flavor, texture, and a wonderful aroma that just screams “treat.”
Equipment You’ll Need
- Stand mixer or hand mixer
- 10-inch round cake pan (springform is easiest)
- Medium saucepan
- Whisk and silicone spatula
- Serrated bread knife for slicing cake layers
- Cooling rack
- Measuring cups and spoons
Storing Your Cocada Cake
Because of the milk-soaked layers and creamy filling, this cake needs to be refrigerated. Cover it well with a cake dome or place it in a large airtight container. It will keep beautifully for up to 4 days in the fridge.
The cool environment actually helps the flavors meld together. The cake becomes even more moist and cohesive after a day. Just let individual slices sit at room temperature for about 15 minutes before serving to take the chill off.
You can also freeze the assembled cake for up to a month. Wrap it tightly in a double layer of plastic wrap and then aluminum foil. Thaw overnight in the refrigerator before serving.
My Best Tips for Success
- Room Temp is Key: Eggs and dairy mix better and create a better texture when not cold.
- Don’t Open the Oven: Resist peeking for the first 25 minutes! A sudden drop in temperature can make the cake fall.
- Cool Completely: Never try to slice or fill a warm cake. It will tear and the filling will melt. Patience!
- Toast Extra Coconut: Toast a whole cup of coconut. Use half in the filling and save the rest to decorate the outside. It looks gorgeous.
Presenting Your Cake Like a Pro
- Serve on a pretty cake stand with fresh flowers or lime wedges around the base.
- Drizzle each plate with a little dulce de leche or caramel sauce before placing the slice.
- Add a dollop of lightly sweetened whipped cream on the side.
- For a party, top with edible gold leaf or sprinkle with coarse sugar for sparkle.
Six Delicious Variations to Try
Once you master the classic, get creative! Here are six fun twists:
- Chocolate Cocada Cake: Add 1/2 cup of cocoa powder to the flour when making the cake batter. For the filling, swirl in some chocolate ganache.
- Tropical Fruit Cocada Cake: Add a layer of diced mango or pineapple between the cake and filling. The bright acid cuts the sweetness wonderfully.
- Lime-Infused Cocada Cake: Add the zest of two limes to the cake batter and a tablespoon of lime juice to the filling for a zingy twist.
- Toasted Almond Cocada Cake: Fold 1/2 cup of finely chopped toasted almonds into the batter and sprinkle sliced almonds on the outside.
- Mini Cocada Cakes: Bake the batter in a cupcake pan (filled halfway) for about 18 minutes. Fill and frost individually for perfect party portions.
- Vegan Cocada Cake: Use flax eggs, plant-based milk and cream, and vegan condensed milk. It requires some special ingredients but is totally doable!
If you love playing with cake flavors, you must explore our collection of classic and modern cake recipes for more inspiration. You might find your next favorite, like a rich Chocolate Truffle Cake, a zesty Lemon Poppy Seed Bundt, or a stunning Berry Chantilly Cake. And for another coconut lover’s dream, this Toasted Coconut Cream Pie is pure heaven.
Common Mistakes to Avoid
Mistake 1: Not Whipping the Eggs Enough
This is the biggest culprit for a dense, flat cake. The eggs need to be whipped until they are very pale, thick, and hold a ribbon. If you stop too soon, you won’t have enough air to lift the heavy flour and milk. The result is a sad, sunken cake. Be patient! Let the mixer run for a full 5-7 minutes on high. The volume should nearly triple.
Mistake 2: Adding Flour and Milk Too Quickly
Dumping in all the flour and milk at once will deflate all the air you just worked so hard to whip in. You must add them alternately, in small batches, with the mixer on the lowest speed. This gentle incorporation keeps the structure intact. Think of it as folding clouds into the batter. Slow and steady wins a fluffy cake.
Mistake 3: Using Cold Filling on a Warm Cake
Impatience leads to a soggy, melting mess. If you try to assemble the cake while the layers are still warm, they will absorb the milk soak unevenly and can become mushy. The cold filling will melt and slide right off. Always, always let the cake cool completely on a wire rack. Let the filling chill and set in the fridge. A cool assembly is a clean and beautiful assembly.
Mistake 4: Overcooking the Coconut Filling
The filling will continue to thicken as it cools. If you cook it until it’s super thick in the pan, it will become almost too firm and pasty once refrigerated. You want it to be the consistency of a thick pudding or custard that coats the back of a spoon. Once it bubbles and thickens noticeably, add the coconut milk, cook for the final two minutes, and remove it from the heat. Remember, perfect macronutrient balance in a dessert is about the right texture and satisfaction, not just the ingredients.
Frequently Asked Questions About Cocada Cake
Can I make this Cocada Cake a day ahead?
Absolutely! In fact, I highly recommend it. Making the cake a day ahead allows the flavors to develop fully and the milk soak to distribute evenly throughout the layers. The texture becomes even more moist and delicious. Just bake and cool the cake layers, make and chill the filling. Assemble the whole cake, cover it well, and store it in the refrigerator overnight. It saves you time on the day you want to serve it, and the taste is even better.
My cake sank in the middle. What went wrong?
A sunken cake usually points to two issues. First, the most common reason is opening the oven door too early. The rush of cold air shocks the delicate rising batter and causes it to collapse. Wait at least 25 minutes before you even think about peeking. Second, underbaking can cause a sinkhole. The center looks set but is still wet inside. Use the toothpick test in a few spots to be sure it’s fully cooked through before removing it from the oven.
What can I use if I can’t find table cream (crema de leche)?
No problem! The best direct substitute is heavy whipping cream (not whipped). It has a similar fat content and richness. Full-fat sour cream is another great option; it will add a very slight tang that balances the sweetness nicely. Greek yogurt can work in a pinch, but the filling will be a bit less creamy and more tart. Any of these will still give you a delicious, creamy coconut filling for your cake.
How do I prevent lumps in my coconut filling?
The key is to mix the cornstarch with the cold liquids before any heat is applied. Always combine the cornstarch with a little of the cold milk first to make a smooth slurry, then whisk it into the condensed milk and other ingredients in a cold pan. Whisk constantly as you turn on the heat and throughout the cooking process. If you do get a small lump or two, simply press the warm filling through a fine-mesh sieve before adding the coconut.
Can I use sweetened coconut flakes instead of grated coconut?
Yes, you can, but there are a couple of things to keep in mind. Sweetened flakes are drier and sweeter. If using them, I recommend pulsing them in a food processor a few times to break them down to a texture more like grated coconut. Also, taste your filling before adding any extra sugar, as the condensed milk and sweetened coconut together might be too sweet for some. You may want to reduce the sugar in another component slightly.
Why is my filling too runny and not setting?
A runny filling typically means the cornstarch didn’t activate properly. This happens if you didn’t bring the mixture to a full boil while stirring constantly. Cornstarch needs to reach a certain temperature to thicken. If it’s runny after cooling, you can salvage it. Simply return it to a saucepan, mix a new tablespoon of cornstarch with a little cold milk, whisk it into the runny filling, and cook again until it bubbles and thickens.
How do I cleanly cut a cake with creamy filling?
For the cleanest slices, dip your knife in hot water and wipe it dry with a clean towel before each cut. The heat helps the knife glide smoothly through the creamy filling without dragging and smearing it. This little trick gives you restaurant-quality, neat slices every single time. It’s especially helpful for a cake like this with soft layers and a rich filling.
Can I freeze the assembled Cocada Cake?
You can, but with a caveat. The texture of the milk-soaked cake may change slightly upon thawing, becoming a bit more dense. For best results, freeze the *unfilled* cake layers wrapped tightly in plastic and foil. Freeze the filling separately in an airtight container. Thaw both in the refrigerator overnight, then assemble the cake fresh. This method preserves the ideal texture much better.
Is there a way to make this cake less sweet?
If you prefer desserts that are less sugary, you can make a few adjustments. You can reduce the sugar in the cake batter by about a quarter cup. For the filling, consider using one can of condensed milk and supplementing the creaminess with more plain milk or coconut milk, but you’ll need to increase the cornstarch slightly to compensate for the thicker texture. Using unsweetened grated coconut instead of sweetened also helps control the overall sweetness level.
What’s the best way to toast coconut for decoration?
Toasting coconut is easy and adds amazing flavor. Spread sweetened or unsweetened shredded coconut in a thin, even layer on a baking sheet. Bake in a preheated 325°F (160°C) oven. Stir it every 3-5 minutes. It can go from perfectly golden to burnt very quickly! It usually takes 5-10 minutes total. Watch it closely—you’ll smell a lovely nutty aroma when it’s done. Let it cool completely before sprinkling it on your cake.
Your New Favorite Cake Awaits
And there you have it—my beloved Cocada Cake recipe in all its glory. This cake is more than just a list of ingredients and steps. It’s a promise of a tender crumb, a creamy surprise, and the tropical whisper of coconut in every bite. It’s the cake that turns a regular day into a small celebration. I’ve made it for birthdays, for comfort, and just because. Each time, it brings nothing but joy. So gather your ingredients, put on your apron, and bake a little happiness. Don’t forget to share a slice with someone you love. Happy baking
Equipment
- Grand bol
- Fouet
- Spatule
- Plaque à pâtisserie
- Papier sulfurisé
Ingredients
- 6 œufs
- 200 g sucre
- 300 ml lait chaud
- 360 g farine tout usage
- 15 g poudre à lever
- 60 g coco râpé non sucré
- 2 boîtes lait concentré sucré 395g chacune
- 200 g crème épaisse ou crème lourde
- 300 ml lait
- 30 g fécule de maïs
- 100 g cocotier râpé
- 200 ml lait de coco
Instructions
- Préchauffez votre four à 175°C.
- Battez les 6 œufs à vitesse élevée pendant 5 à 7 minutes jusqu'à ce qu'ils deviennent pâles et triples de volume.
- Ajoutez progressivement le sucre en continuant à battre pendant une minute supplémentaire.
- Réduisez la vitesse du mixeur et ajoutez alternativement la farine et le lait chaud jusqu'à ce que le mélange soit à peine homogène.
- Incorporez délicatement la poudre à lever et la noix de coco râpée à l'aide d'une spatule.
- Versez la pâte dans un moule graissé et fariné et égalisez le dessus.
- Faites cuire au four pendant 30 à 35 minutes ou jusqu'à ce qu'un cure-dent inséré en ressorte propre.
- Dans une casserole moyenne (hors du feu), fouettez le lait concentré, la crème, 300ml de lait et la fécule jusqu'à obtenir un mélange homogène.
- Faites cuire le mélange à feu moyen, en remuant constamment jusqu'à ce qu'il épaississe, puis incorporez le coco râpé et le lait de coco.
- Laissez la garniture refroidir et réfrigérez.
- Une fois que le gâteau a refroidi, découpez-le en trois couches.
- Arrosez chaque couche avec 200ml de lait supplémentaire, en ajoutant une généreuse quantité de garniture entre les couches.
- Utilisez le reste de la garniture pour glacer le dessus et les côtés du gâteau, en terminant avec de la noix de coco grillée sur le dessus.
Notes
Nutrition

Hi, I’m Olivia Parker, the founder of BakingSecret.com and a lifelong lover of all things sweet and homemade. I grew up in a small town in Oregon, where the smell of fresh cookies in my family’s kitchen sparked my passion for baking. Over the years, I turned that passion into a mission: to help home bakers feel confident, inspired, and creative.
After studying food science and working in several artisan bakeries across the U.S., I decided to create a space where everyone from beginners to seasoned bakers can find reliable recipes, expert tips, and a warm, welcoming community. BakingSecret.com is my way of sharing the magic of baking with the world. When I’m not testing new recipes, you’ll find me exploring farmers’ markets, collecting vintage cookbooks, or perfecting my sourdough technique.