
Bibingka Recipe: My Family’s Favorite Festive Treat
There’s a certain magic in the air when the smell of toasting banana leaves and sweet coconut milk fills the kitchen. For me, that smell is pure childhood, pure celebration, pure home. That smell is bibingka. This Filipino rice cake is more than just a dessert; it’s a warm hug on a plate. Today, I’m sharing my tried-and-true Bibingka recipe that’s foolproof, delicious, and will make your kitchen smell absolutely incredible.
The Sweet Story of Bibingka: From Streets to Your Oven
Traditionally, bibingka is cooked over hot charcoal in clay pots lined with aromatic banana leaves. You’d find it at Filipino Christmas markets, a must-have treat after ‘Simbang Gabi’ (night mass). The modern home kitchen version is just as wonderful. My version captures that classic, slightly chewy texture and sweet, coconutty soul of the original. While it honors tradition, using a regular oven makes it accessible for anyone wanting a taste of Filipino comfort food. It’s a beautiful link to heritage, and I love sharing that story with every bite.
Why You’ll Absolutely Adore This Bibingka
First, it’s wonderfully simple! No fancy techniques are needed. Second, the flavor is uniquely comforting—sweet, fragrant, and unlike any typical cake. The combination of rice flour and coconut milk creates a delightfully tender yet substantial crumb. Plus, it’s naturally gluten-free! This recipe is my go-to for potlucks because it’s always a conversation starter and disappears faster than you can say “seconds, please!”
When to Whip Up This Amazing Bibingka
This cake is a star at any gathering! It’s perfect for holiday breakfasts, especially during Christmas. It’s a brilliant dessert for dinner parties—serve it warm for maximum “wow” factor. I also love making it for weekend brunch with a cup of strong coffee. Honestly, any day you need a little extra sweetness is a perfect day for bibingka.
Gathering Your Bibingka Ingredients
Here’s what you’ll need for this beautiful bibingka:
- 3 Cups rice flour
- 1 1/2 Tablespoons baking powder
- 1 Cup brown sugar
- 3 Eggs
- 3 Cups coconut milk
- 1 1/2 Teaspoons vanilla extract
- 1/2 Teaspoon salt
Easy Swaps: Bibingka Substitution Options
No rice flour? You can use an equal amount of glutinous rice flour for a chewier texture, or all-purpose flour for a more cake-like result (though it won’t be gluten-free). Out of brown sugar? White sugar works, but you’ll miss that lovely molasses depth. If fresh coconut milk isn’t available, a high-quality canned version is fine. I also love adding a sprinkle of grated cheese or salted egg on top before baking for a savory twist!
How to Make Perfect Bibingka: Step-by-Step
Step 1: Mix Your Dry Ingredients
Grab a large mixing bowl. Pour in your fluffy rice flour, the baking powder, a half-teaspoon of salt, and that gorgeous pile of brown sugar. Whisk them all together. Watch as the sugar creates little ribbons through the pale flour. This ensures every bite is evenly sweet and perfectly risen. Set this fragrant dry mix aside for a moment.
Step 2: Create the Wet Mixture
In a separate bowl, crack in three eggs. Add the vanilla extract—that wonderful smell is just the beginning! Now, pour in the rich, creamy coconut milk. Use a whisk to beat this together until it’s a smooth, homogenous, pale liquid. The coconut fat might separate a little; that’s okay, just whisk it back in. This mixture is the heart of your bibingka’s moisture and flavor.
Step 3: Combine Everything Gently
Here’s the key part: pour your flour mixture over the coconut milk mixture. Now, use a spatula to fold them together. Gently cut through the center and sweep around the bowl. You want a smooth, lump-free batter, but be kind to it. Pro tip: Do not overbeat! Overmixing can make the bibingka tough. Just fold until no dry streaks remain. The batter will be pourable and slightly thick.
Step 4: Prep, Pour, and Bake
Preheat your oven to 400°F (200°C). Line your baking pan or molds with banana leaves for that authentic aroma, or use parchment paper. Pour the lovely batter in. Slide it into the hot oven and bake for about 30 minutes. Your kitchen will smell like a tropical paradise. Chef’s tip: For that classic, slightly crusty top, turn on your broiler for the last 2-3 minutes. Watch it closely so it doesn’t burn!
Step 5: The Final Test for Doneness
After 30 minutes, your bibingka should be golden and puffed. The true test? Insert a toothpick into the center. If it comes out clean or with just a few dry crumbs, it’s done! If it’s wet, give it a few more minutes. Let it cool in the pan for 10-15 minutes. It will settle and become easier to slice. The wait is the hardest part!
Your Bibingka Timing Breakdown
- Prep Time: 15 minutes
- Cooking Time: 30 minutes
- Resting Time: 15 minutes
- Total Time: About 1 hour
The Chef’s Secret for the Best Bibingka
My absolute secret? Freshly grated coconut milk. If you can find a fresh coconut, the effort is 100% worth it. The flavor is brighter, creamier, and less oily than some canned versions. It elevates the entire cake from great to mind-blowingly authentic. Trust me on this one!
A Little Extra About Bibingka
Did you know the banana leaf isn’t just for tradition? It actually imparts a subtle, herbal fragrance that you can’t replicate with parchment paper. It also creates a tiny insulating layer, preventing the bottom from burning in the intense heat of traditional clay ovens. It’s ancient, clever cooking tech!
Equipment You’ll Need
- Two large mixing bowls
- Whisk
- Spatula
- 9-inch round cake pan or similar-sized baking dish
- Oven
- Toothpick for testing
Storing Your Delicious Bibingka
Once completely cool, you can store your bibingka. Wrap it tightly in plastic wrap or place it in an airtight container. It will keep at room temperature for about 2 days. The texture is best on the day it’s made, but it’s still delicious the next day.
For longer storage, bibingka freezes beautifully. Slice it, wrap each piece individually, and freeze for up to a month. This lets you have a taste of the holidays anytime you want!
To reheat, simply thaw (if frozen) and warm it in the oven or toaster oven at 300°F for 5-10 minutes. Avoid the microwave, as it can make the texture gummy. A quick re-toast brings back that wonderful, slightly crisp edge.
My Best Tips and Advice for Success
- Room temperature ingredients blend more smoothly, especially the eggs and coconut milk.
- Sift your rice flour if it seems lumpy for an ultra-smooth batter.
- Don’t skip the salt! It balances the sweetness perfectly.
- Let the bibingka rest before slicing. It firms up and is easier to serve.
Fun Ways to Present Your Bibingka
- Serve it on a plate lined with a fresh piece of banana leaf.
- Dust the top with a little powdered sugar or a sprinkle of grated coconut.
- Add a pat of butter on top of a warm slice and watch it melt.
- Pair it with a scoop of vanilla ice cream or a dollop of sweetened whipped cream.
6 Delicious Bibingka Variations to Try
1. Bibingka with Cheese & Salted Egg: This is a classic combo! Before baking, top your batter with thin slices of sharp cheddar and quarters of salted duck egg. The salty, savory notes cut the sweetness beautifully.
2. Ube Bibingka: Add 1 cup of ube (purple yam) halaya (jam) to the wet ingredients. You’ll get a stunning violet color and a fantastic, earthy flavor. It’s a real showstopper.
3. Chocolate Bibingka: Stir in 1/2 cup of cocoa powder with the dry ingredients and add some chocolate chips to the batter. A fun twist for chocolate lovers.
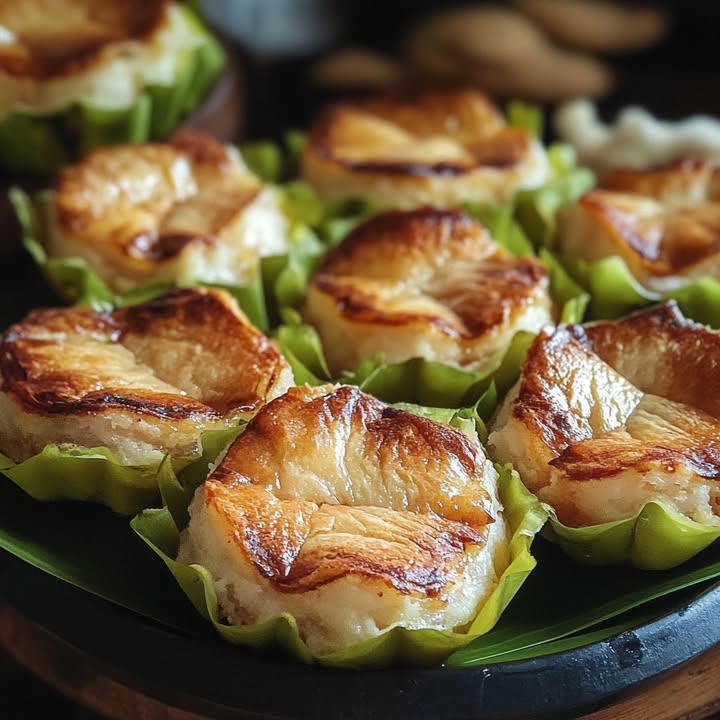
4. Bibingka Muffins: Pour the batter into a muffin tin lined with banana leaf cups or paper liners. Reduce baking time to 20-25 minutes. Perfect for individual portions!
5. Coconut Glaze Bibingka: Whisk together powdered sugar, a splash of coconut milk, and a pinch of salt. Drizzle this glaze over the cooled cake for extra sweetness and coconut punch.
6. Pandan Bibingka: Replace the vanilla extract with 1 teaspoon of pandan extract. It will give your cake a wonderful green hue and a lovely, fragrant aroma reminiscent of vanilla and almond.
Common Mistakes to Avoid When Making Bibingka
Mistake 1: Overmixing the Batter
This is the biggest culprit for a dense, tough bibingka. When you vigorously beat the batter, you develop the gluten in the rice flour (yes, even rice flour has some!). This leads to a chewy, rubbery texture instead of a soft, tender crumb. The fix is simple: gently fold the wet and dry ingredients together just until combined. A few small lumps are better than an overworked batter.
Mistake 2: Using Cold Ingredients
Adding cold eggs and coconut milk straight from the fridge to your mix can cause the batter to separate or become grainy. It can also affect how evenly the cake rises. To avoid this, let your eggs and coconut milk sit on the counter for 20-30 minutes before you start. Room-temperature ingredients emulsify better, creating a smoother, more homogenous batter that bakes up perfectly.
Mistake 3: Not Testing for Doneness Properly
Relying solely on baking time or just the color of the top can lead to an undercooked or dry bibingka. Ovens vary, and pan sizes differ. Always use the toothpick test. Insert it into the very center of the cake. If it comes out with wet batter, it needs more time. If it comes out clean or with a few dry crumbs, it’s ready. This is the only sure way to know your cake is perfectly baked inside.
Mistake 4: Skipping the Banana Leaf Lining
You might think parchment paper is an equal swap, but you’d miss out on the essential flavor and aroma that defines authentic bibingka. The heat releases fragrant oils from the banana leaf that infuse the entire cake with a subtle, sweet, grassy note you can’t get otherwise. If you can find them (check Asian grocery stores), give them a quick pass over a stove flame to make them pliable before lining your pan. It makes a world of difference.
Speaking of core ingredients, the eggs in this recipe aren’t just for structure; they also contribute to the overall dietary protein content, making this sweet treat a bit more satisfying.
Frequently Asked Questions About Bibingka
Can I make bibingka without banana leaves?
Yes, you can! While banana leaves add an authentic flavor and aroma, you can successfully use parchment paper to line your baking pan. Just be aware that the final product will have a slightly different, though still delicious, character. If you want to capture some of that fragrance, you can sometimes find banana leaf extract or use a tiny drop of pandan extract to mimic the herbal notes.
My bibingka came out too dense. What went wrong?
A dense bibingka usually points to two issues: overmixing the batter or expired baking powder. Remember to fold the batter gently until just combined. Also, check your baking powder’s freshness. Old baking powder loses its lifting power. To test it, mix a teaspoon with some hot water. If it doesn’t bubble vigorously, it’s time for a new can. Properly aerated batter is key to a light texture.
Can I use canned coconut milk for this recipe?
Absolutely, canned coconut milk is a perfectly convenient and common choice. For the best results, look for a “full-fat” or “regular” coconut milk, not “lite” or “cream of coconut” which is sweetened. Shake the can well before opening. For a truly exceptional flavor, though, seeking out fresh coconut milk from an Asian market is a wonderful upgrade.
Is bibingka supposed to be jiggly in the middle?
No, a fully baked bibingka should be set and spring back lightly when touched in the center. A slight jiggle often means it’s undercooked. The toothpick test is your best friend here. If the center is jiggly and the toothpick is wet, give it more baking time in 5-minute increments until the test comes out clean.
How do I get that signature brown, speckled top?
That beautiful, slightly caramelized and speckled top comes from the brown sugar and a final blast of high heat. The sugar rises and caramelizes on the surface. Using the broiler for the last few minutes of baking is the traditional method to achieve this. Watch it like a hawk during broiling—it can go from perfect to burnt in seconds!
Can I make bibingka ahead of time?
You can prepare the batter ahead of time, but I don’t recommend it for more than an hour or two. The baking powder will start to activate once mixed with the wet ingredients, and you may lose some of its rising power. It’s best mixed and baked fresh. However, the baked bibingka stores and reheats wonderfully, so you can bake it a day in advance.
What’s the difference between rice flour and glutinous rice flour for bibingka?
Regular rice flour (like the one in this recipe) gives a tender, slightly crumbly cake. Glutinous rice flour, also called sweet rice flour, produces a much chewier, denser, and stickier texture. They are not direct substitutes unless you want a very different result. For classic bibingka, regular rice flour is the standard choice.
My bibingka sank in the middle after baking. Why?
A sunken center usually indicates underbaking or opening the oven door too early. The structure of the cake sets during the first half of baking. If you let cool air in too soon, the cake can collapse. Ensure your oven is fully preheated and avoid opening the door until at least the 25-minute mark to check on it. Also, make sure your baking powder is fresh.
Can I add fruit or other mix-ins to the batter?
You can, but be cautious with very wet fruits like fresh pineapple, as they can make the batter soggy. Dried or candied fruits work better—try diced dried mango or raisins. Traditional add-ins are grated young coconut (buko) or sweet corn kernels. Fold them in gently at the end, just before pouring the batter into the pan.
What do I serve with bibingka?
Bibingka is wonderfully versatile! It’s fantastic on its own with a hot beverage like coffee or tea. For a richer treat, top a warm slice with butter, a sprinkle of sugar, or grated coconut. Some enjoy it with a slice of sharp cheese. It also pairs beautifully with fresh fruit like mango slices or a scoop of ice cream for a decadent dessert.
If you loved exploring this Filipino classic, you’ll enjoy discovering more global pastry recipes from around the world on our site. There’s a whole universe of sweet traditions to bake and share!
Ready to Bake Some Memories?
So there you have it—my heartwarming, kitchen-tested bibingka recipe. It’s more than just steps and ingredients; it’s about creating a moment of joy and sharing a piece of culture. I hope you give it a try and fill your home with that incredible, sweet, coconutty aroma. Gather your loved ones, slice into that golden cake, and make your own delicious memories. Happy baking!
Equipment
- Grand bol
- Fouet
- Spatule
- Plaque à pâtisserie
- Papier sulfurisé
Ingredients
- 3 tasses farine de riz
- 1.5 cuillères à soupe poudre à lever
- 1 tasse sucre brun
- 3 unités œufs
- 3 tasses lait de coco
- 1.5 cuillères à café extrait de vanille
- 0.5 cuillère à café sel
Instructions
- Mélangez les ingrédients secs : farine de riz, poudre à lever, sel et sucre brun dans un grand bol.
- Dans un bol séparé, battez ensemble les œufs, l'extrait de vanille et le lait de coco.
- Versez le mélange sec sur le mélange humide et pliez doucement le tout jusqu'à obtenir une pâte lisse.
- Préchauffez le four à 200°C (400°F) et chemisez le moule à pâtisserie de feuilles de bananier ou de papier sulfurisé.
- Versez la pâte dans le moule préparé et faites cuire pendant environ 30 minutes.
- Vérifiez la cuisson avec un cure-dent ; il doit ressortir propre ou avec quelques miettes.
- Laissez le bibingka refroidir dans le moule pendant 10-15 minutes avant de trancher.
Notes
Nutrition

Hi, I’m Olivia Parker, the founder of BakingSecret.com and a lifelong lover of all things sweet and homemade. I grew up in a small town in Oregon, where the smell of fresh cookies in my family’s kitchen sparked my passion for baking. Over the years, I turned that passion into a mission: to help home bakers feel confident, inspired, and creative.
After studying food science and working in several artisan bakeries across the U.S., I decided to create a space where everyone from beginners to seasoned bakers can find reliable recipes, expert tips, and a warm, welcoming community. BakingSecret.com is my way of sharing the magic of baking with the world. When I’m not testing new recipes, you’ll find me exploring farmers’ markets, collecting vintage cookbooks, or perfecting my sourdough technique.