
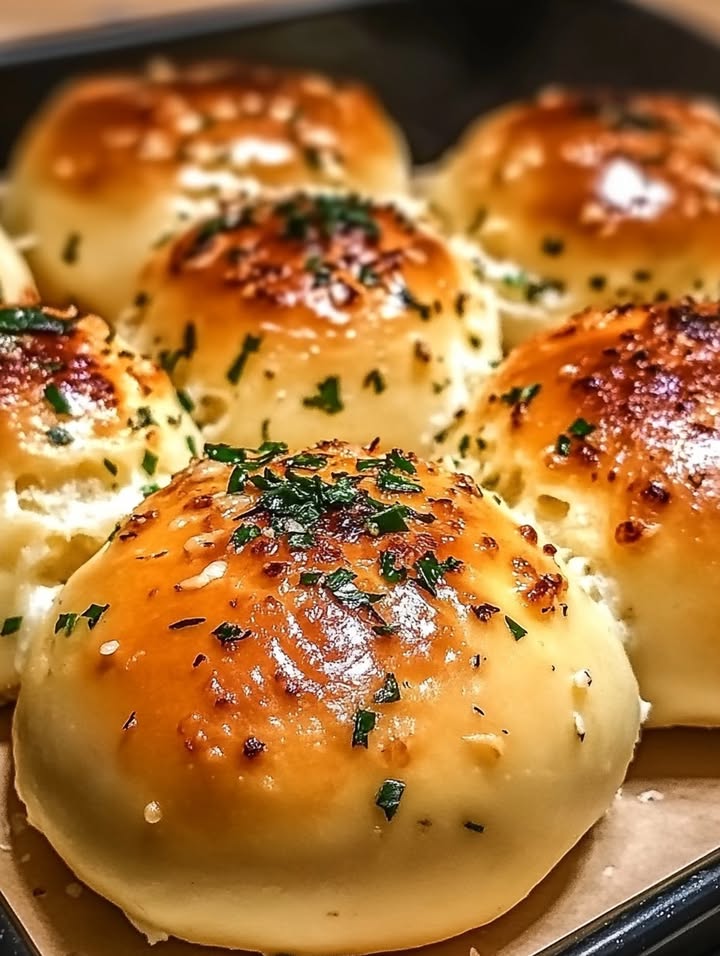
Garlic Butter Cheese Bombs: A Flavor Explosion in Every Bite
Imagine sinking your teeth into a warm, gooey, and irresistibly cheesy biscuit, all wrapped up in a blanket of garlicky, buttery goodness. That’s exactly what you get with these Pillsbury Biscuit Garlic Butter Cheese Bombs. I first tried this recipe at a friend’s potluck, and it was an instant hit. Ever since, it’s been a staple at my family gatherings and lazy Sunday brunches. Let me show you how to make this delicious treat in your own kitchen!
The Story Behind Garlic Butter Cheese Bombs
These Garlic Butter Cheese Bombs are a modern twist on traditional cheese-filled breads from various cultures. The combination of tender biscuits, melty mozzarella, and the rich, aromatic garlic butter brings a burst of flavor that’s hard to resist. Whether you’re looking for a quick snack or a crowd-pleasing appetizer, these little bombs of joy are sure to impress.
Why You’ll Love These Garlic Butter Cheese Bombs
What makes these Garlic Butter Cheese Bombs so special? First, they’re incredibly easy to make, even for beginners. Second, the flavors are simply divine. The gooey mozzarella melts perfectly, while the garlic butter adds a savory, aromatic touch. Plus, the biscuits are soft and fluffy, making them a perfect vessel for all that cheesy goodness.
Perfect Occasions to Prepare This Recipe
These Garlic Butter Cheese Bombs are versatile enough for any occasion. Serve them at a game day, as a side dish for a family dinner, or as a festive addition to your holiday spread. They also make a great after-school snack for the kids or a late-night treat for the adults.
Ingredients
- 1 can (16 oz) Pillsbury Grands! biscuits
- 8 oz mozzarella cheese, cut into 1-inch cubes
- 4 tablespoons butter, melted
- 2 garlic cloves, minced
- 1 teaspoon Italian seasoning (optional)
- 1 tablespoon fresh parsley, chopped (optional)
- ½ cup grated Parmesan cheese (optional)
Substitution Options
- Biscuits: If you can’t find Pillsbury Grands!, any large, flaky biscuit dough will do.
- Cheese: Swap out the mozzarella for cheddar, pepper jack, or any other cheese you love.
- Butter: Use olive oil or ghee for a slightly different flavor profile.
Preparation
Step 1: Preheat the Oven
Start by preheating your oven to 375°F (190°C). Line a baking sheet with parchment paper or lightly grease it. This will ensure your Garlic Butter Cheese Bombs don’t stick and come out perfectly golden brown.
Step 2: Prepare the Biscuits
Open the can of Pillsbury Grands! biscuits and separate each biscuit. Flatten each one slightly with your hands. The biscuits should be pliable but not too thin. This step is crucial to make sure the cheese stays inside and the biscuits bake evenly.
Step 3: Add the Cheese Filling
Place a cube of mozzarella cheese in the center of each biscuit. Wrap the dough around the cheese, pinching the seams tightly to seal it completely. Make sure there are no gaps or the cheese might ooze out during baking. Place each cheese-filled biscuit, seam side down, on the prepared baking sheet.
Step 4: Make the Garlic Butter
In a small bowl, mix the melted butter, minced garlic, and Italian seasoning if using. The smell of garlic and butter will already have your mouth watering. This mixture will give your Garlic Butter Cheese Bombs a rich, aromatic flavor.
Step 5: Brush and Bake
Brush the tops of the biscuit bombs with the garlic butter mixture. Bake the biscuits in the preheated oven for 10-12 minutes, or until they turn a beautiful golden brown. The aroma filling your kitchen will be irresistible.
Step 6: Garnish and Serve
Once the Garlic Butter Cheese Bombs are out of the oven, brush them with any remaining garlic butter. Sprinkle with fresh parsley and grated Parmesan cheese for extra flavor. These beauties are now ready to serve, and I promise, they won’t last long!
Timing
Prep Time: 10 minutes
Cooking Time: 10-12 minutes
Total Time: 22-24 minutes
Chef’s Secret: A Unique Trick to Enhance the Recipe
For an extra burst of flavor, add a pinch of red pepper flakes to the garlic butter. This will give your Garlic Butter Cheese Bombs a slight kick that elevates the overall taste. It’s a simple trick that makes a big difference.
Extra Info: An Interesting Anecdote About the Recipe
Did you know that garlic has been used for centuries for its health benefits and flavor? Adding it to your Cheese Bombs not only enhances the taste but also provides a boost of antioxidants and anti-inflammatory properties. It’s a win-win!
Necessary Equipment
- Baking sheet
- Parchment paper or non-stick spray
- Mixing bowl
- Brush
- Knife for cutting cheese
Storage
To store your Garlic Butter Cheese Bombs, let them cool completely before placing them in an airtight container. They can be stored at room temperature for up to 2 days. If you want them to last longer, refrigerate them for up to 5 days. When you’re ready to reheat, pop them in the oven at 350°F (175°C) for about 10 minutes, or until they’re warm and gooey again.
For longer storage, you can freeze the unbaked Cheese Bombs. Simply place them on a baking sheet and freeze until solid. Once frozen, transfer them to a freezer bag or airtight container. They can be stored in the freezer for up to 3 months. When you’re ready to bake, you can do so directly from the freezer, adding a few extra minutes to the baking time.
Remember, the key to maintaining the texture and flavor is to store them properly. This way, you can enjoy these delightful treats whenever you crave them.
Tips and Advice
- Make sure the seams are well sealed to prevent the cheese from oozing out during baking.
- If you like a bit of spice, add a pinch of red pepper flakes to the garlic butter.
- For a more robust flavor, use a combination of different cheeses.
Presentation Tips
- Serve the Garlic Butter Cheese Bombs on a platter garnished with fresh herbs and a sprinkle of Parmesan cheese.
- Arrange them in a wreath shape for a festive touch during the holidays.
- Pair them with a side of marinara sauce for dipping, or serve with a side salad for a complete meal.
Healthier Alternative Recipes
Looking for some healthier options? Here are six variations you can try:
- Whole Wheat Biscuit Version: Use whole wheat biscuit dough for a healthier twist. The nutty flavor of whole wheat pairs wonderfully with the garlic and cheese.
- Vegetarian Cheese Bombs: Substitute the mozzarella with a plant-based cheese for a vegan-friendly option. You can also add some finely chopped vegetables like bell peppers or spinach for extra nutrition.
- Lactose-Free Version: Use lactose-free cheese and butter for those with dairy sensitivities. The flavors will still be amazing, and no one will guess the difference.
- Herb-Infused Cheese Bombs: Mix in some finely chopped fresh herbs like basil, thyme, and rosemary into the biscuit dough for a burst of freshness. This version is perfect for a summer gathering.
- Protein-Rich Cheese Bombs: Add a spoonful of cooked, crumbled bacon or diced ham to the cheese filling for a protein-packed treat. It’s a great option for a hearty breakfast or brunch.
- Spicy Cheese Bombs: For those who love a bit of heat, add some diced jalapeños or a dash of hot sauce to the cheese filling. The spicy kick will balance well with the creamy cheese and butter.
If you’re in the mood for something sweet, check out our Cranberry Orange Pecan Muffins. They’re a perfect complement to the savory Garlic Butter Cheese Bombs.
Common Mistakes to Avoid
Mistake 1: Not Sealing the Biscuits Properly
One of the most common mistakes is not sealing the biscuits well enough. If the cheese isn’t fully enclosed, it will melt out during baking, leaving you with a mess. Make sure to pinch the edges firmly and check for any gaps before placing the biscuits in the oven.
Mistake 2: Over-Baking the Biscuits
Over-baking can lead to dry, tough biscuits. Keep an eye on them and take them out when they are just starting to turn golden brown. This will ensure they stay soft and fluffy on the inside.
Mistake 3: Using Cold Butter
Using cold butter instead of melted butter can result in uneven coating and less flavorful Cheese Bombs. Make sure your butter is melted and mixed well with the garlic and seasonings. This will give your biscuits a rich, even flavor throughout.
Mistake 4: Too Much Filling
Adding too much cheese can be tempting, but it can make the biscuits difficult to seal and may cause the cheese to spill out. Stick to the recommended amount of cheese, and if you want more, consider adding a cheese sauce dip on the side.
Mistake 5: Neglecting the Seasoning
Seasoning is key to enhancing the flavor. Don’t skip the Italian seasoning or fresh parsley. These ingredients add a burst of flavor that complements the cheese and garlic perfectly. A little goes a long way in making your Garlic Butter Cheese Bombs truly delicious.
For more tips on portion control and serving sizes, check out the FDA’s portion information. It’s always good to be mindful of how much you’re eating, especially with such delectable treats.
If you’re enjoying these recipes and want to explore more, visit our baking recipes section for more inspiration.
FAQ
Can I use different types of cheese?
Absolutely! While mozzarella is classic, you can experiment with other cheeses like cheddar, pepper jack, or even feta. Each type will bring its unique flavor and texture to the Garlic Butter Cheese Bombs.
How do I store leftover Garlic Butter Cheese Bombs?
Let the biscuits cool completely, then store them in an airtight container at room temperature for up to 2 days. For longer storage, keep them in the refrigerator for up to 5 days or freeze them for up to 3 months. Reheat in the oven for a few minutes to restore their gooey, delicious texture.
Can I make these ahead of time?
Yes, you can prepare the Garlic Butter Cheese Bombs ahead of time and store them in the refrigerator. Just make sure to let them come to room temperature before baking for the best results.
What can I use instead of Italian seasoning?
If you don’t have Italian seasoning, you can use a combination of dried herbs like basil, oregano, and thyme. A pinch of each will give you a similar flavor profile.
Can I add other ingredients to the filling?
Definitely! Feel free to get creative. You can add finely chopped cooked bacon, diced jalapeños, or even a bit of pesto to the cheese filling for extra flavor and texture.
How do I make them gluten-free?
To make these Garlic Butter Cheese Bombs gluten-free, use a gluten-free biscuit dough. Many brands offer excellent gluten-free options that will work just as well in this recipe.
Can I make these without the garlic?
Yes, you can omit the garlic if you prefer. The Garlic Butter Cheese Bombs will still be delicious with just the butter and Italian seasoning. You can also add other flavors like herbs or spices to the butter for a different twist.
What can I serve these with?
These Garlic Butter Cheese Bombs are fantastic on their own, but they also pair well with a variety of sides. Try serving them with a side of marinara sauce, a fresh salad, or even a bowl of soup. They make a great appetizer, snack, or main course.
Can I make these smaller for a party?
Absolutely! You can use smaller biscuits and adjust the amount of cheese accordingly. This way, you can make bite-sized Garlic Butter Cheese Bombs that are perfect for a party or gathering. Just reduce the baking time slightly to ensure they cook evenly.
How do I know if they are done?
Your Garlic Butter Cheese Bombs are done when they are golden brown and puffy. The cheese should be melted and gooey, and the biscuits should be soft and tender. If you’re unsure, insert a toothpick into the center of a biscuit; if it comes out clean, they’re ready.
Final Thoughts
These Garlic Butter Cheese Bombs are more than just a recipe; they’re a delightful experience that will leave your taste buds dancing. Whether you’re a seasoned chef or a beginner, this recipe is a must-try. The combination of tender biscuits, melty cheese, and the rich, garlicky butter is a match made in heaven. So, next time you’re looking for a quick and delicious treat, whip up a batch of these Garlic Butter Cheese Bombs and savor every bite. Happy baking! 🧀✨
Equipment
- Baking sheet
- Parchment paper or non-stick spray
- Mixing bowl
- Brush
- Knife for cutting cheese
Ingredients
- 1 can Pillsbury Grands! biscuits 16 oz
- 8 oz mozzarella cheese cut into 1-inch cubes
- 4 tbsp butter melted
- 2 cloves garlic minced
- 1 tsp Italian seasoning optional
- 1 tbsp fresh parsley chopped, optional
- ½ cup grated Parmesan cheese optional
Instructions
- Preheat your oven to 375°F (190°C) and line a baking sheet with parchment paper or lightly grease it.
- Open the can of Pillsbury Grands! biscuits and separate each biscuit. Flatten each one slightly with your hands.
- Place a cube of mozzarella cheese in the center of each biscuit. Wrap the dough around the cheese, pinching the seams tightly to seal it completely.
- In a small bowl, mix the melted butter, minced garlic, and Italian seasoning if using.
- Brush the tops of the biscuit bombs with the garlic butter mixture. Bake for 10-12 minutes until golden brown.
- Once out of the oven, brush with any remaining garlic butter and sprinkle with fresh parsley and grated Parmesan cheese.
Notes
Nutrition

Hi, I’m Olivia Parker, the founder of BakingSecret.com and a lifelong lover of all things sweet and homemade. I grew up in a small town in Oregon, where the smell of fresh cookies in my family’s kitchen sparked my passion for baking. Over the years, I turned that passion into a mission: to help home bakers feel confident, inspired, and creative.
After studying food science and working in several artisan bakeries across the U.S., I decided to create a space where everyone from beginners to seasoned bakers can find reliable recipes, expert tips, and a warm, welcoming community. BakingSecret.com is my way of sharing the magic of baking with the world. When I’m not testing new recipes, you’ll find me exploring farmers’ markets, collecting vintage cookbooks, or perfecting my sourdough technique.