
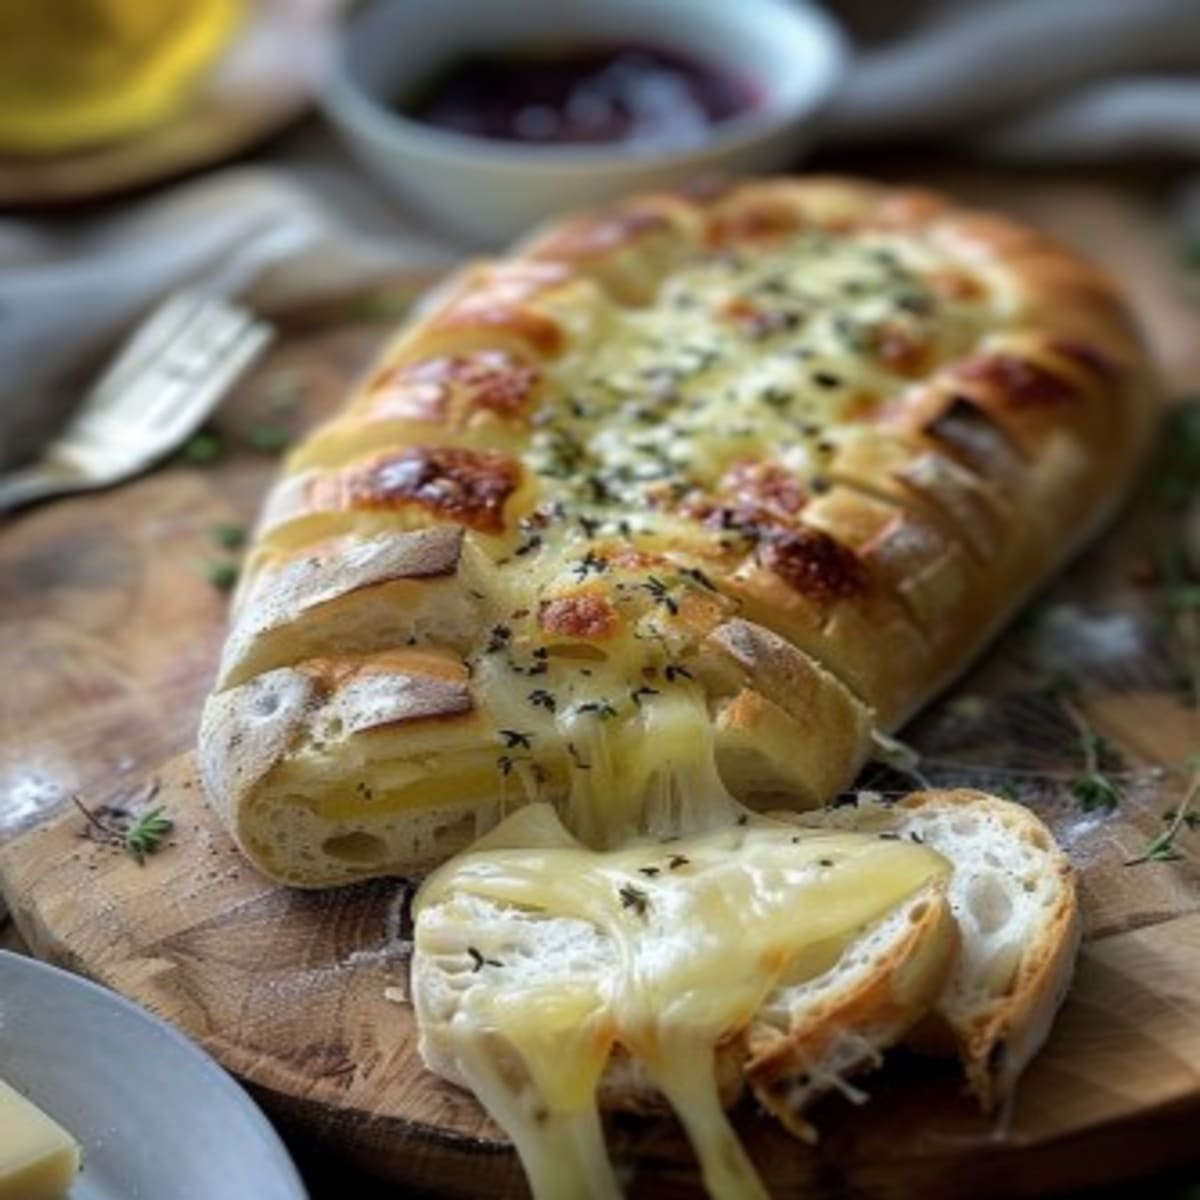
Discover the Irresistible Cheesy Garlic Bread: A Delightful Treat!
Hey there, food lovers! If you’re anything like me, you can’t resist the aroma of freshly baked bread mixed with the heavenly scent of garlic and melted cheese. This Cheesy Garlic Bread is not just a side dish; it’s a symphony of flavors that will make any meal unforgettable. I’ve been making this recipe for years, and it’s always a hit at family dinners and gatherings. So, let’s dive into this mouthwatering treat and see why it’s so special.
History or Background of the Recipe: A Classic with a Twist
Garlic bread has been a classic in many cultures, but adding cheese takes it to another level. Traditionally, garlic bread was a simple Italian staple, made with fresh bread, butter, and minced garlic. Over time, it evolved as people started experimenting with different ingredients. In my family, we added a generous amount of cheese, and it became an instant favorite. It’s a perfect blend of tradition and innovation, making it a modern classic.
Why You’ll Love This Recipe: Flavor and Simplicity Combined
There are a few reasons why this Cheesy Garlic Bread is a must-try:
- Flavor: The combination of garlic, butter, and cheese is simply irresistible. It’s a match made in heaven.
- Simplicity: With just a few ingredients and easy steps, you can whip up this delicious side dish in no time.
- Versatility: It pairs perfectly with pasta, soups, or even as a standalone snack. It’s a crowd-pleaser every time.
Perfect Occasions to Prepare This Recipe: From Family Dinners to Game Nights
This Cheesy Garlic Bread is the star of any gathering. Whether you’re hosting a family dinner, having friends over for a game night, or just looking for a cozy weekend snack, this bread is your go-to. It’s also a fantastic addition to holiday meals, adding a touch of warmth and comfort.
Ingredients: Simple and Delicious
- 1 baguette or ciabatta bread
- 100 g softened butter
- 4 cloves of garlic, crushed
- 150 g of parmesan, mozzarella, or cheddar cheese, grated
- 1 tablespoon fresh parsley, chopped
- Salt and pepper to taste
Substitution Options: Flexibility for All Tastes
If you don’t have all the ingredients on hand, don’t worry! Here are some easy substitutions:
- Bread: You can use any type of bread, but a baguette or ciabatta works best.
- Butter: Use margarine or olive oil if you prefer a lighter option.
- Cheese: Any hard or semi-hard cheese, like Gruyère or Swiss, will work well.
- Herbs: Substitute parsley with basil or oregano for a different flavor profile.
Preparation Section: Step-by-Step Guide
Step 1: Prepare the Mixture
In a mixing bowl, combine the softened butter, crushed garlic, grated cheese, chopped parsley, salt, and pepper. Mix until you get a smooth and creamy consistency. The aroma will already start to tantalize your senses!
Step 2: Prepare the Bread
Take your baguette or ciabatta and slice it into thick slices, but don’t cut all the way through. This will help keep the bread together. Open each slice slightly and generously spread the garlic and cheese mixture in between the slices. Make sure to get into all the nooks and crannies for maximum flavor.
Step 3: Bake to Perfection
Wrap the prepared bread in aluminum foil and place it on a baking sheet. Preheat your oven to 180°C (350°F) and bake for about 15-20 minutes. Remove the foil and bake for an additional 5 minutes to get a golden and crispy top. The kitchen will be filled with the most amazing smell!
Chef’s Tip: Add a Hint of Freshness
For an extra burst of flavor, sprinkle a little more fresh parsley on top right before serving. It adds a vibrant, fresh note that complements the rich, cheesy goodness.
Timing: Quick and Easy
Here’s a quick breakdown of the timing:
- Prep Time: 10 minutes
- Cooking Time: 20 minutes
- Total Time: 30 minutes
Chef’s Secret: The Perfect Balance of Flavors
The key to perfect Cheesy Garlic Bread is balancing the flavors. Make sure the garlic is well-integrated into the butter and cheese mixture. The garlic should be noticeable but not overpowering. The cheese should melt perfectly, creating a gooey, delicious texture.
Extra Info: A Fun Fact About Garlic
Did you know that garlic has been used for both culinary and medicinal purposes for thousands of years? It’s packed with health benefits, including boosting the immune system and reducing blood pressure. So, not only does it add incredible flavor, but it’s also good for you!
Necessary Equipment: Simple Tools for a Great Result
To make this Cheesy Garlic Bread, you’ll need:
- A mixing bowl
- A knife and cutting board
- Aluminum foil
- A baking sheet
- An oven
Storage: Keep It Fresh and Tasty
If you happen to have any leftovers (which is rare!), store them properly to keep the bread fresh.
- Room Temperature: Store in an airtight container for up to 2 days.
- Refrigerator: Wrap tightly in plastic wrap or aluminum foil and store in the fridge for up to 5 days.
- Freezer: For longer storage, wrap the bread in plastic wrap and then in aluminum foil. Place in a freezer bag and freeze for up to 3 months. Thaw and reheat in the oven when ready to eat.
Tips and Advice: Enhance Your Experience
Here are a few tips to make your Cheesy Garlic Bread even better:
- Use Fresh Ingredients: Fresh garlic and herbs will give you the best flavor.
- Softened Butter: Ensure the butter is soft enough to mix easily but not melted.
- Cheese Varieties: Experiment with different types of cheese to find your favorite combination.
Presentation Tips: Serve with Style
Make your Cheesy Garlic Bread look as good as it tastes:
- Garnish with Fresh Herbs: Sprinkle some fresh parsley or chives on top for a pop of color.
- Serve Hot: Serve the bread hot, straight from the oven, for the best texture and flavor.
- Slice Nicely: Cut the bread into neat slices and arrange them on a platter for a visually appealing presentation.
Healthier Alternative Recipes: Enjoy Guilt-Free
Looking for a healthier twist? Here are six variations to try:
- Whole Wheat Version: Use whole wheat bread for a fiber-rich option. Check out our Light Banana Chocolate Muffins for another healthy treat.
- Low-Fat Cheese: Swap regular cheese for a low-fat alternative. Try our Zucchini Tuna Cake for a light and tasty main course.
- Herb Infusion: Add more herbs like rosemary and thyme for a flavorful, lower-calorie option. Our Fluffy Pancakes Recipe is another great choice for a light breakfast.
- Roasted Garlic: Roast the garlic for a milder, sweeter flavor. Pair it with our Caramelized Peach French Toast for a decadent brunch.
- Avocado Spread: Replace some of the butter with mashed avocado for a creamy, healthy spread.
- Vegetable Addition: Add finely chopped vegetables like bell peppers or zucchini for extra nutrition and crunch.
Common Mistakes to Avoid: Ensure Success Every Time
Mistake 1: Using Hard Butter
Using butter that’s too cold can make it difficult to mix with the other ingredients, resulting in lumps and an uneven spread. Make sure your butter is at room temperature. Pro tip: Leave the butter out for about 30 minutes before starting, or soften it in the microwave briefly.
Mistake 2: Slicing the Bread Too Thinly
Slicing the bread too thinly can cause it to become soggy and fall apart. Aim for slices that are about 1/2 inch thick. This will ensure the bread holds up well and gets a nice, crispy texture after baking.
Mistake 3: Overcooking the Bread
Overcooking the bread can make it dry and tough. Keep an eye on it and check frequently towards the end of the baking time. The bread should be golden brown and the cheese fully melted. Pro tip: Start checking the bread after 15 minutes and remove it once it reaches the desired golden color.
Mistake 4: Not Using Fresh Herbs
Using dried herbs instead of fresh ones can make the bread taste less vibrant. Fresh herbs add a burst of flavor and aroma that dried herbs can’t match. If you don’t have fresh herbs, use a small amount of dried herbs and add a splash of lemon juice to brighten the flavor.
Mistake 5: Not Wrapping the Bread Properly
Wrapping the bread poorly in aluminum foil can lead to uneven cooking. Make sure the bread is completely wrapped, leaving no gaps. This helps the heat distribute evenly and ensures the bread cooks through without burning. Pro tip: Double-wrap the bread for extra protection.
FAQ: Your Questions Answered
Can I use any type of bread for Cheesy Garlic Bread?
Yes, you can use various types of bread, but a baguette or ciabatta works best. These types of bread have a crusty exterior and a soft interior, which makes them perfect for holding the garlic and cheese mixture. Other options include sourdough or even a standard loaf of white bread.
What kinds of cheese can I use for Cheesy Garlic Bread?
You can use a variety of cheeses, such as parmesan, mozzarella, cheddar, or a combination of these. Each cheese brings a unique flavor and texture. For a rich and creamy texture, try using a blend of parmesan and mozzarella. If you prefer a sharper flavor, go for cheddar or a sharp parmesan.
How long can I store leftover Cheesy Garlic Bread?
Leftover Cheesy Garlic Bread can be stored in an airtight container at room temperature for up to 2 days. For longer storage, wrap it tightly in plastic wrap and aluminum foil, and refrigerate for up to 5 days. You can also freeze it for up to 3 months. Reheat in the oven for best results.
Can I prepare the garlic and cheese mixture ahead of time?
Absolutely! You can prepare the garlic and cheese mixture up to a day in advance. Store it in the refrigerator in an airtight container. When you’re ready to bake, bring the mixture to room temperature and spread it on the bread. This saves time and ensures the flavors meld together nicely.
Is there a way to make Cheesy Garlic Bread healthier?
Yes, you can make Cheesy Garlic Bread healthier by using whole wheat bread, low-fat cheese, and adding more herbs and vegetables. You can also replace some of the butter with mashed avocado or Greek yogurt for a creamy, lower-fat spread. Experiment with different combinations to find your favorite healthy version.
Can I use garlic powder instead of fresh garlic?
While fresh garlic is preferred for its vibrant flavor, you can use garlic powder as a substitute. Use 1/2 teaspoon of garlic powder for every clove of fresh garlic. Keep in mind that garlic powder has a milder, more subtle flavor compared to fresh garlic. For the best results, use fresh garlic whenever possible.
How do I prevent the bread from getting soggy?
To prevent the bread from getting soggy, make sure the slices are thick enough (about 1/2 inch) and don’t over-saturate the bread with the garlic and cheese mixture. Also, wrapping the bread tightly in aluminum foil helps it cook evenly and prevents moisture from escaping. Finally, avoid overcooking, as this can make the bread dry and tough.
Can I use dried herbs instead of fresh ones?
Yes, you can use dried herbs if fresh ones are not available. However, dried herbs have a more concentrated flavor, so use them sparingly. For every tablespoon of fresh herbs, use about 1 teaspoon of dried herbs. You can also add a splash of lemon juice to brighten the flavor if you’re using dried herbs.
How do I reheat Cheesy Garlic Bread?
To reheat Cheesy Garlic Bread, preheat your oven to 180°C (350°F). Place the bread on a baking sheet and cover it loosely with aluminum foil. Heat for about 10-15 minutes, or until the bread is warm and the cheese is melted. You can also reheat individual slices in a toaster oven or microwave, but the oven method gives the best results.
Can I freeze the bread before baking?
Yes, you can freeze the bread before baking. Prepare the bread as directed, but instead of baking, wrap it tightly in aluminum foil and place it in a freezer-safe bag. Freeze for up to 3 months. When you’re ready to bake, place the frozen bread in the oven and bake at 180°C (350°F) for about 25-30 minutes, or until the cheese is melted and the bread is golden brown.
Conclusion: A Heavenly Side Dish for Every Meal
There you have it, a wonderful Cheesy Garlic Bread that’s sure to become a staple in your kitchen. It’s a delicious, versatile, and easy-to-make side dish that everyone will love. Whether you’re hosting a dinner party or enjoying a quiet evening at home, this bread is the perfect accompaniment. Give it a try and see why it’s a favorite in my household. For more delightful recipes, check out our Bread Lovers Category. Happy baking, and enjoy your meal!
Equipment
- Mixing bowl
- Knife
- Cutting board
- Aluminum foil
- Baking sheet
- Oven
Ingredients
- 100 g softened butter
- 4 cloves garlic, crushed
- 150 g parmesan, mozzarella, or cheddar cheese, grated
- 1 tablespoon fresh parsley, chopped
- to taste Salt and pepper
Instructions
- In a mixing bowl, combine the softened butter, crushed garlic, grated cheese, chopped parsley, salt, and pepper. Mix until smooth and creamy.
- Slice the baguette or ciabatta into thick slices, taking care not to cut all the way through.
- Open each slice slightly and generously spread the garlic and cheese mixture in between.
- Wrap the prepared bread in aluminum foil and place it on a baking sheet.
- Preheat your oven to 180°C (350°F) and bake for 15-20 minutes.
- Remove the foil and bake for an additional 5 minutes until golden and crispy.
Notes
Nutrition

Hi, I’m Olivia Parker, the founder of BakingSecret.com and a lifelong lover of all things sweet and homemade. I grew up in a small town in Oregon, where the smell of fresh cookies in my family’s kitchen sparked my passion for baking. Over the years, I turned that passion into a mission: to help home bakers feel confident, inspired, and creative.
After studying food science and working in several artisan bakeries across the U.S., I decided to create a space where everyone from beginners to seasoned bakers can find reliable recipes, expert tips, and a warm, welcoming community. BakingSecret.com is my way of sharing the magic of baking with the world. When I’m not testing new recipes, you’ll find me exploring farmers’ markets, collecting vintage cookbooks, or perfecting my sourdough technique.