
Introduction
I’ve always had a soft spot for baking. There’s something magical about turning simple ingredients into something that makes people smile. One of my all-time favorite creations? The crème brûlée cupcake recipe. It’s the perfect mix of creamy custard and light, fluffy cake—two classics combined into one show-stopping dessert.
If you’re wondering what exactly a crème brûlée cupcake is, don’t worry. I’ll explain everything in this article. You’ll get step-by-step instructions to make these treats at home, plus tips to ensure they turn out perfectly every time. I’ll also answer common questions like “What is a crème brûlée cupcake?” and “Can you make crème brûlée in cupcake liners?” Let’s dive in!
What is a Crème Brûlée Cupcake?
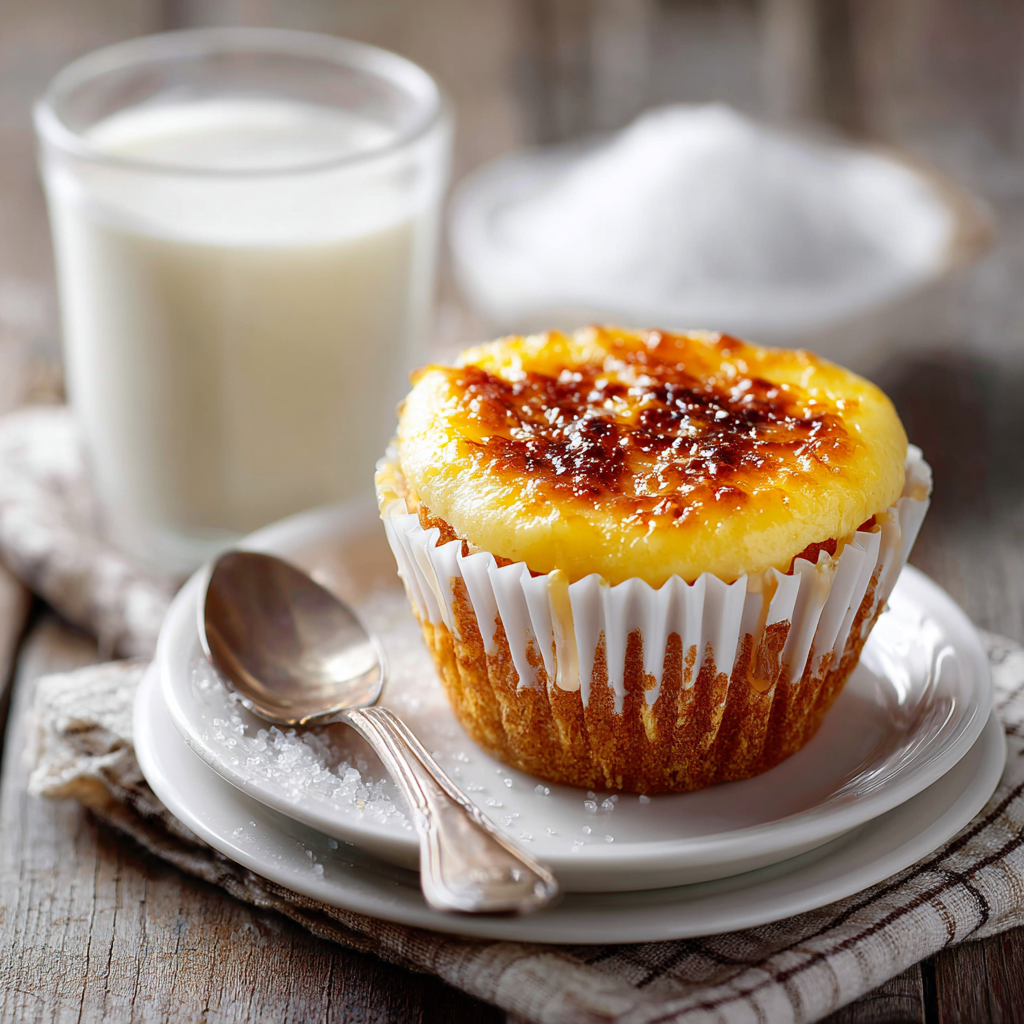
A crème brûlée cupcake brings together two beloved desserts: the rich, creamy custard of traditional crème brûlée and the comforting texture of a classic cupcake. Imagine biting into a soft, moist cupcake only to discover a luscious custard center. Top it off with a layer of caramelized sugar that cracks satisfyingly under your spoon. That’s the magic of this dessert.
What makes this treat stand out is its versatility. It’s fancy enough for special occasions but simple enough to enjoy anytime. Whether you’re hosting a dinner party or surprising your family with something sweet, these cupcakes are sure to impress. Plus, the caramelized sugar topping adds a touch of elegance that makes them feel extra special.
Related question: Can you make crème brûlée in cupcake liners? Absolutely! This recipe proves that you can adapt classic techniques to create something new and exciting. All you need are the right tools, like a kitchen torch, and a little patience.
Ingredients You’ll Need
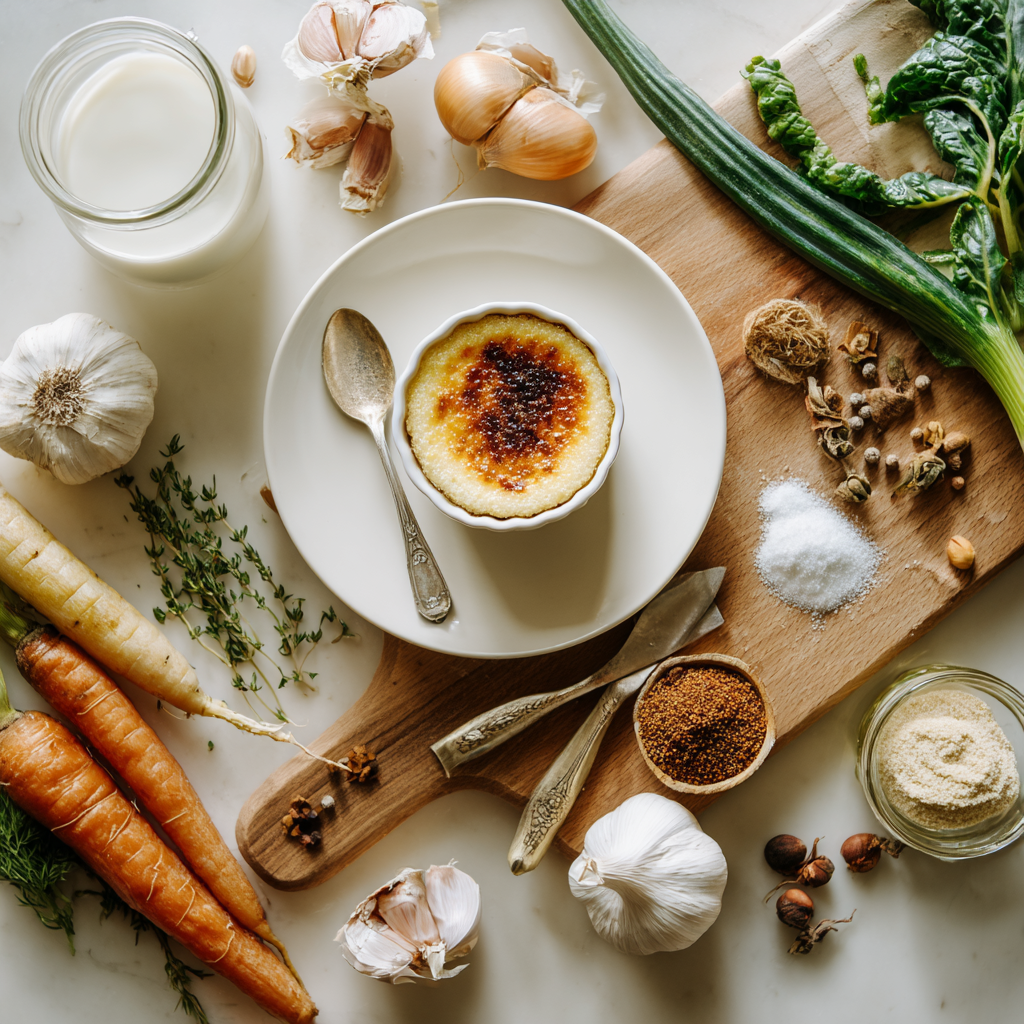
To make these delightful cupcakes, you’ll need a few key ingredients. Don’t worry—they’re mostly pantry staples you probably already have on hand. Here’s what you’ll need:
For the Cupcakes:
- 1 ½ cups all-purpose flour
- 1 cup granulated sugar
- ½ cup unsalted butter (softened)
- 2 large eggs
- 1 teaspoon vanilla extract
- 1 ½ teaspoons baking powder
- ¼ teaspoon salt
- ½ cup milk
For the Custard Filling:
- 1 cup heavy cream
- 3 large egg yolks
- ¼ cup granulated sugar
- 1 teaspoon vanilla extract
For the Topping:
- ¼ cup granulated sugar (for caramelizing)
Tools You’ll Need:
- Cupcake liners
- Muffin tin
- Kitchen torch (or broiler as an alternative)
- Piping bag or zip-top bag (for filling)
Wondering about the secret to fluffy cupcakes? It’s all about how you mix the batter. Overmixing can make your cupcakes dense, so stir just until the ingredients come together. For the custard filling, low and slow is the way to go. Heat the cream gently and whisk constantly to avoid scrambling the eggs.
Related question: What is the secret to crème brûlée? The key lies in achieving the perfect balance between the creamy custard and the crisp sugar topping. For the topping, use superfine sugar if possible—it melts more evenly and creates a smoother crust. If you don’t have a kitchen torch, you can use your oven’s broiler, but keep a close eye on it to avoid burning.
With these ingredients and tools ready, you’re well on your way to making unforgettable crème brûlée cupcakes. Stay tuned for the detailed steps and pro tips to guide you through the process!
Step-by-Step Instructions for Making Crème Brûlée Cupcakes
Alright, so we’ve got our ingredients and tools ready—now it’s time to roll up our sleeves and get baking. The best part about this crème brûlée cupcake recipe is how each step builds on the last, creating layers of flavor and texture that just work. Let’s jump into it.
Baking the Perfect Cupcake Base
Here’s the thing: a great cupcake starts with the base. If the cake itself isn’t light and airy, no amount of custard or caramelized sugar will save it. I’ve had my fair share of dense cupcakes (you know, the ones that feel like little bricks), and trust me, they’re not fun to eat. So, let’s avoid that disaster together.
When mixing your batter, remember this golden rule: less is more. Overmixing develops gluten, which can make your cupcakes tough instead of tender. I like to think of it as treating the batter like a shy friend—it needs attention, but not too much. Start by creaming the butter and sugar until it’s fluffy, then add the eggs one at a time. Mix in the vanilla and milk gently, folding in the dry ingredients just until combined. You’ll know you’re done when there are no streaks of flour left, but don’t overdo it.
By the way, did you preheat your oven? It’s such a small step, but skipping it can ruin your whole batch. Ovens need time to reach the right temperature, and popping your cupcakes in before it’s ready is like asking them to fail. Aim for 350°F (175°C) and line your muffin tin with cupcake liners. Oh, and if you’re looking for a twist on traditional flavors, check out this lactose free cupcake recipe. It’s a lifesaver for anyone avoiding dairy.
Related question: What is the secret to fluffy cupcakes? Besides not overmixing, it’s all about the leavening agents. Make sure your baking powder is fresh—if it’s been sitting in your pantry since 2012, it’s probably lost its oomph. Fresh baking powder gives your cupcakes the lift they need to rise beautifully.
Preparing the Custard Filling
Now onto the star of the show—the custard filling. This is where things get a little fancy. If you’ve ever made crème brûlée from scratch, you’ll recognize this process. If not, don’t worry; I’ll walk you through it.
Start by heating your heavy cream in a saucepan over medium heat. Keep an eye on it—you want it hot but not boiling. While that warms up, whisk together your egg yolks and sugar in a separate bowl. This is important because cold eggs added directly to hot cream can scramble, and nobody wants scrambled custard. Once the cream is warm, slowly pour it into the egg mixture while whisking constantly. This technique, called tempering, ensures everything blends smoothly without curdling.
Funny enough, I once forgot to temper my eggs and ended up with what looked like sweet scrambled eggs. Lesson learned! Patience pays off here. After tempering, return the mixture to the stove and cook it over low heat, stirring constantly, until it thickens enough to coat the back of a spoon. Strain it through a fine mesh sieve to remove any lumps, then stir in the vanilla extract. Let it cool completely before using it to fill your cupcakes.
If you’re curious about other creative cupcake ideas, take a peek at this purple yam cupcake recipe. It’s vibrant, unique, and perfect for adventurous bakers.
Assembling Your Masterpiece
With your cupcakes baked and cooled and your custard ready to go, it’s assembly time. Grab a piping bag fitted with a small round tip—or, if you don’t have one, a zip-top bag with the corner snipped off works just fine. Insert the tip into the center of each cupcake and gently squeeze in the custard. Be careful not to overfill, though, unless you want custard spilling out everywhere (been there, done that).
Here’s a pro tip: use a paring knife to cut a small cone-shaped hole in the top of each cupcake before filling. This makes room for the custard and helps prevent overflow. Plus, you can snack on the little cones you carve out—a baker’s perk!
Before moving on to the final step, consider leveling off the tops of your cupcakes. A flat surface makes it easier to caramelize the sugar evenly later. And speaking of caramelization, if you’re a fan of bold flavors, you might enjoy trying this taro cupcakes recipe. It’s rich, earthy, and totally unexpected.
Caramelizing the Sugar Topping
Ah, the pièce de résistance—the caramelized sugar topping. This is what transforms these cupcakes into true crème brûlée cupcakes. To achieve that signature crunchy layer, sprinkle a thin, even layer of granulated sugar over each cupcake. Superfine sugar works best here because it melts quickly and evenly, but regular granulated sugar will do in a pinch.
Now comes the fun part: torching. Using a kitchen torch, move the flame in slow, circular motions about 2–3 inches above the sugar. Watch closely as it turns golden brown and forms a crisp crust. It only takes a minute or two per cupcake, but keep your eyes peeled—one second too long, and you’ll burn it. Trust me, burnt sugar smells worse than it tastes.
If you don’t own a kitchen torch, don’t panic. You can use your oven’s broiler as an alternative. Place the cupcakes on a baking sheet and pop them under the broiler for 1–2 minutes, watching them like a hawk. Just be warned: this method is less forgiving, so stay vigilant. For another classic dessert-inspired cupcake idea, check out this red velvet cupcake recipe without buttermilk. It’s creamy, indulgent, and always a crowd-pleaser.
And there you have it—a crème brûlée cupcake recipe that’s as impressive as it is delicious. Whether you’re making these for a special occasion or just because you feel like treating yourself, they’re bound to bring smiles. Happy baking!

Tips for Success with Your Crème Brûlée Cupcake Recipe
Alright, we’ve covered the nitty-gritty of making these cupcakes, but let’s talk about how to make sure they turn out perfect every time. Here’s the thing: baking is as much about the details as it is about the big picture. A few small tweaks can mean the difference between “Wow, this is amazing!” and “Hmm, it’s okay.” Let’s dive into some tips that’ll help you nail your crème brûlée cupcake recipe.
Storage Recommendations and Serving Suggestions
So, you’ve made these beauties—but now what? How do you store them without losing that magical crunch on top or the moistness of the cake? Here’s my advice: if you’re not serving them immediately, keep the caramelized sugar step for last. Why? Because the sugar crust softens over time, especially if stored in an airtight container. Instead, bake and fill the cupcakes ahead of time, then torch the sugar topping right before serving. Trust me, nothing beats the sound of cracking into freshly caramelized sugar.
By the way, if you need to store them overnight, place the unfilled cupcakes in an airtight container at room temperature. Keep the custard filling in a separate container in the fridge. When you’re ready to serve, assemble and torch. Oh, and here’s a pro tip: serve them slightly chilled. The contrast between the cool custard and warm sugar layer? Chef’s kiss!
For presentation, try adding a sprig of mint or a dusting of powdered sugar around the plate. It’s a small touch, but it makes a big impact—especially if you’re serving these at a party. Funny enough, I once forgot to chill mine before serving, and while they still tasted great, the presentation felt a bit messy. Lesson learned!
Patience and Precision: The Secret to Perfect Crème Brûlée
If there’s one thing I’ve learned from years of baking, it’s that patience pays off. This is especially true when working with custards and caramelized sugar. You can’t rush perfection, folks. Remember how we talked about tempering the eggs earlier? That slow, steady process ensures your custard stays silky smooth instead of curdled. Same goes for caramelizing the sugar—it’s all about moving the torch slowly and evenly. If you rush it, you’ll end up with burnt spots, and nobody wants that.
Related question: What is the secret to crème brûlée? Honestly, it boils down to two things: precision and timing. Whether you’re making traditional crème brûlée or adapting it into cupcakes, the principles remain the same. Cook your custard low and slow, and don’t skimp on the caramelization step. Use superfine sugar if possible, and always keep an eye on it while torching. These little details might seem minor, but they add up to create that wow factor.
A Few More Tricks Up My Sleeve
Here’s something most recipes won’t tell you: room-temperature ingredients are your best friend. Cold butter or eggs can throw off the texture of your batter, so take them out of the fridge ahead of time. Also, don’t skip sifting your flour—it aerates the mixture and gives your cupcakes that light, fluffy texture everyone loves.
I’ve also found that using a stand mixer makes life easier, but a hand mixer works just fine too. Just be gentle with it, especially when combining the wet and dry ingredients. And if you’re worried about overfilling the cupcakes with custard, start with a small amount and adjust as needed. Practice makes perfect, right?
Before we wrap this up, if you’re looking for more cupcake inspiration, check out my collection of cakes and cupcakes recipes. There’s everything from classic flavors to bold, experimental twists. Who knows? You might discover your next favorite dessert idea.
Frequently Asked Questions (FAQ)
Let’s tackle some common questions about this crème brûlée cupcake recipe. Whether you’re a beginner or a seasoned baker, these answers will come in handy.
What is a crème brûlée cupcake?
Think of it as a mashup of two beloved desserts. These cupcakes combine the rich, creamy center of crème brûlée with the light, airy texture of a classic cupcake. Each bite features a tender cake base, a luscious custard filling, and a crunchy caramelized sugar topping. It’s indulgent yet surprisingly easy to make!
What is the secret to crème brûlée?
The magic lies in balance and technique. Slowly heat your custard to avoid scrambling the eggs, and strain it for a velvety texture. For the topping, use superfine sugar and caramelize it evenly with a kitchen torch or broiler. Patience is key—rushing either step can ruin the result.
Can you make crème brûlée in cupcake liners?
Absolutely! This recipe proves it’s possible. Simply bake the cupcakes, fill them with custard, and finish with a caramelized sugar topping. Using cupcake liners doesn’t change the process; it just makes cleanup easier. Plus, it adds a fun twist to a classic dessert.
What is the secret to fluffy cupcakes?
To achieve fluffy cupcakes, avoid overmixing the batter—it leads to dense cakes. Use fresh baking powder, bring your ingredients to room temperature, and fold the dry ingredients gently. Don’t forget to preheat your oven too, since consistent heat helps them rise properly.
How far in advance can I prepare these cupcakes?
You can bake the cupcakes and make the custard filling up to a day ahead. Store them separately until assembly. However, wait to caramelize the sugar topping until just before serving to maintain its crunch.
Do I need a kitchen torch for the sugar topping?
Nope! While a kitchen torch gives you more control, you can use your oven’s broiler as an alternative. Just watch it closely to prevent burning. Place the cupcakes on a baking sheet and broil for 1–2 minutes, rotating halfway through.
Can I freeze these cupcakes?
Yes, but freeze only the unfilled cupcakes. Wrap them tightly in plastic wrap and store in an airtight container for up to a month. Thaw at room temperature before filling and adding the topping.
What’s the best substitute for heavy cream in the custard?
If you’re out of heavy cream, full-fat coconut milk or half-and-half works well. Keep in mind that substitutions may alter the flavor slightly, but they’ll still yield a delicious custard.
Why did my custard curdle during cooking?
Curdling happens when the eggs get too hot too quickly. To fix this, strain the mixture through a fine mesh sieve before chilling. Next time, temper the eggs by gradually adding warm cream while whisking constantly.
Can I use flavored extracts in this recipe?
Definitely! Try almond, coconut, or even orange extract for a unique twist. Just swap it for the vanilla extract in both the cupcake batter and custard filling. Experimentation is part of the fun!
Final Thoughts on Your Crème Brûlée Cupcake Journey
Baking isn’t just about following instructions—it’s about creating moments. Whether you’re whipping up these cupcakes for a celebration or simply because you feel like treating yourself, remember that every step brings you closer to something special. So go ahead, experiment a little. Maybe try swapping vanilla for another extract or adding a pinch of cinnamon to the sugar topping. Whatever you do, have fun with it!
And hey, if you give this crème brûlée cupcake recipe a shot, I’d love to hear how it turns out. Share your results with me—I’m always thrilled to see what you come up with. Most importantly, enjoy these homemade treats with loved ones. After all, food tastes better when shared, doesn’t it?
Equipment
- Muffin tin
- Mixing bowl
- Piping bag
- Cupcake liners
- Kitchen torch or use the broiler as an alternative
Ingredients
- 1.5 cups all-purpose flour
- 1 cup granulated sugar
- 0.5 cup unsalted butter softened
- 2 large eggs
- 1 teaspoon vanilla extract
- 1.5 teaspoons baking powder
- 0.25 teaspoon salt
- 0.5 cup milk
- 1 cup heavy cream
- 3 large egg yolks
- 0.25 cup granulated sugar for custard filling
- 1 teaspoon vanilla extract for custard filling
- 0.25 cup granulated sugar for caramelizing
Instructions
- Preheat the oven to 350°F (175°C) and line a muffin tin with cupcake liners.
- Cream together the softened butter and sugar in a mixing bowl until fluffy.
- Add the eggs one at a time, mixing well after each addition.
- Incorporate the vanilla and milk gently into the mixture.
- In a separate bowl, sift together the flour, baking powder, and salt.
- Gradually fold the dry ingredients into the wet mixture until just combined.
- Pour the batter into the cupcake liners, filling each about two-thirds full.
- Bake for 18-20 minutes or until a toothpick inserted comes out clean.
- While the cupcakes cool, prepare the custard by heating the heavy cream in a saucepan until hot but not boiling.
- In a separate bowl, whisk together the egg yolks and ¼ cup sugar.
- Slowly pour the hot cream into the egg mixture while whisking constantly to temper the eggs.
- Return the mixture to the stovetop and cook over low heat, stirring constantly until it thickens and coats the back of a spoon.
- Strain the custard through a fine mesh sieve and stir in the 1 teaspoon of vanilla extract. Let cool completely.
- Once cupcakes have cooled, use a piping bag to fill each cupcake with custard.
- Sprinkle a thin layer of granulated sugar over the custard topping of each cupcake.
- Using a kitchen torch, carefully caramelize the sugar until golden brown and crackling. Alternatively, broil them in the oven for 1-2 minutes.
- Serve slightly chilled or at room temperature.
- For the best results, use room temperature ingredients. This helps ensure a smoother batter and better texture.
- If you’re not serving the cupcakes immediately, delay the caramelization step until just before serving to retain the sugar’s crunch.
- Feel free to experiment with flavored extracts like almond or coconut in place of vanilla for a unique twist.
- Store unfilled cupcakes at room temperature and the custard filling in the refrigerator, assembling just before serving.
Notes
Nutrition

Hi, I’m Olivia Parker, the founder of BakingSecret.com and a lifelong lover of all things sweet and homemade. I grew up in a small town in Oregon, where the smell of fresh cookies in my family’s kitchen sparked my passion for baking. Over the years, I turned that passion into a mission: to help home bakers feel confident, inspired, and creative.
After studying food science and working in several artisan bakeries across the U.S., I decided to create a space where everyone from beginners to seasoned bakers can find reliable recipes, expert tips, and a warm, welcoming community. BakingSecret.com is my way of sharing the magic of baking with the world. When I’m not testing new recipes, you’ll find me exploring farmers’ markets, collecting vintage cookbooks, or perfecting my sourdough technique.