
Introduction to Mother’s Day Lemon Meringue Tart
There’s something magical about a dessert that combines tangy lemon curd with pillowy meringue, all resting on a buttery tart crust. The Mother’s Day Lemon Meringue Tart is my go-to recipe for celebrating special occasions, especially when I want to honor the incredible women in my life. This tart is not just a dessert; it’s a celebration of love and gratitude. I remember making this for my mom last year—her face lit up as she took the first bite, and that moment made all the effort worthwhile. Whether you’re a baking novice or a seasoned pro, this recipe is designed to bring joy to your kitchen and smiles to your table.
The Story Behind Lemon Meringue Desserts
Lemon meringue desserts have been delighting taste buds for centuries. The origins of this classic treat trace back to 19th-century Europe, where bakers combined the zesty brightness of lemons with the airy sweetness of meringue. Over time, this combination evolved into pies, tarts, and even layered cakes. My version of the Mother’s Day Lemon Meringue Tart puts a modern twist on tradition by using a shortcrust pastry base instead of a pie crust, giving it a refined and elegant touch. It’s perfect for those who appreciate a balance of flavors and textures.
Why You’ll Love This Mother’s Day Lemon Meringue Tart Recipe
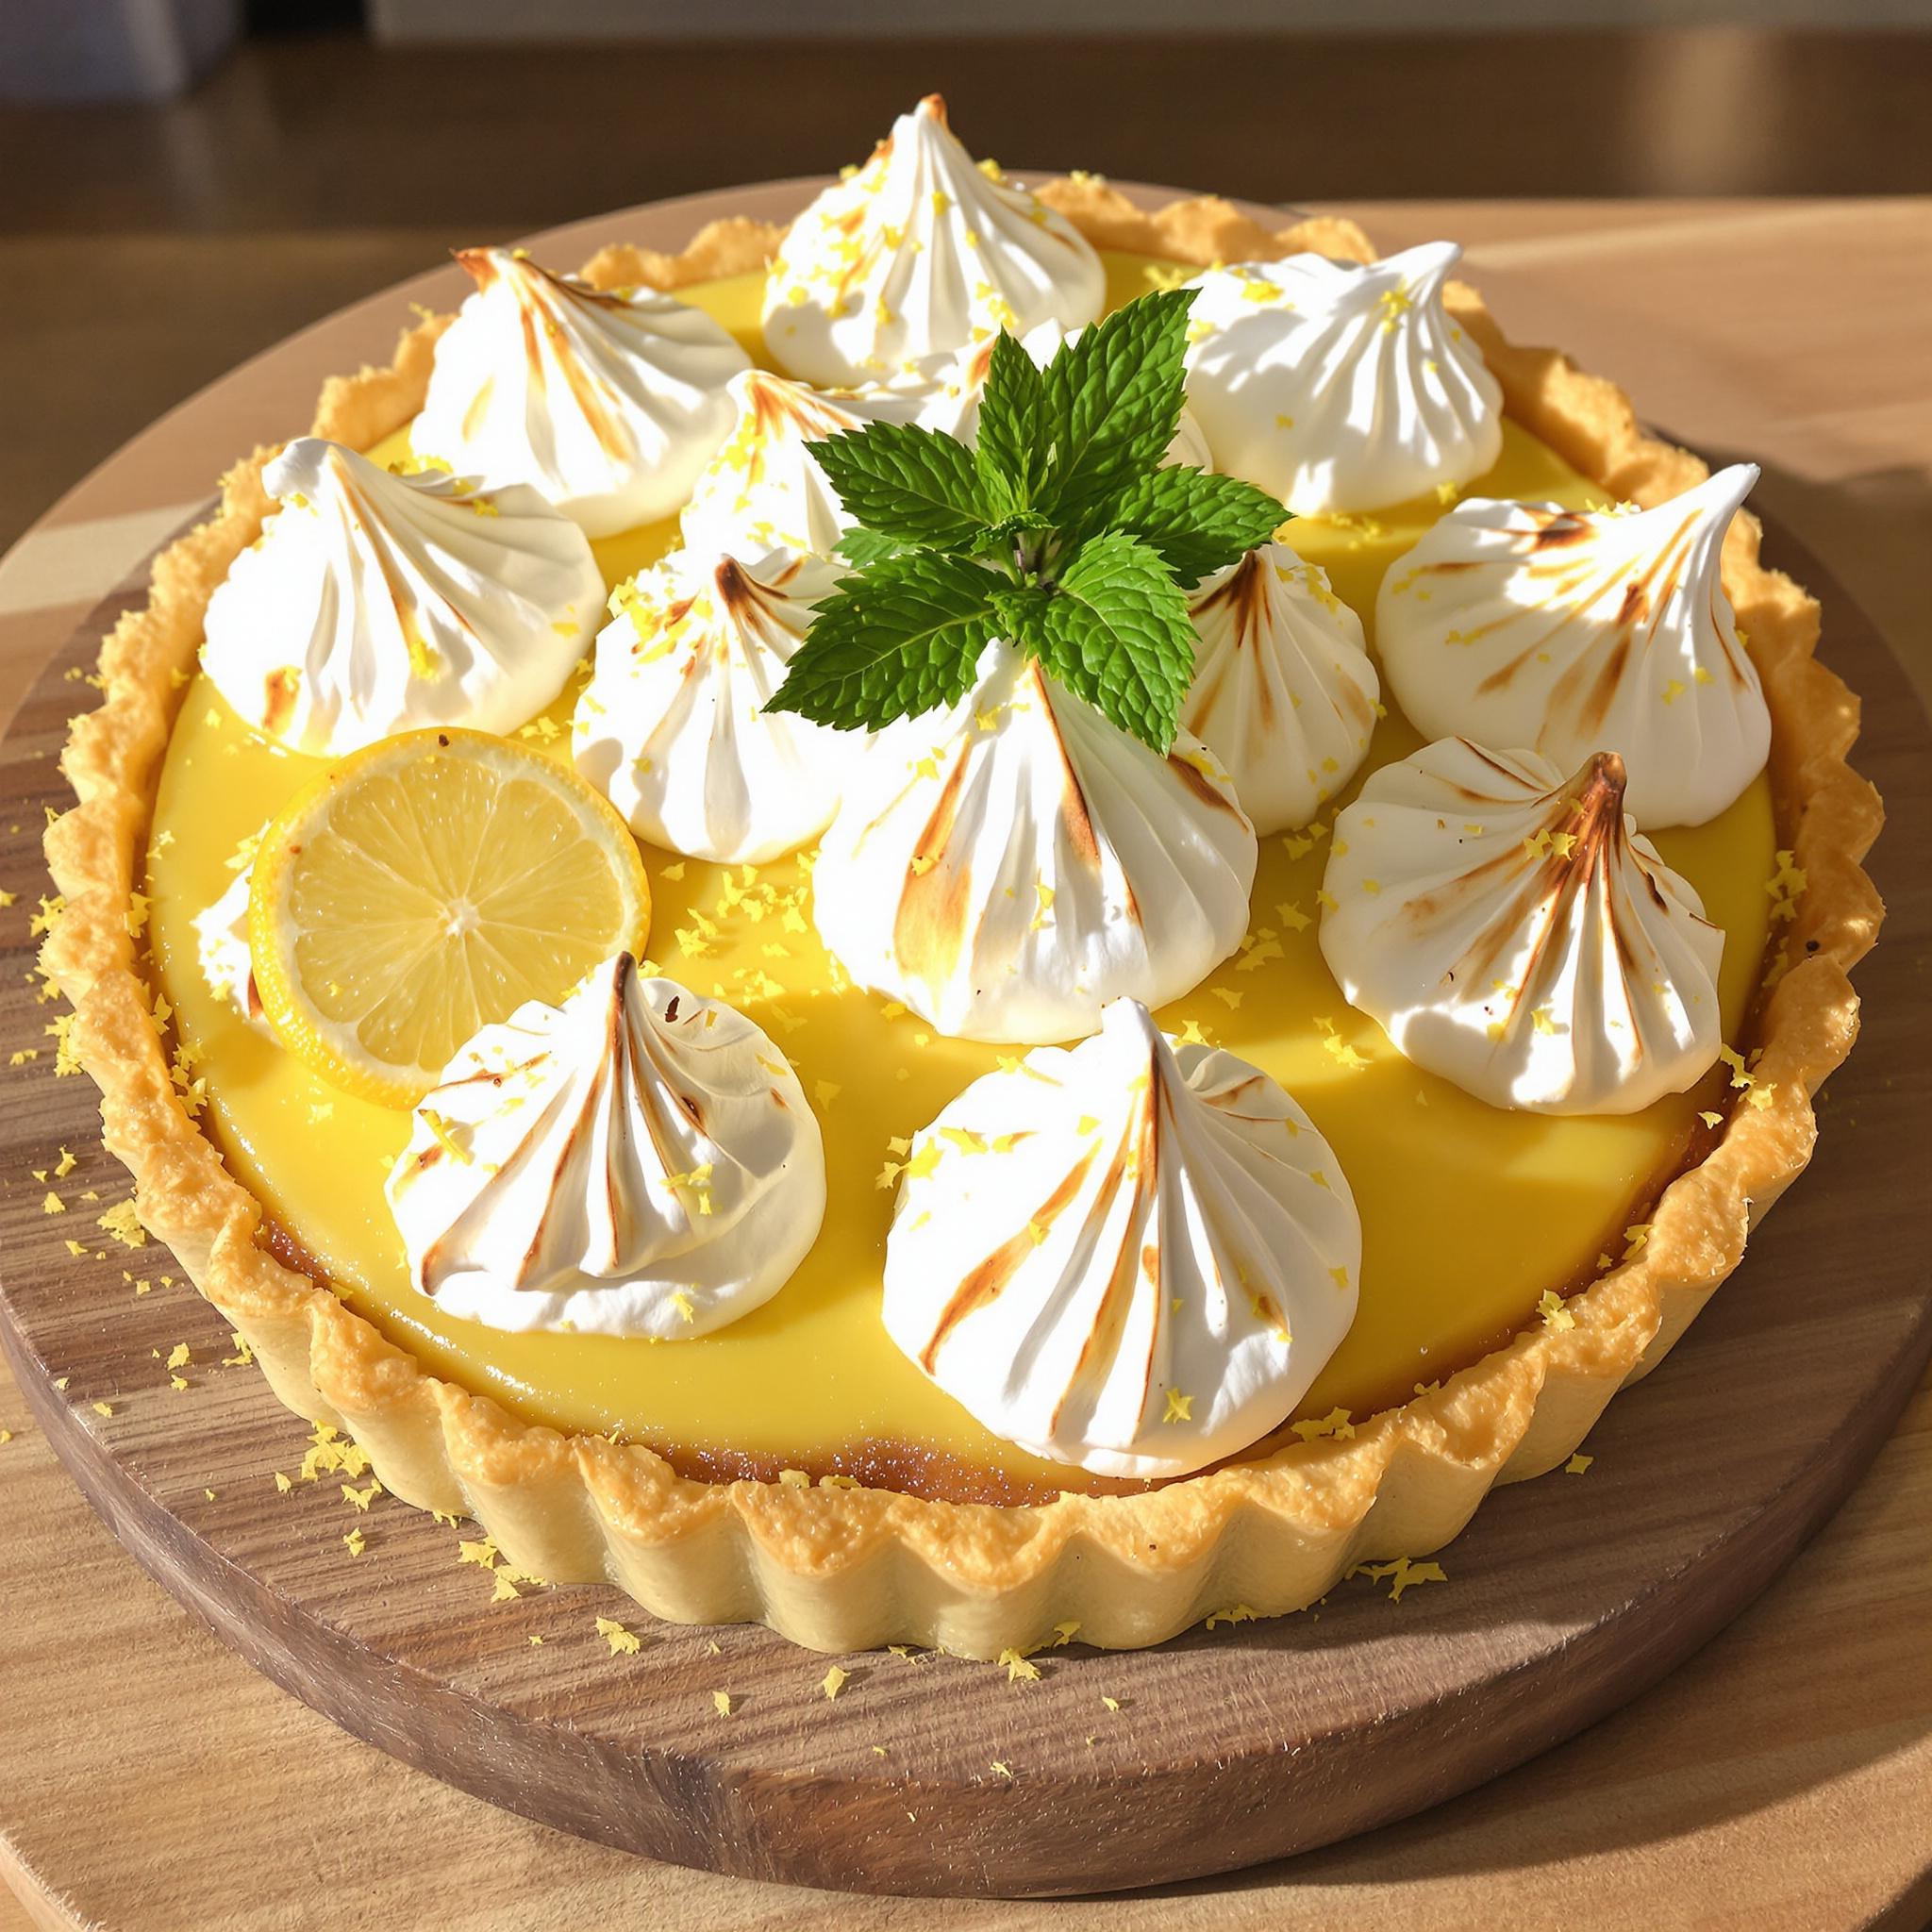
What makes this recipe stand out is its simplicity paired with its show-stopping results. The vibrant yellow of the lemon curd contrasts beautifully with the snowy peaks of the meringue, creating a dessert that’s as visually stunning as it is delicious. Plus, the combination of tart, sweet, and creamy flavors ensures that no one can resist going back for seconds. Whether you’re looking to impress guests or simply indulge in a slice of happiness, this lemon meringue tart recipe has got you covered.
Perfect Occasions to Prepare This Tart
This Mother’s Day Lemon Meringue Tart is ideal for springtime gatherings, brunches, or holiday celebrations like Easter or Mother’s Day (of course!). It’s also a fantastic choice for birthdays, bridal showers, or any event where you want to add a touch of elegance to the dessert table. Personally, I love serving it at family dinners because it always sparks joy and conversation.
Ingredients
- 1 ½ cups all-purpose flour
- ½ cup unsalted butter, cold and cubed
- 3 tablespoons granulated sugar
- 1 large egg yolk
- 2-3 tablespoons ice water
- 4 large eggs
- 1 cup fresh lemon juice (about 4-5 lemons)
- 1 cup granulated sugar
- ¼ teaspoon salt
- ½ cup unsalted butter, melted
- 4 large egg whites
- ½ cup granulated sugar
- ½ teaspoon cream of tartar
Substitution Options
If you’re missing an ingredient or want to experiment, here are some swaps:
- Use gluten-free flour for a gluten-free crust.
- Substitute store-bought lemon juice if fresh lemons aren’t available.
- Replace granulated sugar with honey or maple syrup for a different sweetness profile.
- Swap regular butter with vegan butter for a dairy-free option.
Preparation
Step 1: Make the Tart Crust
Start by preparing the tart crust, which serves as the foundation for your Mother’s Day Lemon Meringue Tart. In a mixing bowl, combine the flour, cold cubed butter, and sugar. Use your fingers or a pastry cutter to blend until the mixture resembles coarse crumbs. Add the egg yolk and ice water, one tablespoon at a time, until the dough comes together. Shape it into a disc, wrap it in plastic wrap, and chill for 30 minutes. Pro tip: Keep everything cold to ensure a flaky texture!
Step 2: Prepare the Lemon Curd
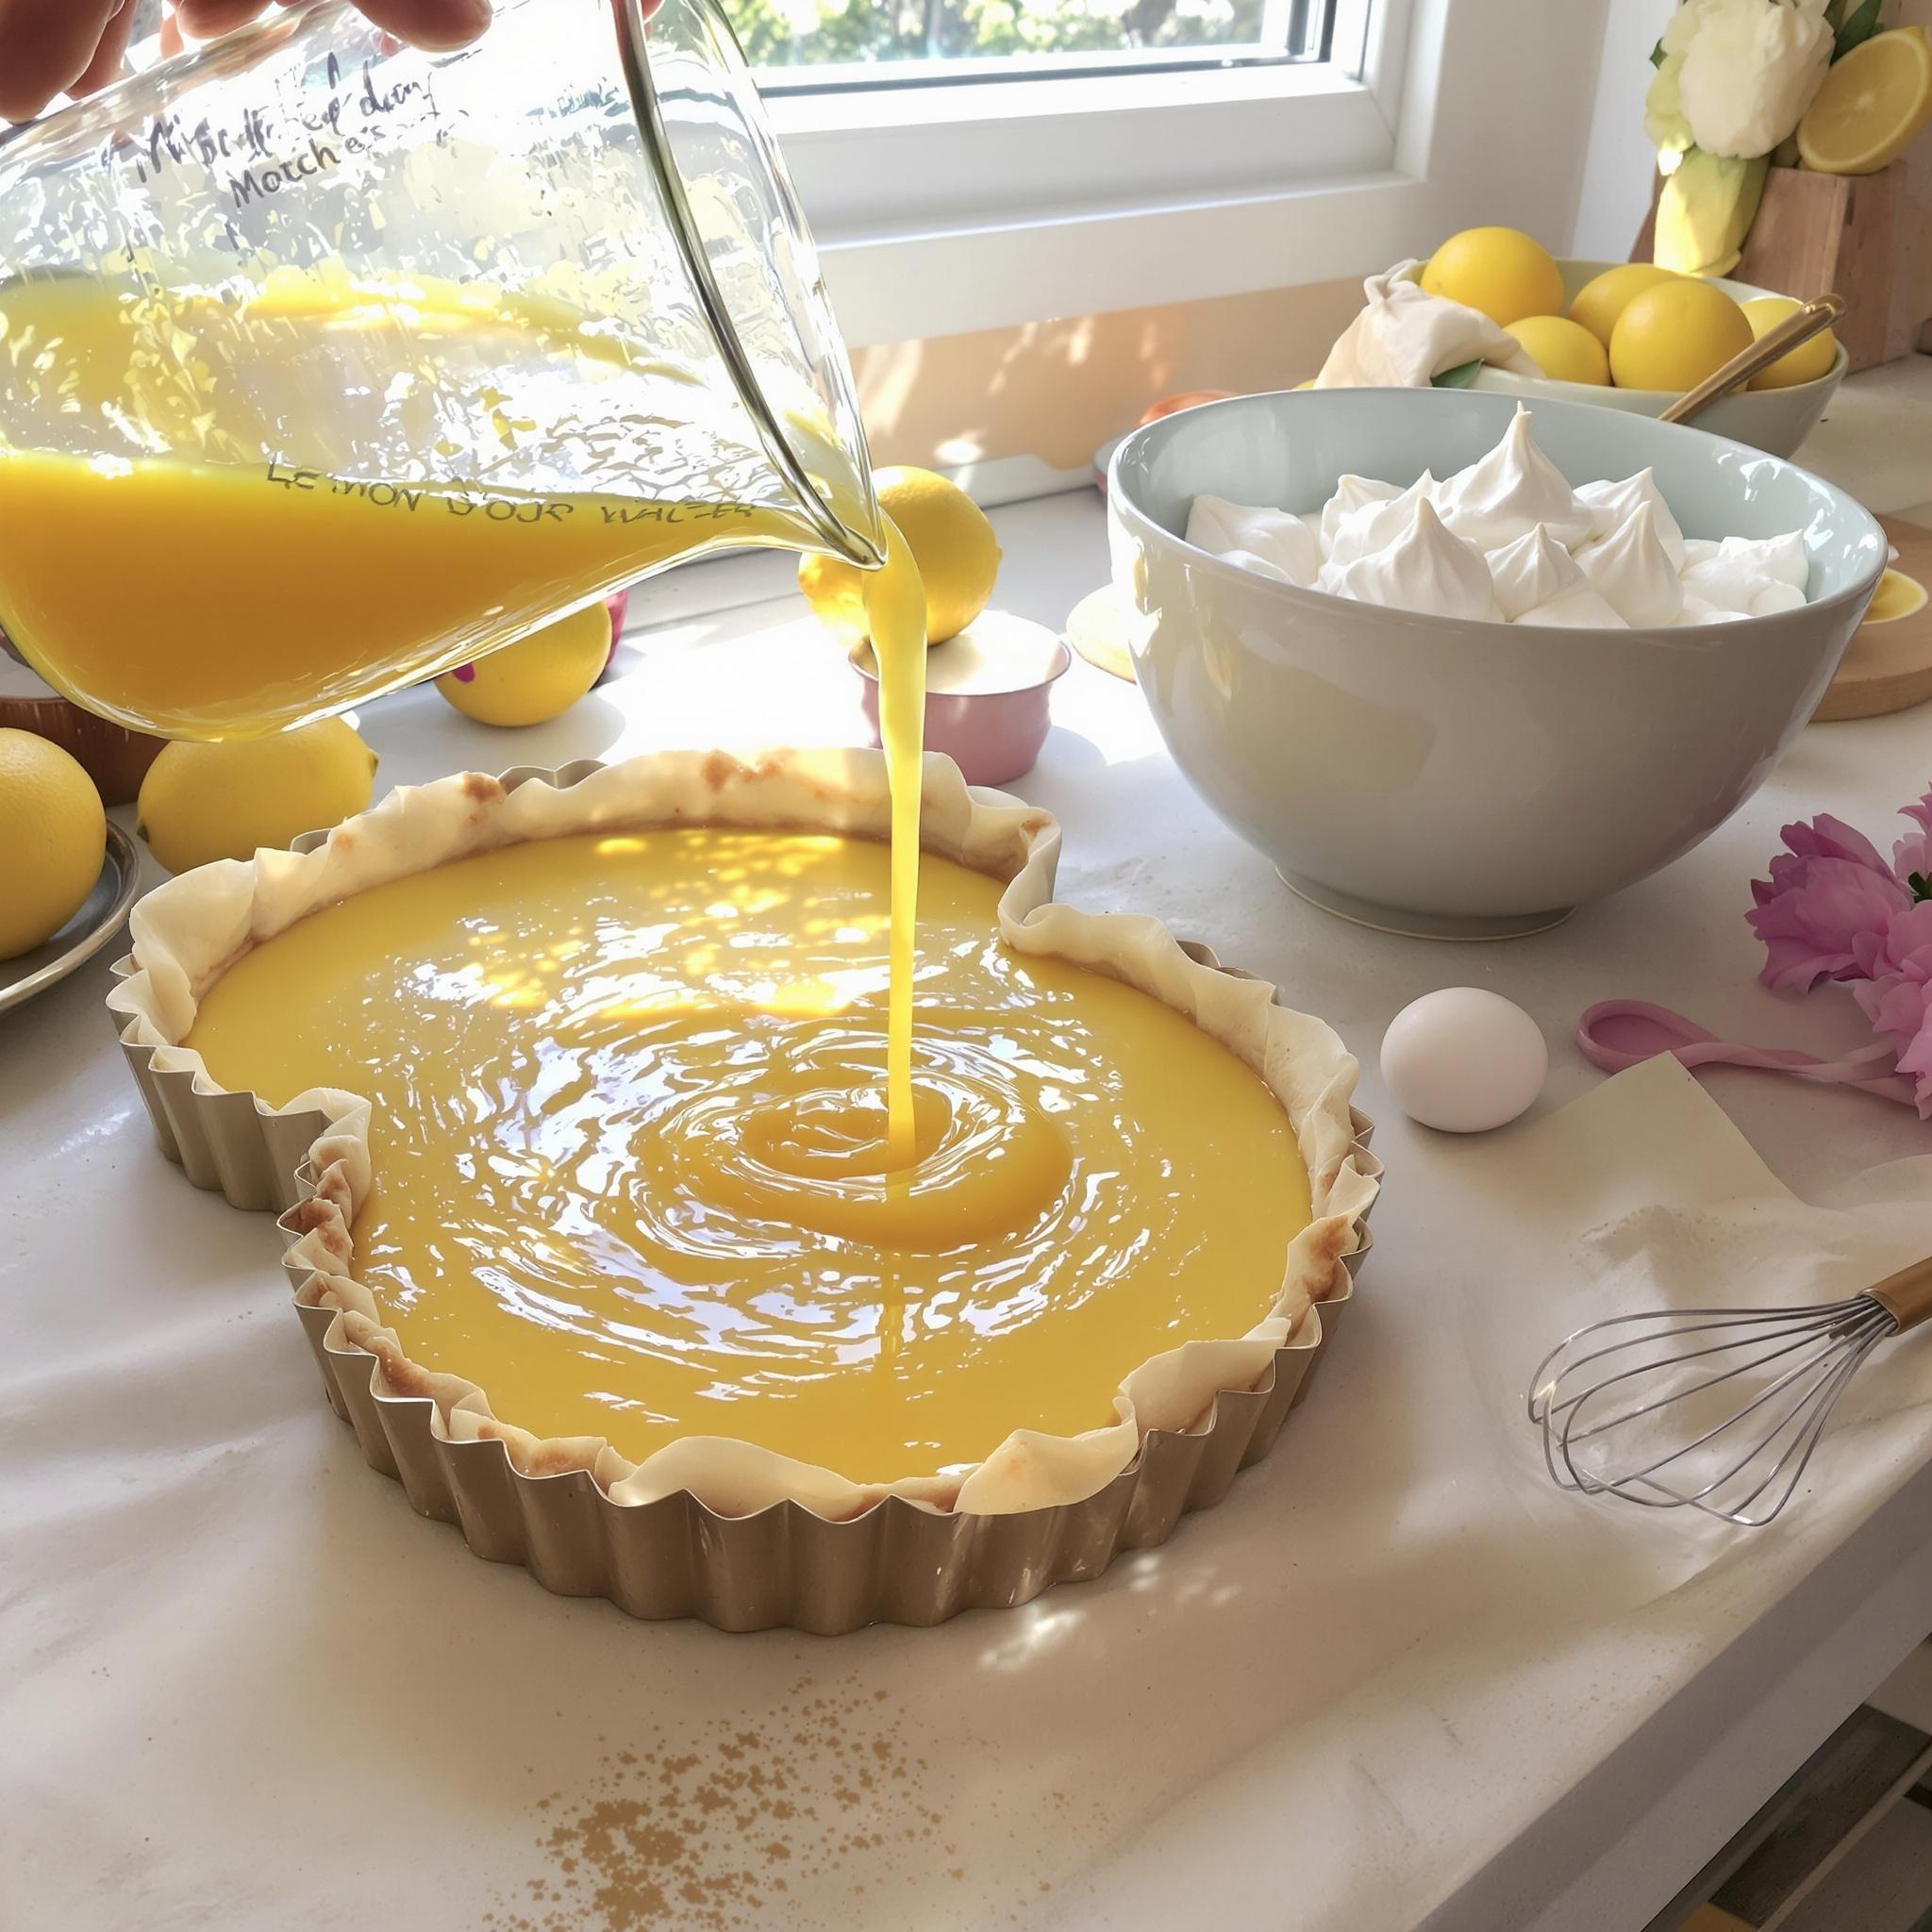
While the dough chills, prepare the star of the show—the lemon curd. In a saucepan, whisk together the eggs, lemon juice, sugar, and salt. Cook over medium heat, stirring constantly, until the mixture thickens enough to coat the back of a spoon. Remove from heat and stir in the melted butter for added richness. Strain the curd through a fine-mesh sieve to achieve a silky-smooth consistency. Let it cool slightly before spreading it onto the baked crust.
Step 3: Whip the Meringue
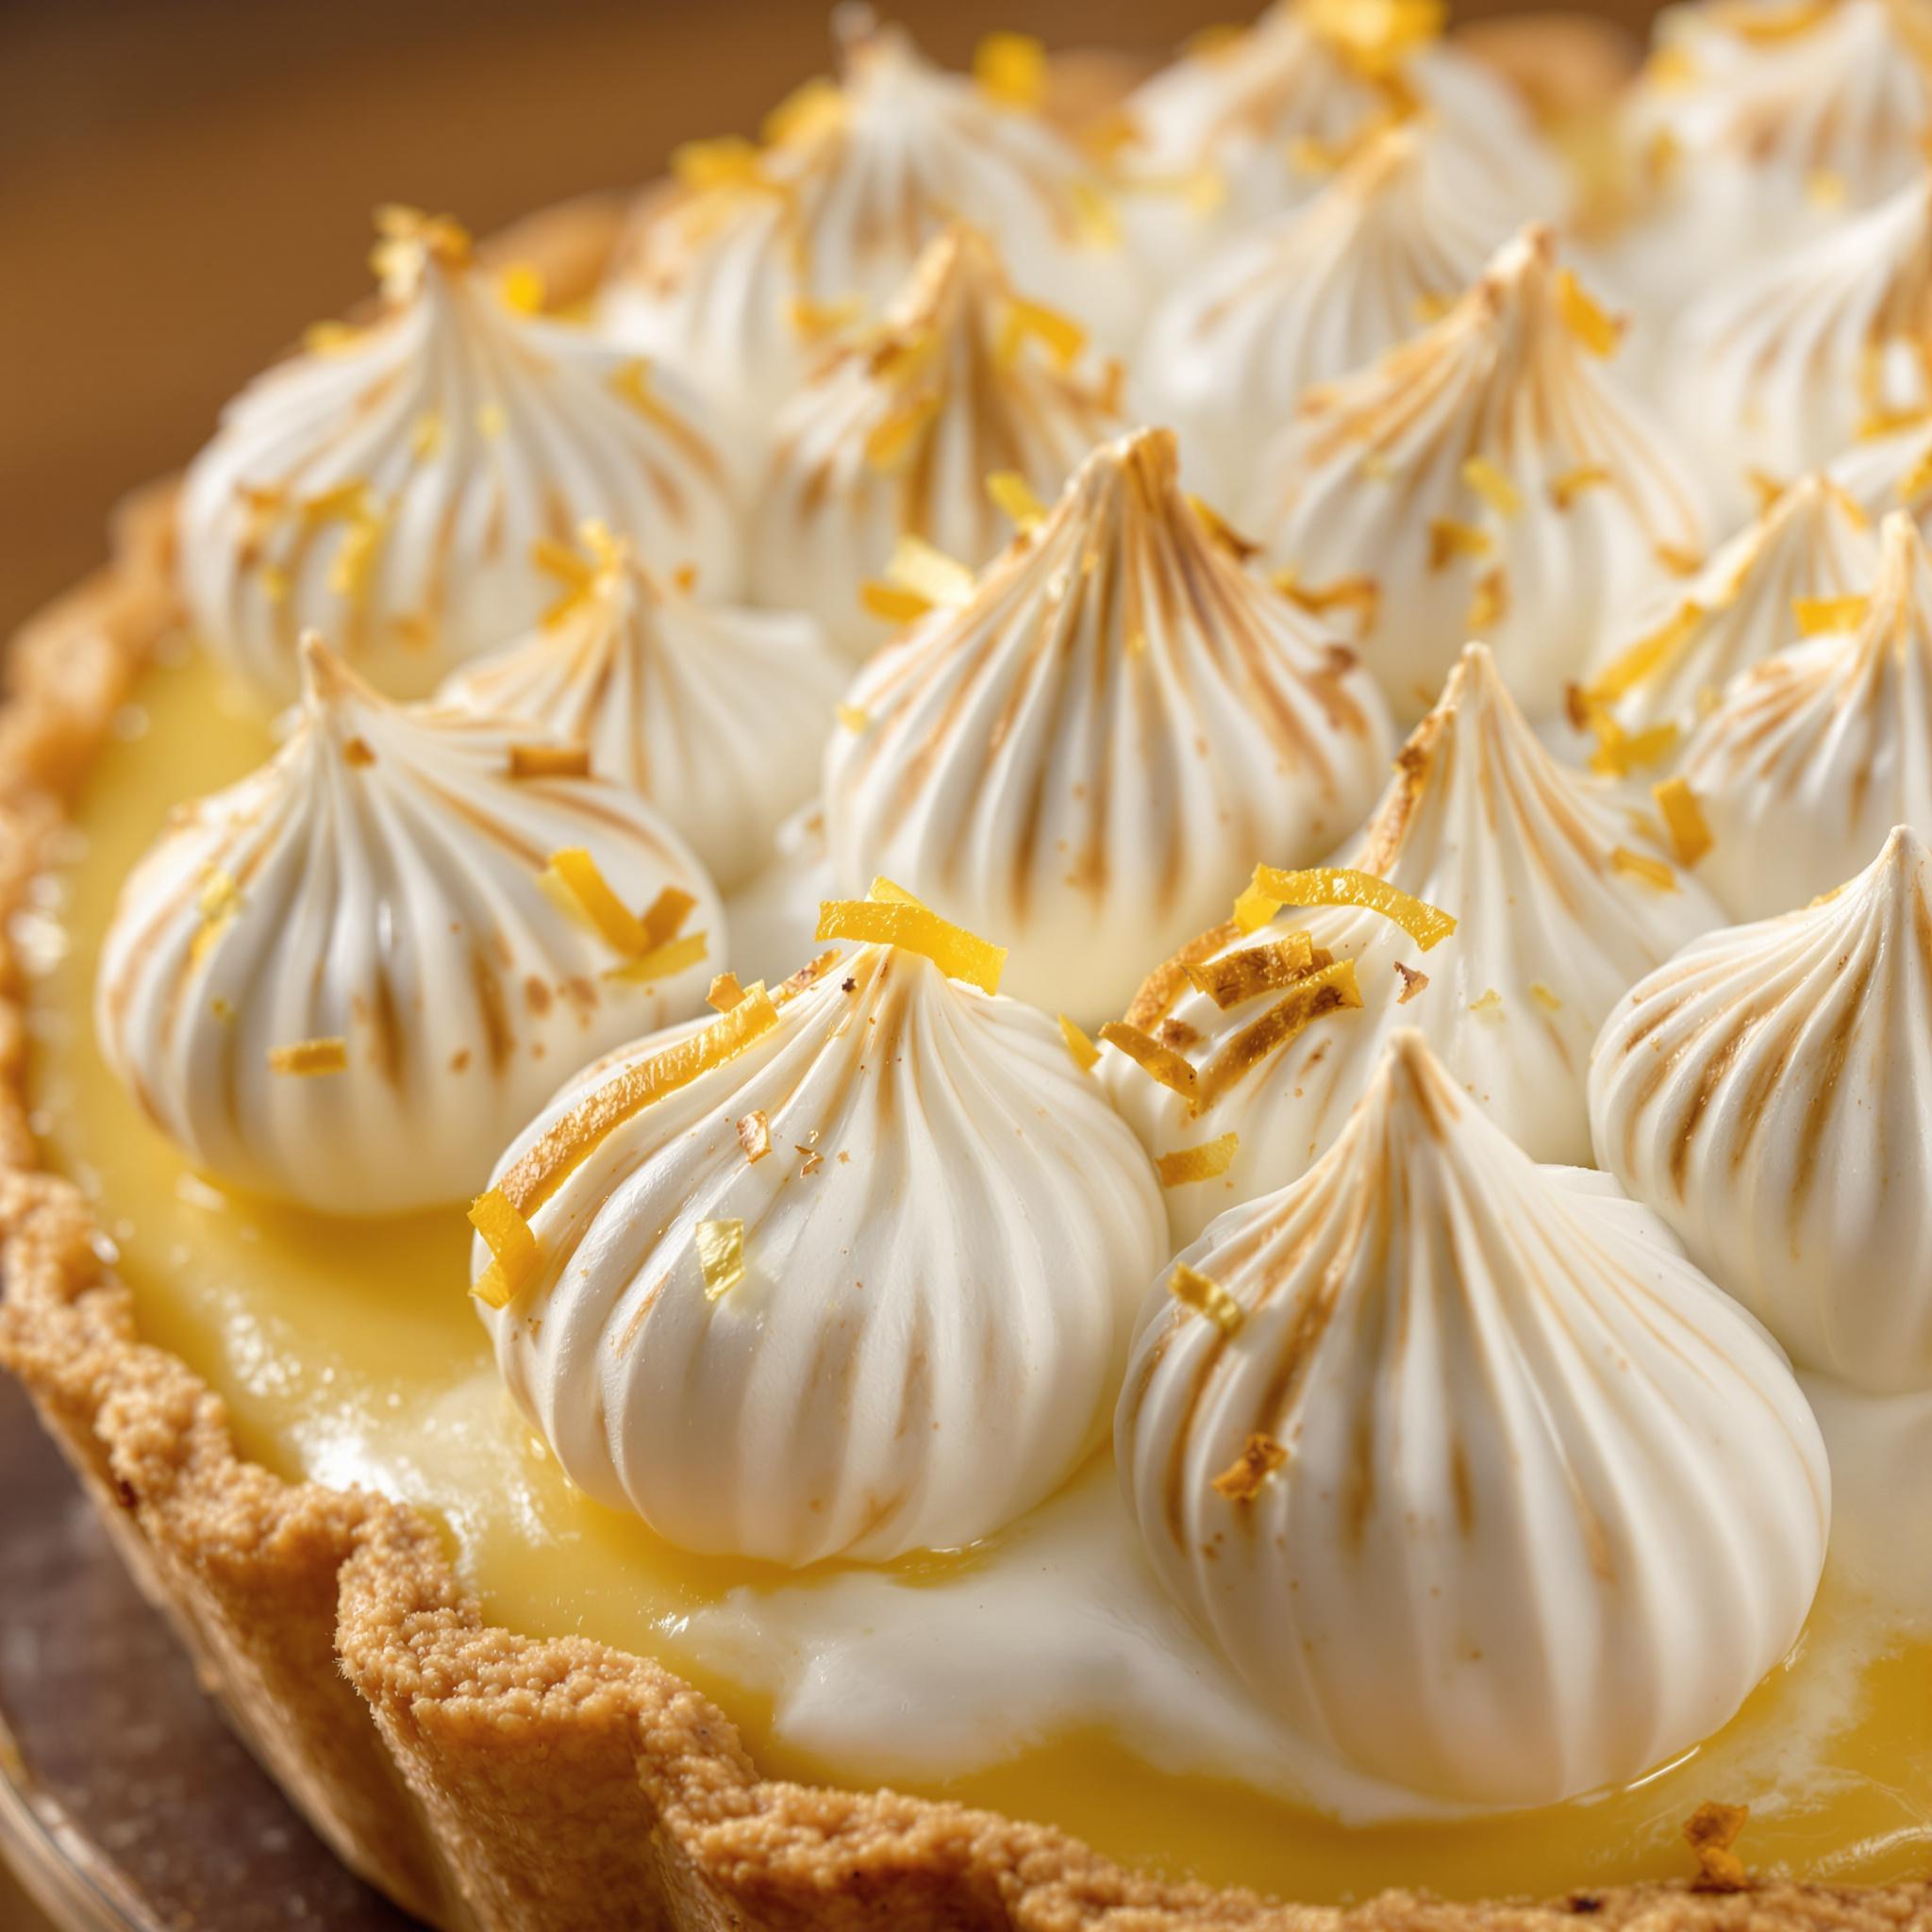
Now it’s time to create the crowning glory of your tart—the meringue. In a clean bowl, beat the egg whites and cream of tartar until soft peaks form. Gradually add the sugar while continuing to whip until stiff, glossy peaks appear. Spread the meringue over the cooled lemon curd, making sure to seal the edges to prevent browning during baking. Pro tip: Use a kitchen torch for extra caramelized peaks if you don’t want to bake it further.
Step 4: Assemble and Bake
Roll out the chilled dough and press it into a tart pan. Prick the bottom with a fork to prevent puffing, then blind bake it at 375°F (190°C) for 15-20 minutes until golden brown. Once the crust is ready, spread the lemon curd evenly inside. Top with the meringue and bake at 350°F (175°C) for 10-15 minutes until the meringue turns lightly golden. Let it cool completely before slicing.
Chef’s Tip
For an extra burst of flavor, zest the lemons before juicing them and sprinkle the zest over the finished tart. It adds a fragrant aroma and enhances the citrus notes without overpowering the dish.
Time
- Prep Time: 30 minutes
- Cooking Time: 45 minutes
- Resting Time: 30 minutes (for chilling the dough)
- Total Time: 1 hour 45 minutes
Nutritional Information
Per serving (1 slice):
- Calories: 320
- Protein: 5g
- Fat: 18g
- Carbohydrates: 36g
- Sugar: 22g
Extra Information
Did you know that lemons are packed with vitamin C and antioxidants? They not only brighten up desserts but also offer health benefits like boosting immunity and improving skin health.
Necessary Tools
- Tart pan
- Rolling pin
- Mixing bowls
- Whisk
- Stand mixer or hand mixer
- Fine-mesh sieve
Storage Instructions
To keep your Mother’s Day Lemon Meringue Tart fresh, store it in the refrigerator. Cover it loosely with plastic wrap or place it in an airtight container to prevent the meringue from absorbing odors. Consume within 3 days for the best flavor and texture.
If you need to freeze the tart, wrap individual slices tightly in plastic wrap and aluminum foil. Thaw in the fridge overnight before serving. Note that freezing may slightly alter the texture of the meringue.
Avoid leaving the tart at room temperature for more than two hours, as the lemon curd contains eggs and butter, which can spoil quickly.
Tips and Tricks
- Always use room-temperature eggs for easier whipping and better incorporation.
- Don’t rush the cooling process; patience ensures a firmer set for both the crust and filling.
- For a professional finish, pipe the meringue using a star tip.
Serving Suggestions
- Serve with a dollop of whipped cream for added indulgence.
- Pair with a cup of Earl Grey tea or sparkling wine for an elevated experience.
Healthier Alternatives for the Recipe
Here are six ways to make this tart healthier while still delicious:
1. Whole Wheat Crust
Swap all-purpose flour with whole wheat flour for added fiber and nutrients.
2. Reduced Sugar
Cut the sugar in the lemon curd and meringue by half without compromising too much on sweetness.
3. Coconut Sugar
Use coconut sugar instead of granulated sugar for a lower glycemic index.
4. Greek Yogurt Base
Replace part of the lemon curd with Greek yogurt for a protein boost.
5. Almond Flour Crust
Make the crust gluten-free by using almond flour and a bit of coconut oil.
6. Aquafaba Meringue
Use aquafaba (chickpea brine) instead of egg whites for a vegan-friendly meringue.
Common Mistakes to Avoid
Mistake 1: Overmixing the Dough
Overworking the dough can lead to a tough crust. Mix just until the ingredients come together and handle it minimally. Pro tip: Chill the dough before rolling to relax the gluten.
Mistake 2: Undercooking the Lemon Curd
If the curd isn’t cooked long enough, it won’t thicken properly. Stir constantly and cook until it coats the back of a spoon. Patience is key here!
Mistake 3: Skipping the Sieve
Straining the curd removes any lumps and ensures a smooth filling. Don’t skip this step—it makes a world of difference.
Mistake 4: Overbeating the Meringue
Beating the meringue too long can cause it to become grainy. Stop once you reach stiff, glossy peaks.
Mistake 5: Baking at High Heat
High temperatures can cause the meringue to brown too quickly or burn. Bake at a moderate temperature for even results.
Frequently Asked Questions
Can I make the tart ahead of time?
Absolutely! You can prepare the crust and lemon curd a day in advance and assemble the tart closer to serving time. Store the components separately in the fridge.
How do I prevent the meringue from weeping?
Weeping occurs when the meringue releases liquid due to improper cooking or cooling. Ensure you bake the meringue adequately and let the tart cool gradually.
Can I use bottled lemon juice?
While fresh lemon juice is preferred for its vibrant flavor, bottled juice works in a pinch. Just ensure it’s pure lemon juice without additives.
What if my crust shrinks during baking?
Shrinkage happens when the dough is stretched too thin. Roll it evenly and avoid stretching when transferring it to the pan.
Is this recipe suitable for vegans?
With substitutions like aquafaba for egg whites and plant-based butter, this tart can easily be adapted for vegans.
How do I know when the curd is done?
The curd should thicken enough to coat the back of a spoon and register 170°F (77°C) on a thermometer. It will continue to thicken as it cools.
Can I freeze the tart?
Yes, but freezing may affect the meringue’s texture. Wrap slices individually and thaw in the fridge overnight.
Why does my meringue collapse?
This usually happens if the sugar isn’t fully dissolved or if the meringue is exposed to moisture. Beat thoroughly and avoid humid environments.
What tools do I need for piping the meringue?
A piping bag fitted with a star tip creates beautiful swirls. If you don’t have one, simply spread the meringue with a spatula.
Can I use Meyer lemons?
Yes, Meyer lemons work wonderfully and impart a sweeter, less acidic flavor compared to regular lemons.
Conclusion
The Mother’s Day Lemon Meringue Tart is more than just a dessert—it’s a labor of love that brings people together. With its vibrant flavors, elegant presentation, and customizable variations, this recipe is sure to become a staple in your repertoire. So roll up your sleeves, gather your ingredients, and get ready to create something truly unforgettable. Happy baking!
Equipment
- Mixing bowls
- Whisk
- Pastry cutter
- Tart pan
- Fine-mesh sieve
Ingredients
- 1 ½ cups all-purpose flour
Instructions
- In a mixing bowl, combine the flour, cold cubed butter, and sugar. Blend until resembling coarse crumbs. Add the egg yolk and ice water, one tablespoon at a time, until the dough comes together. Chill for 30 minutes.
Notes
Nutrition

Hi, I’m Olivia Parker, the founder of BakingSecret.com and a lifelong lover of all things sweet and homemade. I grew up in a small town in Oregon, where the smell of fresh cookies in my family’s kitchen sparked my passion for baking. Over the years, I turned that passion into a mission: to help home bakers feel confident, inspired, and creative.
After studying food science and working in several artisan bakeries across the U.S., I decided to create a space where everyone from beginners to seasoned bakers can find reliable recipes, expert tips, and a warm, welcoming community. BakingSecret.com is my way of sharing the magic of baking with the world. When I’m not testing new recipes, you’ll find me exploring farmers’ markets, collecting vintage cookbooks, or perfecting my sourdough technique.