
Why This Heavenly Texture Cake Will Steal Your Heart
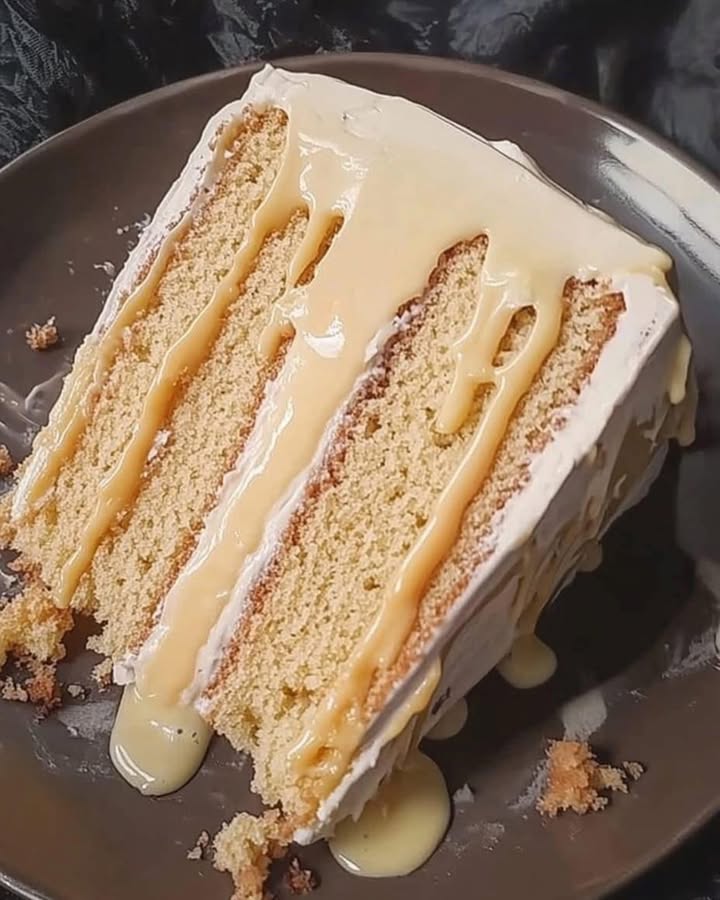
There’s something magical about a dessert that looks as good as it tastes. The first time I made this Angel Kiss Cake, my family couldn’t stop raving about it. It’s not just a cake; it’s a symphony of textures—soft sponge cake, creamy flan, and a luscious milk syrup that ties everything together. One bite, and you’ll understand why it’s called a Heavenly Texture Cake. Whether you’re baking for a special occasion or just because, this recipe is sure to become a favorite.
A Little Story Behind the Cake
I stumbled upon this recipe during a family reunion. My aunt brought out this towering beauty, and when I took my first bite, I was transported to dessert heaven. She told me it’s a twist on traditional Latin American cakes, where layers of flavor and texture are key. Over the years, I’ve tweaked the recipe to make it even more irresistible. Each layer feels like a warm hug, and the final result? Pure bliss. Trust me, once you try it, you’ll want to share it with everyone you love.
Why You’ll Fall Head Over Heels for This Recipe
This Heavenly Texture Cake is perfect for anyone who loves desserts that are rich but not overly sweet. The sponge cake is light and airy, while the creamy flan adds a velvety touch. The milk syrup soaks into every layer, making each bite moist and flavorful. Plus, it’s surprisingly easy to make—even if you’re new to baking. With step-by-step instructions and a few pro tips, you’ll feel like a pastry chef in no time.
Perfect Occasions to Serve This Cake
Whether it’s a birthday, anniversary, or holiday gathering, this cake is a showstopper. It’s also a hit at potlucks, family dinners, or even as a sweet treat for movie night. I once made it for a friend’s bridal shower, and everyone kept asking for seconds. It’s versatile enough for any celebration but special enough to make an ordinary day feel extraordinary.
Ingredients You’ll Need
For the Sponge Cake:
- 3 cups of flour (sifted three times)
- 6 eggs, separated into whites and yolks
- 1 cup of whole milk
- 1 cup of sugar
- 2 teaspoons of vanilla extract
- 4 teaspoons of baking powder
For the Creamy Flan:
- 1 packet of gelatin, hydrated in ½ cup of water
- 1 can of condensed milk
- 1 can of evaporated milk
- 1 bar of cream cheese
- 5 eggs
- 2 teaspoons of vanilla extract
For the Syrup:
- 1 can of condensed milk
- 1 can of evaporated milk
- 1 cup of whole milk
- ½ cup of vanilla-flavored milk
- 1 teaspoon of vanilla extract
Substitution Options
If you’re looking to tweak the recipe, here are some ideas:
- Use almond or oat milk instead of whole milk for a dairy-free option.
- Swap the cream cheese for mascarpone for a richer flavor.
- Replace granulated sugar with coconut sugar for a slightly caramelized taste.
- For a gluten-free version, use a gluten-free flour blend instead of all-purpose flour.
Step-by-Step Preparation
Step 1: Make the Sponge Cake
Start by beating the egg whites until they form stiff peaks—it’s like watching clouds form in your mixing bowl! Gradually add the sugar, then fold in the yolks one at a time. Mix the flour, milk, and vanilla in a separate bowl, then incorporate it into the egg mixture in three parts. Be gentle; you don’t want to deflate those fluffy whites. Pour the batter into a greased cake pan and bake at 350°F for 30 minutes. Pro tip: Insert a toothpick into the center—if it comes out clean, your cake is ready!
Step 2: Prepare the Creamy Flan
Blend all the flan ingredients until smooth—it should look like liquid silk. Add the hydrated gelatin and mix well. Pour this heavenly mixture into the same cake mold, lined with aluminum foil for easy removal later. Bake at 350°F for 40 minutes or until firm. Chef’s tip: Let the flan cool completely before assembling the cake to avoid a soupy mess.
Step 3: Create the Celestial Syrup
Blend all the syrup ingredients until they’re perfectly combined. This golden elixir will soak into every layer of your cake, adding moisture and sweetness. Once blended, set it aside until assembly time. Pro tip: Warm the syrup slightly before pouring it over the cake for better absorption.
Step 4: Assemble the Magic
Now comes the fun part! Place a layer of sponge cake at the bottom, followed by a drizzle of whipped cream, a generous helping of flan, and another layer of cake. Finish with a dollop of whipped cream on top if you’re feeling fancy. Refrigerate overnight to let the flavors meld together. When you cut into it the next day, you’ll see why it’s called a Heavenly Texture Cake.
Timing Breakdown
Here’s how long each step takes:
- Prep Time: 1 hour (including cooling)
- Cooking Time: 1 hour 10 minutes
- Resting Time: Overnight (for best results)
- Total Time: Approximately 15 hours
Chef’s Secret
For an extra touch of magic, sprinkle a pinch of cinnamon or cocoa powder on top before serving. It adds depth and makes the presentation even more stunning.
An Interesting Tidbit
Did you know that gelatin was originally made from boiling animal bones? Thankfully, modern versions are much easier to work with—and vegetarian options are now widely available. Fun fact: Gelatin is what gives jiggly desserts their bounce!
Necessary Equipment
You’ll need:
- Mixing bowls
- Electric mixer or whisk
- Cake pans
- Blender
- Spatula
- Aluminum foil
Storage Tips
This cake is best enjoyed fresh, but if you have leftovers, store them in an airtight container in the fridge. It will stay good for up to 3 days. Keep in mind that the longer it sits, the softer it becomes due to the syrup soaking in.
If you need to freeze it, wrap individual slices tightly in plastic wrap and place them in a freezer-safe bag. They’ll last up to a month. Thaw in the fridge overnight before serving.
Avoid leaving the cake at room temperature for more than two hours, as dairy-based desserts spoil quickly.
Tips and Advice
To elevate your cake, consider these tips:
- Use room-temperature eggs for easier blending.
- Sift the flour multiple times for a lighter texture.
- Don’t rush the resting process—the overnight chill is crucial.
- Experiment with flavored syrups, like dulce de leche or coconut milk.
Presentation Ideas
Make your cake Instagram-worthy with these ideas:
- Garnish with fresh berries or edible flowers.
- Dust powdered sugar over the top for a snowy effect.
- Drizzle caramel sauce around the plate for a restaurant-quality finish.
- Serve with a scoop of vanilla ice cream on the side.
Healthier Alternatives
Want to lighten things up? Try these variations:
- Low-Sugar Version: Use sugar substitutes like stevia or monk fruit in both the cake and syrup.
- Vegan Option: Replace eggs with flaxseed meal and dairy with plant-based alternatives.
- Gluten-Free Twist: Use a gluten-free flour blend for the sponge cake.
- Protein-Packed Cake: Add protein powder to the cake batter for a fitness-friendly treat.
- Fruit-Infused Flan: Blend in pureed mango or strawberries for a fruity twist.
- Lightened-Up Syrup: Dilute the syrup with extra milk for a less sweet option.
Common Mistakes to Avoid
Mistake 1: Skipping the Sifting Process
Sifting the flour might seem tedious, but it’s essential for achieving a light and airy sponge cake. Without sifting, your cake could turn dense and heavy. Pro tip: Sift the flour onto a piece of parchment paper for easy cleanup.
Mistake 2: Overmixing the Batter
Overmixing deflates the air bubbles created by beating the egg whites, resulting in a flat cake. Mix gently and stop as soon as everything is incorporated.
Mistake 3: Rushing the Cooling Process
Letting the flan and cake cool completely ensures they hold their shape during assembly. Patience pays off here!
FAQ
Can I make this cake ahead of time?
Absolutely! In fact, making it a day in advance allows the flavors to meld beautifully. Just refrigerate it overnight and serve chilled.
Is this cake too sweet?
While it’s rich, the balance of textures keeps it from being overly sugary. If you prefer less sweetness, reduce the sugar in the syrup by half.
Can I use boxed cake mix for the sponge?
Yes, but homemade sponge cake has a fresher taste and lighter texture. If you’re short on time, go for it—but try the original method when you can!
What if I don’t have gelatin?
You can use agar-agar as a plant-based alternative. Follow the package instructions for hydration and usage.
How do I prevent the flan from sticking to the pan?
Line the mold with non-stick aluminum foil or spray it generously with cooking spray. This makes unmolding a breeze.
Can I skip the syrup?
Technically, yes, but the syrup adds moisture and enhances the overall flavor. It’s worth including!
What size cake pan should I use?
A 9-inch round or square pan works perfectly. Adjust the quantities if using a different size.
How do I know when the flan is done?
The edges should be set, and the center should jiggle slightly. It will firm up as it cools.
Can I add fruit to the layers?
Definitely! Thin slices of mango, strawberry, or peach would complement the flavors beautifully.
Why does my cake sink in the middle?
This usually happens if the oven door is opened too early or if the batter was overmixed. Keep the door closed until the minimum baking time is reached.
Final Thoughts
Baking this Heavenly Texture Cake is like creating a masterpiece—it’s rewarding, delicious, and guaranteed to impress. From its soft sponge layers to its creamy flan filling, every bite is a reminder of how wonderful homemade desserts can be. So grab your apron, gather your ingredients, and get ready to wow your loved ones with this delightful creation. Happy baking!
Equipment
- Mixing bowl
- Electric mixer or whisk
- Spatula
- Cake pans
- Blender
Ingredients
- 3 cups flour sifted three times
- 6 eggs separated into whites and yolks
- 1 cup whole milk
- 1 cup sugar
- 2 teaspoons vanilla extract
- 4 teaspoons baking powder
- 1 packet gelatin hydrated in ½ cup of water
- 1 can condensed milk
- 1 can evaporated milk
- 1 bar cream cheese
- 5 eggs
- 2 teaspoons vanilla extract
- 1 can condensed milk
- 1 can evaporated milk
- 1 cup whole milk
- ½ cup vanilla-flavored milk
- 1 teaspoon vanilla extract
Instructions
- Beat the egg whites until stiff peaks form, then gradually add the sugar.
- Fold in the egg yolks one at a time.
- Mix flour, milk, and vanilla in a separate bowl, then incorporate it into the egg mixture in three parts.
- Pour the batter into a greased cake pan and bake at 350°F for 30 minutes.
- Blend all the flan ingredients until smooth, then mix in the hydrated gelatin.
- Pour the flan mixture into the cake mold lined with aluminum foil and bake at 350°F for 40 minutes or until firm.
- Blend all syrup ingredients until perfectly combined and set aside.
- Start assembling the cake by layering sponge cake, whipped cream, flan, and repeat until you finish with whipped cream on top.
- Refrigerate overnight before serving.
Notes
Nutrition

Hi, I’m Olivia Parker, the founder of BakingSecret.com and a lifelong lover of all things sweet and homemade. I grew up in a small town in Oregon, where the smell of fresh cookies in my family’s kitchen sparked my passion for baking. Over the years, I turned that passion into a mission: to help home bakers feel confident, inspired, and creative.
After studying food science and working in several artisan bakeries across the U.S., I decided to create a space where everyone from beginners to seasoned bakers can find reliable recipes, expert tips, and a warm, welcoming community. BakingSecret.com is my way of sharing the magic of baking with the world. When I’m not testing new recipes, you’ll find me exploring farmers’ markets, collecting vintage cookbooks, or perfecting my sourdough technique.