
Escape to the Tropics with Every Bite
I can still remember the first time I made this cold pineapple cake. It was a sweltering July afternoon, and the idea of turning on the oven felt like a crime. I wanted something magical—something that felt like a mini vacation. This cake was my answer. With the very first bite, my family was transported to a sunny beach. The cool, creamy filling and that sweet, tangy pineapple are pure joy. It’s like summer in a dish, no plane ticket required.
From Picnics to Parties: A Modern Tropical Dream
This cold pineapple cake is a beautiful example of a no-bake classic. It takes inspiration from beloved icebox cakes of the past, where convenience meets creamy goodness. While it may not have ancient roots, its spirit is all about modern, easy entertaining with a tropical twist. Think of it as the fancier cousin of a classic pineapple fluff salad, transformed into a show-stopping dessert. It’s perfect for today’s cooks who want maximum flavor with minimal fuss and heat in the kitchen.
Why You’ll Fall in Love with This Tropical Pineapple Delight
This recipe is a true gem. First, it’s incredibly easy. No baking means you can’t mess it up. Second, the flavor is a perfect balance of sweet and tangy. The cream cheese and condensed milk create a rich, velvety base. The pineapple cuts through with a bright, sunny note. It’s rich, yet somehow light and refreshing. Finally, it’s a crowd-pleaser. Kids and adults alike go crazy for its creamy texture and tropical taste. It’s the dessert that disappears first from the table, every single time.
The Best Moments for Your Pineapple Delight
- Summer BBQs & Picnics: It stays cool and refreshing, beating the heat.
- Potluck Dinners: It travels like a dream and feeds a crowd.
- Weekend Family Treats: A special dessert that feels like a celebration.
- Holidays like Easter or Mother’s Day: A bright, beautiful centerpiece for your table.
- Just Because: Honestly, any day that needs a little sunshine deserves this cake.
Gather Your Ingredients for Sunshine
Here is everything you need to make this effortless tropical treat. You probably have some of it in your pantry already!
- 1 can of pineapple pieces in its juice (do not drain!)
- 1 cup of Maria-type cookies, crushed (about 20 cookies)
- 1/2 cup melted butter (salted adds a nice contrast)
- 1 cup cream cheese, softened to room temperature
- 1 can (395g) of sweetened condensed milk
- 1/2 cup cold whipping cream or heavy cream
- 1 teaspoon pure vanilla extract
- Pineapple slices to decorate (optional, but so pretty!)
No Pineapple? No Problem! Easy Swaps
Feel free to play around with this recipe based on what you have.
- Cookies: Graham cracker crumbs work beautifully instead of Maria cookies.
- Fruit: Try crushed, well-drained mandarin oranges or mango for a different tropical twist. For a different fruity flavor, consider a jello cake variant like our bright and cheerful Orange Jello Cake.
- Cream Cheese: For a lighter take, you can use Neufchâtel cheese.
- Whipping Cream: An 8-ounce tub of thawed frozen whipped topping (like Cool Whip) can be folded in at the end instead of whipping fresh cream.
Crafting Your Cold Tropical Pineapple Delight
Let’s get mixing! The process is simple, soothing, and smells amazing.
Step 1: Create the Crunchy Cookie Base
Start by crushing your Maria cookies into fine crumbs. I love putting them in a zip-top bag and rolling a glass over them—it’s oddly satisfying! In a medium bowl, mix the golden crumbs with the melted, slightly cooled butter. The mixture will look like wet sand. Press this firmly and evenly into the bottom of an 8×8 inch square dish or a 9-inch round springform pan. The butter is your glue, creating that perfect crust. Pop it in the fridge to set while you make the filling.
Step 2: Whip Up the Dreamy Cheese Mixture
Time for the creamy heart of the cake. In a large bowl, beat the softened cream cheese with a hand mixer until it’s completely smooth and lump-free. This is key for a silky texture. Now, pour in the entire can of sweetened condensed milk and the vanilla. Beat again until the mixture is glossy, thick, and perfectly combined. Fold in the entire can of pineapple pieces, including all that wonderful juice. The juice is essential for flavor and keeps the filling luscious.
Step 3: Master the Whipped Cream Fold
In a separate, clean, cold bowl, pour your cold whipping cream. Whip it using clean beaters until you get soft peaks. This means when you lift the beaters, the cream forms a gentle peak that flops over slightly. Pro tip: A cold bowl and cream help it whip faster and higher. Now, gently add about a third of the whipped cream into the cheese-pineapple mixture. Fold it in with a spatula to lighten the base. Then, carefully fold in the rest of the cream until no white streaks remain. You’ll have a cloud-like, pale yellow filling.
Step 4: Assemble Your Masterpiece
Take your chilled crust out of the fridge. Pour the heavenly pineapple cream filling over the top. Use your spatula to smooth it into an even, beautiful layer. Gently tap the pan on the counter to remove any air bubbles. This is your tropical pineapple delight coming to life! Cover it tightly with plastic wrap and refrigerate for at least 6 hours, but overnight is truly best. The wait is the hardest part, but it allows all the flavors to meld and the cake to become perfectly sliceable.
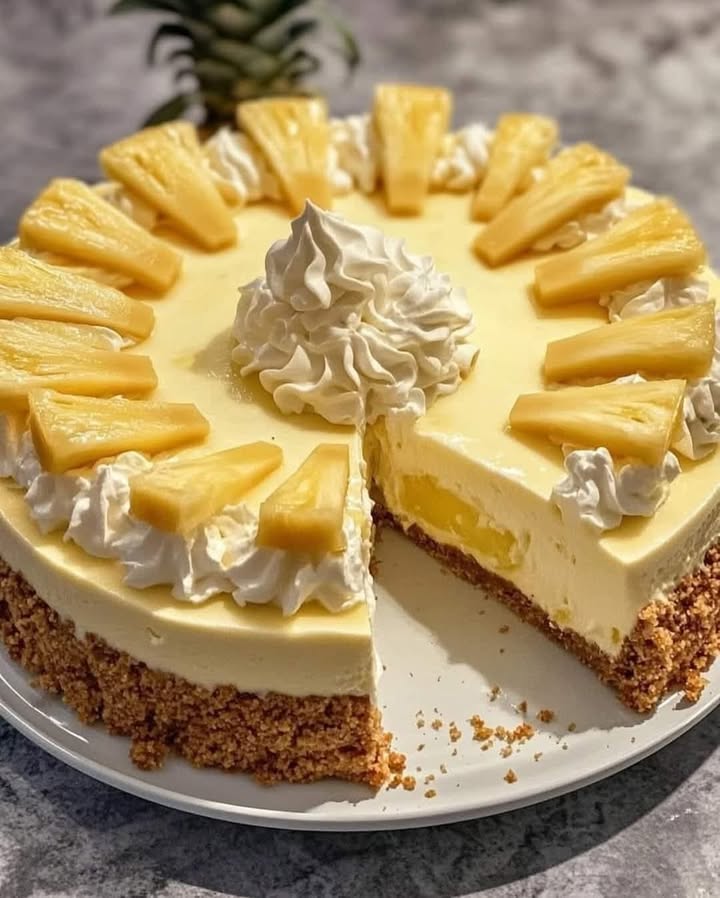
Step 5: The Grand Finale: Decorating
Just before serving, let your creativity shine! You can simply dust the top with a little crushed cookie or cocoa powder. For a stunning look, arrange fresh or well-drained canned pineapple slices on top. A sprig of mint adds a lovely fresh touch. Slice, serve on a pretty plate, and get ready for the compliments to roll in. It’s a dessert that looks as good as it tastes.
Chef’s Tip: For clean, beautiful slices, dip your knife in hot water and wipe it dry between each cut. It glides right through the creamy layers!
Timing Your Tropical Treat
This recipe is all about planning ahead. It comes together in a flash, but the magic happens in the fridge.
- Prep Time: 20 minutes
- Cooking Time: 0 minutes (No-bake!)
- Chilling Time: Minimum 6 hours (Overnight is ideal)
- Total Time: 6 hours 20 minutes (mostly hands-off)
A Little Secret for Maximum Flavor
Here’s my secret trick: drain the pineapple juice from the can into a small saucepan. Simmer it over medium heat until it reduces by half and becomes a slightly thicker syrup. Let it cool, then drizzle it over the top of the finished cake or even lightly brush it on the cookie crust before adding the filling. It concentrates the pineapple flavor into an incredible, natural syrup that takes this cake over the top!
Fun Fact: The Power of Pineapple
Did you know pineapple contains an enzyme called bromelain? It’s a natural meat tenderizer! That’s why some people worry it will make their dairy curdle. In this cake, the canned pineapple is heated during canning, which deactivates most of the enzyme. That means you get all the sweet, tangy flavor without any texture issues. Science in dessert!
What You’ll Need to Make It
- 8×8 inch square dish or a 9-inch springform pan
- Mixing bowls (large and medium)
- Hand mixer or stand mixer
- Rubber spatula
- Measuring cups and spoons
- Zip-top bag and rolling pin (for crushing cookies)
Keeping Your Tropical Delight Fresh
This cake is meant to be kept cold. Always store it covered with plastic wrap or in an airtight container in the refrigerator. The creamy filling and fresh fruit need that cool environment to stay perfect.
It will keep beautifully for 3 to 4 days. The flavors actually get better on the second day! The cookie base may soften slightly as it sits, but it transforms into a delicious, cake-like layer that many people adore.
I do not recommend freezing this cake. The texture of the whipped cream and condensed milk filling can become grainy and separate when thawed. It’s best enjoyed fresh from the fridge.
My Best Tips for Success
- Room Temp Cream Cheese: This is non-negotiable. Softened cream cheese blends smoothly without lumps. Take it out of the fridge an hour before you start.
- Cold Cream for Whipping: Use cream straight from the fridge. A chilled metal bowl helps even more for achieving stiff peaks quickly.
- Fold, Don’t Stir: When combining the whipped cream, use a gentle folding motion with a spatula. This keeps the air in the cream, making your cake light and fluffy.
- Patience is Key: Don’t skimp on the chilling time. It’s what gives the cake its structure and allows the flavors to marry.
Presentation Ideas to Wow Your Guests
- Serve in individual glasses or mason jars as parfaits, layering crust and filling.
- Garnish with a sprinkle of toasted coconut for an extra tropical feel.
- Add a drizzle of caramel or chocolate sauce for a decadent twist.
- For a party, cut into small squares and serve on a platter with decorative toothpicks.
Love This? Try These 6 Flavor Twists!
This recipe is a fantastic base for all sorts of delicious variations. The no-bake method is a lifesaver, and you can find more inspiration in our full collection of easy, no-oven-required desserts.
- Coconut Pineapple Dream: Add 1/2 cup of toasted coconut flakes to the crust and another 1/2 cup folded into the filling. Use coconut extract instead of vanilla.
- Strawberry-Pineapple Fusion: Swap half the pineapple for chopped fresh strawberries. The pink color is gorgeous!
- Lime & Pineapple Mojito Cake: Add the zest of one lime to the filling. Substitute half the vanilla with a little rum extract (or real rum!). Garnish with lime zest.
- Choco-Pineapple Delight: Add 1/4 cup of cocoa powder to the cookie crust. You could also layer in some chocolate shavings. For full-on chocolate lovers, our Decadent Chocolate Peanut Butter Layer Cake is the ultimate treat.
- Berry Blast: Use a mix of crushed pineapple and mixed berries like blueberries and raspberries.
- Nutty Tropical Crunch: Replace 1/4 cup of the cookie crumbs with very finely chopped macadamia nuts or pecans in the crust. For another nutty dessert option, our honey-kissed Walnut and Honey Cake is a warm, baked alternative.
Common Mistakes to Avoid for the Perfect Cake
Avoiding these simple pitfalls will guarantee your cake is perfect every single time.
Mistake 1: Using Cold, Hard Cream Cheese
This is the number one reason for a lumpy filling. Cold cream cheese will not blend smoothly with the condensed milk. No matter how long you beat it, you’ll end up with little lumps. How to Avoid: Simply take the cream cheese out of the fridge at least an hour before you start. When you press your finger into it, it should leave a deep, easy indentation. Trust me, this one step makes all the difference in texture.
Mistake 2: Draining the Pineapple Juice
It’s a natural instinct to drain canned fruit. But in this recipe, that sunny pineapple juice is liquid gold! It adds moisture, flavor, and helps create the perfect creamy consistency. If you drain it, your filling can become too thick and pasty. How to Avoid: Dump the entire contents of the can—juice and all—straight into the cheese mixture. Every last drop is needed.
Mistake 3: Rushing the Chill Time
If you try to cut and serve this cake after just an hour or two, you’ll have a delicious, but soupy, mess. The chilling time is what allows the fats to firm up and the crust to set. It’s not just about being cold; it’s about the structure. How to Avoid: Plan ahead. Making it the day before is your best bet. A minimum of 6 hours in the fridge is crucial for a cake you can slice neatly.
Mistake 4: Over-Whipping or Vigorously Stirring the Cream
Whipping the cream until it’s stiff and almost buttery is great for frosting, but not for folding. And stirring it in aggressively will deflate all the air you just whipped in. How to Avoid: Whip the cream only to soft peaks—it should look like soft, billowy clouds. Then, use a gentle folding motion with a rubber spatula to incorporate it. This keeps the filling light and airy.
Nutrition Note on Sweet Enjoyment
This tropical pineapple delight is a wonderful treat to share on special occasions. Like many delicious desserts, it’s rich in sugars. If you’re mindful of your sugar intake, you can enjoy a smaller portion. It’s always a good idea to balance indulgent treats with nutrient-dense foods. For more information on maintaining a healthy blood sugar balance, you can consult trusted nutritional resources.
Your Cold Pineapple Cake Questions Answered
Can I use fresh pineapple instead of canned?
You can, but you need to prepare it correctly. Fresh pineapple contains active bromelain, which can break down dairy and prevent the filling from setting properly. To use fresh pineapple, you must cook it first. Chop it, simmer it in a small amount of water or its own juices until soft, let it cool completely, and then use it like you would the canned version. The canned stuff is easier and works perfectly, so I recommend sticking with it for guaranteed results.
Why is my filling runny and not setting?
A runny filling usually points to two issues. First, you may not have whipped the heavy cream enough. It needs to be at soft peaks to provide structure. Second, and most likely, the cake simply didn’t chill long enough. The fridge time is not a suggestion—it’s a requirement. The fats in the cream cheese and butter need time to firm up. If it’s still runny after the full time, your fridge might not be cold enough. Give it several more hours or even overnight.
Graham crackers are the most common and delicious substitute! You’ll need about 1 1/2 cups of graham cracker crumbs. Digestive biscuits or even vanilla wafers also work wonderfully. The goal is a plain, slightly sweet cookie that forms a solid crust when mixed with butter. Just avoid cookies with strong flavors like chocolate chip or oatmeal raisin, as they’ll clash with the pineapple.
How far in advance can I make this cake?
You can make this cake up to two days in advance, which actually makes it a fantastic party dessert. The flavors improve as they meld. Just keep it tightly covered in the refrigerator. Add any fresh garnishes, like pineapple slices or mint, right before you serve it so they look their best.
Can I make this cake in a different pan?
Absolutely! An 8×8 or 9×9 square pan, a 9-inch pie dish, or a 9-inch springform pan all work well. A springform is great if you want to lift the whole cake out for a cleaner presentation. If you use a deeper dish, your layers will just be thicker. Just avoid a pan that’s too large and shallow, or your layers will be very thin.
Is it possible to make a lower-sugar version?
It’s tricky because sweetened condensed milk is a key ingredient for texture and sweetness. You could try using a “reduced sugar” or “fat-free” version of condensed milk, though the texture may vary slightly. You cannot substitute it with regular milk. For a different fruity and creamy dessert with a lighter feel, a blended drink like our Strawberries & Cream Frappuccino might hit the spot.
My crust is too hard or too crumbly. What happened?
A rock-hard crust means you used too much butter. A crumbly crust that won’t hold together means you didn’t use enough. The ideal texture comes from a mix that looks like wet sand and holds together when you pinch it. If it’s too dry, add a bit more melted butter, a teaspoon at a time. If it’s too wet, add a few more cookie crumbs.
Can I use frozen whipped topping instead of whipping cream?
Yes, this is a common and easy swap! Thaw an 8-ounce tub of frozen whipped topping (like Cool Whip) in the fridge. Once your cream cheese, condensed milk, and pineapple are mixed, gently fold in the entire tub of whipped topping until combined. Skip the step of whipping the fresh cream. It’s a bit sweeter and has a different texture, but it’s delicious and foolproof.
How do I get perfectly clean slices?
The secret is a hot, clean knife! Run your sharp knife under very hot water, wipe it completely dry with a towel, and then make your cut. The heat helps the knife glide through the creamy filling without sticking or dragging. Wipe the blade clean and re-heat it between each slice for picture-perfect pieces.
Can I double this recipe for a crowd?
You sure can! Simply double all the ingredients. You’ll need to use a 9×13 inch baking dish instead. The preparation steps are exactly the same. Just make sure you have a bowl big enough to mix the large batch of filling. It will need the same chilling time, or perhaps a little longer to set completely in the center.
Ready for Your Taste of Sunshine?
And there you have it! Your guide to creating the easiest, most refreshing tropical dessert. This cold pineapple cake is more than just a recipe. It’s a promise of a sweet escape, a guaranteed smile, and a dessert that makes everyone ask for the recipe. It proves that the best things don’t need an oven, just a little love and some chill time. So grab that can of pineapple, gather your simple ingredients, and treat yourself to a slice of pure, creamy paradise. Happy no-bake baking!
Equipment
- Grand bol
- Fouet
- Spatule
- Plaque à pâtisserie
- Papier sulfurisé
Ingredients
- 1 boîte morceaux d'ananas dans leur jus ne pas égoutter
- 1 tasse biscuits Maria écrasés environ 20 biscuits
- 1/2 tasse beurre fondu salé ajoute un contraste agréable
- 1 tasse fromage à la crème ramolli à température ambiante
- 1 boîte lait concentré sucré
- 1/2 tasse crème fouettée ou crème épaisse
- 1 cuillère à café extrait de vanille
- quantité suffisante tranches d'ananas pour décorer (facultatif)
Instructions
- Écrasez les biscuits Maria en miettes fines et mélangez avec le beurre fondu dans un bol moyen. Pressez le mélange dans un plat de 8x8 pouces ou un moule à charnière de 9 pouces.
- Réfrigérez la croûte pour qu'elle se fixe.
- Dans un grand bol, battez le fromage à la crème jusqu'à obtenir une consistance lisse. Ajoutez le lait concentré sucré et la vanille, puis battez jusqu'à ce que le mélange soit brillant.
- Incorporez la boîte entière de morceaux d'ananas avec leur jus.
- Dans un bol séparé, fouettez la crème froide jusqu'à ce que des pics mous se forment.
- Incorporez un tiers de la crème fouettée dans le mélange de fromage-ananas, puis incorporez le reste jusqu'à ce qu'il n'y ait plus de stries blanches.
- Versez la garniture sur la croûte refroidie et lissez le dessus. Couvrez et réfrigérez pendant au moins 6 heures ou toute la nuit.
- Avant de servir, décorez avec des biscuits écrasés ou des tranches d'ananas.
Notes
Nutrition
Hi there! I’m Emma Lawson, and I’m thrilled to be part of the BakingSecret.com team! Baking has been a part of my life since I was a little girl, growing up in a family that loved to bake together. From birthday cakes to cookies, I learned early on that the kitchen was a place of creativity and connection.
After studying culinary arts at The Culinary Institute of America, I fell in love with the science behind baking. Understanding how different ingredients interact and how slight adjustments can change the final product is something that continues to fascinate me. My background in pastry arts and food science has helped me develop recipes that are not only delicious but also reliable.
At BakingSecret.com, I’m excited to share recipes that cater to all levels, from beginners to seasoned bakers. My goal is to make sure that you feel confident in the kitchen and have fun with every bake. When I’m not in the kitchen, you can find me experimenting with new flavor combinations, hiking, or trying out new coffee shops in town!