
I’ll never forget the first time I brought a cheesecake ball to a holiday party. Within minutes, people crowded around the dessert table, crackers in hand, fighting over the last creamy bites. My aunt pulled me aside and whispered, “You have to give me this recipe!” That’s when I realized just how magical a simple cheesecake ball recipe can be. It’s not just dessert. It’s a conversation starter, a crowd-pleaser, and honestly, one of the easiest treats you’ll ever make.
Cheesecake balls have become my go-to recipe for everything from casual get-togethers to fancy dinner parties. The beauty of these little bites lies in their flexibility. You can whip up a no-bake cheesecake ball recipe in under 15 minutes, or get creative with baked cheesecake balls if you want something extra special. They’re fun to make, even more fun to eat, and you can customize them to match any flavor profile you’re craving.
The creative possibilities are endless. Want to add crushed Oreos? Go for it. Craving something fruity? Try strawberry cheesecake balls. Love chocolate? Mix in some cocoa powder or coat them in melted chocolate. The best part is watching people’s faces light up when they taste these creamy, dreamy treats. Trust me, once you master this recipe, you’ll be making it all the time.
Why You’ll Love This Cheesecake Ball Recipe
Let me tell you why this cheesecake ball recipe has earned a permanent spot in my recipe collection. First, it’s ridiculously simple. You don’t need fancy equipment or hard-to-find ingredients. A mixing bowl, a spoon, and about ten minutes of your time will do the trick. If you can stir cream cheese and mix in some sweetener, you can make these.
The taste is absolutely incredible. Imagine all the rich, tangy goodness of traditional cheesecake packed into convenient, bite-sized portions. Each ball delivers that signature cream cheese flavor with whatever fun additions you choose. I’ve made plain vanilla versions, decadent Oreo cheesecake ball recipe variations, and even pumpkin spice versions for fall gatherings. Every single one disappeared faster than I expected.
These cheesecake balls work perfectly for parties and gatherings. They’re easy to serve, require no plates or forks, and people can grab as much or as little as they want. Set out some graham crackers, vanilla wafers, or fresh fruit for dipping, and you’ve created an interactive dessert station that guests love. I’ve served them at baby showers, birthday parties, and even tailgates. They never fail to impress.
But here’s my favorite thing about this recipe. You don’t always need to start from scratch. Got leftover cheesecake sitting in your fridge? Don’t let it go to waste. You can absolutely transform it into delicious cheesecake balls with leftover cheesecake. This discovery changed everything for me.
Can I use leftover cheesecake to make cheesecake balls? Yes, absolutely! Here’s how I do it. Take your leftover cheesecake and crumble it into a bowl. Add a bit of softened cream cheese to help bind everything together. The cream cheese acts like glue, making the mixture easier to shape. Mix it well, roll into balls, and coat with your favorite toppings. It’s that simple.
I learned this trick after making a full-sized cheesecake for Thanksgiving one year. We had about a quarter of it left, and it was starting to dry out around the edges. Instead of tossing it, I broke it into chunks, mixed it with four ounces of cream cheese, and rolled the mixture into balls. Then I coated them in crushed pecans and mini chocolate chips. My family thought I’d made a completely new dessert. They had no idea they were eating Thursday’s leftovers on Saturday afternoon.
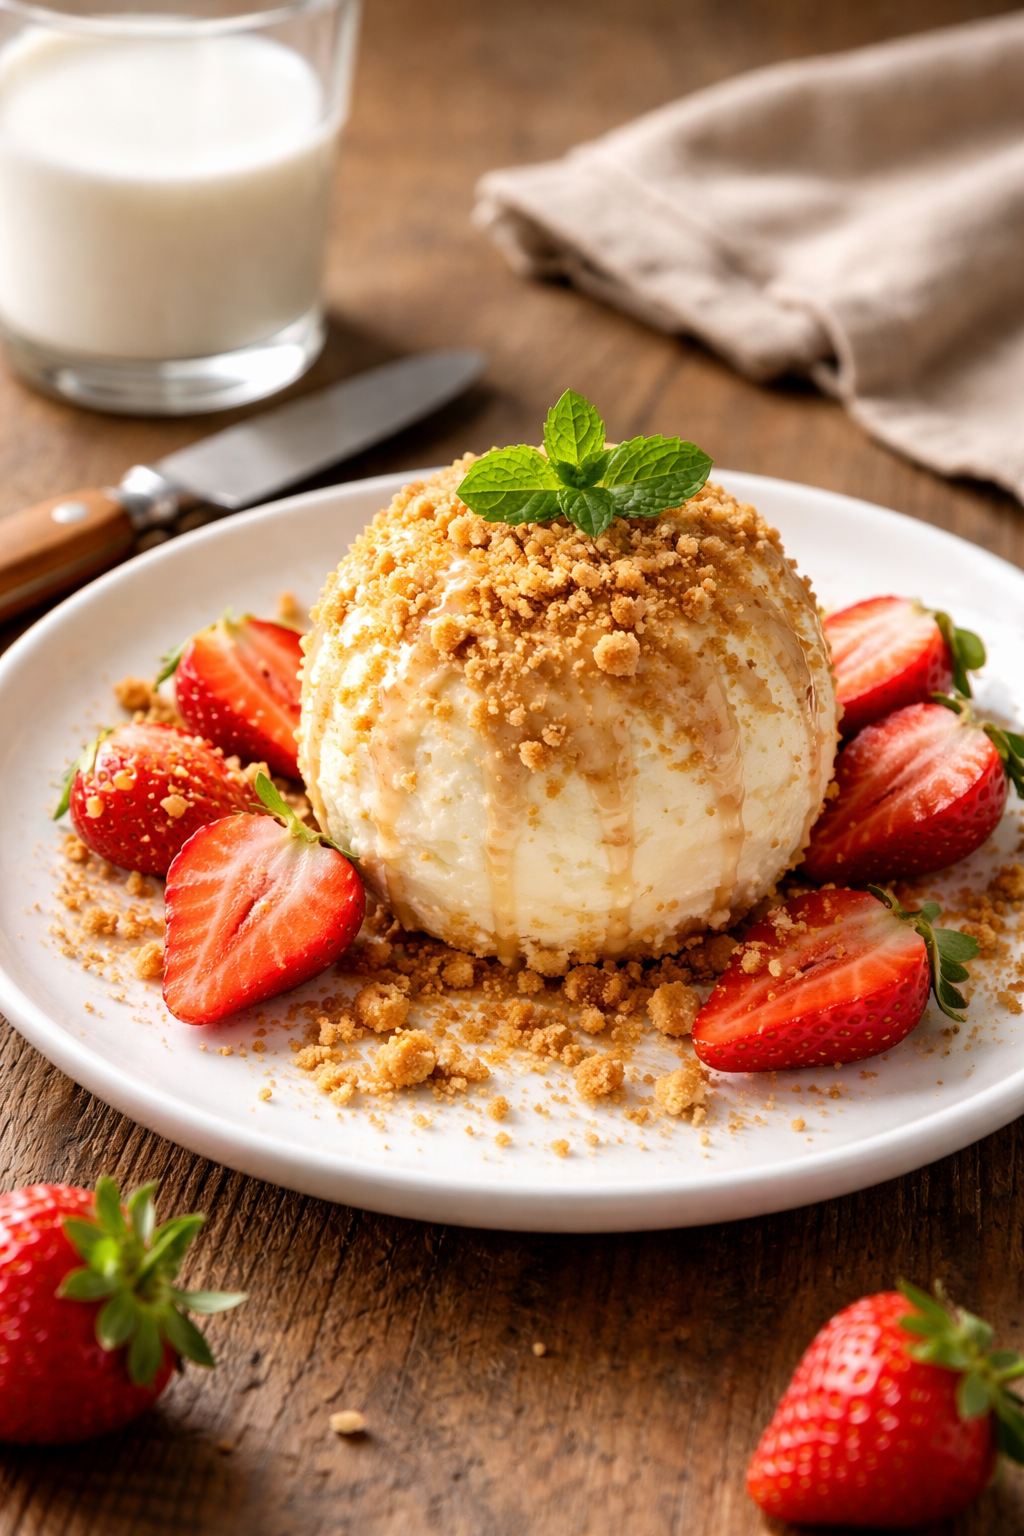
The versatility of this recipe means you can match it to any occasion or craving. Making a romantic dessert for two? Shape the mixture into one large cheese ball and serve it with strawberries. Hosting a kids’ party? Roll small balls and coat them in colorful sprinkles. Need something elegant for a wedding shower? Make strawberry cheesecake balls and dust them with freeze-dried strawberry powder. The options go on forever.
Another reason I love these sweet cheese balls is the make-ahead factor. You can prepare them days in advance and keep them refrigerated until you’re ready to serve. This takes so much stress out of party planning. I usually make mine the night before any event, which leaves me free to focus on other dishes or just relax before guests arrive. The flavors actually get better after sitting for a few hours as everything melds together.
The cost factor is worth mentioning too. Cheesecake balls are incredibly budget-friendly. Cream cheese goes on sale regularly, and the other ingredients are pantry staples you probably already have. Compare that to buying fancy desserts from a bakery, and you’ll save serious money. I once priced out a similar dessert at a local bakery. They wanted $25 for a small cheese ball. I made three times that amount at home for under $10.
You also don’t need to be an experienced baker to nail this recipe. I’ve taught this to friends who claim they can’t cook, and they’ve all succeeded. There’s no baking temperature to worry about with no-bake versions. No concern about underbaking or overbaking. No stress about whether your dessert will turn out. Just mix, roll, coat, and chill. That’s it.
The customization options make this recipe perfect for dietary needs too. Need a gluten-free option? Use gluten-free cookies for coating. Want to reduce sugar? Try a sugar substitute in place of powdered sugar. You can adjust this cheesecake recipe base to fit almost any requirement without sacrificing flavor.
I also appreciate how these treats satisfy my sweet tooth without being overwhelming. Sometimes a full slice of cheesecake feels like too much, especially after a big meal. But popping a couple of cheesecake balls? That’s just right. They give you that creamy, satisfying dessert experience in a much more manageable portion.
Storage is another win. These keep well in the refrigerator for up to a week, and you can even freeze them for longer storage. I’ve frozen batches and pulled them out weeks later for unexpected guests. Just thaw them in the fridge for a few hours, and they taste freshly made. This makes them perfect for meal prep or keeping emergency dessert on hand.
Whether you’re looking for a quick sweet snack, an impressive party dessert, or a creative way to use up ingredients, this cheesecake ball recipe delivers every single time. The combination of simplicity, versatility, and absolutely delicious results makes it a winner in my book.

Ingredients and Equipment You’ll Need
Now that you’re ready to dive into making these amazing treats, let’s talk about what you’ll actually need to gather before you start. The ingredient list is refreshingly short, which is one of the things I absolutely love about this recipe.
For a basic cheesecake ball recipe, you’ll need cream cheese as your star ingredient. I always use full-fat cream cheese because it gives you that rich, luxurious texture we’re after. You’ll want two eight-ounce blocks, softened to room temperature. Here’s a tip I learned the hard way: don’t try to rush the softening process in the microwave. I did that once and ended up with a melted mess. Just set your cream cheese out on the counter about an hour before you plan to start.
Powdered sugar comes next, usually about one cup. This sweetens your mixture and helps create that smooth consistency. I prefer powdered sugar over granulated because it dissolves completely without any grittiness. Vanilla extract adds depth of flavor, and you’ll only need about a teaspoon. Don’t skip this ingredient even though it seems small. It makes a real difference.
For coating your cheesecake balls, you have endless options. Graham cracker crumbs work beautifully and give you that classic cheesecake vibe. Chopped nuts like pecans or almonds add a nice crunch. Mini chocolate chips, shredded coconut, crushed cookies, or even colorful sprinkles all work great. I usually pick up whatever sounds good at the store that week.
As for equipment, you really don’t need much. A large mixing bowl is essential. I prefer glass or metal bowls because they’re easier to clean when you’re working with sticky cream cheese. An electric mixer makes the job easier, but honestly, a wooden spoon and some elbow grease will work just fine. I’ve made these both ways depending on how lazy I’m feeling.
You’ll also want a cookie scoop or small ice cream scoop for portioning. This isn’t absolutely necessary, but it makes your balls uniform in size, which looks nicer when you’re serving them. A couple of shallow bowls or plates for your coating ingredients help with the rolling process. Parchment paper or wax paper to line your storage container keeps things from sticking. That’s genuinely all you need.
The simplicity of this setup means you can make these treats almost anywhere. I’ve made cheesecake balls in tiny apartment kitchens, at my mom’s house using her ancient mixing bowls, and even in a vacation rental with minimal supplies. The lack of special equipment removes any barriers to getting started.
Variations to Try
Here’s where things get really fun. Once you master the basic recipe, a whole world of flavor combinations opens up. I’ve probably tried twenty different variations over the years, and I’m still coming up with new ideas.
The Oreo cheesecake ball recipe might be my most requested variation. For this one, you’ll add about one cup of crushed Oreos directly into your cream cheese mixture. I usually use regular Oreos, but I’ve also experimented with Golden Oreos, mint Oreos, and even the red velvet variety. Each one creates a completely different flavor experience. The cookies add texture and that distinctive chocolate-vanilla taste that people go crazy for. If you love cookies and cream combinations, you should definitely check out this blue bell cookies and cream cheesecake for more inspiration.
Then you roll the outside in more crushed Oreos for a double dose of cookie goodness. My nephew requests these specifically for his birthday every year. He’s fourteen now, and this tradition started when he was seven. That’s how good they are.
For strawberry cheesecake balls, I fold in about half a cup of finely chopped freeze-dried strawberries into the base mixture. Fresh strawberries add too much moisture and make everything soggy, which I learned after a failed batch years ago. The freeze-dried ones give you intense strawberry flavor without changing the texture. You can coat these in graham cracker crumbs mixed with a little more crushed freeze-dried strawberries for a gorgeous pink finish. These remind me of the flavors in strawberry crunch cheesecake, just in a more portable form.
Chocolate lovers need to try a chocolate chip version. Mix mini chocolate chips into your cream cheese base and roll the finished balls in cocoa powder or more mini chips. Sometimes I drizzle melted chocolate over the top for extra decadence. My sister made these for her book club last month, and she texted me at nine o’clock that night asking for the exact measurements because everyone wanted the recipe.
Pumpkin spice cheesecake balls have become my autumn specialty. I add about a quarter cup of pumpkin puree and a teaspoon of pumpkin pie spice to the basic mixture. Roll them in crushed gingersnap cookies, and you’ve got fall in a bite. These pair incredibly well with apple cider at Halloween parties.
Funny enough, I accidentally created my lemon version when I was trying to use up some lemon curd from another baking project. I mixed in about three tablespoons of lemon curd and added some lemon zest to the cream cheese mixture. The bright, tangy flavor was perfect for spring gatherings. I roll these in crushed vanilla wafers, which complements the lemon beautifully.
By the way, if you’re into fruit-flavored desserts, raspberry cheesecake cookies offer a similar tangy-sweet combination that’s worth exploring. The flavor profile works beautifully in cheesecake ball form too. Just substitute raspberry preserves for the lemon curd in my accidentally-invented recipe.
Peanut butter cheesecake balls satisfy those peanut butter cup cravings. Replace about four ounces of the cream cheese with creamy peanut butter. Mix in some mini Reese’s pieces if you want extra peanut butter punch. Roll the outside in crushed peanuts or chocolate graham crackers. My husband, who usually isn’t big on desserts, will eat five of these in one sitting.
Caramel pecan is another crowd-pleaser. Drizzle caramel sauce into your cream cheese mixture, creating swirls of caramel throughout. Don’t mix it in completely because those caramel ribbons look beautiful when you cut into the balls. Roll them in toasted pecans for a sophisticated finish. These work great for dinner parties when you want something that feels a bit fancier.
For coffee addicts, try adding instant espresso powder to your base. Just a tablespoon dissolved in a tiny bit of warm water creates an amazing coffee-flavored cheesecake ball. Coat these in crushed chocolate-covered espresso beans if you really want to go all out. I serve these after dinner when we have friends over for game night.
What are some popular variations of cheesecake balls? Based on what I’ve seen at parties and potlucks, the most popular versions tend to be Oreo, strawberry, chocolate chip, and pumpkin spice during fall months. People also love anything with caramel or peanut butter. The beauty is that you can really customize based on what your crowd enjoys.
One variation that surprised me was white chocolate cranberry. I made these for a holiday party thinking they might be too sophisticated for the crowd. Wrong. They disappeared first. I mixed dried cranberries into the base and rolled the balls in white chocolate chips. The tart-sweet combination felt festive and different from the usual holiday desserts. Speaking of sophisticated cheesecake flavors, the san sebastian cheesecake offers that same elegant vibe with its caramelized top.
The key to successful variations is balancing moisture levels. When you add wet ingredients like fruit preserves or pumpkin puree, you might need to adjust by adding a bit more cream cheese or reducing the amount of liquid ingredients. I usually test the consistency by scooping a small amount and trying to roll it. If it holds together well, you’re good. If it’s too soft, refrigerate the mixture for thirty minutes before forming your balls.
Don’t be afraid to get creative and invent your own combinations. Some of my best variations happened by accident or because I was trying to use up random ingredients in my pantry. That’s actually how cooking should be—fun, experimental, and personal.
Step-by-Step Instructions
Alright, let’s get down to the actual making part. I’m going to walk you through this process exactly how I do it in my own kitchen, complete with the little tricks I’ve picked up along the way.
Start by taking your cream cheese out of the refrigerator at least an hour before you begin. This is crucial. Cold cream cheese is a nightmare to work with—it clumps, refuses to mix smoothly, and you’ll end up with lumpy balls that nobody wants. I usually set mine on the counter when I’m having my morning coffee, and by the time I’m ready to bake in the afternoon, it’s perfect.
For a basic cheesecake ball recipe no bake version, place your softened cream cheese in a large mixing bowl. Using an electric mixer on medium speed, beat it for about two minutes until it’s fluffy and smooth. This step matters more than you might think. Properly whipped cream cheese creates that light, airy texture that makes these balls feel luxurious instead of dense.
Add your powdered sugar gradually, maybe a quarter cup at a time. I learned this after dumping all the sugar in at once and creating a white dust cloud that covered my entire kitchen counter. Not fun to clean up. Mix on low speed initially to incorporate the sugar, then increase to medium speed once everything starts coming together. Add your vanilla extract and beat for another minute.
Here’s where you’ll add any mix-ins you’ve chosen. Whether it’s crushed Oreos, chocolate chips, or fruit preserves, fold them in gently with a spatula. Over-mixing at this point can make your mixture too soft to shape properly. You want everything just combined.
Now comes the part that takes a little patience. Cover your bowl with plastic wrap and refrigerate the mixture for at least two hours. I know waiting is hard, especially when you’re excited to finish, but this chilling time is essential. It firms up the cream cheese so you can actually shape it into balls without everything sticking to your hands. I’ve tried rushing this step more times than I care to admit, and it never works out well.
While you’re waiting, prepare your coating ingredients. Pour graham cracker crumbs, crushed nuts, or whatever you’re using into shallow bowls or plates. Set these up in a little assembly line on your counter. This makes the rolling process so much smoother.
After your mixture has chilled, grab a cookie scoop or just use a spoon to portion out your cheesecake balls. I usually make mine about one to two tablespoons each, roughly the size of a walnut. Roll each portion between your palms to create a smooth ball. If the mixture starts sticking to your hands, wet them slightly with cold water. This trick changed my life when I discovered it.
Immediately roll each ball in your coating while the surface is still slightly sticky. This helps the coating adhere better. I learned that if you wait too long, the outer layer dries a bit and the coating doesn’t stick as well. Place your finished balls on a parchment-lined plate or baking sheet.
Once all your balls are coated, pop them back in the refrigerator for at least another hour before serving. This final chill sets everything and makes them easier to handle. The texture improves dramatically with this resting time too.
For baked cheesecake balls, the process differs slightly and honestly, these feel more special for formal occasions. Prepare your cream cheese mixture the same way, but after the initial chill, you’ll shape your balls and place them on a parchment-lined baking sheet. Preheat your oven to 350 degrees Fahrenheit.
Before baking, I like to freeze the shaped balls for about fifteen minutes. This helps them hold their shape better in the oven. Then bake for twelve to fifteen minutes, just until they’re set but not browned. You’re not looking for color here, just firmness. The balls should jiggle slightly when you gently shake the pan.
Let them cool completely on the baking sheet, then roll them in your coating ingredients. The baked version has a slightly denser, more traditional cheesecake texture that some people prefer. My mother-in-law swears by the baked version because she says it reminds her more of “real” cheesecake. I make them both ways depending on my mood and how much time I have.
One tip I wish someone had told me earlier: keep a damp towel nearby while you’re working. Cream cheese gets everywhere, and having something to wipe your hands on between balls makes the whole process cleaner and more efficient. Also, work in batches if you’re making a large quantity. Trying to shape fifty balls at once means the mixture warms up too much by the time you reach the end.
Temperature control is honestly the biggest factor in success with this recipe. Too warm, and you’re fighting sticky, shapeless mush. Too cold, and the cream cheese becomes hard and difficult to work with. You’re aiming for that sweet spot where it’s firm enough to hold its shape but soft enough to roll smoothly.
Another thing I’ve noticed is that the quality of your cream cheese makes a real difference. I usually buy the name-brand stuff when it’s on sale because generic versions sometimes have different moisture levels that can throw off your consistency. It’s worth paying a bit extra for reliable results.
If your mixture turns out too soft even after chilling, don’t panic. Beat in a few more tablespoons of powdered sugar or add another ounce of cream cheese. Both will help firm things up. Conversely, if your mixture feels too stiff and crumbly, a tablespoon of heavy cream or milk will loosen it right up.
Storing and Serving Your Cheesecake Balls
Let’s talk about keeping these beauties fresh and presenting them in ways that’ll make people think you hired a caterer.
How do I store cheesecake balls? Store them in an airtight container in the refrigerator, and they’ll stay fresh for up to one week. Layer them between sheets of parchment paper if you’re stacking them to prevent sticking. I use a plastic container with a tight lid, and I’ve never had issues with them drying out or absorbing other flavors from the fridge.
Here’s the thing about storage that surprised me: these actually freeze beautifully. I make double batches now and freeze half for later. Just place them on a baking sheet in a single layer and freeze until solid, about two hours. Then transfer them to a freezer bag or container. They’ll keep frozen for up to three months. When you’re ready to serve them, move them to the refrigerator and let them thaw for about four hours. They taste just as good as fresh ones.
I discovered the freezing trick accidentally when I made way too many for a party that got cancelled. Instead of having twenty sweet cheese balls go to waste, I froze them. Two months later, I had unexpected guests and pulled them out. Nobody had any idea they weren’t freshly made that morning.
For serving, presentation really elevates these treats. I like arranging them on a nice platter with fresh fruit around the edges. Strawberries, apple slices, and grapes all look beautiful and provide healthier dipping options alongside the crackers. The color contrast makes everything more appealing.
Speaking of crackers, variety matters. I set out graham crackers, vanilla wafers, cinnamon pita chips, and even pretzels. Different textures and flavors let people customize their experience. My friend Sarah brought over those chocolate-covered graham crackers once, and they were incredible with the plain vanilla cheesecake balls.
For a fancier presentation, I sometimes use a tiered serving stand. Put different variations on each level—maybe strawberry cheesecake balls on top, Oreo in the middle, and chocolate chip on the bottom. It creates this impressive display that barely requires any effort but looks like you spent hours planning.
Toothpicks or small dessert forks make serving easier, especially if you’re worried about people handling the balls directly. Stick a decorative toothpick in each one, and suddenly they look like fancy hors d’oeuvres. I found these cute little party picks shaped like tiny forks at a kitchen store, and they’re perfect for this.
Funny enough, I once served these at a children’s birthday party, and the kids loved building little “snowmen” by stacking two or three balls on top of each other with pretzel stick arms. It wasn’t my original plan, but it became the hit of the party. Sometimes the best serving ideas come from letting people play with their food.
Temperature at serving time matters too. Pull your cheesecake balls out of the fridge about fifteen to twenty minutes before guests arrive. They taste best when they’re cold but not ice-cold. The flavors come through more clearly when they’re slightly softened.
For outdoor events in warm weather, keep them chilled until the last possible moment. I learned this the hard way at a summer barbecue where I set them out too early and they started getting soft and droopy in the heat. Now I keep them in a cooler and bring out just a few at a time, replenishing as needed.
If you’re bringing these to a potluck, transport them in the same container you’ll serve from to minimize handling. I have a special carrier with a lid and handle that keeps everything stable during car rides. Those tight turns used to send my desserts sliding all over the place before I invested in proper transport containers.
Creating a little dessert card with the flavor written on it adds a nice touch for parties with multiple variations. People appreciate knowing what they’re trying, especially if anyone has allergies or preferences. I handwrite mine on small cards and stick them in the platter with mini clothespins. It looks cute and provides useful information.
While we’re talking about nutrition awareness, it’s worth noting that cream cheese is high in calories and saturated fat. If you’re watching your intake, you can find nutritional information including daily value percentages for ingredients to help make informed choices. I’m not suggesting these are health food—they’re definitely a treat—but knowing what’s in them helps with mindful eating.
One serving idea I absolutely love is creating a dessert board. Arrange your cheesecake balls alongside other sweet bites like brownies, cookies, and chocolate-covered pretzels. Add some fresh berries and you’ve got this incredible spread that feels abundant and special. I did this for my sister’s baby shower, and people kept commenting on how professional it looked.
For elegant dinner parties, I sometimes plate individual portions. Three small cheesecake balls arranged on a dessert plate with a drizzle of chocolate or caramel sauce and a mint leaf garnish looks restaurant-quality. It takes barely any extra effort but impresses people way more than just setting out a platter.
By the way, if you’re interested in exploring more creative takes on classic cheesecake, you’ll find tons of inspiration in the cheesecake recipe collection where traditional techniques meet modern twists.
The versatility in serving options means you can match your presentation to any occasion, from casual game nights to formal celebrations. That’s part of what makes this cheesecake recipe base so valuable—it adapts to whatever you need.
Just remember that whether you’re keeping it simple or going all out with your presentation, these treats taste amazing. Sometimes I serve them straight from the container while watching movies with my husband, and they’re just as satisfying as when I arrange them on my fanciest platter for guests. The presentation is fun, but the flavor is what really matters.
So go ahead and make a batch this weekend. Experiment with flavors, get creative with coatings, and don’t stress about making them perfect. The beauty of homemade treats is that they show you care enough to make something from scratch, and that always comes through regardless of how they look.
Frequently Asked Questions
Can I use low-fat cream cheese for this recipe?
You can, but I don’t recommend it for the best results. Low-fat cream cheese has higher moisture content and doesn’t set up as firmly, which makes shaping the balls much harder. I tried this once trying to make a “lighter” version, and they turned out mushy and difficult to roll. If you’re determined to reduce fat, try using one block of full-fat and one block of reduced-fat cream cheese as a compromise. This gives you better texture while cutting some calories.
How far in advance can I make cheesecake balls?
You can make them up to five days ahead if you’re storing them in the refrigerator, or up to three months if you freeze them. I actually think they taste better after sitting for a day because the flavors have time to blend together. For big events, I usually make them two days before, which takes pressure off my schedule while still ensuring fresh-tasting results. Just keep them properly covered so they don’t absorb any refrigerator odors.
What’s the best way to soften cream cheese quickly?
The best method is still leaving it on the counter for an hour, but if you’re truly in a rush, cut the cream cheese into small cubes and let it sit for twenty minutes. The increased surface area speeds up warming. You can also try the microwave method: unwrap the cream cheese, place it on a microwave-safe plate, and heat it in ten-second intervals at fifty percent power. Check and rotate between each interval to avoid melting.
Can I make these dairy-free?
Absolutely! Use dairy-free cream cheese alternatives made from cashews, almonds, or soy. The texture works pretty well with most brands, though some are softer than traditional cream cheese. I’ve had success with cashew-based cream cheese, which has a nice rich flavor similar to regular cream cheese. You might need to add extra powdered sugar or chill the mixture longer to get the right consistency for rolling.
Why are my cheesecake balls falling apart?
This usually happens when your mixture is too dry or hasn’t been mixed thoroughly enough. Make sure your cream cheese is properly softened and beaten until smooth before adding other ingredients. If your mixture seems crumbly, add a tablespoon of heavy cream or milk and mix again. Also check that you’ve chilled the mixture long enough—at least two hours—before trying to shape it. Rushing the chilling time leads to balls that don’t hold together.
Can I use a food processor to make the mixture?
Yes, and it actually works great for ensuring everything is completely smooth and well-combined. Just pulse your softened cream cheese with the powdered sugar and vanilla until creamy, then add your mix-ins. Be careful not to over-process once you add things like cookies or nuts, or you’ll lose the texture those ingredients provide. I use my food processor when I’m making multiple batches because it’s faster than my hand mixer.
What’s the best size for cheesecake balls?
I find that one to two tablespoons per ball is perfect—roughly the size of a walnut or small golf ball. This size is substantial enough to feel satisfying but not so large that they’re overwhelming. Mini versions about half that size work great for parties where you want bite-sized options. Larger balls around three tablespoons work if you’re serving them as a plated dessert rather than finger food.
Can I add alcohol to cheesecake balls?
You can, though you need to be careful about adding too much liquid. I’ve successfully made Bailey’s Irish Cream cheesecake balls by adding two tablespoons of the liqueur to the cream cheese mixture. You might need to compensate by adding extra powdered sugar to maintain the right consistency. Flavored vodkas, rum, or amaretto all work well in small amounts—stick to one or two tablespoons max per batch.
Why do my coatings fall off?
The coating falls off when the surface of your cheesecake ball has dried out too much before rolling. Make sure you coat each ball immediately after shaping it while the surface is still slightly sticky. Press the coating gently but firmly into the surface. If you’ve already shaped all your balls and the coating won’t stick, try brushing them very lightly with a tiny bit of water or corn syrup before rolling in the coating.
Can I make a giant cheese ball instead of individual ones?
Definitely! Shape your entire mixture into one large ball instead of portioning it out. This works wonderfully for holiday parties or romantic occasions. Roll the large ball in your coating and serve it on a platter surrounded by crackers and fruit. You can even get creative and shape it into seasonal forms—like a pumpkin for fall or a heart for Valentine’s Day. The same storage guidelines apply, and it’ll keep just as well as individual portions.
Equipment
- Large mixing bowl
- Electric mixer
- Spatula
- Parchment paper
- Shallow bowls
Ingredients
- 16 ounces full-fat cream cheese, softened
- 1 cup powdered sugar
- 1 teaspoon vanilla extract
- q.s. coating options (graham cracker crumbs, chopped nuts, mini chocolate chips, etc.) for rolling the balls
Instructions
- Remove the cream cheese from the refrigerator and let it soften at room temperature for at least an hour.
- Place softened cream cheese in a large mixing bowl and beat with an electric mixer on medium speed for about two minutes until fluffy and smooth.
- Gradually add powdered sugar (¼ cup at a time), mixing on low speed initially, then increase to medium speed.
- Add vanilla extract and beat for an additional minute until fully combined.
- Gently fold in any mix-ins with a spatula, avoiding over-mixing.
- Cover the bowl with plastic wrap and refrigerate the mixture for at least two hours to firm up.
- Prepare your coating ingredients in shallow bowls or plates.
- Use a cookie scoop or spoon to portion out the mixture (about 1-2 tablespoons each) and roll into smooth balls.
- Roll each ball in your chosen coating while still slightly sticky.
- Place finished balls on a parchment-lined plate or baking sheet.
- Refrigerate the coated balls for at least another hour before serving.