
Why This Decadent Chocolate Cake is a Must-Try
There’s something magical about the smell of chocolate wafting through your kitchen. I remember the first time I made this Decadent Chocolate Cake. My kids were running around, my dog was begging for crumbs, and I felt like a wizard conjuring happiness out of flour and cocoa. It wasn’t just a cake—it was an experience. Whether you’re a seasoned baker or a beginner, this recipe will make you feel like a pro. Trust me, once you taste this rich, moist masterpiece, you’ll never settle for boxed mixes again.
The Sweet History Behind Chocolate Cake
Chocolate cake has been a crowd-pleaser for centuries. Its origins trace back to the 1800s when cocoa powder became widely available. Back then, cakes were simple and less indulgent than today’s versions. Fast forward to modern times, and we’ve elevated it to an art form. My grandma used to bake a humble chocolate sheet cake every Sunday. It was good, but nothing like this Decadent Chocolate Cake. This recipe combines old-school charm with a luxurious twist that feels downright sinful.
Why You’ll Love This Recipe
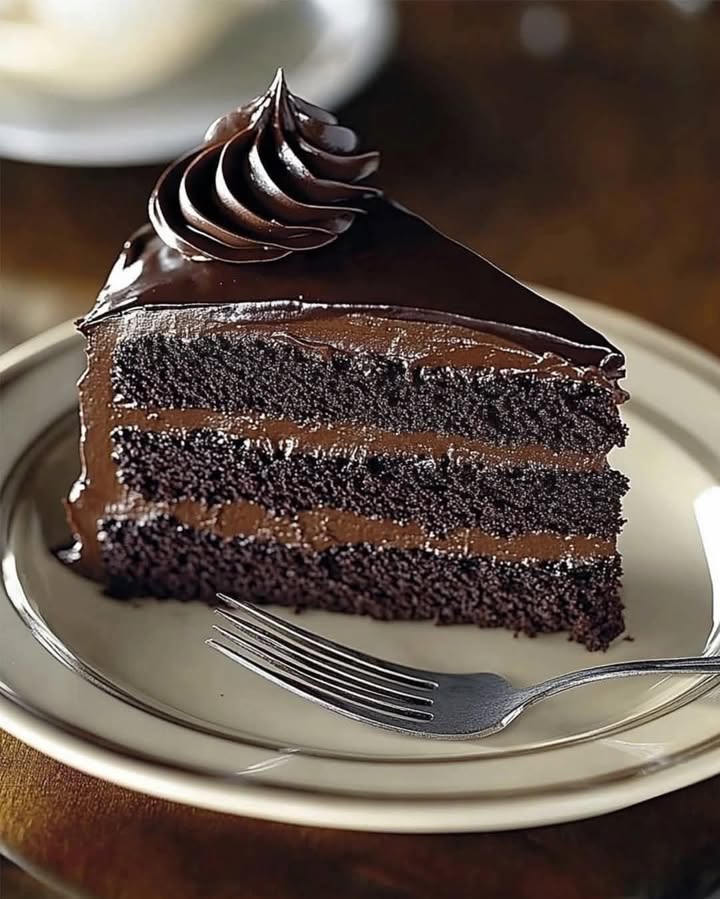
This Decadent Chocolate Cake is everything you want in a dessert: rich, moist, and oh-so-chocolatey. The frosting is velvety smooth, and the cake itself melts in your mouth. What makes it stand out is how easy it is to whip up. No fancy techniques or hard-to-find ingredients—just simple steps that lead to extraordinary results. Plus, it’s versatile enough for any occasion, from casual family dinners to elegant celebrations.
Perfect Occasions to Bake This Cake
Need a reason to bake this beauty? Birthdays, anniversaries, holidays—you name it! It’s perfect for Valentine’s Day if you’re looking to impress someone special. I’ve also served it at potlucks where it disappeared faster than I could say “chocolate.” Even on regular weekdays, it’s a great way to end the day on a sweet note. Honestly, does anyone really need an excuse to eat cake?
Ingredients You’ll Need
- For the Cake:
- 1 cup all-purpose flour
- 1 cup granulated sugar
- ½ cup unsweetened cocoa powder
- 1 tsp baking powder
- 1 tsp baking soda
- 1 tsp salt
- 2 large eggs
- 1 cup whole milk
- ½ cup unsalted butter, melted
- 2 tsp vanilla extract
- 1 cup boiling water
- For the Frosting:
- 1 cup unsalted butter, softened
- ½ cup unsweetened cocoa powder
- 4 cups powdered sugar
- ½ cup heavy cream
- 1 tsp vanilla extract
- Pinch of salt
Substitution Options
If you’re missing an ingredient, don’t panic! Swap whole milk with almond or oat milk for a dairy-free option. Coconut oil can replace butter if you prefer plant-based fats. For a lower-sugar version, try using coconut sugar instead of granulated sugar. Just keep in mind that substitutions may slightly alter the flavor or texture, but the cake will still be delicious.
Step 1: Prep the Pans
Before you dive into the fun part, let’s get organized. Preheat your oven to 350°F (175°C). Grab two 9-inch round cake pans and grease them generously with butter or nonstick spray. Dust a little flour inside each pan to prevent sticking. Pro tip: Cut parchment paper circles to fit the bottoms of the pans for extra insurance against sticking. Now your workspace smells like butter, which is always a good sign!
Step 2: Mix Dry Ingredients
In a big mixing bowl, whisk together the flour, sugar, cocoa powder, baking powder, baking soda, and salt. As you stir, imagine yourself as a mad scientist creating a potion of pure joy. The dry mix should look uniform and smell faintly chocolaty. Don’t rush this step—it ensures even distribution of leavening agents so your cake rises perfectly.
Step 3: Add Wet Ingredients
Crack those eggs into the bowl and pour in the milk, melted butter, and vanilla extract. Mix until the batter turns smooth and creamy. At this stage, the aroma becomes irresistible—a blend of warm vanilla and rich cocoa. Chef’s tip: Scrape down the sides of the bowl with a spatula to incorporate every bit of goodness. Nobody likes wasted batter!
Step 4: Incorporate Boiling Water
Here comes the magic moment. Slowly pour in the boiling water while stirring. The batter will thin out dramatically, but don’t worry—that’s exactly what we want. This step creates a super-moist crumb that practically melts in your mouth. Be gentle; boiling water can splash if you’re too aggressive. Safety first, folks!
Step 5: Bake the Cake
Divide the batter evenly between the prepared pans. Pop them into the oven and set a timer for 30-35 minutes. Peek through the window occasionally (no opening the door!) to watch the cakes rise and develop their golden-brown tops. When a toothpick comes out clean, they’re done. Let them cool in the pans for 10 minutes before transferring to wire racks. Patience pays off here!
Step 6: Prepare the Frosting
While the cakes cool, whip up the frosting. Beat the softened butter and cocoa powder until smooth. Gradually add powdered sugar, heavy cream, vanilla extract, and a pinch of salt. Keep beating until the frosting is light and fluffy. Picture clouds of chocolate bliss—this stuff is dreamy. Pro tip: Chill the bowl for 10 minutes if the frosting feels too soft.
Step 7: Assemble the Cake
Once the cakes are completely cool, it’s assembly time. Spread a generous layer of frosting between the layers, then cover the top and sides. Use a spatula or knife to create swirls and peaks for a professional touch. Take a step back and admire your handiwork. Doesn’t it look amazing?
Step 8: Serve & Enjoy
Slice into that Decadent Chocolate Cake and prepare for bliss. Each bite is a symphony of flavors and textures. Pair it with a glass of cold milk or a hot cup of coffee for maximum enjoyment. Leftovers? Lucky you—they taste even better the next day!
Timing Breakdown
- Prep Time: 20 minutes
- Bake Time: 30-35 minutes
- Total Time: About 1 hour
- Servings: 12 slices
Chef’s Secret
Want to take your frosting to the next level? Add a teaspoon of instant espresso powder to enhance the chocolate flavor. It won’t taste like coffee, but it’ll deepen the richness. Your guests will wonder how you achieved such decadence.
Extra Info
Did you know cocoa powder contains antioxidants? While this cake isn’t exactly health food, it’s nice to know there’s a tiny silver lining to indulging. Plus, studies show dark chocolate boosts mood. So go ahead—have another slice!
Necessary Equipment
- Two 9-inch round cake pans
- Mixing bowls
- Whisk or electric mixer
- Spatula
- Wire cooling racks
- Toothpick or cake tester
Storage Tips
To store leftover cake, wrap it tightly in plastic wrap or place it in an airtight container. Keep it at room temperature for up to 2 days. If you live in a warm climate, refrigerate it to prevent spoilage. Bring it back to room temperature before serving for optimal flavor.
For longer storage, freeze individual slices wrapped in foil. They’ll stay fresh for up to 3 months. Simply thaw overnight in the fridge before enjoying.
Avoid leaving the cake uncovered, as it can dry out quickly. Proper storage ensures every bite stays as heavenly as the first.
Tips and Advice
- Use room-temperature eggs and milk for easier mixing.
- Sift the cocoa powder to remove lumps and ensure a smoother batter.
- Don’t overmix the batter—stop as soon as it’s combined.
- Chill the frosted cake for 15 minutes before slicing for cleaner cuts.
Presentation Ideas
- Garnish with chocolate shavings or curls for elegance.
- Add fresh berries for a pop of color and tangy contrast.
- Dust with powdered sugar for a rustic, homemade look.
- Top with sprinkles for a playful, kid-friendly vibe.
Healthier Alternatives
If you’re looking to lighten things up, here are six variations:
- Gluten-Free: Substitute all-purpose flour with almond or oat flour.
- Vegan: Replace eggs with flax eggs and use plant-based milk and butter.
- Low-Sugar: Use stevia or monk fruit sweetener instead of granulated sugar.
- Protein-Packed: Add a scoop of chocolate protein powder to the batter.
- Oil-Based: Swap melted butter with coconut or olive oil.
- Fruit-Infused: Fold mashed bananas or applesauce into the batter for natural sweetness.
Common Mistakes to Avoid
Mistake 1: Overmixing the Batter
Overmixing leads to dense, tough cakes. Once the wet and dry ingredients are combined, stop stirring. A few lumps are okay—they’ll disappear during baking. Pro tip: Use a gentle folding motion to mix without deflating air bubbles.
Mistake 2: Skipping the Cooling Step
Rushing to frost a warm cake causes the frosting to melt and slide off. Always let the cakes cool completely on wire racks. This ensures a stable base for decorating.
Mistake 3: Using Cold Ingredients
Cold eggs and milk won’t emulsify properly, leading to uneven texture. Take these ingredients out of the fridge 30 minutes before starting. Room temperature equals better results.
Mistake 4: Not Greasing the Pans Enough
Nothing ruins a baking session like stuck-on cake. Make sure to grease and flour your pans thoroughly—or line them with parchment paper—to guarantee easy release.
Mistake 5: Overbaking
An overbaked cake is dry and crumbly. Start checking for doneness at the 30-minute mark. Insert a toothpick near the center—if it comes out clean or with a few moist crumbs, it’s ready.
FAQs About Decadent Chocolate Cake
Can I make this recipe gluten-free?
Absolutely! Swap the all-purpose flour with a gluten-free alternative like almond or oat flour. Just note that the texture might vary slightly depending on the substitute.
How do I store leftovers?
Wrap the cake tightly in plastic wrap or store it in an airtight container. Keep it at room temperature for 2 days, or refrigerate for longer shelf life. Frozen slices last up to 3 months.
Can I use Dutch-process cocoa?
Yes, Dutch-process cocoa works beautifully in this recipe. It adds a deeper, darker chocolate flavor compared to regular cocoa powder.
What if I don’t have heavy cream for the frosting?
No worries! Whole milk or half-and-half can work in a pinch, though the frosting might be slightly less rich. For vegans, try coconut cream.
Why does the batter seem so thin?
The boiling water thins the batter, which helps create a moist, tender crumb. Don’t worry—it bakes up perfectly fine.
Can I halve the recipe?
Of course! Halving the recipe yields one 9-inch layer. Perfect for smaller gatherings or solo indulgence.
Is this cake freezer-friendly?
Definitely. Wrap unfrosted layers in plastic wrap and foil, then freeze for up to 3 months. Thaw overnight in the fridge before frosting.
Can I add nuts or chips to the batter?
Go for it! Walnuts, pecans, or chocolate chips pair wonderfully with this cake. Fold them in gently after adding the boiling water.
How do I fix grainy frosting?
Grainy frosting usually means the powdered sugar wasn’t fully incorporated. Keep beating until smooth, adding a splash more cream if needed.
Can I bake this as cupcakes?
Yes! Fill cupcake liners two-thirds full and bake for 18-20 minutes. They’re adorable and portable.
Final Thoughts
Baking this Decadent Chocolate Cake is more than just following a recipe—it’s creating memories. Whether you’re celebrating a special occasion or simply craving something sweet, this cake delivers. With its rich flavor, moist texture, and versatility, it’s bound to become a staple in your repertoire. So grab your apron, turn on some music, and let’s bake something magical together. Happy baking!
Equipment
- Two 9-inch round cake pans
- Mixing bowls
- Whisk or electric mixer
- Spatula
- Wire cooling racks
- Toothpick or cake tester
Ingredients
- 1 cup all-purpose flour
- 1 cup granulated sugar
- ½ cup unsweetened cocoa powder
- 1 tsp baking powder
- 1 tsp baking soda
- 1 tsp salt
- 2 large eggs
- 1 cup whole milk
- ½ cup unsalted butter (melted)
- 2 tsp vanilla extract
- 1 cup boiling water
Instructions
- Preheat your oven to 350°F (175°C). Grease two 9-inch round cake pans and dust them with flour.
- In a large mixing bowl, whisk together the flour, sugar, cocoa powder, baking powder, baking soda, and salt.
- Add eggs, milk, melted butter, and vanilla extract to the dry ingredients and mix until smooth.
- Slowly stir in the boiling water until the batter is combined and thin.
- Divide the batter evenly between the prepared pans and bake for 30-35 minutes, until a toothpick comes out clean.
- Let the cakes cool in the pans for 10 minutes before transferring them to wire racks to cool completely.
- For the frosting, beat the softened butter and cocoa powder until smooth. Gradually add powdered sugar, cream, vanilla extract, and a pinch of salt until fluffy.
- Once cooled, spread frosting between the layers, on top, and around the sides of the cake.