
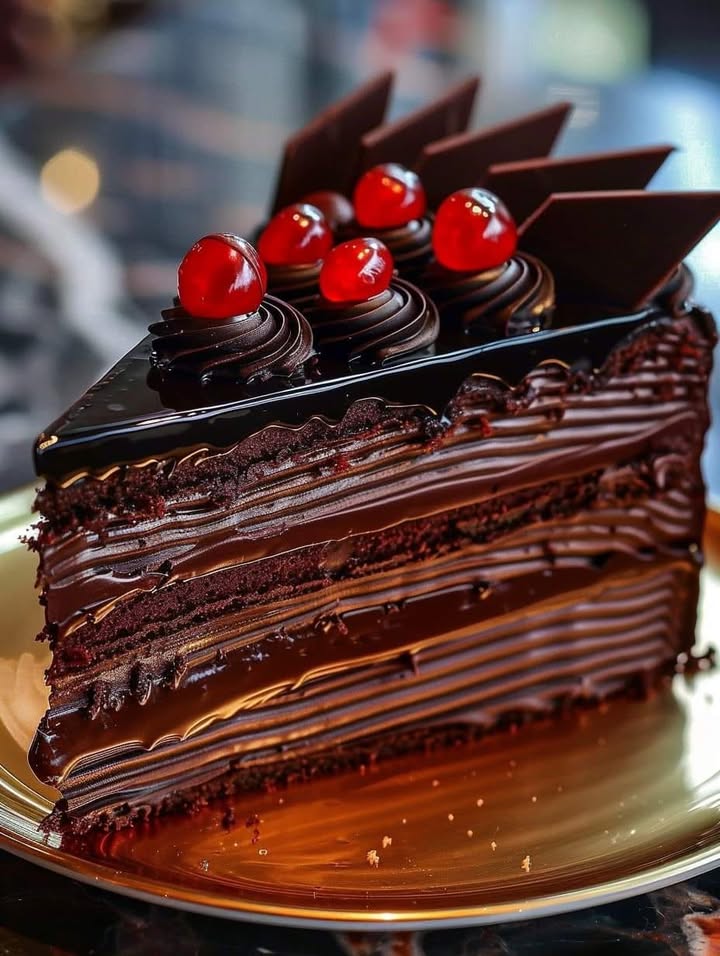
Have you ever needed chocolate so badly you could almost taste it in the air? I have. Last winter, during a gloomy week of endless rain, my family’s collective sweet tooth staged a full-scale rebellion. That’s when this Decadent Chocolate Cake, with its river of dark chocolate ganache, became our official mood-lifter. It’s more than just dessert; it’s a warm, fudgy hug on a plate. I’ve made it for birthdays, bad days, and just-because Tuesdays, and it never lets me down.
A Slice of Chocolate History
Chocolate cake has been a beloved treat since the 1800s, but this version has a special trick up its sleeve—the hot water! Adding boiling water to the batter might seem odd, but it’s a classic technique that blooms the cocoa powder. This makes the chocolate flavor incredibly deep and intense. It also gives the cake a wonderfully moist, almost pudding-like crumb. This recipe is my take on that timeless method, perfected after many happy (and delicious) trials in my own kitchen.
Why You’ll Love This Decadent Chocolate Cake
You’ll adore this recipe because it’s shockingly simple for such a show-stopping result. The cake is unbelievably moist, rich, and deeply chocolatey. The ganache topping is pure luxury, setting into a shiny, crackable shell. It’s a one-bowl wonder for the batter, and the ganache comes together in minutes. This cake promises—and delivers—maximum chocolate satisfaction with minimal fuss.
Perfect Occasions for This Chocolate Delight
This cake is your secret weapon for any event. It’s elegant enough for a birthday party or anniversary dinner. It’s comforting enough for a potluck or family gathering. I love bringing it to friends who just moved or had a baby—it’s a gift that’s always welcomed. Honestly, a quiet coffee break with a thick slice feels like a special occasion all on its own.
Ingredients for Your Decadent Chocolate Cake
Gathering simple, quality ingredients is the first step to cake success. Here’s what you’ll need:
- 1 cup all-purpose flour: Gives the cake its structure. Sift it for a lighter, fluffier texture.
- 1 cup granulated sugar: Sweetens the cake and balances the intense cocoa.
- ¾ cup unsweetened cocoa powder: Use high-quality cocoa for an intense, deep chocolate flavor. Sift it to avoid lumps.
- 2 teaspoons baking powder: Helps the cake rise and become fluffy.
- 1 teaspoon baking soda: Another leavening agent that gives the cake a tender crumb.
- 1 teaspoon salt: Balances the sweetness and enhances the chocolate flavor.
- 2 large eggs: Adds moisture and structure. Bring them to room temperature for best results.
- 1 cup whole milk: Adds richness and moisture to the cake.
- ½ cup vegetable oil: Keeps the cake moist and soft.
- 2 teaspoons vanilla extract: Adds a lovely aroma and depth of flavor.
- 1 cup boiling water: Enhances the cocoa flavor, making it more intense and giving the batter a smooth texture.
- For the Chocolate Ganache Topping:
- 1 cup heavy cream: Creates a creamy, luscious ganache.
- 12 oz finely chopped dark chocolate: For a rich, indulgent chocolate flavor. Use good-quality chocolate for the best results.
- 1 teaspoon vanilla extract: Adds a touch of sweetness and depth to the ganache.
Easy Substitution Options
Don’t have an ingredient? No problem! Here are some easy swaps:
- Milk: Any milk you have—2%, almond, or oat milk—works just fine.
- Oil: You can use melted coconut oil or even applesauce for a slightly lighter option.
- Cocoa Powder: Dutch-processed cocoa works, but do not swap it for hot chocolate mix.
- Dark Chocolate: For the ganache, semi-sweet chocolate chips are a perfect, convenient substitute.
How to Make This Decadent Chocolate Cake
Let’s bake! Get your bowls ready and preheat your oven to 350°F (175°C). Grease and flour two 9-inch round cake pans.
Step 1: Combine Your Dry Ingredients
Start by sifting the flour, sugar, cocoa powder, baking powder, baking soda, and salt into a large mixing bowl. The sifting is a key step! It gets rid of any lumps in the cocoa and flour. It also aerates the dry ingredients, which helps create that wonderfully light cake texture. Whisk everything together until the mixture is one uniform, rich brown color. You’ll already start to smell that wonderful chocolate scent.
Step 2: Mix in the Wet Ingredients
Create a well in the center of your dry ingredients. Add the eggs, milk, oil, and vanilla extract. Use a hand mixer or whisk to beat everything on medium speed for about two minutes. The batter will be lovely, thick, and glossy. Pro tip: Make sure your eggs and milk aren’t straight from the fridge. Room-temperature ingredients blend together much more smoothly, giving you a better batter.
Step 3: The Secret Step – Add Boiling Water
Here’s where the magic happens. Carefully pour in the cup of boiling water. The batter will look very thin and liquid—this is exactly right! Stir gently until the water is fully incorporated. The hot water “blooms” the cocoa powder, waking up all its intense flavor. It also ensures your cake bakes up supremely moist. Pour the thin batter evenly into your prepared pans.
Step 4: Bake to Perfection
Place the pans in the center of your preheated oven. Bake for 30 to 35 minutes. You’ll know it’s done when a toothpick inserted into the center comes out with just a few moist crumbs attached. The cakes will be fragrant and will have pulled away slightly from the sides of the pans. Let them cool in the pans for 10 minutes, then turn them out onto a wire rack to cool completely. Patience is important—a warm cake will melt your ganache!
Step 5: Create the Silky Ganache
While the cakes cool, make the ganache. Place the finely chopped dark chocolate in a heatproof bowl. Heat the heavy cream in a small saucepan until it just begins to simmer—you’ll see small bubbles around the edges. Pour the hot cream over the chocolate and let it sit, untouched, for 5 minutes. This allows the heat to gently melt the chocolate. Then, add the vanilla and stir slowly from the center outward until you have a smooth, shiny, and velvety sauce. Let it sit for 10-15 minutes to thicken slightly so it will coat the cake beautifully.
Step 6: Assemble and Frost Your Masterpiece
Place one completely cool cake layer on your serving plate. Spread a thin layer of the slightly thickened ganache over the top. Carefully place the second layer on top. Now, pour the rest of the ganache over the center of the top layer. Use an offset spatula to gently push the ganache over the edges, letting it drip down the sides in elegant, delicious rivers. Chef’s tip: For a super-smooth finish, pour most of the ganache on top and use your spatula to push it to the edges, guiding the flow rather than spreading it.
Your Baking Timeline
- Prep Time: 20 minutes
- Cook Time: 35 minutes
- Cooling Time: 1 hour
- Total Time: 1 hour 55 minutes
My Chef’s Secret for the Ultimate Cake
My secret weapon is a sprinkle of flaky sea salt on top of the ganache after you pour it. Wait until the ganache starts to set just a tiny bit, then sprinkle. The little salty crystals create an amazing contrast with the deep, sweet chocolate. It makes every single bite more interesting and will have your guests wondering what your special trick is!
A Little Extra Chocolate Info
Did you know the type of cocoa powder matters? Natural cocoa powder (like most common brands) is acidic and works perfectly with baking soda in this recipe. It gives that classic, robust chocolate flavor. If you find a cake recipe calling for Dutch-processed cocoa (which is alkalized), the leavening agents are usually different. Stick with natural cocoa here for the best rise and taste!
Necessary Equipment
- Two 9-inch round cake pans
- Mixing bowls (large and medium)
- Sifter or fine-mesh strainer
- Hand mixer or whisk
- Saucepan for heating cream
- Wire cooling rack
- Offset spatula for frosting
How to Store Your Decadent Chocolate Cake
If you have leftovers (a rare event in my house!), store the cake covered at room temperature for up to two days. The ganache will stay perfectly soft and shiny. You can use a cake carrier or invert a large bowl over the cake plate.
For longer storage, you can refrigerate it for up to five days. Let it sit out for about 30 minutes before serving to let the cake come back to room temperature. The cold fridge can make the crumb a bit firm.
This cake also freezes beautifully! Wrap individual slices or the whole cake (without garnishes) tightly in plastic wrap and then foil. Freeze for up to three months. Thaw overnight in the refrigerator.
Pro Tips and Helpful Advice
- Always measure your flour correctly. Spoon it into the measuring cup and level it off. Don’t scoop directly from the bag—you’ll pack in too much flour and end up with a dry cake.
- Let the cakes cool completely before frosting. Even a slightly warm cake will cause the ganache to slide right off and become oily.
- For the prettiest drips, test your ganache consistency on the side of the cake before pouring it all. It should be like warm honey.
Inspired Presentation Ideas
Make your cake a centerpiece! Here are a few ideas:
- Top with fresh raspberries or strawberries for a pop of color and a tart contrast.
- Scatter gold or silver sprinkles over the wet ganache for a festive touch.
- Dust the very edges with a little powdered sugar for an elegant, snowy look.
- Serve each slice with a dollop of freshly whipped cream or a scoop of vanilla bean ice cream.
Healthier & Fun Recipe Variations
Love this base recipe? Try these delicious twists:
- Chocolate Orange Cake: Add the zest of one orange to the cake batter and a tablespoon of orange liqueur to the ganache for a bright, citrusy twist.
- Chocolate Peanut Butter Cake: Swirl ½ cup of creamy peanut butter into the ganache before pouring it over the cake. Top with chopped peanuts.
- Mint Chocolate Chip Cake: Add ½ teaspoon of peppermint extract to the cake batter and fold in ⅓ cup of mini chocolate chips. Use the standard ganache or add a drop of mint extract.
- Gluten-Free Chocolate Cake: Substitute the all-purpose flour with a 1-to-1 gluten-free baking blend. The result is just as fudgy and delicious.
- Dairy-Free Chocolate Cake: Use almond milk and a dairy-free yogurt in place of the milk and oil. For the ganache, use full-fat coconut milk and dairy-free chocolate.
- Mocha Cake: Dissolve 1 tablespoon of instant espresso powder into the boiling water before adding it to the batter. It deepens the chocolate flavor incredibly.
Looking for other cake inspirations? My lavender blueberry chocolate cake offers a wonderfully floral and fruity spin on a classic chocolate base.
Common Mistakes to Avoid
Mistake 1: Overmixing the Batter After Adding Water
Once you add the boiling water, the batter becomes very thin. It’s tempting to keep mixing it, but this can develop the gluten in the flour. Too much gluten makes the cake tough and chewy instead of tender and light. Simply stir until the water is just incorporated—no more. A few small streaks are okay. The batter is supposed to be runny, almost like chocolate soup. Trust the process!
Mistake 2: Using Cold Ingredients
Baking with cold eggs and milk straight from the fridge is a common oversight. Cold ingredients don’t bind together as well with the oil and dry ingredients. This can lead to a dense, uneven cake. Always plan ahead. Take your eggs and milk out about 30-60 minutes before you start baking. Your batter will be smoother and more emulsified, promising a better rise and texture in the final cake.
Mistake 3: Frosting a Warm Cake
Impatience is the enemy of a beautiful ganache finish. If the cake layers are even slightly warm, the heat will break the ganache. The fat will separate, creating a greasy, grainy layer that won’t set properly. It’s a heartbreaker. Let your cakes cool in the pans for 10 minutes, then on a wire rack until they are completely cool to the touch. This can take a full hour. Use this time to clean up and make your ganache.
Mistake 4: Chopping the Chocolate Too Coarsely for Ganache
If your chocolate pieces are too big, the hot cream won’t melt them all evenly. You’ll be left with lumps of unmelted chocolate in your otherwise silky ganache. Take an extra minute to chop the chocolate bar finely into small, uniform pieces, or use high-quality chocolate chips which are already the perfect size. Fine pieces melt quickly and smoothly, giving you that professional, glossy pour every time.
Frequently Asked Questions
Can I make this Decadent Chocolate Cake in a different pan?
Absolutely! This versatile batter works great in a 9×13 inch rectangle pan. Just adjust the baking time—it will likely need 5-10 extra minutes. You can also make cupcakes. Fill liners ⅔ full and bake for 18-22 minutes. This recipe makes about 24 perfect cupcakes. For a bundt cake, grease the pan very well and bake for 40-50 minutes. Always do the toothpick test to check for doneness, no matter the pan shape.
Why do I have to add boiling water to the cake batter?
The boiling water does two crucial jobs. First, it “blooms” the cocoa powder. This means the hot liquid opens up the cocoa solids, releasing a much deeper, more intense chocolate flavor than you’d get with cold liquid. Second, the hot water helps dissolve the sugar and other dry ingredients completely. This creates a smooth, thin batter that bakes into an exceptionally moist cake with a tender, almost velvety crumb. Don’t skip this step—it’s the secret to the rich taste and wonderful texture.
My ganache is too runny. How can I fix it?
A runny ganache usually needs more time or more chocolate. If it’s freshly made, just let it sit at room temperature for 15-30 minutes. It will thicken as it cools. Stir it occasionally. If it’s still too thin after that, you can add a bit more finely chopped chocolate. Add about an ounce at a time, stirring until it melts completely. The residual heat should melt it. Avoid putting it in the fridge to thicken quickly, as this can cause it to set unevenly and lose its shine.
Can I make this cake ahead of time?
Yes, this cake is fantastic for making ahead! You have a couple of options. You can bake the cake layers up to two days in advance. Let them cool completely, then wrap them tightly in plastic wrap and store at room temperature. You can also freeze the wrapped layers for up to three months. The ganache is best made the day you plan to serve the cake. You can assemble the whole cake a day ahead. Store it covered at cool room temperature. The flavors actually meld and improve overnight.
What is the best cocoa powder to use?
For this recipe, use a natural, unsweetened cocoa powder. Common grocery store brands like Hershey’s work perfectly. Do not use Dutch-processed cocoa unless the recipe is specifically written for it, as it reacts differently with baking soda. The quality does matter—a better brand often means a richer flavor. Look for cocoa that smells strongly of chocolate. I’ve found that spending a little more on a good cocoa powder makes a noticeable difference in the depth of your Decadent Chocolate Cake.
How do I get my cake layers to be perfectly flat?
For perfectly flat layers that don’t dome in the middle, try these tricks. First, make sure your baking powder and soda are fresh. Old leaveners won’t give a strong, even rise. You can also use bake-even strips—fabric strips you soak in water and wrap around the outside of the pan. They insulate the edges so the cake bakes evenly from center to edge. The simplest method is to gently tap the filled pans on the counter a few times to release air bubbles before baking.
Is there a way to make the ganache less rich?
If you prefer a slightly lighter ganache, you can use semi-sweet chocolate instead of dark chocolate. Semi-sweet has more sugar and a milder cocoa flavor. You can also use half semi-sweet and half milk chocolate. Another option is to make a chocolate buttercream frosting instead. Cream together 1 cup of softened butter with 3 cups of powdered sugar, ¾ cup of cocoa powder, a pinch of salt, and 3-4 tablespoons of milk or cream until light and fluffy.
My cake is too dry. What did I do wrong?
A dry cake is often caused by overbaking or overmeasuring the flour. Always set a timer for the minimum bake time and check with a toothpick. Ovens can run hot, so an oven thermometer is a helpful tool. For flour, the most common mistake is scooping the measuring cup directly into the bag. This packs the flour down. Instead, spoon the flour lightly into the cup and level it off with a knife. This “spoon and level” method gives you the correct, lighter amount.
Can I add coffee instead of water?
Yes, and it’s a fantastic idea! Replacing the boiling water with hot, strongly brewed coffee is a baker’s secret. The coffee doesn’t make the cake taste like coffee. Instead, it enhances and deepens the chocolate flavor, making it taste even more chocolatey. It’s a simple swap that adds a wonderful complexity. If you’re sensitive to caffeine, you can use decaf coffee. The flavor-enhancing effect is exactly the same.
How do I cleanly slice a ganache-covered cake?
Slicing a glossy ganache cake without cracking the shell is easy with a hot knife. Fill a tall glass with very hot water. Wipe your sharp knife clean and dip the blade into the hot water for a few seconds. Dry it quickly with a towel, then make your slice. The warm blade will glide right through the ganache and cake, giving you a perfect, clean cut. Wipe the knife clean and re-heat it in the water between each slice for the best results.
For more fantastic dessert ideas, from a quick breakfast croissant sandwich to a creamy blackberry cheesecake or a light Jello fruit pie, be sure to explore our full collection. And remember, enjoying treats like this as part of balanced eating patterns is a sustainable and joyful approach to food.
I hope this Decadent Chocolate Cake becomes a beloved recipe in your home, just like it is in mine. It’s proof that the most satisfying desserts often come from a simple, well-loved process. For more baking inspiration, check out all our wonderful creations in the cakes and cupcakes category. Now, go preheat that oven and get ready for the best chocolate cake of your life. Happy baking!
Equipment
- 2 moules à gâteau ronds de 9 pouces
- Grand bol
- Spatule
- Tamis ou passoire fine
- Fouet
Ingredients
- 1 tasse farine tout usage
- 1 tasse sucre granulé
- ¾ tasse cacao en poudre non sucré
- 2 cuillères à thé poudre à lever
- 1 cuillère à thé bicarbonate de soude
- 1 cuillère à thé sel
- 2 grands œufs œufs
- 1 tasse lait entier
- ½ tasse huile végétale
- 2 cuillères à thé extrait de vanille
- 1 tasse eau bouillante
- 1 tasse crème épaisse
- 12 oz chocolat noir haché finement
- 1 cuillère à thé extrait de vanille
Instructions
- Préchauffez le four à 175°C (350°F) et graissez deux moules à gâteau ronds de 9 pouces.
- Tamisez ensemble la farine, le sucre, le cacao en poudre, la poudre à lever, le bicarbonate de soude et le sel dans un grand bol.
- Faites un puits dans les ingrédients secs, puis ajoutez les œufs, le lait, l'huile et l'extrait de vanille; mélangez à vitesse moyenne pendant 2 minutes.
- Incorporez délicatement l'eau bouillante.
- Répartissez la pâte également entre les moules préparés et faites cuire au four pendant 30 à 35 minutes.
- Laissez les gâteaux refroidir dans les moules pendant 10 minutes, puis démoulez-les sur une grille pour refroidir complètement.
- Préparez la ganache en chauffant la crème épaisse jusqu'à frémissement, puis versez-la sur le chocolat haché; laissez reposer pendant 5 minutes avant de remuer jusqu'à obtenir une consistance lisse.
- Assemblez le gâteau en étalant la ganache sur la première couche, placez la deuxième couche dessus et nappez le gâteau de la ganache restante.