
The Ultimate Decadent Hazelnut Delight: A Cake for the Soul
Have you ever had a dessert so good it felt like a warm hug? That’s this cake. I created this Hazelnut Chocolate Truffle Cake for my best friend’s birthday. The look on her face when she saw it, with all those shiny Ferrero Rocher chocolates, was pure magic. It’s not just a cake. It’s an event on a plate. Every slice is a journey through rich, velvety chocolate and toasted, nutty bliss. Trust me, your guests will talk about this one for years.
A Slice of History: From Simple Treat to Showstopper
Chocolate and hazelnut are a timeless love story. Think of classic European spreads and pralines. This cake takes that perfect pairing and turns it into a grand celebration. I was inspired by those fancy bakery cakes but wanted a recipe anyone could make at home. The Ferrero Rocher garnish is my modern, glamorous twist. It adds crunch and a touch of luxury. It’s my way of making a traditional flavor combination feel new and exciting.
Why You’ll Fall in Love With This Decadent Hazelnut Delight
This recipe is a winner for so many reasons. First, the flavor is unreal. Deep chocolate meets nutty hazelnut in every single layer. Second, it’s a total showstopper! The glossy ganache and gold sprinkles make it look professional. But the steps are simple and foolproof. Third, it’s incredibly versatile. Dress it up for a wedding or keep it cozy for a family Sunday. This Decadent Hazelnut Delight promises joy in every bite.
When to Whip Up This Spectacular Cake
This cake isn’t for just any Tuesday (unless you need a really amazing Tuesday!). It’s your secret weapon for special moments. Imagine it as a breathtaking birthday centerpiece. It brings elegance to holiday dinners. It’s the perfect “thank you” gift for a neighbor. I love making it for anniversary celebrations. It says “I love you” better than words ever could. Any event becomes instantly more memorable with this dessert on the table.
Gathering Your Ingredients for Success
Using great ingredients makes a great cake. Here’s your shopping list for this chocolate hazelnut masterpiece.
For the Cake:
- 2 cups all-purpose flour
- 2 cups sugar
- 3/4 cup unsweetened cocoa powder
- 2 tsp baking powder
- 1.5 tsp baking soda
- 1 tsp salt
- 1 tsp espresso powder (my secret for richer chocolate!)
- 1 cup milk
- 1/2 cup vegetable oil
- 2 large eggs
- 2 tsp vanilla extract
- 1 cup boiling water
For the Hazelnut Frosting:
- 1 cup unsalted butter, softened
- 3/4 cup cocoa powder
- 3 cups powdered sugar
- 1/3 cup hazelnut liqueur or extract
- Pinch of salt
For the Chocolate Ganache:
- 2/3 cup heavy cream
- 1 cup dark chocolate chips
For the Glamorous Garnish:
- Ferrero Rocher chocolates
- Gold sprinkles
Easy Swaps: Make It Your Own
No hazelnut liqueur? Use Frangelico syrup or even strong brewed coffee for moisture. Dairy-free? Swap milk for oat milk and butter for plant-based butter. Nut allergy? Skip the liqueur and use vanilla extract. Top with chocolate-dipped strawberries instead of Ferrero Rocher. Make it work for you and your family!
Crafting Your Decadent Hazelnut Delight: A Step-by-Step Journey
Let’s bake! Clear your counter, put on some music, and get ready to create something wonderful.
Step 1: Bake the Chocolate Cake Layers
Start by heating your oven to 350°F (177°C). Grease and flour three 8-inch cake pans well. In a big bowl, whisk together your dry ingredients: flour, sugar, cocoa, baking powder, baking soda, salt, and espresso powder. The cocoa will puff up in a fragrant cloud. In another bowl, mix the milk, oil, eggs, and vanilla. Pour the wet mix into the dry and beat on medium until it’s smooth. Now, slowly add the boiling water. The batter will become thin and glossy. Pro tip: Divide the batter with a measuring cup for perfectly even layers. Bake for 30-35 minutes. Your kitchen will smell amazing. A toothpick should come out clean when they’re done.
Step 2: Whip Up the Dreamy Hazelnut Frosting
While the cakes cool, make the frosting. Beat the softened butter in a bowl for a full 3 minutes. You want it pale and fluffy. Gradually add the cocoa powder and powdered sugar. The mixture will look dark and sandy at first. Keep mixing! Pour in the hazelnut liqueur and that pinch of salt. Watch as it transforms into a silky, spreadable dream. The smell is nutty and sweet. This frosting is so good you might eat it with a spoon. I won’t tell.
Step 3: Create the Silky Chocolate Ganache
This is the easy part with a huge payoff. Pour the heavy cream into a small pot. Heat it over medium until you see little bubbles around the edges. It should be steaming but not boiling. Place your chocolate chips in a heat-proof bowl. Pour the hot cream over the chips. Let it sit for 5 minutes. This patience lets the chocolate melt gently. Then, take a whisk and stir from the center out. A beautiful, shiny river of ganache will form. Set it aside to cool and thicken slightly.
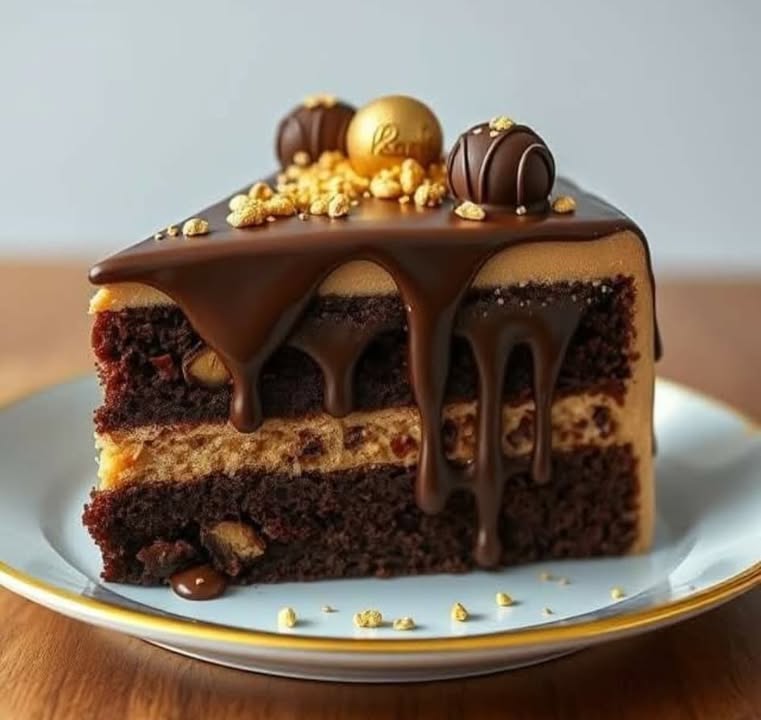
Step 4: Assemble Your Masterpiece
This is where the magic happens. Put your first cake layer on a stand. Spread a generous layer of the hazelnut frosting on top. Now, press halved Ferrero Rocher chocolates into the frosting. Add the second layer and repeat with more frosting. Place the final cake layer on top. Take a step back and admire your tower of deliciousness. Now, gently pour the lukewarm ganache over the top. Use a spoon to nudge it over the edges for those beautiful drips. Chef’s tip: Act quickly before the ganache sets. Finally, crown your cake with whole Ferrero Rocher chocolates and a sprinkle of gold. It’s pure glamour.
Your Recipe Timing Blueprint
- Prep Time: 20 minutes
- Bake Time: 30-35 minutes
- Cooling Time: 1 hour (crucial!)
- Frosting & Assembly: 15 minutes
- Total Time: About 2 hours
Chef’s Secret for the Perfect Slice
For the cleanest, most beautiful slices, dip your knife in hot water and wipe it dry between each cut. The heat glides through the ganache and frosting without dragging. It makes your cake look as perfect inside as it does outside.
A Fun Fact About Your Ingredients
That espresso powder in the cake batter isn’t there to make it taste like coffee. It’s a flavor enhancer! Cocoa powder can sometimes taste a bit flat. A small amount of espresso deepens and enriches the chocolate flavor, making it taste more intensely chocolatey. It’s a baker’s oldest trick.
Essential Tools for the Job
You don’t need fancy gear. Just gather three 8-inch round cake pans, a stand mixer or hand mixer, a few mixing bowls, a whisk, a spatula, a small saucepan, and a cake stand or plate for serving.
How to Store Your Leftover Luxury
This cake stores beautifully. First, any leftover cake should be covered lightly with plastic wrap or kept in a cake carrier. It’s best to store it at cool room temperature for up to two days because refrigeration can dry out the cake layers.
If you need to keep it longer, the refrigerator is your friend. Pop it in for up to 5 days. The flavors actually deepen and meld together. The ganache will firm up in the cold.
Let the cake sit out for about 30 minutes before serving again. This takes off the chill and brings back that soft, truffle-like texture. For optimal quality, check the recommended shelf life for dairy-based desserts to enjoy it at its best.
Tips for a Flawless Cake Every Time
- Use room temperature eggs and butter. They mix into the batter more evenly.
- Don’t skip cooling the cakes completely. Frosting a warm cake is a messy disaster.
- If your ganache is too thin, let it cool longer. If it’s too thick, gently reheat it with a teaspoon of cream.
- Toast some extra chopped hazelnuts for a crunchy garnish on the sides.
Presentation Ideas to Wow Your Crowd
- Serve on a beautiful cake stand with a gold-rimmed plate.
- Add edible gold leaf for an ultra-luxe finish.
- Place each slice on a plate with a drizzle of melted Nutella and a fresh raspberry.
- For a party, turn it into a dessert bar with coffee and a luscious Chocolate Caramel Roll for variety.
Healthier & Fun Variations to Try
Love this cake but want to mix it up? Here are six delicious spins on the classic.
- Gluten-Free Delight: Swap the all-purpose flour for a 1:1 gluten-free baking blend. Everything else stays the same!
- Dairy-Free Dream: Use your favorite plant-based milk, vegan butter, and dairy-free chocolate chips. The result is just as rich and satisfying.
- Mini Cake Tower: Bake the batter in cupcake tins. Layer the mini cakes with frosting and a single Ferrero Rocher on top for individual treats.
- Mocha Twist: Add an extra tablespoon of espresso powder to the cake batter and use coffee liqueur in the frosting instead of hazelnut.
- Orange Chocolate Fusion: Add the zest of one orange to the cake batter and use orange liqueur in the frosting for a bright, citrusy note.
- Salted Caramel Swirl: After frosting each layer, drizzle store-bought or homemade salted caramel sauce before adding the next layer. It’s incredible.
Finding More Inspiration for Sweet Celebrations
If you loved making this showstopper, you’ll find endless ideas in our full collection of decadent cake recipes, perfect for any skill level or occasion.
Common Mistakes to Avoid
Let’s make sure your cake is perfect. Here are a few common pitfalls and how to skip them.
Mistake 1: Using Cold Ingredients
Cold butter and eggs don’t blend smoothly into your cake batter or frosting. This can lead to a lumpy frosting or a dense, uneven cake. Always plan ahead. Take your eggs, butter, and milk out of the fridge about an hour before you start baking. Your butter should be soft to the touch but not melted. This simple step ensures everything emulsifies perfectly for a light, tender crumb and creamy frosting.
Mistake 2: Overmixing the Batter After Adding Water
When you add the boiling water, the batter becomes very thin. It’s tempting to keep mixing to make it smooth again. But overmixing at this stage develops the gluten in the flour. This can give your cake a tough, rubbery texture instead of being soft and fluffy. Mix on low speed just until the water is fully incorporated. It’s okay if it looks a little watery. That’s exactly how it should be before going into the pan.
Mistake 3: Assembling with Warm Cake Layers
We’ve all been there—you’re excited and want to frost the cake right away. But frosting a warm cake is a recipe for disaster. The heat will melt the butter in your frosting, making it slide right off. The ganache will become a runny mess. Be patient. Let the layers cool in the pans for 10 minutes, then turn them out onto a wire rack. Let them cool completely, about an hour. Your patience will be rewarded with a stable, beautiful cake.
Mistake 4: Rushing the Ganache
Pouring the ganache while it’s too hot or too cold leads to problems. If it’s too hot, it will be thin and run straight off the cake. Too cold and it will be thick and gloppy, impossible to pour. The ideal texture is like warm chocolate pudding or thick syrup. After you make it, let it sit at room temperature for 10-15 minutes. It should coat the back of a spoon nicely. Test a drip down the side of your mixing bowl before committing to the cake.
Frequently Asked Questions
Can I make this cake ahead of time?
Absolutely! This cake is actually better the next day. You can bake the layers up to two days in advance. Let them cool completely, wrap them tightly in plastic wrap, and store at room temperature. You can also make the frosting and ganache a day ahead. Keep the frosting covered at room temperature (if your kitchen is cool) or in the fridge. Store the ganache in a sealed container at room temperature. Gently re-warm the ganache if it thickens too much. Assemble the cake the day you plan to serve it for the freshest look and texture.
What can I use instead of hazelnut liqueur?
No problem! There are a few great substitutes. You can use pure hazelnut extract. Start with 1-2 teaspoons and add it to the frosting with a tablespoon of milk or cream. Another fantastic option is using the liquid from a jar of dulce de leche or even strong brewed coffee. The coffee will complement the chocolate beautifully. If you want a non-alcoholic version that still has nutty flavor, try a teaspoon of hazelnut extract mixed with a few tablespoons of simple syrup or milk.
Why did my cake layers sink in the middle?
A sunken cake is usually a sign of underbaking or an issue with leavening. First, make sure your baking powder and baking soda are fresh. They lose their power over time. Second, don’t open the oven door during the first 25 minutes of baking. The rush of cold air can cause the fragile rising cake to collapse. Finally, use the toothpick test. It should come out with a few moist crumbs, not wet batter. If it’s clean, it’s done. Make sure your oven temperature is accurate with an oven thermometer.
My ganache is too runny. How can I fix it?
Don’t worry, this is an easy fix. If your ganache is too thin to coat the cake properly, just let it sit at room temperature to cool and thicken. Stir it occasionally. If you’re really in a hurry, you can pop it in the fridge for 5-10 minutes, stirring every few minutes. Be careful not to let it get too cold and hard. The ideal pouring consistency is like warm honey or thick chocolate sauce. It should flow slowly from the spoon.
Can I freeze this hazelnut chocolate cake?
Yes, you can! The best way is to freeze it before you add the ganache and final garnish. Wrap the unfrosted, cooled cake layers individually in plastic wrap and then in foil. They will keep for up to 3 months. You can also freeze the whole assembled and frosted cake (without the ganache garnish) on a tray until solid, then wrap it well. Thaw overnight in the refrigerator. Then, bring to room temperature, make a fresh batch of ganache, and add your Ferrero Rocher topping. The texture will be perfect.
How do I get perfectly flat cake layers?
The easiest method is the “bake even strips” trick. You soak fabric strips in water, wrap them around the outside of the cake pans, and pin them. This keeps the edges from baking faster than the center. No strips? You can also gently press down on the domed top of the cooled cake with a clean kitchen towel. Or, use a long serrated knife to carefully slice the dome off to create a flat surface. A little trickier, but it works!
Is espresso powder necessary?
It’s not strictly necessary, but it is highly recommended. The espresso powder doesn’t make your cake taste like coffee. Instead, it acts as a flavor enhancer for the cocoa. It deepens and intensifies the chocolate flavor, making it taste richer and more complex. If you absolutely don’t have it, you can use 1-2 teaspoons of very strong instant coffee granules dissolved in the boiling water. Or, you can simply leave it out. The cake will still be delicious, just a bit less deep in chocolate flavor.
Can I use a different type of chocolate for the ganache?
Certainly! Dark chocolate chips are recommended for their rich, not-too-sweet flavor that balances the sweet cake and frosting. But you can use semi-sweet chips for a slightly sweeter ganache. You can even use milk chocolate, but be aware it is much sweeter and softer. If using a chocolate bar, chop it into small, even pieces so it melts evenly with the cream. Avoid using chocolate with a very high cocoa percentage (like 90%) unless you love a very bitter contrast, as it might not pour as smoothly.
What’s the best way to transport this cake?
Transporting a tall, gorgeous cake can be nerve-wracking! First, chill the fully assembled cake for at least an hour. This firms everything up. Use a cake carrier with a locking lid if you have one. If not, place the cake on a sturdy, non-slip plate or board. Put two strips of non-slip shelf liner under the plate in your car to keep it from sliding. Drive carefully, avoiding sudden stops. If it’s a short trip and the weather is cool, leaving it at room temperature is fine. For longer trips, keep it cool with an ice pack nearby, but not directly on the cake.
I don’t have three cake pans. Can I still make this?
Of course! You have two great options. First, you can bake the cake in batches. Divide your batter into thirds. Bake one layer at a time, washing and re-greasing the pan between each. Just make sure you let the pan cool completely before adding new batter. Second, you can bake the entire batter in one 9×13 inch rectangular pan. Bake it for a bit longer, maybe 35-45 minutes, until a toothpick comes out clean. Once cooled, you can slice it horizontally to create two or three layers for stacking. It works beautifully!
Your Moment of Sweet Victory
And there you have it—your very own stunning Hazelnut Chocolate Truffle Cake. Seeing that final creation, all shiny and glamorous with its Ferrero Rocher crown, is a feeling like no other. It’s more than just mixing bowls and an oven. It’s about creating a moment of pure, shared joy. So slice it up, pour the coffee, and get ready for the compliments. You’ve just baked a masterpiece. Now, go enjoy every single decadent, nutty, chocolatey bite. You deserve it!
Equipment
- 3 x moules ronds de 8 pouces
- Mélangeur
- Bols à mélanger
- Fouet
- Petite casserole
Ingredients
- 2 tasses farine tout usage
- 2 tasses sucre
- 3/4 tasse cacao en poudre non sucré
- 2 cuil. à thé poudre à lever
- 1.5 cuil. à thé bicarbonate de soude
- 1 cuil. à thé sel
- 1 cuil. à café poudre d'expresso
- 1 tasse lait
- 1/2 tasse huile végétale
- 2 grands œufs
- 2 cuil. à café extrait de vanille
- 1 tasse eau bouillante
Instructions
- Préchauffez le four à 350°F (177°C) et graissez trois moules à gâteau de 8 pouces.
- Dans un grand bol, fouettez ensemble la farine, le sucre, le cacao en poudre, la poudre à lever, le bicarbonate de soude, le sel et la poudre d'expresso.
- Dans un autre bol, mélangez le lait, l'huile végétale, les œufs et l'extrait de vanille.
- Combinez les ingrédients humides et secs, puis incorporez progressivement l'eau bouillante jusqu'à ce que le mélange soit lisse.
- Divisez la pâte entre les moules et faites cuire pendant 30-35 minutes, ou jusqu'à ce qu'un cure-dent en ressorte propre.
- Pendant que les gâteaux refroidissent, battez le beurre ramolli dans un bol pendant 3 minutes, jusqu'à ce qu'il soit pâle et crémeux.
- Ajoutez progressivement le cacao en poudre et le sucre en poudre, puis incorporez le liqueur de noisette et le sel.
- Chauffez la crème épaisse dans une casserole jusqu'à ce qu'elle commence à fumer, puis versez-la sur les pépites de chocolat noir dans un bol et laissez reposer pendant 5 minutes. Fouettez jusqu'à l'obtention d'un mélange lisse.
- Assemblez le gâteau en alternant les couches avec le frosting aux noisettes et les chocolats Ferrero Rocher coupés en deux.
- Versez le ganache refroidi sur le dessus et décorez avec des Ferrero Rocher entiers et des paillettes dorées.