
Delightful Raspberry Cheesecake Cupcakes: A Bite of Heaven
You know that feeling when you want a whole cheesecake but also want to be a little bit fancy? That’s exactly where I was when I created these Raspberry Cheesecake Cupcakes. I was hosting a baby shower and needed a dessert that was elegant, easy to serve, and a guaranteed crowd-pleaser. Let me tell you, these little gems disappeared faster than you can say “second helping!” They combine the creamy, tangy dream of cheesecake with the sweet-tart punch of raspberries, all in a perfectly portable cupcake form. It’s the best of both worlds, and I’m so excited to share this family-favorite recipe with you.
The Story Behind These Cheesecake Cupcakes
Cheesecake itself has a history that goes all the way back to ancient Greece, but the cupcake version is a wonderfully modern twist. It speaks to our love for individual desserts—no slicing required! My version is a nod to classic New York-style cheesecake, with its rich cream cheese base, but I’ve lightened it up just a touch with sour cream for incredible texture. The raspberry swirl isn’t just for looks; it cuts through the richness beautifully. While a traditional baked cheesecake is a weekend project, these cupcakes are totally doable for a weeknight treat. They’re my go-to when I need a special dessert without the stress.
Why You’ll Fall in Love With This Recipe
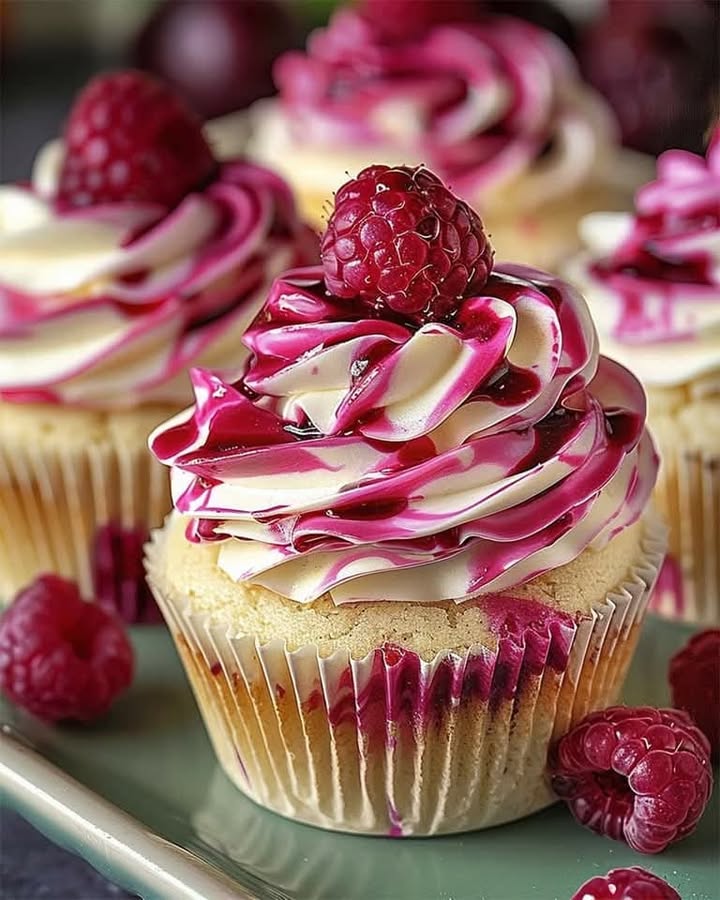
First, they are stunning. The deep red raspberry topping against the pale cheesecake is just gorgeous. Second, they are surprisingly simple! You don’t need a water bath or any fancy techniques. The graham cracker crust bakes right in the liner, and the filling comes together in one bowl. They’re also incredibly versatile. You can make them a day ahead, which is a lifesaver for parties. And let’s be honest, anything in cupcake form is automatically more fun. They’re portion-controlled… well, in theory. I’ve never managed to eat just one.
Perfect Occasions for Raspberry Cheesecake Cupcakes
These little delights are perfect for so many events! They’re a hit at bridal and baby showers, where a beautiful, feminine dessert is a must. I love packing them in a festive box as a thoughtful homemade gift for neighbors during the holidays. They’re also the star of my summer picnic baskets—they travel so well. Honestly, a Tuesday night is a perfect occasion too. Sometimes you just need a mini celebration, and a raspberry cream cheese cupcake is the perfect way to do it.
What You’ll Need: Ingredients
Gather these simple ingredients for your cheesecake adventure. Using full-fat, room-temperature cream cheese is the secret to a smooth, lump-free filling.
For the Graham Cracker Crust:
- 1 ½ cups (150g) graham cracker crumbs
- ¼ cup (50g) granulated sugar
- ½ tsp ground cinnamon (optional, but lovely)
- 6 tbsp (85g) unsalted butter, melted
For the Cheesecake Filling:
- 2 (8 oz) blocks cream cheese, softened
- ½ cup (100g) granulated sugar
- 1 tsp vanilla extract
- 2 large eggs
- ⅓ cup (80ml) sour cream
- 2 tbsp all-purpose flour
- 1 cup (150g) fresh raspberries (or frozen, thawed and drained)
For the Raspberry Topping:
- 1 cup (150g) fresh raspberries
- 2 tbsp granulated sugar
- 1 tsp lemon juice
Handy Substitution Options
Don’t fret if you’re missing an ingredient! Here are some easy swaps:
- Graham Crackers: Digestive biscuits or vanilla wafers make a great crust.
- Sour Cream: Plain, full-fat Greek yogurt will work in a pinch.
- Fresh Raspberries: Frozen raspberries are absolutely fine for both the filling and topping. Just thaw and drain them well to remove excess liquid.
- Flour: The flour helps stabilize the cheesecake. You can use 1 tbsp of cornstarch as a substitute.
How to Make Raspberry Cheesecake Cupcakes
Follow these steps for perfect, crack-free mini cheesecakes every single time.
Step 1: Prepare the Graham Cracker Crust
Start by preheating your oven to 325°F (163°C). Line a 12-cup muffin tin with your favorite cupcake liners. In a medium bowl, stir together the graham cracker crumbs, sugar, and cinnamon. The smell is already heavenly! Pour in the melted butter and mix until all the crumbs are evenly coated and look like wet sand. Spoon a heaping tablespoon into each liner. Now, use the back of a spoon or your fingers to press the mixture down firmly and evenly. This creates a solid base that won’t crumble when you bite into it. Bake the crusts for 8-10 minutes until they smell toasty and look set. Let them cool on a rack while you make the filling.
Step 2: Make the Cheesecake Filling
In a large bowl, beat the softened cream cheese and sugar together. You want it perfectly smooth and creamy, with no lumps. This should take about 2-3 minutes with an electric mixer. Scrape down the bowl. Add the vanilla, then the eggs one at a time, mixing just until each is incorporated. Stir in the sour cream; its tang will balance the sweetness beautifully. Finally, add the flour and mix until the batter is thick, creamy, and uniform. Pro tip: Don’t over-mix once the eggs are in, as this can incorporate too much air and cause the cupcakes to rise and fall dramatically. Gently fold in the raspberries with a spatula. I like leaving them mostly whole for juicy bursts in every bite.
Step 3: Assemble and Bake the Cupcakes
Divide the beautiful pink-speckled batter among the cooled crusts, filling each liner almost to the top. Smooth the tops gently. Bake for 18-22 minutes. The centers should be just set but still have a slight jiggle—think like Jell-O, not liquid. This is the key to creamy cheesecake! When they’re done, turn off the oven, crack the door open with a wooden spoon, and let the cupcakes cool inside for 10 minutes. This gradual cooling helps prevent those dreaded cracks. Then, move them to a wire rack to cool completely before popping them in the fridge. They need at least 2 hours, but overnight is best for the perfect firm, creamy texture.
Step 4: Prepare the Raspberry Topping
While the cheesecakes chill, make the simple topping. In a small saucepan, combine the raspberries, sugar, and lemon juice. Cook over medium heat for 5-7 minutes. As the berries warm, they’ll break down and release their gorgeous ruby juice. Stir occasionally, mashing them gently with your spoon. The sauce will thicken slightly. Let it cool completely; it will thicken more as it sits. Chef’s tip: For a super smooth sauce, press the cooked mixture through a fine-mesh sieve to remove the seeds. I sometimes leave them in for a more rustic, homemade look.
Step 5: Serve and Enjoy!
The final step is the most rewarding! Pull your chilled cheesecake cupcakes from the fridge. Give the raspberry sauce a stir, then spoon a glossy dollop over the top of each one. For that final professional touch, place a single perfect fresh raspberry right on top. The contrast of the cool, creamy cheesecake, the crunchy crust, and the vibrant, tangy sauce is pure magic. Serve them immediately and watch the smiles appear.
Timing is Everything
Here’s a quick breakdown of the time commitment for these delightful treats:
- Prep Time: 25 minutes
- Cook Time: 30 minutes (including crust)
- Cooling/Chilling Time: 2 hours 30 minutes (minimum)
- Total Time: About 3 hours 25 minutes
Remember, the long chill is non-negotiable for the perfect texture, so plan ahead!
My Chef’s Secret for the Creamiest Texture
My absolute best trick is to ensure every single ingredient is at room temperature before you start the filling. Cold cream cheese will never blend smoothly, leading to a lumpy batter. Cold eggs can re-solidify the butter in the cream cheese. I take my cream cheese, eggs, and sour cream out of the fridge about an hour before I start baking. It makes the mixing process effortless and guarantees a velvety-smooth cheesecake filling.
A Little Berry Good-to-Know Info
Raspberries are not only delicious but also packed with antioxidants and fiber. Their bright flavor is a natural pairing with rich dairy. In fact, combining berries with cream cheese is a tradition in many cultures, from Danish desserts to classic American coffee cakes. Using fresh, in-season berries will give you the most vibrant flavor, but don’t shy away from frozen—they’re often picked and frozen at peak ripeness and work wonderfully in baked goods and sauces.
Necessary Equipment
You likely have everything you need already:
- 12-cup standard muffin tin
- Cupcake liners
- Mixing bowls (medium and large)
- Electric hand mixer or stand mixer
- Spatula
- Small saucepan
- Measuring cups and spoons
Storing Your Raspberry Cheesecake Cupcakes
These cupcakes store beautifully. Once topped, they should be kept covered in the refrigerator. They will stay fresh and delicious for up to 4 days. The crust may soften slightly after day two, but the flavor will still be fantastic.
For longer storage, you can freeze the un-topped cheesecake cupcakes. Place the fully chilled cupcakes (without raspberry sauce) on a baking sheet and freeze until solid, about 2 hours. Then, wrap each one individually in plastic wrap and place them all in a large freezer bag. They can be frozen for up to 2 months.
To serve frozen cupcakes, thaw them overnight in the refrigerator. Prepare your fresh raspberry topping just before serving. This make-ahead trick is perfect for getting a head start on holiday baking or just having a sweet treat ready for unexpected guests.
Tips and Advice for Success
- Don’t Overfill: Leave a tiny bit of space at the top of the liner. The cheesecakes will puff slightly as they bake.
- Patience with Chilling: I know it’s hard to wait, but the long chill is what gives these their perfect cheesecake consistency.
- Drain Thawed Berries: If using frozen raspberries in the filling, thaw them in a sieve over a bowl and pat them very dry with paper towels. Extra moisture can make the batter runny.
- If you love the combination of fruit and creamy cheesecake, you must explore our other creations like the tropical Mango Tango Cheesecake Cake or the decadent Banana Caramel Peanut Butter Cheesecake.
Presentation Ideas to Impress
- Dust with a light snowfall of powdered sugar just before serving.
- Add a tiny mint leaf next to the fresh raspberry for a pop of green.
- Serve on a beautiful cake stand or a white platter to make the colors pop.
- For a party, create a dessert bar with these, some Zesty Lemon Meringue Pie Cannolis, and a rich Triple Chocolate Mousse Cake for the ultimate sweet spread.
6 Delicious Recipe Variations to Try
Love this base recipe? Here are some fun twists:
- Mixed Berry Bliss: Swap the raspberries for a mix of blueberries, blackberries, and chopped strawberries.
- Lemon Raspberry: Add the zest of one lemon to the cheesecake batter for a bright, citrusy kick.
- Chocolate Crust: Use chocolate graham crackers or Oreo crumbs (without the filling) for the crust base.
- Swirl Design: Instead of folding berries in, fill the cups with plain batter, then add a small spoonful of raspberry jam and swirl with a toothpick.
- White Chocolate Raspberry: Fold ½ cup of melted and cooled white chocolate into the batter before adding the berries.
- Mini Chocolate Chip: Fold ½ cup of mini chocolate chips into the batter for a fun texture surprise.
Common Mistakes to Avoid
Mistake 1: Using Cold Ingredients
This is the number one cause of lumpy cheesecake batter. Cold cream cheese doesn’t blend smoothly with sugar, leading to tiny lumps that won’t bake out. Cold eggs can cause the batter to break or curdle. Always plan ahead and let your cream cheese, eggs, and sour cream sit on the counter for at least an hour. The cream cheese should feel soft to the touch. This simple step ensures a silky, professional-quality filling.
Mistake 2: Overbaking the Cheesecakes
It’s easy to think they need to be completely firm in the center, but that leads to dry, dense cupcakes. Cheesecake continues to set as it cools. The perfect doneness is when the edges are set but the center, about the size of a quarter, still has a slight jiggle when you gently shake the pan. Remember, they will finish setting in the fridge. Follow the cooling-in-the-oven trick to prevent sudden temperature changes that cause cracks.
Mistake 3: Skipping the Chill Time
You simply cannot serve these right out of the oven. The texture will be loose and sunken. The chilling process is when the cheesecake structure fully sets, becoming firm and sliceable. Rushing this step means a runny mess. For the best results, chill for the full time—overnight is ideal. Your patience will be rewarded with the perfect creamy, dreamy texture that makes cheesecake so special.
Mistake 4: Not Draining Thawed Frozen Berries
Frozen berries release a lot of water as they thaw. If you dump that liquid into your batter, you add unwanted moisture that can prevent proper setting. Always thaw frozen berries in a colander or sieve. Let the excess juice drip away, then gently pat the berries dry with a few paper towels. This keeps your batter thick and ensures your cupcakes bake up perfectly. You can use that flavorful juice in the topping or a smoothie—great for reducing food waste!
Your Raspberry Cheesecake Cupcake Questions, Answered
Can I make these gluten-free?
Absolutely! To make gluten-free raspberry cheesecake cupcakes, simply use a certified gluten-free graham cracker or cookie to make your crumbs for the crust. Also, ensure that the 2 tablespoons of all-purpose flour in the filling is replaced with a 1:1 gluten-free baking flour blend or a tablespoon of cornstarch. This small swap will make the entire recipe safe for those with gluten sensitivities without compromising the wonderful texture.
Why did my cheesecake cupcakes crack on top?
Cracking usually happens from one of two things: overmixing or sudden temperature change. Overmixing after adding the eggs incorporates too much air, which rises and then collapses, causing cracks. Mix just until each ingredient is combined. The second cause is going from a hot oven to a cool counter. That’s why we let them cool slowly in the turned-off oven with the door ajar. It’s a gentle transition that helps the delicate custard set without stress. A small crack is still tasty, but these tips help prevent them.
Can I use a different fruit for the topping?
Of course! The recipe is very versatile. Blueberries, blackberries, or a mix of berries work wonderfully. For a richer sauce, try cherries. Simply swap the raspberries in the topping for an equal amount of your chosen fruit. You may need to adjust the sugar slightly depending on the fruit’s natural sweetness. A strawberry topping is also a classic and delicious choice. Feel free to get creative with what’s in season or what you love.
How do I know when they are done baking?
Visual and tactile clues are your best friends. The edges of the cupcakes will look puffed and set. If you gently shake the muffin tin, the centers should have a slight jiggle, like Jell-O, but should not look wet or liquidy. A toothpick inserted near the edge should come out clean, but the very center might still be a bit soft. They will continue to firm up as they cool. It’s better to slightly under-bake than over-bake for a creamy result.
Can I freeze the finished cupcakes?
You can, but with one important step: freeze them *before* adding the fresh raspberry topping. Place the fully chilled, plain cheesecake cupcakes on a tray and freeze until solid. Then wrap each one tightly in plastic wrap and store in a freezer bag for up to 2 months. Thaw overnight in the fridge. Make the fresh raspberry sauce the day you plan to serve them for the best texture and flavor. The crust may be slightly softer after thawing, but still delicious.
What’s the purpose of the sour cream?
Sour cream adds a wonderful tangy flavor that balances the sweetness of the cream cheese and sugar. More importantly, it adds moisture and fat, which contributes to the luxuriously creamy, smooth texture of the filling. It helps prevent the cheesecake from becoming dry or grainy. If you don’t have it, full-fat plain Greek yogurt is the best substitute, as it has a similar texture and tang.
Do I have to use cupcake liners?
Liners are highly recommended. They make removal incredibly easy and clean, and they help the cupcakes hold their shape. Without liners, you risk the crust sticking to the pan, and the delicate cheesecake can be hard to get out in one piece. If you must go liner-free, be sure to generously grease the muffin tin wells with butter or non-stick spray.
My filling is runny. What went wrong?
A runny filling is usually due to under-mixing the cream cheese base, using ingredients that weren’t at room temperature (causing the batter to break), or adding too much liquid from undrained berries. Also, double-check that you used full-fat block cream cheese, not the spreadable kind in a tub, which has different moisture and stabilizer content. Properly creamed, room-temperature ingredients are the foundation of a thick, perfect batter.
How far in advance can I make these?
These are a fantastic make-ahead dessert. You can bake and chill the cupcakes (without topping) up to two days in advance. Store them covered in the fridge. Prepare the raspberry topping up to one day ahead and keep it in a separate container in the refrigerator. Assemble by spooning the topping over the cupcakes just a few hours before serving to keep the crust from getting too soggy. This makes party planning a breeze.
Can I make one large cheesecake instead?
Yes, you can adapt this recipe for a 7-inch or 8-inch springform pan. You’ll need to increase the baking time to about 45-55 minutes, or until the center is just set with that familiar slight jiggle. Use the same slow cooling method. Be sure to press all of the crust mixture into the bottom of the pan. For more large-format inspiration, check out our full collection of stunning cheesecake recipes that are perfect for any celebration.
I hope you and your loved ones enjoy making and eating these Delightful Raspberry Cheesecake Cupcakes as much as we do. They’re little bites of joy that prove the best things really do come in small packages. Happy baking!
Equipment
- Grand bol
- Fouet
- Spatule
- Plaque à pâtisserie
- Papier sulfurisé
Ingredients
- 1.5 tasse chapelure de biscuits Graham
- 0.25 tasse sucre granulé
- 0.5 cuil. à café cannelle en poudre facultatif
- 6 cuil. à soupe beurre non salé, fondu
- 16 oz fromage à la crème, ramolli
- 0.5 tasse sucre granulé
- 1 cuil. à café extrait de vanille
- 2 grand œufs
- 0.33 tasse crème aigre
- 2 cuil. à soupe farine tout usage
- 1 tasse framboises fraîches ou congelées, décongelées et égouttées
- 1 tasse framboises fraîches
- 2 cuil. à soupe sucre granulé
- 1 cuil. à café jus de citron
Instructions
- Préchauffez votre four à 163°C et tapissez un moule à muffins de 12 tasses avec des caissettes.
- Dans un bol moyen, mélangez les chapelures de biscuits Graham, le sucre et la cannelle. Versez le beurre fondu et mélangez jusqu'à ce que les chapelures soient uniformément enrobées.
- Déposez une cuillère à soupe bien remplie du mélange dans chaque caissette et appuyez pour former la croûte. Faites cuire pendant 8-10 minutes jusqu'à ce qu'elle soit prise.
- Dans un grand bol, battez le fromage à la crème ramolli et le sucre jusqu'à ce que le mélange soit lisse. Ajoutez la vanille et les œufs un à un, en mélangeant jusqu'à incorporation.
- Incorporez la crème aigre et la farine jusqu'à ce que le mélange soit complètement homogène. Incorporez délicatement les framboises fraîches.
- Répartissez la pâte aux framboises entre les croûtes refroidies, en remplissant presque jusqu’au bord. Faites cuire pendant 18-22 minutes, jusqu'à ce que les centres aient une légère tremblotte.
- Laissez refroidir dans le four pendant 10 minutes, puis transférez sur une grille pour refroidir complètement. Réfrigérez pendant au moins 2 heures.
- Dans une petite casserole, combinez les framboises, le sucre et le jus de citron. Faites cuire à feu moyen pendant 5-7 minutes, en écrasant doucement jusqu'à ce que la sauce épaississe. Laissez refroidir complètement.
- Déposez la sauce aux framboises sur les cupcakes refroidis et garnissez d'une framboise fraîche. Servez et profitez !