
No-Bake Pineapple Heaven Cheesecake Dessert: A Tropical Escape in Your Kitchen
Picture this: a sunny afternoon, the scent of tropical pineapple wafting through your kitchen, and a dessert that’s ready without ever turning on the oven. That’s the magic of this No-Bake Pineapple Heaven Cheesecake. It’s my go-to recipe when friends drop by unexpectedly or when I just need a splash of sunshine on a cloudy day. Let’s make something delightful.
The Story Behind This Tropical Treat
This recipe feels like a family heirloom, even though I stumbled upon it just a few summers ago. I was searching for a dessert that could beat the heat—no baking required! The classic combination of creamy cheesecake and bright pineapple just clicked. It reminds me of old-fashioned “icebox” cakes, where clever cooks used the refrigerator to create magic. My modern twist is the layer of crushed pineapple nestled right in the middle, giving every bite a juicy burst. It’s a little taste of paradise, no passport needed.
Why You’ll Love This Pineapple Cheesecake Dessert
First, it’s incredibly easy. You won’t mess with a hot oven or worry about a cracked cake. Second, the flavors are pure sunshine: creamy, sweet, and tangy all at once. Third, it’s a crowd-pleaser. Kids adore it, and adults appreciate its light, refreshing taste. It’s the dessert that says “relax and enjoy” louder than any fancy, complicated bake.
Perfect Occasions for This No-Bake Dessert
- Summer Picnics & BBQs: It travels well and stays cool.
- Potluck Parties: It looks gorgeous in a 9×13 dish, ready to share.
- Weeknight Treats: Because sometimes you need a little heaven on a Tuesday.
- Holiday Gatherings: Its bright colors and flavors break from the usual rich winter fare.
Ingredients for Your Pineapple Heaven Cheesecake
Gather these simple ingredients. Quality matters here, especially for the cream cheese and fruit.
- Crust: 2 cups graham cracker crumbs, ½ cup melted butter.
- Cheesecake Filling: 2 cups softened cream cheese, 1 cup powdered sugar, 2 cups heavy whipping cream.
- Fruit Layer: 1 can (20 oz) crushed pineapple, drained well.
- Topping & Garnish: 1 can (20 oz) pineapple rings, drained; fresh raspberries; extra whipped cream.
Smart Substitutions If You Need Them
Don’t stress if you’re missing something. Here are easy swaps:
- Graham Cracker Crust: Use digestive biscuit crumbs or even ground-up vanilla wafers.
- Heavy Whipping Cream: Full-fat coconut cream can work for a subtle tropical twist.
- Canned Pineapple: Fresh pineapple, finely chopped and drained, is fantastic.
- Raspberry Garnish: Sliced strawberries, blueberries, or a mint sprig look just as lovely.
Crafting Your No-Bake Pineapple Cheesecake: A Step-by-Step Guide
Step 1: Building the Foundation
Take your graham cracker crumbs and pour the melted butter over them. Mix until it looks like wet sand. Press this mixture firmly into the bottom of your 9×13 dish. You want a solid, even crust that will hold all the creamy goodness above. A flat-bottomed glass works great for pressing.
Pro tip: If your crumbs seem too dry, add a touch more butter. The crust should hold together when pressed.
Step 2: Creating the Creamy Cloud
In a large bowl, beat the softened cream cheese and powdered sugar. Start slow to avoid a powdered sugar cloud, then increase speed until it’s perfectly smooth and lump-free. In another bowl, whip the heavy cream until it forms stiff, fluffy peaks. Gently fold the whipped cream into the cream cheese mixture. This folding motion keeps the filling light and airy.
Chef’s tip: Ensure your cream cheese is truly softened. Cold cream cheese will make your filling grainy.
Step 3: Layering the Tropical Sunshine
Spread half of your fluffy cream cheese mixture over the crust. Smooth it into an even layer. Now, take your well-drained crushed pineapple and sprinkle it evenly over this first creamy layer. The crushed pineapple will seep its sweet juice into the cheesecake, creating that wonderful “heaven” layer. Then, spread the remaining cream cheese mixture over the pineapple, sealing it in.
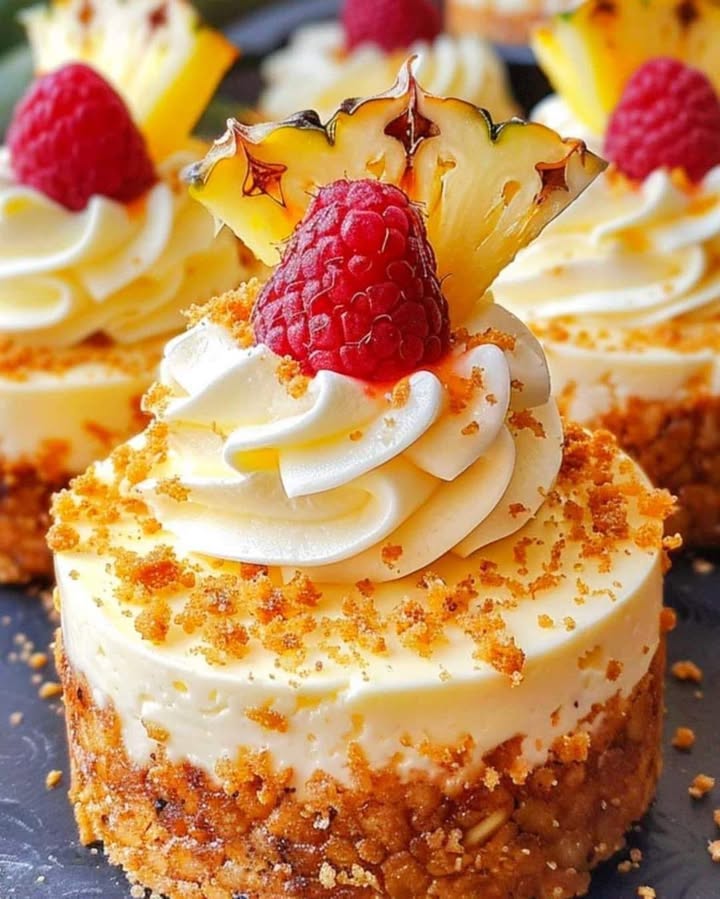
Step 4: The Final Garnish & Chill
Arrange the drained pineapple rings on top in a pretty pattern. Dot fresh raspberries between them. Add dollops of whipped cream for extra luxury. Now, the most important step: cover the dish and refrigerate it for at least 4 hours, preferably overnight. This chill time lets the layers set and the flavors marry into a perfect, sliceable dessert.
Timeline for Your Dessert
- Prep Time: 20 minutes
- Chill Time: 4 hours minimum
- Total Time: 4 hours 20 minutes
- Servings: 12 generous portions
A Chef’s Secret for the Best Texture
The secret is in the draining. Drain the crushed pineapple and the pineapple rings extremely well. Pat them with a paper towel if needed. Excess liquid can make your creamy layers soggy and prevent proper setting. Well-drained fruit means a clean, firm slice and intense pineapple flavor.
A Little Extra Fact
Pineapple contains an enzyme called bromelain. It’s why fresh pineapple can’t be used in gelatin desserts—it breaks down the proteins! In this no-bake cheesecake, using canned pineapple is perfect because the canning process neutralizes that enzyme, so your creamy layers stay perfectly intact.
Equipment You’ll Need
- 9×13 inch baking dish
- Two mixing bowls (one large)
- Electric mixer or strong whisk
- Spatula for folding and spreading
- Measuring cups and spoons
Storing Your Pineapple Cheesecake Dessert
Keep the dessert covered in its dish in the refrigerator. It will stay fresh and delicious for up to 3 days. The crust may soften slightly over time, but the flavors will still be wonderful.
For longer storage, you can freeze individual slices. Wrap slices tightly in plastic wrap and place them in a freezer-safe container for up to a month. Thaw in the refrigerator before serving.
Always use an airtight cover or wrap. This prevents the dessert from absorbing other refrigerator odors and keeps the whipped cream topping fresh.
Tips and Advice for Success
- Use full-fat, block-style cream cheese for the best texture and stability.
- Chill your heavy whipping cream before whipping—it whips faster and higher.
- If you’re in a hurry, you can set the dessert in the freezer for 1.5 hours instead of the fridge for 4. Just don’t let it freeze solid.
- Garnish with fresh berries just before serving so they stay bright and perky.
Presentation Ideas to Wow Your Guests
- Serve on individual plates with a mint leaf beside the pineapple ring.
- Drizzle a little caramel sauce over the top for a “pineapple upside-down cake” vibe.
- Use a star-shaped cookie cutter to cut the pineapple rings into fun shapes for kids.
- Present the whole dish on a tropical-themed tray with other fruit around it.
Healthier & Fun Variations
Want to tweak this tropical pineapple cheesecake? Here are six inspired ideas:
- Lighter Version: Swap cream cheese for Greek yogurt and use a light whipped topping. The tangy yogurt pairs beautifully with pineapple.
- Coconut Dream: Add ½ cup of toasted coconut flakes to the crust and use coconut cream instead of heavy whipping cream.
- Berry Medley: Replace the crushed pineapple layer with a mix of mashed raspberries and blueberries.
- Citrus Twist: Add the zest of one lime or orange to the cream cheese filling for an extra zing.
- Chocolate-Dipped: Serve each slice with a side of dark chocolate sauce for dipping—a surprising but delicious combo.
- Individual Parfaits: Layer the components in clear glasses for single-serving parfaits. Perfect for a party buffet.
More Delicious No-Bake Ideas
If you love easy, no-bake treats like this Pineapple Heaven Cheesecake, you might also enjoy a refreshing Festive Non-Alcoholic Sangria for parties, a vibrant Rainbow Cheesecake Delight for birthdays, a classic Lemon Strawberry Cheesecake, or even fun Butterfinger Caramel Truffles. You can explore all these and more in our collection of no-bake recipes.
Common Mistakes to Avoid
Mistake 1: Using Cold Cream Cheese
Cold cream cheese will never blend smoothly with the powdered sugar. You’ll end up with a lumpy, grainy filling instead of a creamy cloud. Always let your cream cheese sit out on the counter for at least an hour before starting. If you forget, you can soften it slightly in the microwave for a few seconds, but be careful not to melt it.
Mistake 2: Not Draining the Pineapple Well
This is the most common pitfall. Extra pineapple juice will seep into your layers, making the crust soggy and preventing the dessert from setting properly. After draining the cans, take an extra minute to press the fruit in a sieve or even pat it gently with a paper towel. Dry fruit means a perfect slice.
Mistake 3: Skipping the Long Chill Time
Impatience leads to a soupy dessert. The refrigeration time is not just for cooling; it’s essential for the structure to set. The whipped cream and cream cheese need time to firm up. If you try to serve it after just two hours, it will be messy and difficult to portion. Plan ahead and give it the full four hours, or even overnight.
Mistake 4: Over-whipping or Under-whipping the Cream
Heavy cream should be whipped to stiff peaks—firm enough that a dollop holds its shape. Under-whipped cream will be loose and make the filling runny. Over-whipped cream can turn grainy and start to separate. Watch closely as you whip; stop when the whisk leaves clear, firm trails in the cream.
Fresh Ingredients Matter
Using quality ingredients makes a real difference in taste and texture. For more information on food quality and nutrition, you can refer to resources like the USDA’s resources on food transparency.
Frequently Asked Questions
Can I use fresh pineapple instead of canned?
Yes, you can. Fresh pineapple needs to be finely chopped or crushed. Crucially, you must drain it very, very well, as fresh pineapple releases more juice. You might even want to gently press the chopped fruit in a clean towel to remove excess liquid. The flavor will be brighter and more vibrant, but the extra draining step is key to success.
How long can this dessert stay in the fridge?
This no-bake cheesecake dessert will keep beautifully in the refrigerator for up to 3 days. Make sure it is covered tightly with plastic wrap or a lid to prevent it from drying out or absorbing odors. The crust will soften a bit by day three, but the flavors will still be delightful. It’s not recommended to keep it beyond four days.
Can I freeze the Pineapple Heaven Cheesecake?
You can freeze it, but with some considerations. Freeze individual slices wrapped tightly in plastic wrap and then placed in a freezer bag. The creamy layers freeze well, but the graham cracker crust may become a bit softer upon thawing. Thaw the slices in the refrigerator for several hours before serving. This is a great way to save leftovers for a future treat.
What can I use if I don’t have graham crackers?
Several alternatives work perfectly. Digestive biscuits are a common substitute. You could also use plain vanilla wafers, shortbread cookies, or even crushed pretzels for a salty-sweet twist. Just crush them to a fine crumb and use the same amount (2 cups) with the same ½ cup of melted butter to bind.
Is there a way to make this dessert less sweet?
Absolutely. You can reduce the powdered sugar in the filling from 1 cup to ¾ or even ½ cup, depending on your preference. Also, using unsweetened canned pineapple or fresh pineapple (which is naturally less sweet than canned syrup-packed fruit) will help. Taste the filling before folding in the whipped cream to adjust.
Can I make this in a springform pan for a round cake?
Yes, a 9-inch springform pan works well. Just press the crust into the bottom of the pan and follow the same layering steps. The chill time is the same. When serving, you can release the springform sides for a beautiful round presentation. The slices will be taller and more like a traditional cheesecake slice.
My filling seems too runny. What did I do wrong?
A runny filling usually points to two issues: the cream wasn’t whipped to stiff peaks, or the pineapple wasn’t drained well enough. Also, ensure your cream cheese was full-fat and properly softened. Runny filling can still set with extra chill time (sometimes 6+ hours), but for best results, whip the cream firmly and drain the pineapple thoroughly.
Can I add other fruits to this recipe?
You can certainly add other fruits. Chopped mango or peaches would be a great tropical addition. If using berries, like strawberries, chop them and drain any excess juice well. Avoid very watery fruits like watermelon. The key is to ensure any added fruit is well-drained so it doesn’t compromise the structure of the creamy layers.
Do I need an electric mixer?
An electric mixer (hand or stand) is highly recommended for whipping the heavy cream and beating the cream cheese smooth. Doing this by hand with a whisk is possible but will require significant effort and time. For the cream, especially, an electric mixer ensures you get the necessary stiff peaks for a stable dessert.
Can this be made ahead for a party?
This dessert is ideal for making ahead! In fact, making it the day before your party is the best plan. The extended chill time in the refrigerator overnight means it will be perfectly set, firm, and ready to serve when guests arrive. Garnish with the pineapple rings, raspberries, and whipped cream dollops just before serving to keep everything looking fresh.
Your Taste of Heaven is Ready
This No-Bake Pineapple Heaven Cheesecake Dessert is more than just a recipe. It’s a promise of easy joy, a burst of tropical flavor, and a guaranteed happy ending to any meal. With its simple steps and forgiving nature, it’s the dessert that lets you relax and still shine. So whip it up, chill it down, and get ready for the compliments. Every creamy, sunny bite is a little piece of heaven right from your own kitchen. Enjoy!
Equipment
- Grand bol
- Fouet
- Spatule
- Plat de cuisson 9x13 pouces
- Papier sulfurisé
Ingredients
- 2 tasses miettes de biscuit graham
- ½ tasse beurre fondu
- 2 tasses fromage à la crème ramolli
- 1 tasse sucre en poudre
- 2 tasses crème épaisse
- 1 boîte ananas écrasé égoutté
- 1 boîte tranches d'ananas égouttées
- q.s. framboises fraîches
- q.s. crème fouettée extra
Instructions
- Mélangez les miettes de biscuit graham avec le beurre fondu jusqu'à ce que cela ressemble à du sable humide; pressez dans le fond d'un plat de 9x13 pour former une croûte solide.
- Battez le fromage à la crème ramolli et le sucre en poudre jusqu'à ce que le mélange soit lisse; fouettez la crème épaisse jusqu'à ce qu'elle forme des pics fermes.
- Incorporez délicatement la crème fouettée au mélange de fromage à la crème; étalez la moitié sur la croûte et ajoutez l'ananas écrasé bien égoutté dessus.
- Étalez le reste du mélange de fromage à la crème sur l'ananas; disposez les tranches d'ananas sur le dessus, décorez avec des framboises et des cuillerées de crème fouettée.
- Couvrez et réfrigérez pendant au moins 4 heures, de préférence toute la nuit, avant de servir.