
Introduction: Your New Favorite Pumpkin Pie Cheesecake Recipe
Last Thanksgiving, I stood in my kitchen staring at two dessert recipes. My family wanted pumpkin pie. My best friend begged for cheesecake. I couldn’t choose, so I didn’t. That’s when I discovered the magic of combining both into one incredible dessert.
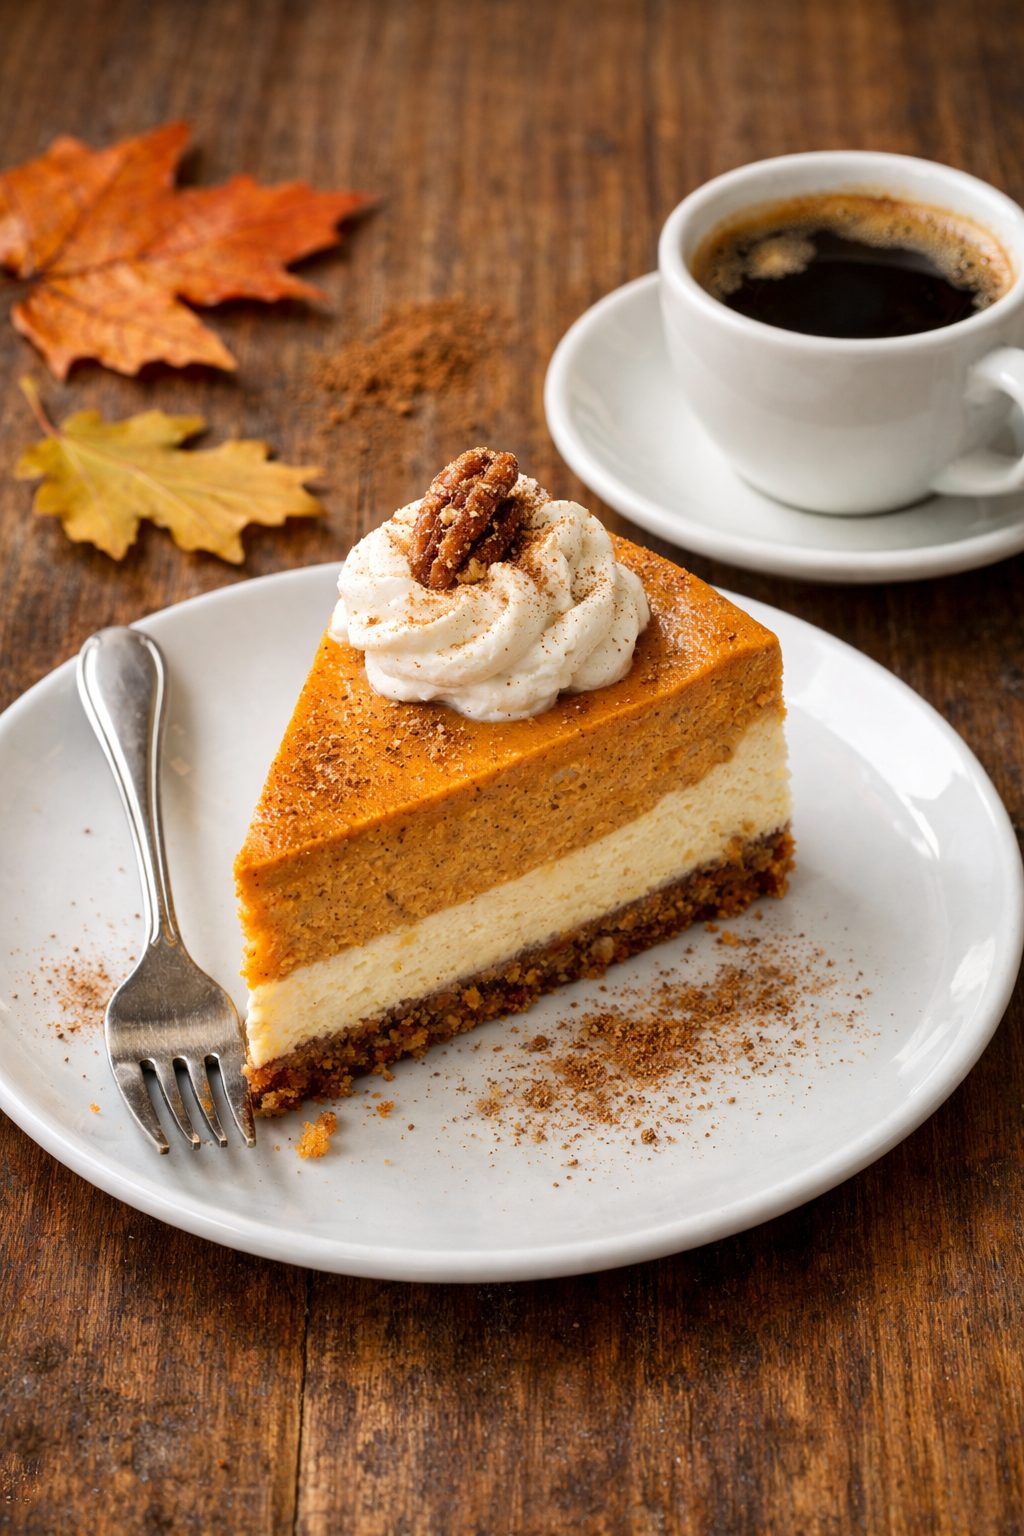
This pumpkin pie cheesecake recipe brings together everything you love about fall. The creamy tang of cheesecake meets the warm spices of pumpkin pie. It’s rich without being heavy. Sweet but not overpowering. Every bite tastes like October wrapped in a cozy blanket.
Fall arrives with cooler air and changing leaves. It also brings cravings for anything pumpkin-flavored. This dessert satisfies those cravings perfectly. The smooth pumpkin filling sits on a buttery graham cracker base. The cream cheese adds richness that regular pumpkin pie can’t match. Your guests will ask for the recipe before they finish their first slice.
Here’s the best part. I’m sharing an easy pumpkin pie cheesecake that requires no oven time. That’s right—this is a pumpkin pie cheesecake no bake version. You won’t heat up your kitchen or worry about cracked tops. Just mix, chill, and serve. Perfect for busy holidays when your oven is already full of turkey and side dishes.
The no-bake method also means less stress. No water baths to manage. No waiting for the oven to preheat. You can make this dessert the day before your gathering. It actually tastes better after sitting in the fridge overnight. The flavors blend together and the texture becomes perfectly firm.
Ingredients You’ll Need for This Easy Pumpkin Pie Cheesecake
Great news—you probably have most of these ingredients already. Everything is available at regular grocery stores across the USA. I buy mine at Walmart or Target without any trouble.
For the Crust:
- 2 cups graham cracker crumbs (about 16 full crackers)
- 1/4 cup granulated sugar
- 1/2 cup melted butter (one stick)
- 1/2 teaspoon cinnamon (optional but recommended)
For the Filling:
- 16 ounces cream cheese (two 8-ounce blocks, softened to room temperature)
- 1 cup powdered sugar
- 1 can (15 ounces) pumpkin puree
- 1 teaspoon vanilla extract
- 1 1/2 teaspoons pumpkin pie spice
- 1/2 teaspoon cinnamon
- 8 ounces whipped topping (like Cool Whip, thawed)
Let me talk about the pumpkin for a second. I always reach for Libby’s pumpkin when making this recipe. The Libbys pumpkin cheesecake recipe tradition exists for good reasons. Their puree has the perfect consistency and sweetness. It’s not watery like some store brands. The color is rich and orange. You’ll find it in the baking aisle of any major grocery store in the USA. Stock up during fall because it sometimes sells out around Thanksgiving.
Make sure you buy pure pumpkin puree. Don’t accidentally grab pumpkin pie filling. The pie filling already contains sugar and spices. Using it will make your cheesecake too sweet and throw off the texture.
Room temperature cream cheese is critical. Cold cream cheese creates lumps that won’t mix out. I leave mine on the counter for about an hour before starting. Some people microwave it for 10 seconds, but I find that makes it too soft.
You can find all these ingredients at Kroger, Safeway, Publix, or any regional chain. The graham crackers are usually near the cookies. Cream cheese lives in the dairy section. Pumpkin pie spice sits with the baking spices. If you can’t find pumpkin pie spice, make your own by mixing cinnamon, ginger, nutmeg, and cloves.
Preparing the Perfect No-Bake Crust
The crust sets the foundation for everything else. A good crust needs to be firm enough to slice cleanly but not so hard it shatters. This no-bake version achieves that balance beautifully.
Start by crushing your graham crackers. I use a food processor because it’s fast and creates even crumbs. You can also put the crackers in a sealed plastic bag and crush them with a rolling pin. This method works great and lets you take out some stress. Either way, you want fine crumbs with no large chunks.
Pour the graham cracker crumbs into a medium bowl. Add the sugar and cinnamon if using. The cinnamon isn’t traditional for all cheesecakes, but it adds warmth that complements the pumpkin filling. Stir the dry ingredients together with a fork.
Melt your butter in the microwave. It should be fully liquid but not scorching hot. Pour it over the crumb mixture. Use a fork or your hands to mix everything together. The mixture should look like wet sand. When you squeeze a handful, it should hold together in a clump.
Here’s where texture matters. Too little butter and your crust will be dry and crumbly. Too much makes it greasy. The mixture should be moist enough to pack down but not dripping with butter. If it seems too dry, add another tablespoon of melted butter. If it’s too wet, add more graham cracker crumbs.
Choose your pan wisely. A 9-inch springform pan works best for this pumpkin pie cheesecake no bake recipe. The removable sides make serving easy. You can also use a 9×9 inch square pan if you want to make pumpkin pie cheesecake bars. Both options work with the same crust recipe.
Press the crust mixture firmly into the bottom of your pan. I use the bottom of a measuring cup to pack it down. Push hard enough that the crust feels solid. Pay special attention to the edges where the crust meets the pan sides. Those spots tend to stay loose if you don’t press them well.
For bars, press the crust about halfway up the sides of your square pan. This creates nice edges when you cut the bars later. For a traditional round cheesecake, keep the crust on the bottom only. Some people like bringing it up the sides slightly, but I prefer more filling and less crust.
Place your crust in the refrigerator while you prepare the filling. Thirty minutes of chilling helps it firm up. This step isn’t absolutely necessary, but it makes the crust sturdier. A chilled crust won’t shift around when you spread the filling on top.
The same crust method works if you’re making pumpkin pie cheesecake bars for a crowd. Simply use a 9×13 inch pan instead. Press the crust across the entire bottom. You’ll get more servings and an easier dessert to transport to parties.
My favorite tip? Line your pan with parchment paper first. Let the paper hang over the edges. After the cheesecake chills, you can lift the whole thing out using the paper as handles. This trick makes cutting and serving so much cleaner. No fighting with a spatula to get the first slice out.

Making the Creamy Pumpkin Pie Cheesecake Filling
With your crust chilling nicely in the fridge, you’re ready for the fun part. The filling comes together surprisingly fast. I usually have mine done in less than ten minutes. No complicated techniques or fancy equipment needed here.
Pull out your cream cheese blocks. Remember, they need to be soft. Not melted, not cold, but somewhere in between. I learned this the hard way when I once tried mixing cold cream cheese and ended up with a lumpy disaster. My stand mixer protested loudly and the texture was terrible. Room temperature is non-negotiable.
Grab a large mixing bowl and add your softened cream cheese. Beat it with an electric mixer on medium speed for about two minutes. You want it smooth and fluffy. This step might seem excessive, but it makes all the difference. Those two minutes eliminate lumps before you add anything else. The cream cheese should look lighter in color and airy in texture.
Add the powdered sugar gradually. I usually dump in half, beat for thirty seconds, then add the rest. Powdered sugar flies everywhere if you’re not careful. Turn your mixer on low first, then increase the speed once the sugar incorporates. Beat until everything looks uniform and creamy.
Now comes the star ingredient. Open your can of Libby’s pumpkin and add the entire contents to your bowl. The orange color is gorgeous against the pale cream cheese. Pour in your vanilla extract too. Then add your pumpkin pie spice and cinnamon. If you’re following a pumpkin pie recipe you’ll recognize these same warm spices. They’re what make fall baking smell so incredible.
Beat everything together on medium speed. Watch as the white cream cheese transforms into a beautiful pumpkin orange. Mix for about one minute, stopping once to scrape down the sides of the bowl. You want complete integration. No white streaks should remain. The mixture should look smooth and smell like Thanksgiving morning.
Here’s where technique matters. Turn off your mixer completely. Grab your container of whipped topping. This is one ingredient you absolutely cannot beat with electric mixers. Doing so will deflate the air bubbles and ruin the light texture. Instead, use a rubber spatula to fold it in gently.
Folding is different from stirring. Scrape the spatula along the bottom of the bowl, then lift it up through the middle. Rotate the bowl slightly and repeat. The motion is more like turning the mixture over on itself. This technique keeps the air in the whipped topping. It might take fifty or sixty folds to fully incorporate everything. You’ll know you’re done when you can’t see any white streaks of whipped topping.
The final filling should be light, fluffy, and mousse-like. Not dense like traditional baked cheesecake. This texture is what makes the no-bake version special. It melts on your tongue instead of sitting heavy in your stomach. Similar to the texture you’d get with cookie dough cheesecake, though obviously with completely different flavors.
Creating Beautiful Layers and Swirls
Funny enough, my most popular variation came from a happy accident. I was making this for a potluck and realized I’d only brought one container of whipped topping instead of the two I needed. Rather than run back to the store, I divided my filling in half. I made one batch with less whipped topping, creating a denser layer. The second batch used all my remaining whipped topping, making it lighter. I poured them in two separate layers and ended up with a layered pumpkin pie cheesecake recipe that everyone raved about.
You can recreate this intentionally. Make your filling as directed above, but divide it into two bowls before adding the whipped topping. To the first bowl, add only half the whipped topping and fold it in. This creates a denser, more intensely flavored layer. Pour this into your prepared crust and spread it evenly. Smooth the top with an offset spatula.
Add the remaining whipped topping to your second bowl and fold it in. This lighter mixture goes on top. The contrast is beautiful when you slice the finished cheesecake. You get a darker bottom layer and a paler top layer. The flavors are slightly different too, with the bottom being more concentrated pumpkin.
Want something even fancier? Try a pumpkin swirl cheesecake effect instead. This technique looks impressive but takes minimal effort. Make your filling as usual, but hold back about one cup before adding the pumpkin puree. That reserved portion stays plain cream cheese flavored. Add the pumpkin to the rest of your mixture and complete the recipe normally.
Pour your pumpkin filling into the crust and smooth the top. Then dollop spoonfuls of your reserved cream cheese mixture on top. Use the tip of a butter knife to swirl the two together. Draw the knife through in figure-eight patterns. Don’t overmix or you’ll lose the distinct swirl. Three or four passes with the knife is plenty. The finished top should have marbled streaks of cream and pumpkin.
I’ve seen variations of this technique on pumpkin cheesecake Allrecipes posts. Home bakers get creative with their swirls. Some add chocolate for contrast. Others use caramel sauce. One woman in the comments section mentioned using maple cream, which sounded absolutely amazing. The basic swirl technique works with whatever flavors appeal to you.
The pumpkin pie cheesecake Cheesecake Factory style is more uniform without swirls or layers. Their version has that signature dense, rich texture throughout. While our no-bake version won’t replicate their exact texture since theirs is baked, you can get closer by using less whipped topping. Reduce it to six ounces instead of eight for a denser result. Just know that the cheesecake will be heavier and richer, much like this guava cheesecake I make for special occasions.
The No-Bake Advantage and Proper Chilling Techniques
Once your filling sits perfectly in the crust, you face the easiest step. No preheating ovens. No water baths. No anxiously watching through the oven door hoping the top doesn’t crack. Just slide the whole pan into your refrigerator.
This is where the pumpkin pie cheesecake recipe no bake method really shines. Your oven stays free for other dishes. During Thanksgiving, this is crucial. I can’t tell you how many times I’ve juggled cooking schedules trying to fit everything in. Having one less thing competing for oven space feels like a small miracle.
The cheesecake needs at least four hours to set properly. I usually make mine the night before I plan to serve it. Overnight chilling gives you the best texture. The filling firms up completely and the flavors meld together beautifully. That extra time makes every bite taste more cohesive.
Here’s the thing about chilling time. You might be tempted to check it every hour. Don’t. Opening the fridge lets in warm air and can cause condensation on your cheesecake. Cover your pan loosely with plastic wrap before refrigerating. This protects the surface while still allowing air circulation. After two hours, you can press the plastic wrap directly onto the surface if you want extra protection.
How do you know when it’s ready? The center should be firm when you gently press it. Not rock solid like ice cream, but not jiggly either. Think of the consistency of set pudding. If the center still wobbles significantly, give it more time. I’ve never had one take longer than six hours to fully set.
Temperature matters here. Your refrigerator should be at 40°F or below. Warmer fridges take longer to set the cheesecake. If your fridge is packed full of other items, air can’t circulate well. Try to position your cheesecake where cold air flows freely around it. Middle shelf usually works best.
What About Baking Instead?
Some of you might prefer traditional baked cheesecake. I get it. There’s something satisfying about pulling a golden dessert from the oven. You can absolutely bake this recipe with a few modifications. The flavor profile stays the same, but the texture becomes denser and more classic.
For baked pumpkin cheesecake, you’d need to adjust the recipe slightly. Skip the whipped topping entirely. Instead, add two eggs to your cream cheese mixture for binding. Reduce the pumpkin puree to one cup instead of the full can. The eggs and lower moisture content help the cheesecake bake properly without becoming soupy.
Bake at 325°F for about 55 to 65 minutes. The edges should be set while the center still has a slight wobble. Turn off the oven and crack the door open. Let the cheesecake cool inside for one hour. This gradual temperature change prevents cracking. Then refrigerate for at least four hours before serving.
Honestly though? I rarely bake this anymore. The no-bake version tastes just as good with a fraction of the effort. It’s similar to how I prefer making mini pumpkin cheesecake versions for parties because they’re easier to serve. Sometimes the simpler method wins.
For pumpkin pie cheesecake bars, the chilling process is identical. Use your square pan, spread the filling evenly, and refrigerate. Bars actually chill slightly faster because they’re thinner than a full-height cheesecake. Three hours is usually sufficient. When ready to serve, lift the whole thing out using your parchment paper sling. Place it on a cutting board and slice into squares with a sharp knife. Wipe the knife clean between cuts for the neatest edges.
By the way, if you’re the type who likes pecans with your pumpkin, check out these pecan pie cheesecake bars for another fall flavor combination. They use a similar no-bake concept but with completely different toppings.
One last tip about chilling. If you’re in a genuine time crunch, you can pop the cheesecake in the freezer for two hours instead of refrigerating for four. This speeds up the setting process. Just don’t forget about it. A frozen cheesecake needs thirty minutes at room temperature before serving. Otherwise you’re basically eating pumpkin ice cream, which isn’t terrible but wasn’t what you planned.
Serving and Garnishing Your Pumpkin Pie Cheesecake
Presentation makes a huge difference with desserts. I’ve served this cheesecake plain and it disappeared quickly. But when I take five extra minutes to garnish it nicely? People pull out their phones before taking a bite. Food photos flood Instagram. Suddenly I’m the “amazing baker” even though the recipe is ridiculously simple.
The classic topping is whipped cream. Not the stuff from the can, though that works in a pinch. I’m talking about real whipped cream you make yourself. Pour a cup of heavy whipping cream into a cold bowl. Add two tablespoons of powdered sugar and half a teaspoon of vanilla. Beat with a mixer until stiff peaks form. This takes maybe three minutes. The fresh taste beats store-bought by miles.
Pipe the whipped cream around the edges of your cheesecake using a star tip. Or just dollop it on with a spoon if you’re not into fancy piping. Either way looks good. Sometimes I add a sprinkle of cinnamon or pumpkin pie spice on top of the whipped cream. The little specks of brown look rustic and smell amazing.
Caramel sauce is my second favorite topping. The sweet, buttery flavor pairs beautifully with pumpkin spices. I drizzle it over each slice right before serving. You can buy jarred caramel sauce at any grocery store. Trader Joe’s makes a salted caramel that’s particularly good. The salt cuts through the sweetness and adds complexity.
For a fancier presentation, try making your own caramel. Melt a cup of sugar in a heavy saucepan over medium heat. Don’t stir it, just swirl the pan occasionally. When it turns deep amber, remove from heat and carefully whisk in half a cup of heavy cream. The mixture will bubble violently, so be careful. Add a pinch of salt and let it cool. Homemade caramel tastes incredible and isn’t as hard as people think.
Candied pecans add crunch and visual interest. Toss pecan halves with maple syrup and a bit of cinnamon. Spread them on a baking sheet and roast at 350°F for ten minutes. Let them cool completely before scattering them on top of your cheesecake. The contrast between the creamy filling and crunchy nuts is wonderful.
Here’s something I discovered by accident. Crushed gingersnap cookies make an excellent garnish. I had leftover gingersnaps from making another dessert. I crushed a few and sprinkled them on top. The spicy ginger flavor complemented the pumpkin perfectly. Now I do this regularly, especially for Thanksgiving when I want something that looks fancy without much effort.
Chocolate shavings might sound weird with pumpkin, but trust me on this. Use a vegetable peeler to shave curls from a dark chocolate bar. The slight bitterness of dark chocolate balances the sweet pumpkin. It’s similar to how chocolate and pumpkin work together in Mexican mole sauce. Unexpected but delicious.
For holiday gatherings, I sometimes press mini chocolate chips into the sides of the cheesecake. This only works if you’ve made it in a springform pan and removed the ring. Press the chips gently around the perimeter while the cheesecake is still cold. They stick to the cream cheese and create a decorative border. Kids especially love this detail.
Slicing and Serving Tips
Getting clean slices takes a little technique. Fill a tall glass with very hot water. Dip your knife in the water, wipe it dry with a towel, then make your cut. Dip and wipe between every single slice. This keeps the knife warm and clean, preventing the filling from sticking and dragging.
I use a long, thin blade for the neatest cuts. My offset serrated knife works great. Some people swear by dental floss for cutting cheesecake. You hold a long piece of floss taut and press it down through the cheesecake. It works surprisingly well for pumpkin pie cheesecake bars where you need multiple straight cuts.
Serve slices on dessert plates with a fork. If you’re doing a buffet-style event, pre-slice the cheesecake but leave it assembled in the pan. Guests can lift out their own slice. Provide a serving spatula to make this easier. Those angled pie servers with the flat blade work perfectly.
Room temperature versus cold is a personal preference. I prefer serving this cheesecake cold, straight from the fridge. The texture is firmer and more refreshing. Some people like letting it sit out for fifteen minutes to soften slightly. Either way tastes good, so do what appeals to you.
This dessert fits any fall occasion. Obviously Thanksgiving is perfect. But don’t limit yourself to just one day. I’ve served this at Halloween parties with orange and black sprinkles on top. It works for autumn birthdays, harvest festivals, or casual Sunday dinners. Anytime someone craves pumpkin, this easy pumpkin pie cheesecake delivers.
Storing Leftovers Properly
Leftover cheesecake keeps well in the refrigerator for up to five days. Cover the pan tightly with plastic wrap or aluminum foil. If you’ve already cut slices, press plastic wrap directly against the cut edges. This prevents the surface from drying out or absorbing fridge odors.
Individual slices can be wrapped separately in plastic wrap and stored in an airtight container. This makes grabbing a quick dessert easy. I’ve been known to eat a slice for breakfast with my coffee. No judgment here. Cream cheese is basically dairy, right?
Freezing works beautifully with this recipe. Wrap the entire cheesecake tightly in two layers of plastic wrap, then cover with aluminum foil. It keeps in the freezer for up to two months. Thaw overnight in the refrigerator before serving. The texture stays remarkably good. I honestly can’t tell the difference between fresh and frozen.
For individual portions, freeze slices separately on a baking sheet until solid. Then wrap each one in plastic and store them all in a freezer bag. This lets you thaw single servings whenever a craving hits. My sister does this every fall. She makes three cheesecakes in one day, freezes them, and has dessert ready for months.
By the way, if you’re thinking about long-term healthy eating habits, this dessert obviously falls in the “occasional treat” category rather than everyday food. I mention this because I’ve gotten questions about making it healthier. You can reduce sugar slightly or use low-fat cream cheese, but it definitely changes the taste and texture. Sometimes a proper dessert is worth it.
Making This Recipe Work for Special Diets
Several readers have asked about dietary modifications. While this isn’t naturally gluten-free or vegan, you can adapt it with some ingredient swaps. The taste won’t be identical, but you’ll get close enough to satisfy most cravings.
For gluten-free versions, replace graham crackers with gluten-free graham crackers or cookies. Several brands make them now. Kinnikinnick and Pamela’s both work well. You can also use crushed gluten-free gingersnaps for extra flavor. The rest of the ingredients are naturally gluten-free, so that’s your only change.
Vegan versions require more creativity. Swap the cream cheese for vegan cream cheese. Kite Hill and Miyoko’s make decent options, though they’re pricier than regular cream cheese. Use coconut whipped cream instead of dairy-based whipped topping. Brands like So Delicious make this. For the butter in the crust, use vegan butter or coconut oil.
I’ll be honest—I haven’t perfected a vegan version yet. The texture comes out softer and doesn’t set quite as firmly. If you try this route, add an extra half cup of vegan cream cheese to compensate. Also, let it chill for at least six hours. One reader mentioned using cashew cream as a base with good results, though I haven’t tested that myself.
Dairy-free but not vegan? You have more options. Lactose-free cream cheese exists now. Use that with dairy-free whipped topping and dairy-free butter. The recipe works exactly the same otherwise. My neighbor has lactose intolerance and makes it this way regularly.
Holiday Table Presentation
Thanksgiving tables get crowded fast. Turkey, sides, bread, drinks—suddenly you’re out of space. Here’s my strategy. I place the pumpkin pie cheesecake recipe no bake on the dessert table or kitchen counter, not the main dinner table. This keeps the dining table less cluttered and builds anticipation for dessert.
If you’re bringing this to someone else’s house, transport it in the springform pan with the ring still attached. Cover the top with plastic wrap held up by toothpicks so it doesn’t touch the surface. Place the whole thing in a large flat-bottomed bag or box so it stays level during travel. Remove the ring after you arrive, right before serving.
For a dramatic presentation at the table, dim the lights slightly and bring out the cheesecake on a cake stand. Everyone loves a good food entrance. Add a few fall decorations around the base. Small pumpkins, colorful leaves, or cinnamon sticks look festive without being over the top.
Multiple desserts at your gathering? Label them with small cards. Write “Pumpkin Pie Cheesecake” on a decorative card and prop it in front. This helps guests who have allergies or dietary restrictions know what they’re choosing. It also sparks conversation when people see something interesting they want to try.
Speaking of multiple desserts, if you enjoy experimenting with different cheesecake flavors throughout the year, you’ll find plenty more inspiration in the cheesecake recipes section where creative variations keep things interesting season after season.
The best part about this dessert? It genuinely makes people happy. Food brings us together, especially during holidays when families gather. This pumpkin pie cheesecake recipe combines familiar flavors in a new way. It gives people something to talk about. I’ve watched complete strangers bond over discussing whether they prefer this to traditional pumpkin pie. That’s the magic of good food—it creates connections and memories that last long after the plates are empty.
Frequently Asked Questions
What makes this pumpkin pie cheesecake recipe unique?
The no-bake method sets this recipe apart from traditional versions. You get all the flavor of pumpkin pie and cheesecake combined without heating up your oven. The texture is lighter and more mousse-like than baked cheesecake, which many people prefer. It’s also faster and less stressful since there’s no risk of cracking or overbaking. The combination of cream cheese tang with warm pumpkin spices creates a flavor profile you won’t find in either dessert alone.
Can I use store-bought crust for this recipe?
Absolutely. Ready-made graham cracker crusts from the grocery store work fine. Look for them near the baking supplies. They come in 9-inch sizes that fit this recipe perfectly. Just pour your filling directly into the store-bought crust and chill as directed. The homemade crust tastes slightly better in my opinion, but the convenience of pre-made is hard to beat when you’re short on time. This works especially well for the pumpkin pie cheesecake no bake approach since the whole point is simplicity.
How do I make the pumpkin swirl in the cheesecake?
Reserve about one cup of your cream cheese mixture before adding the pumpkin puree. Complete the rest of the recipe normally with the pumpkin. Pour the pumpkin filling into your crust, then dollop spoonfuls of the reserved plain cream cheese mixture on top. Use a butter knife to draw figure-eight patterns through both layers. Make three or four passes with the knife—don’t overmix or you’ll lose the distinct swirl pattern. The contrast between orange and cream colors looks beautiful when you slice it.
Is there a way to make this recipe vegan?
Yes, though the texture changes slightly. Use vegan cream cheese brands like Kite Hill or Miyoko’s. Replace the whipped topping with coconut whipped cream. Substitute vegan butter or coconut oil in the crust. The biggest challenge is getting the filling to set properly since vegan cream cheese behaves differently. Add an extra half cup of vegan cream cheese and extend the chilling time to at least six hours. Some readers have reported success using cashew cream as a base, though I haven’t tested that variation personally.
How long does the cheesecake need to chill before serving?
Minimum four hours in the refrigerator for the filling to set properly. I strongly recommend making it the night before you plan to serve it. Overnight chilling gives you the best texture and allows the flavors to develop fully. The center should feel firm when you gently press it, not jiggly or soft. If you’re in a serious time crunch, you can freeze it for two hours instead, but then you’ll need to let it sit at room temperature for thirty minutes before serving.
Can I freeze the pumpkin pie cheesecake?
Definitely. This freezes beautifully for up to two months. Wrap the entire cheesecake tightly in two layers of plastic wrap, then cover with aluminum foil to prevent freezer burn. Thaw overnight in the refrigerator before serving. You can also freeze individual slices by placing them on a baking sheet until solid, then wrapping each separately in plastic wrap. Store wrapped slices in a freezer bag for easy single servings. The texture remains remarkably good after freezing.
What are some good alternatives to pumpkin puree?
Sweet potato puree works surprisingly well and tastes very similar. Roast sweet potatoes until soft, scoop out the flesh, and mash it smooth. You can also try butternut squash puree for a slightly different flavor. Some people use canned sweet potato, though I find the texture less consistent than pumpkin. If you can’t find pure pumpkin puree, making your own from a sugar pumpkin is possible but time-consuming. Roast pumpkin chunks until tender, then puree in a food processor and drain excess liquid through cheesecloth.
How can I make this recipe gluten-free?
Simply replace regular graham crackers with gluten-free graham crackers in the crust. Several brands like Kinnikinnick and Pamela’s make them. You can also use gluten-free gingersnap cookies for extra spice flavor. Crush them the same way you would regular crackers. All the other ingredients—cream cheese, pumpkin, whipped topping, spices—are naturally gluten-free. Just double-check your whipped topping label to make sure it doesn’t contain any unexpected wheat-based stabilizers, though most brands are fine.
Why is my no-bake cheesecake filling too runny?
The most common cause is cream cheese that wasn’t soft enough when you started. Cold cream cheese doesn’t incorporate properly and the mixture stays loose. Make sure your cream cheese sits at room temperature for at least an hour before mixing. Another issue might be over-mixing the whipped topping, which deflates it and removes the air that helps the filling set. Fold it in gently with a spatula instead of using a mixer. Finally, give it more chilling time—some fridges run warmer and need extra hours.
Can I make pumpkin pie cheesecake bars instead of a round cheesecake?
Absolutely, and they’re actually easier to serve for crowds. Use a 9×9 inch square pan for the same quantity, or a 9×13 inch pan if you want to double the recipe. Press your crust into the bottom of the pan, pour in the filling, and chill as directed. Bars often set slightly faster because they’re thinner. Line your pan with parchment paper that hangs over the edges so you can lift the whole thing out before cutting. Wipe your knife clean between cuts for the neatest edges. These pumpkin pie cheesecake bars travel well to potlucks and parties.
This dessert really does have everything going for it—easy preparation, incredible taste, and that perfect balance of familiar and special. Whether you’re making it for the first time or the fiftieth, I hope each slice brings a little extra joy to your table this fall.
Equipment
- Mixing Bowl
- Electric Mixer
- Rubber Spatula
- Springform Pan
- Rolling Pin
Ingredients
- 2 cups graham cracker crumbs about 16 full crackers
- 1/4 cup granulated sugar
- 1/2 cup melted butter one stick
- 1/2 teaspoon cinnamon optional but recommended
- 16 ounces cream cheese two 8-ounce blocks, softened to room temperature
- 1 cup powdered sugar
- 1 can (15 ounces) pumpkin puree
- 1 teaspoon vanilla extract
- 1 1/2 teaspoons pumpkin pie spice
- 1/2 teaspoon cinnamon
- 8 ounces whipped topping like Cool Whip, thawed
Instructions
- Crush graham crackers in a food processor or plastic bag until fine crumbs form.
- In a medium bowl, mix crushed graham crackers, sugar, and cinnamon (if using).
- Melt butter and pour over crumb mixture; mix until it resembles wet sand.
- Press crust mixture firmly into a 9-inch springform pan or 9x9 square pan.
- Chill the crust in the refrigerator for 30 minutes.
- In a large mixing bowl, beat softened cream cheese with an electric mixer until smooth and fluffy.
- Gradually add powdered sugar and mix until uniform and creamy.
- Add pumpkin puree, vanilla extract, pumpkin pie spice, and cinnamon; mix until well blended.
- Gently fold in thawed whipped topping using a spatula until fully incorporated.
- Pour pumpkin filling into chilled crust and smooth the top.
- Cover loosely and refrigerate for at least 4 hours, preferably overnight, until set.
- Serve cold, garnished with whipped cream, caramel sauce, pecans, or other toppings as desired.
Notes
Nutrition

Hello! I’m Sarah Mitchell, and I’m passionate about bringing creativity and innovation to baking. My love for baking started in high school when I first tried my hand at decorating cupcakes for a class project. What began as a fun hobby quickly became a full-time passion. I’ve spent the past decade working in bakeries and dessert shops, honing my skills in everything from simple cookies to intricate wedding cakes.
After working in some of the top bakeries across the country, I realized that baking was about more than just following recipes — it was about infusing your personality into each creation. At BakingSecret.com, I love creating recipes that push boundaries while staying true to the heart of classic baking. I specialize in creating delicious and visually stunning pastries that will wow your guests.
When I’m not baking, I enjoy teaching baking classes, trying out new cake decoration techniques, and traveling to find inspiration in global dessert traditions. I’m so excited to share my tips and tricks with you to help elevate your baking game!