
Strawberry Earthquake Cake: A Fun and Delicious Dessert
Have you ever wanted to bake something that feels like a little party in your kitchen? Strawberry Earthquake Cake is exactly that. It’s a playful, messy, beautiful dessert that combines box cake simplicity with the lush flavor of strawberries and cream cheese. The “earthquake” happens when you dollop a sweet filling on top of the batter and watch it sink and swirl as it bakes, creating gorgeous pockets of flavor. This recipe came to me during a spring baking session with my niece—we wanted something easy, festive, and a total crowd-pleaser. It was a hit, and now it’s my go-to for turning a simple box mix into a showstopping treat.
The Story Behind Earthquake Cakes
The concept of an “earthquake” or “dump” cake is a beloved tradition in home baking, especially across the Southern United States. It’s all about ease and surprise. You prepare a simple base, often a box mix, and then “dump” or dollop a rich topping on top before baking. As the cake cooks, the topping sinks, causing fissures and swirls—the “earthquake.” My version taps into the timeless combination of strawberries and cream cheese, reminiscent of a no-bake cheesecake but baked right into a moist cake. It’s a modern take on a classic, lazy-day baking method that always delivers joy and delicious results.
Why You’ll Love This Strawberry Earthquake Cake Recipe
This cake is a guaranteed smile-maker. First, it’s incredibly easy. Starting with a strawberry cake mix gets you halfway there in minutes. The creamy, sweet cheesecake-like filling with real diced strawberries bakes right into the cake, so every slice is a mix of textures: fluffy cake, creamy pockets, juicy fruit, and melty chocolate chips. It’s visually stunning with its cracked top and swirls, perfect for any table. Plus, it tastes like a celebration—sweet, fruity, and indulgent without being overly complicated.
Perfect Occasions for This Cake
This versatile cake fits almost any gathering. It’s a superstar for:
* Spring celebrations: Easter brunches, Mother’s Day, or a welcome-to-sunshine picnic.
* Potlucks and parties: It travels well and serves easily, always drawing compliments.
* Weekend family treats: A fun project to bake with kids for a special Sunday dessert.
* Birthdays: For someone who loves strawberries, it’s a wonderful, less formal alternative to a layered birthday cake.
Ingredients You’ll Need
Here’s what goes into this delightful Strawberry Earthquake Cake:
- 1 box (approx. 15.25 oz) Strawberry Cake Mix plus the ingredients listed on the box (usually oil, water, and eggs)
- 8 oz Cream Cheese, softened
- 1/2 cup Unsalted Butter, melted
- 1 1/2 tsp Vanilla Extract
- 2 cups Powdered Sugar (confectioners’ sugar)
- 1 cup White Chocolate Chips
- 1 cup Fresh Diced Strawberries
- Whipped Cream for topping (optional)
- Extra Whole or Sliced Strawberries for topping (optional)
Simple Substitution Options
Don’t stress if you’re missing an ingredient! Baking is about creativity.
* Cake Mix: Use any red or pink fruit-flavored mix like raspberry or cherry. A plain white or yellow cake mix works too—just add 1 tsp of strawberry extract to the batter for flavor.
* Cream Cheese: Full-fat gives the best texture, but reduced-fat can be used. Avoid non-fat varieties.
* White Chocolate Chips: Semi-sweet chocolate chips, chopped pecans, or even freeze-dried strawberry pieces are great alternatives.
* Fresh Strawberries: If they’re not in season, use well-drained frozen diced strawberries. Do not use strawberry jam or syrup in the filling—it will change the texture too much.
How to Make Your Strawberry Earthquake Cake
Let’s get baking! The process is simple, but the magic is in the swirl.
Step 1: Prep Your Pan and Batter
Preheat your oven to 350°F (175°C). Grease a 9×13-inch baking pan well with butter or non-stick spray. The rich filling can stick, so a good coat is key. Prepare your strawberry cake mix according to the package directions. As you mix, the batter will turn a lovely pink hue and smell wonderfully fruity. Pour this smooth batter evenly into your prepared pan. The stage is set!
Step 2: Sprinkle the Chocolate
Take your cup of white chocolate chips and sprinkle them evenly over the entire surface of the cake batter. They will look like little pearls dotting the pink landscape. These chips will sink and melt during baking, creating pockets of creamy chocolate flavor throughout the cake. Pro tip: If you worry about chips sinking too much, you can gently press them into the batter with the back of a spoon.
Step 3: Create the “Earthquake” Filling
In a mixing bowl, combine the softened cream cheese and melted butter. Beat them together until smooth and creamy. The mixture will be pale yellow and silky. Add the vanilla extract and mix again. Then, gradually add the powdered sugar, mixing until fully incorporated. The filling will become thick, sweet, and spreadable. Finally, fold in your diced strawberries. The red berry pieces speckle the white filling beautifully, adding pops of color and fresh flavor.
Step 4: Dollop and Swirl
Using a spoon or cookie scoop, drop large dollops of the cream cheese-strawberry filling evenly over the top of the cake batter. Don’t spread it flat! Now, take a butter knife or a small spatula and gently swirl it through the dollops and into the batter below. Make just a few passes—you want to create marbled patterns, not mix it completely. This is where the earthquake effect begins!
Step 5: Bake and Watch the Magic
Place the pan in your preheated oven. Bake for 40 to 45 minutes. The cake will rise, and the top will crack and crater in beautiful ways as the filling sinks. When done, the edges will be golden brown, and the center should be set (a toothpick inserted should come out with moist crumbs, not wet batter). Let the cake cool completely in the pan on a wire rack. This rest allows the flavors to settle and makes slicing easier.
Step 6: Serve with Joy
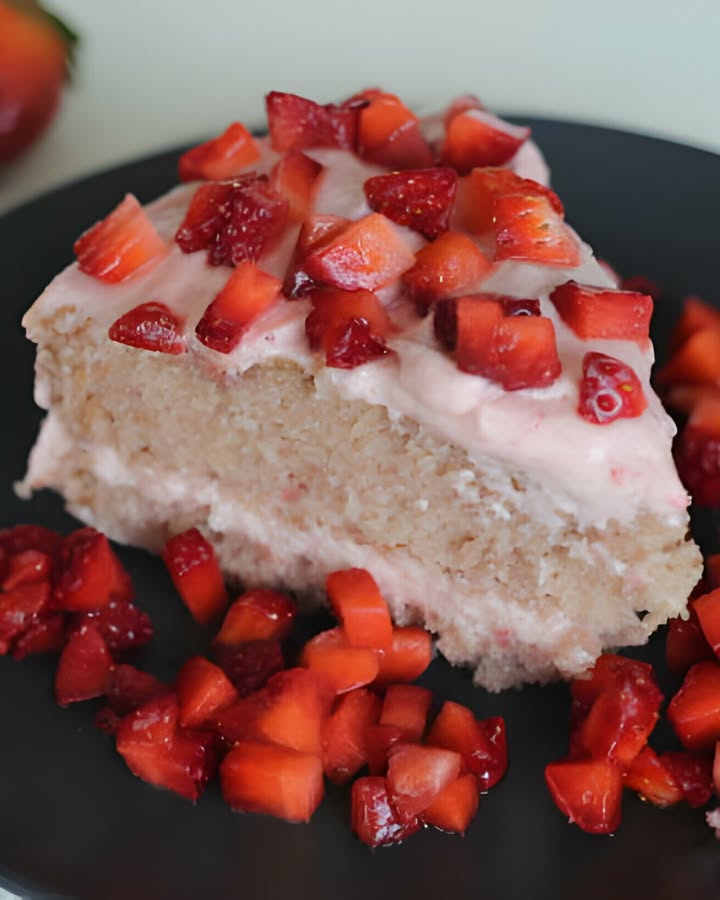
Once cooled, slice your cake into squares. For an extra special touch, top each piece with a dollop of whipped cream and a fresh strawberry slice. The creamy, fruity, slightly messy look is part of the charm! Serve it up and watch your family and friends discover the delicious creamy pockets and bursts of strawberry.
Time Breakdown
| Activity | Time |
|---|---|
| Preparation (mixing batter & filling) | 15 minutes |
| Baking | 40-45 minutes |
| Cooling | 1 hour (recommended) |
| Total Time (until serving) | About 2 hours |
Chef’s Secret for the Best Earthquake Cake
The key to a perfect swirl and defined “earthquake” cracks is the temperature of your filling. Make sure your cream cheese is truly softened at room temperature. If it’s too cold, it won’t blend smoothly with the butter and will create lumpy dollops that don’t sink as gracefully. About 30 minutes out of the fridge is usually perfect.
A Little Extra Info: The Strawberry
Strawberries aren’t just tasty; they’re a symbol of spring and summer happiness. Incorporating fresh fruit into baked goods, like our diced strawberries here, adds a burst of natural flavor and moisture. For the best quality and handling tips for your fresh ingredients, you can refer to trusted resources like the USDA. They offer great guidance on selecting and storing produce.
Necessary Equipment
You likely have everything you need already:
* 9×13-inch baking pan
* Mixing bowls (one large, one medium)
* Hand mixer or sturdy whisk
* Measuring cups and spoons
* Rubber spatula or spoon for folding
* Butter knife for swirling
* Wire cooling rack
Storing Your Strawberry Earthquake Cake
This cake stores beautifully due to its moist texture. First, cover the pan tightly with plastic wrap or aluminum foil. You can store it at room temperature for up to one day, especially if your kitchen is cool.
For longer storage, refrigeration is best. The cream cheese filling means this cake loves the fridge. Keep it covered in the pan or transfer slices to an airtight container. It will stay fresh and delicious for up to 4 days.
If you want to freeze it, wrap individual slices tightly in plastic wrap and then place them in a freezer bag. The cake can be frozen for up to 2 months. Thaw overnight in the refrigerator for the best texture.
Tips and Advice for Success
* Dice strawberries small: Larger pieces can make the filling too watery.
* Don’t over-swirl: A few gentle knife passes are enough. Over-swirling blends the filling too much into the batter and diminishes the pocket effect.
* Cool completely: Cutting into a warm cake can cause it to fall apart. Patience gives cleaner slices.
* Grease the pan well: This cake is sticky. A well-greased pan ensures easy serving.
Presentation Ideas to Make it Special
Make your cake look as festive as it tastes!
* Serve on a pretty cake stand with fresh strawberry garland around the base.
* Top each slice with a rosette of whipped cream and a mint leaf.
* For a party, present the whole cake in the pan decorated with a border of whole strawberries and white chocolate chips.
* Dust the top very lightly with extra powdered sugar just before serving for a snowy effect.
Healthier & Fun Alternative Recipes
Love the concept but want to tweak it? Here are six inspired variations:
1. Lemon Blueberry Earthquake Cake: Use a lemon cake mix, replace strawberries with blueberries, and add lemon zest to the filling.
2. Chocolate Raspberry: Use a chocolate cake mix, raspberry jam in the filling (instead of diced fruit), and dark chocolate chips.
3. Peaches and Cream: Use a vanilla cake mix, diced fresh peaches in the filling, and sprinkle with cinnamon.
4. Pumpkin Spice: Use a spice cake mix, add pumpkin puree and cinnamon to the cream cheese filling, and use pecans instead of chocolate chips.
5. Cookie Dough Earthquake: Use a yellow cake mix, mix mini chocolate chips into the cream cheese filling, and add a touch of brown sugar for a cookie dough flavor.
6. Tropical Version: Use a pineapple or coconut cake mix, add diced mango and shredded coconut to the filling.
Common Mistakes to Avoid
Avoiding these simple pitfalls will ensure your cake is perfect.
Mistake 1: Using Cold Cream Cheese
If your cream cheese is still chilly from the fridge, it won’t blend smoothly with the melted butter. This creates a lumpy, difficult-to-mix filling that won’t dollop or sink properly. The lumps can also bake into uneven, dense spots. Always let your cream cheese sit out at room temperature for at least 30 minutes before you start mixing. It should be soft and spreadable.
Mistake swarm Swirling the Filling
The excitement of creating the swirl can lead to overdoing it. If you swirl the knife too many times, you’ll essentially mix the filling into the batter. This defeats the whole “earthquake” purpose! You lose those lovely defined pockets of creamy filling. Instead, make just 4-5 gentle, shallow passes across the pan. Let the baking process do the rest of the sinking and cracking work.
Mistake 3: Not Greasing the Pan Well Enough
This is a sticky, moist cake with a sugary filling. A light coat of spray might not be enough. If the pan isn’t well-greased, you’ll end up with cake edges that stick and tear when you try to serve it. Use butter or a generous amount of non-stick baking spray on the bottom and all sides of the pan. For extra security, you can also line the bottom with parchment paper after greasing.
Mistake 4: Skipping the Cooling Time
It’s tempting to slice into this warm, fragrant cake right out of the oven. But if you do, the structure hasn’t set yet. The cake will be overly soft and may crumble or squish when cut. The creamy filling pockets will also be too runny. Allowing the cake to cool completely in the pan (about 1 hour) lets everything firm up, giving you neat, beautiful slices that hold their shape.
FAQs About Strawberry Earthquake Cake
Can I use frozen strawberries instead of fresh?
Yes, you can use frozen diced strawberries. It’s crucial to thaw them completely and then drain off any excess liquid. Pat them dry with a paper towel before folding them into the cream cheese filling. Extra moisture from frozen berries can make the filling too runny and affect how it bakes into the cake.
Why is my filling not sinking and creating cracks?
This usually happens if the filling is too thick or too cold. Ensure your cream cheese is properly softened and your butter is melted. The filling should be a thick but pourable consistency. If it’s too stiff, you can add a teaspoon of milk to loosen it slightly. Also, don’t press the dollops down into the batter; just place them on top.
Can I make this cake ahead of time for a party?
Absolutely. This cake actually tastes great the next day. Bake and cool it completely, then cover the pan tightly with plastic wrap or foil. Store it in the refrigerator. You can make it up to 24 hours before serving. For best texture, let it sit at room temperature for about 30 minutes before serving.
What if I don’t have white chocolate chips?
No problem! This recipe is flexible. You can substitute with semi-sweet chocolate chips, chopped nuts like pecans or almonds, or even leave them out entirely. The chips add a sweet surprise, but the cake will still be delicious without them.
Can I use a different size pan?
A 9×13-inch pan is ideal for the proportions here. Using a smaller, deeper pan (like a 9×9) will require a longer baking time and might result in a denser cake. Using a larger pan will spread the batter too thin and lead to over-baking. Stick to the recommended size for best results.
How do I know when the cake is done baking?
The top will be cracked and golden brown around the edges. The center should no longer look wet or jiggly. The most reliable test is to insert a toothpick or thin skewer into the center of the cake (avoiding a major cream cheese pocket). It should come out with a few moist crumbs clinging to it, but not with wet batter.
Can I double the cream cheese filling?
You can, but be cautious. Doubling the filling will make it very heavy and may not sink properly—it could just sit on top. It could also make the cake overly rich and wet. If you love extra filling, try increasing the amounts by only half (e.g., use 12 oz cream cheese, 3/4 cup butter, 3 cups powdered sugar). Ensure your pan is still the 9×13 size.
Is there a way to make this less sweet?
The cake mix and powdered sugar make this a sweet dessert. To moderate the sweetness, you can slightly reduce the powdered sugar in the filling to 1.5 cups. You could also use a less sweet cake mix brand or add a pinch of salt to the filling to balance flavors. The fresh strawberries also provide a natural, slightly tart contrast.
My cake sank a lot in the center after baking. Is that normal?
Some sinking in the areas where the filling dolloped is normal and part of the “earthquake” effect. However, a severe overall sink in the center can indicate under-baking or too much filling in one spot. Ensure your oven temperature is accurate and bake until the center is set. Try to distribute the dollops evenly across the entire pan surface.
Can I frost this cake like a regular cake?
You can, but it’s not necessary. The cake itself is already topped with the baked cream cheese swirls and is very flavorful. Adding a thick frosting might overwhelm it. If you want more topping, a light dusting of powdered sugar or a simple dollop of whipped cream on each serving is a better choice. It complements without overpowering.
Explore More Cake Inspiration
If you love this easy, delicious cake concept, you’ll find plenty of other fantastic ideas to try in our full collection of cake and cupcake recipes. From classic layer cakes to playful muffins, there’s always something new to bake.
Conclusion
Strawberry Earthquake Cake is more than just a dessert; it’s a baking experience. It’s simple enough for a beginner, fun enough for kids to help with, and impressive enough for any guest. The combination of pink strawberry cake, creamy filling, and sweet chocolate chips creates a flavor that feels like sunshine. So grab your box mix and some fresh berries, and create your own delicious kitchen earthquake. I promise the messy swirls and cracked top will lead to perfectly gorgeous slices and absolutely happy faces around your table. Don’t forget to share your baking adventures—tag your photos and spread the sweetness!
Equipment
- Grand bol
- Fouet
- Spatule
- Plaque à pâtisserie
- Papier sulfurisé
Ingredients
- 1 boîte (environ) mélange à gâteau à la fraise
- 240 g fromage à la crème ramolli
- 115 g beurre non salé fondu
- 7 ml extrait de vanille
- 250 g sucre glace
- 180 g pépites de chocolat blanc
- 150 g fraises fraîches découpées en dés
- q.s. crème fouettée pour le topping (facultatif)
- q.s. fraises entières ou tranchées pour le topping (facultatif)
Instructions
- Préchauffez votre four à 175°C et graissez généreusement un moule à pâtisserie de 23x33 cm.
- Préparez le mélange à gâteau à la fraise selon les instructions sur l'emballage et versez la pâte uniformément dans le moule préparé.
- Parsemez les pépites de chocolat blanc uniformément sur la surface de la pâte à gâteau.
- Dans un grand bol, battez le fromage à la crème ramolli et le beurre fondu jusqu'à obtenir un mélange lisse, puis ajoutez l'extrait de vanille et le sucre glace, en mélangeant jusqu'à ce que ce soit complètement incorporé.
- Incorporez délicatement les fraises coupées en dés dans le mélange de fromage à la crème.
- Déposez de grosses cuillerées du mélange de fromage à la crème et de fraises uniformément sur le dessus de la pâte à gâteau et tourbillonnez doucement avec un couteau.
- Faites cuire dans le four préchauffé pendant 40 à 45 minutes, jusqu'à ce que le dessus soit doré et que le centre soit ferme.
- Laissez le gâteau refroidir complètement dans le moule sur une grille, puis coupez et servez.
Notes
Nutrition

Hi, I’m Olivia Parker, the founder of BakingSecret.com and a lifelong lover of all things sweet and homemade. I grew up in a small town in Oregon, where the smell of fresh cookies in my family’s kitchen sparked my passion for baking. Over the years, I turned that passion into a mission: to help home bakers feel confident, inspired, and creative.
After studying food science and working in several artisan bakeries across the U.S., I decided to create a space where everyone from beginners to seasoned bakers can find reliable recipes, expert tips, and a warm, welcoming community. BakingSecret.com is my way of sharing the magic of baking with the world. When I’m not testing new recipes, you’ll find me exploring farmers’ markets, collecting vintage cookbooks, or perfecting my sourdough technique.