
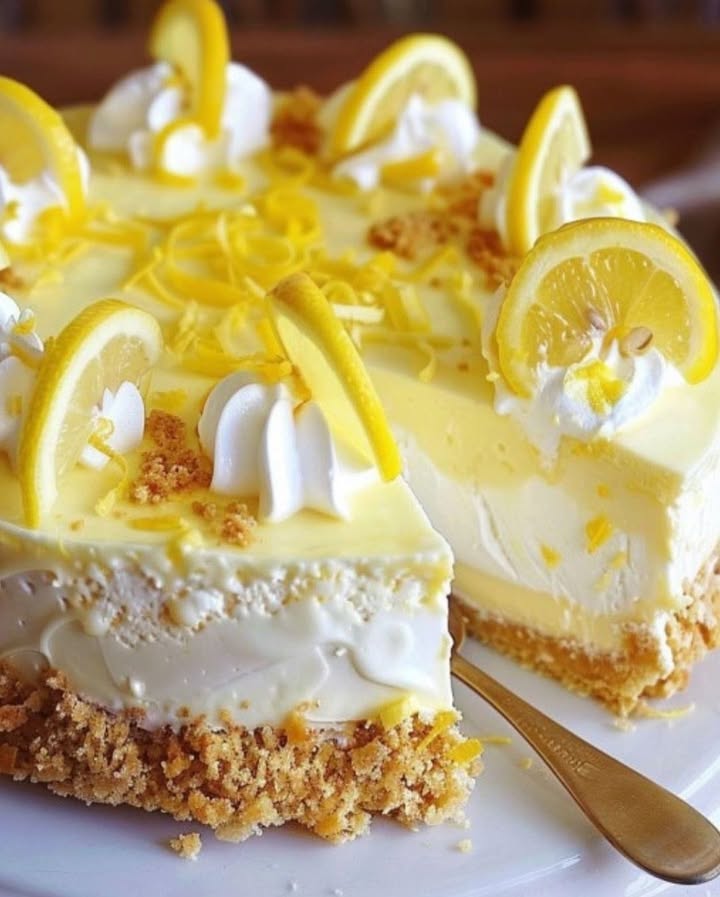
Is there anything better than a cool, creamy dessert on a hot day? I remember last summer, my friends were coming over for a backyard BBQ, and I was melting just thinking about turning on the oven. That’s when my love for Lemon Yogurt No-Bake Cake truly began. It’s like sunshine and a cooling breeze in one delicious slice – a total lifesaver when you need a stunning dessert without any of the heat.
A Slice of Sunshine: The Story of No-Bake Cakes
No-bake desserts feel like a little secret of the clever home cook. While their origins aren’t pinned to one place, they speak a universal language of convenience and joy. I imagine them being born from a need for something sweet on a sweltering day, when using an oven was simply unthinkable. My version, this Lemon Yogurt No-Bake Cake, is my modern twist. It combines the old-world charm of a simple biscuit base with the bright, fresh zing of lemon yogurt. It’s a recipe passed between friends (like the one who shared it with me at that fateful BBQ!), always evolving, and always bringing smiles.
Why You’ll Absolutely Adore This Lemon Yogurt No-Bake Cake
First, it’s incredibly easy. No fancy skills needed! Second, that combo of tangy lemon and rich, creamy yogurt is just divine. It’s light enough to enjoy a generous piece but decadent enough to feel like a real treat. The best part? You get to be the cool, calm, and collected host who whipped up this beauty while everyone else is sweating over a grill.
Perfect Occasions for Your No-Bake Masterpiece
This cake is your go-to for so many events! Think summer picnics, potlucks, baby showers, or a simple “I-deserve-this” Wednesday. It’s elegant enough for a dinner party but simple enough for a family dessert. I love making it with my kids – they love crushing the biscuits, and I love not worrying about a hot oven.
Gathering Your Ingredients for Lemon Yogurt No-Bake Cake
- 300g (about 10.5 oz) biscuits: Plain digestives or graham crackers work perfectly.
- 160g (about 5.6 oz) butter: Unsalted, melted.
- 300g (about 10.5 oz) lemon yogurt: Full-fat gives the creamiest texture.
- 250ml (about 1 cup) cream: Heavy whipping cream, cold.
- 4 sheets gelatin: To set our lovely filling.
- 6 tbsp icing sugar (powdered sugar): For the perfect sweetness.
Handy Substitution Options
No worries if you’re missing something! For a nutty crunch, try substituting half the biscuits with crushed vanilla wafers. If you’re out of gelatin sheets, use one packet (about 2 1/4 tsp) of powdered gelatin. For a dairy-free version, coconut yogurt and a plant-based cream alternative can work wonders. Just ensure your yogurt is quite thick for the best results.
Making Your Refreshing No-Bake Cake: Step-by-Step
Step 1: Create the Crunchy Biscuit Base
Let’s start with the foundation. Place your biscuits in a sturdy zip-top bag and grab your rolling pin. Channel any daily frustrations into crushing them into fine, even crumbs. You should hear a satisfying crunch! Transfer these sandy crumbs to a bowl. Now, pour in the warm, melted butter – it will smell wonderfully rich. Mix until every crumb is coated and the mixture looks like wet sand. Press this firmly into the bottom of your springform pan. A flat-bottomed glass helps create a compact, even layer. Chill this base for a solid 30 minutes; this sets the stage for our creamy topping.
Pro tip: For an extra flavor boost, add a tablespoon of lemon zest to the biscuit mix!
Step 2: Bloom the Gelatin and Sweeten the Yogurt
While the base chills, let’s work on our setting agent. Place the sheets of gelatin in a shallow bowl of cold water. They will become soft and floppy – this is called “blooming.” In a separate, larger bowl, spoon out your bright, tangy lemon yogurt. Sift in the icing sugar to avoid lumps. Whisk them together until smooth and blissfully sweet. The pale yellow color is already so inviting!
Step 3: Whip, Fold, and Integrate
Now for the fluffy element! Pour your cold cream into a chilled bowl. Using a hand mixer or whisk, whip it until it forms soft, billowy peaks. Be careful not to over-whip it into butter. Gently fold about one-third of this whipped cream into the yogurt mixture to lighten it. This makes folding in the rest much easier and keeps the filling airy. Next, squeeze the water from your softened gelatin sheets. Melt them gently in a small saucepan with a couple of tablespoons of the remaining cream over very low heat, just until liquid. Quickly stir this liquid gelatin into your yogurt mixture. Now, fold in the rest of the whipped cream with a gentle, lifting motion until no white streaks remain.
Step 4: The Grand Assembly and Final Chill
Retrieve your firm biscuit base from the fridge. Pour the glorious, airy lemon yogurt filling over the top. Use a spatula to spread it evenly, creating a beautifully smooth, cloud-like surface. This is the moment of truth! Cover the pan loosely and let it chill in the refrigerator for at least 4 to 5 hours, or ideally overnight. This patience allows the gelatin to work its magic, transforming our creamy mixture into a perfectly sliceable yet melt-in-your-mouth cake.
Chef’s tip: For ultra-clean slices, dip your knife in hot water and wipe it dry between each cut.
Your Lemon Yogurt No-Bake Cake Timeline
Prep Time: A quick 20 minutes of active fun.
Chill Time: The essential 5 hours of patience (perfect for a make-ahead dessert!).
Total Time: 5 hours 20 minutes from start to slice.
Kcal: Approximately 400 kcal per serving.
Servings: Makes 6 generous portions of pure joy.
A Little Chef’s Secret Just for You
For an incredible burst of fresh lemon flavor that makes people say “WOW,” add the finely grated zest of one whole lemon directly into the yogurt and sugar mixture. The essential oils in the zest carry the brightest, sunniest lemon aroma, elevating your cake from simply “lemony” to spectacularly fresh.
A Fun Yogurt Fact
Did you know yogurt has been made for over 7,000 years? It’s believed that nomadic tribes carried milk in animal stomachs, where natural bacteria caused it to ferment into an early form of yogurt. Our modern lemon yogurt is a far cry from that, but it’s fun to think we’re part of a very long, delicious tradition!
Equipment You’ll Need
- 8-inch springform pan
- Food processor or zip-top bag & rolling pin
- Mixing bowls (various sizes)
- Hand mixer or whisk
- Spatula
- Small saucepan
Storing Your Lemon Yogurt No-Bake Cake
This cake is a dream for make-ahead plans. Keep it covered in the springform pan or on a cake stand with a dome in the refrigerator. It will stay perfectly fresh and delicious for up to 3 days.
For longer storage, you can freeze the whole cake or individual slices. Wrap it tightly in a couple of layers of plastic wrap, then in aluminum foil. It will keep in the freezer for up to a month. Always remember that proper safe meal storage is key to maintaining both flavor and food quality.
To serve after freezing, thaw it overnight in the refrigerator. This gradual thawing prevents the texture from becoming watery or grainy, so you can enjoy a slice that tastes just as good as the day you made it.
Tips and Advice for No-Bake Success
- Ensure your cream and mixing bowl are very cold for the best whip.
- When melting gelatin, never let it boil, as high heat can destroy its setting power.
- If using a metal springform pan, running a warm towel around the outside for a few seconds can help release the cake cleanly.
Presentation Ideas to Impress
- Top with fresh blueberries, raspberries, or thin lemon slices just before serving.
- A light dusting of icing sugar or a drizzle of lemon curd adds elegance.
- Serve with a dollop of extra whipped cream on the side.
- Garnish with a few sprigs of fresh mint for a pop of color.
6 Delicious Variations to Try
Love this method? The possibilities are endless! Here are six twists on the classic Lemon Yogurt No-Bake Cake:
- Berry Bliss: Swap lemon yogurt for vanilla and fold in a cup of mixed fresh berries after whipping the cream.
- Tropical Escape: Use coconut yogurt, add crushed pineapple (well-drained), and top with toasted coconut.
- Chocolate Orange: Use chocolate biscuits for the base and orange yogurt for the filling. Add some cocoa powder to the biscuit mix.
- Peaches & Cream: Blend ripe peaches into plain Greek yogurt and use vanilla biscuits for the base.
- Mocha Latte: Add a tablespoon of instant espresso powder to the yogurt mix and use chocolate biscuits.
- Very Vanilla: Use plain yogurt and add the seeds of one vanilla bean for an intense, classic flavor.
Exploring different no-bake desserts is such a joy. If you loved the ease of this recipe, you’ll find a whole world of inspiration in our collection of wonderful no-bake treats.
Common Mistakes to Avoid
Mistake 1: A Soggy Biscuit Base
This happens when the butter isn’t fully mixed in or the base isn’t pressed firmly enough. The crumbs need to be completely coated in butter to create a binding “cement.” If the mixture looks dry or crumbly, add a touch more melted butter. Press it down very firmly with the back of a spoon or a glass. A solid, compact base is crucial for supporting the creamy filling and giving you that perfect crunch with every bite.
Mistake 2: Over- or Under-Whipping the Cream
Whipped cream has stages. Soft peaks are perfect for folding – they hold their shape but still droop slightly. If you whip to stiff peaks, the cream becomes grainy and difficult to fold smoothly, making your filling dense. On the flip side, under-whipped cream won’t give enough lift, leading to a runny cake. Watch closely and stop when your whisk or beaters leave a smooth, defined trail that slowly disappears.
Mistake 3: Not Dissolving the Gelatin Properly
Gelatin needs to be melted completely into a liquid state before mixing. If you add softened but not fully melted gelatin sheets, you’ll get unpleasant rubbery bits in your cake. Always melt the bloomed gelatin over very low heat with a small amount of liquid (like a bit of the cream) until it’s completely clear and fluid. Then, stir it into your mixture promptly.
Mistake 4: Skimping on Chill Time
Impatience is the enemy of no-bake desserts! The 4-5 hour chill is not a suggestion; it’s a requirement. This time allows the gelatin to form a stable network throughout the cream and yogurt. Cutting into it too early will result in a delicious but soupy mess. For absolute perfection, let it set overnight. Your patience will be rewarded with clean, beautiful slices.
Frequently Asked Questions
Can I make this cake without gelatin?
Yes, you can use agar-agar as a vegetarian substitute. Keep in mind that agar-agar sets firmer and at a higher temperature than gelatin, so follow the packet instructions carefully. Another option is to use a setting agent like cornstarch, but this will create a more pudding-like texture rather than a light, mousse-like cake. The gelatin really provides the ideal airy yet sliceable consistency that makes this dessert special.
What type of biscuits are best for the base?
You want a plain, slightly sweet biscuit that crumbles well. Digestive biscuits (like McVitie’s) are a classic choice. Graham crackers are the perfect North American alternative. You could also use vanilla wafers, shortbread biscuits, or even ginger snaps for a spiced twist. Avoid cookies with large chunks or too much chocolate coating, as they won’t create an even, compact base layer.
My filling is runny after chilling. What went wrong?
A runny filling usually points to one of three issues: under-whipped cream, not enough gelatin, or insufficient chilling time. First, ensure your cream was whipped to soft peaks. Second, double-check you’re using the correct amount of gelatin (4 sheets). Finally, the cake must chill uninterrupted for the full time. If it’s still soft after 5 hours, your refrigerator might be too warm, or the gelatin may have been compromised by excess heat during melting.
Can I use Greek yogurt instead of regular lemon yogurt?
Absolutely! Greek yogurt will give you a thicker, tangier, and protein-rich filling. Because it’s less sweet, you might want to add an extra tablespoon or two of icing sugar to taste. The texture will be denser and more luxurious. Just make sure it’s plain or lemon Greek yogurt, and give it a good stir before using to smooth it out.
How far in advance can I make this no-bake cake?
This is one of its best features! You can make it up to two days in advance. In fact, making it the night before allows all the flavors to meld beautifully and ensures a perfectly firm set. Keep it covered in the refrigerator until you’re ready to decorate and serve. Avoid freezing it if you’ve already added fresh fruit toppings, as they will become watery when thawed.
Can I double this recipe?
Yes, you can easily double the ingredients to serve a crowd. Use a 9×13 inch baking dish or a larger springform pan instead of doubling the height in your original pan. The chilling time may need to be extended by an hour or two for the center to set completely because of the greater volume. All other steps remain the same.
Is it possible to make this recipe dairy-free?
It is! Use a plant-based butter for the base. For the filling, opt for a thick, full-fat coconut yogurt and whip a chilled can of full-fat coconut cream (just the solid part) in place of the dairy cream. Be sure to check that your biscuits are also dairy-free. The texture and flavor will be different but still deliciously creamy and refreshing.
What can I use if I don’t have a springform pan?
No problem! A deep-dish pie plate works well, though serving might be a little messier. You can also use a regular cake pan lined with parchment paper with overhanging edges to help lift the cake out. For individual portions, consider setting the dessert in small glasses or jars for elegant, no-serve-needed parfaits.
My cake is sticking to the pan. How do I release it?
Run a thin, sharp knife under hot water, wipe it dry, and carefully run it around the very edge of the cake between the filling and the pan wall before unclipping the springform. For the bottom, you can slide a long, flexible spatula underneath to help transfer it to a plate. If you used parchment paper on the base, this step becomes effortless.
Can I add fresh fruit to the filling?
You can, but be cautious. Very juicy fruits like watermelon or oranges will release too much liquid and prevent proper setting. If you want berries, lightly coat them in a bit of cornstarch first, or use frozen berries that have been completely thawed and patted dry. For best results, I recommend keeping the filling as is and adding fresh fruit as a topping right before serving.
Ready for Your Slice of Sunshine?
There you have it – your ticket to the easiest, most refreshing dessert of the summer. This Lemon Yogurt No-Bake Cake is more than just a recipe; it’s a promise of cool, creamy joy without breaking a sweat. I hope it becomes a staple in your kitchen, just like it has in mine. Now go grab those ingredients, and get ready for the compliments to roll in. Happy no-baking!
Equipment
- Moule à charnière de 8 pouces
- Robot culinaire ou rouleau à pâtisserie et sac en plastique
- Bols à mélanger (différentes tailles)
- Spatule
- Petite casserole
Ingredients
- 300 g biscuits digestifs ou graham
- 160 g beurre non salé, fondu
- 300 g yaourt au citron plein gras
- 250 ml crème fouettée épaisse froide
- 4 feuilles gélatine
- 6 cuil. à soupe sucre glace sucre en poudre
Instructions
- Écrasez les biscuits en miettes fines à l'aide d'un robot culinaire ou d'un rouleau à pâtisserie dans un sac en plastique.
- Mélangez le beurre fondu chaud avec les miettes de biscuits jusqu'à ce qu'elles soient bien enrobées et pressez fermement au fond d'un moule à charnière de 8 pouces. Réfrigérez pendant 30 minutes.
- Faites ramollir les feuilles de gélatine dans de l'eau froide et fouettez le yaourt au citron avec le sucre glace dans un bol séparé jusqu'à consistance lisse.
- Montez la crème froide en pics souples et incorporez-en un tiers dans le mélange de yaourt.
- Faites fondre la gélatine ramollie dans une casserole avec quelques cuillères de crème et mélangez-la dans le mélange de yaourt. Puis incorporez délicatement le reste de la crème fouettée.
- Versez la garniture sur la base de biscuits, lissez la surface et réfrigérez pendant au moins 4-5 heures ou toute la nuit.
Notes
Nutrition

Hi, I’m Olivia Parker, the founder of BakingSecret.com and a lifelong lover of all things sweet and homemade. I grew up in a small town in Oregon, where the smell of fresh cookies in my family’s kitchen sparked my passion for baking. Over the years, I turned that passion into a mission: to help home bakers feel confident, inspired, and creative.
After studying food science and working in several artisan bakeries across the U.S., I decided to create a space where everyone from beginners to seasoned bakers can find reliable recipes, expert tips, and a warm, welcoming community. BakingSecret.com is my way of sharing the magic of baking with the world. When I’m not testing new recipes, you’ll find me exploring farmers’ markets, collecting vintage cookbooks, or perfecting my sourdough technique.