
Chocolate Cheesecake Parfaits: A No-Bake Dream
Have you ever wanted the rich joy of a cheesecake but didn’t want to turn on the oven? These Whipped Chocolate Cheesecake Parfaits are your answer. They came to me on a hot summer day when my family begged for a cool, decadent dessert. I whipped up this simple mix, layered it in glasses, and watched everyone’s eyes light up. It’s become our go-to for last-minute celebrations, lazy weekends, and impromptu dinner parties. The magic is in the layers: creamy chocolate cheesecake, fluffy whipped cream, and a crunch of graham crackers. It feels fancy but is honestly so easy.
From Cheesecake to Parfait: A Little History
The classic cheesecake is ancient, but the parfait trend is modern. I love taking traditional flavors and making them more playful and personal. This recipe is my twist on that idea. It borrows the soul of a New York-style chocolate cheesecake—that dense, creamy texture—but presents it in a light, spoonable form. It’s perfect for today’s casual gatherings. You can make it look elegant in glasses or keep it cozy in a big shared bowl. The story here isn’t grand history; it’s about creating happy moments in your own kitchen.
Why You’ll Love This Chocolate Cheesecake Parfait Recipe
First, there’s no baking. You just mix and layer. Second, it’s incredibly forgiving. If your cream cheese isn’t perfectly soft, just beat it a little longer. Third, the flavor is deep and luxurious without being heavy. The whipped cream layer lightens everything up. It’s a dessert that feels special but doesn’t stress you out. Kids can help with the layering, making it a fun family activity. And because you assemble it in individual servings, it’s perfect for parties where everyone gets their own perfect little treat.
Perfect Occasions for Whipped Chocolate Cheesecake Parfaits
This dessert shines anywhere you want a touch of sweetness without a big production.
- Summer Picnics: They travel well in jars and stay cool.
- Potluck Dinners: You can make them ahead and they always impress.
- Weeknight Treats: A 20-minute project that feels like a celebration.
- Valentine’s Day or Anniversaries: Chocolate and creamy layers are inherently romantic.
- Kids’ Birthday Parties: They’re fun, mess-free, and a hit with all ages.
Ingredients for Your Chocolate Cheesecake Parfait
Gathering these simple ingredients is the first step to dessert bliss.
- For the Chocolate Cheesecake Layer: 1 package (8 ounces) cream cheese, softened; ⅓ cup granulated sugar; ¼ cup cocoa powder; ¼ cup sour cream; 1 teaspoon vanilla extract.
- For the Whipped Cream Layer: 1 cup heavy cream; ¼ cup powdered sugar; 1 teaspoon vanilla extract.
- For Assembly: Graham cracker crumbs; Chocolate shavings (optional).
Ingredient Substitution Options
Don’t stress if you’re missing something. Here are easy swaps:
- Cream Cheese: Use full-fat mascarpone for an even richer, silkier texture.
- Sour Cream: Plain Greek yogurt works perfectly and adds a slight tang.
- Granulated Sugar: You can use the same amount of coconut sugar for a deeper flavor.
- Cocoa Powder: Dutch-processed cocoa gives a darker, smoother chocolate taste.
- Heavy Cream: For a lighter version, well-chilled coconut cream can be whipped.
- Graham Cracker Crumbs: Crushed digestive biscuits, shortbread cookies, or even pretzels add a delicious salty-sweet crunch.
Crafting Your Chocolate Cheesecake Parfait: The Steps
Let’s build these beautiful layers. The process is simple but satisfying.
Step 1: Make the Chocolate Cheesecake Mixture
Start with your softened cream cheese in a medium bowl. Beat it with the granulated sugar until the mixture is completely smooth and no lumps remain. The sugar will dissolve into the creamy base. Now, add the cocoa powder. Watch as the pale mixture turns a rich, dark brown. The aroma of chocolate will fill your kitchen. Finally, beat in the sour cream and vanilla extract. The sour cream adds a wonderful tang that balances the sweetness, and the vanilla rounds out all the flavors. Your cheesecake layer is now a thick, spoonable, and decadent pudding. Pro tip: If your cream cheese is still a bit firm, beat it alone for a minute before adding the sugar. This prevents a grainy texture.
Step 2: Create the Whipped Cream Layer
Take a separate, clean bowl for your heavy cream. It’s crucial that your cream, bowl, and beaters are cold. This helps the cream whip up faster and hold its shape better. Pour in the cold cream, powdered sugar, and vanilla. Begin beating at medium speed. You’ll see the liquid cream slowly thicken, forming soft waves. As you continue, those waves will become stiff, lofty peaks. Stop when the cream holds its shape on the beaters. This fluffy cloud will lighten the entire dessert. Chef’s tip: A touch of powdered sugar, instead of granulated, helps stabilize the whipped cream so it stays fluffy longer in the parfait glass.
Step 3: Assemble the Parfaits
This is the fun, creative part. Grab your parfait glasses, jars, or even a nice clear bowl. Spoon a layer of the dark chocolate cheesecake mixture into the bottom. Tap the glass gently to level it. Next, sprinkle a generous layer of graham cracker crumbs over the chocolate. This adds a essential textural crunch and a nostalgic flavor. Now, spoon or pipe a layer of your white whipped cream over the crumbs. Repeat the sequence—chocolate, crumbs, cream—until your glass is full. The contrasting layers look stunning. You can make them neat or rustic, it’s all beautiful.
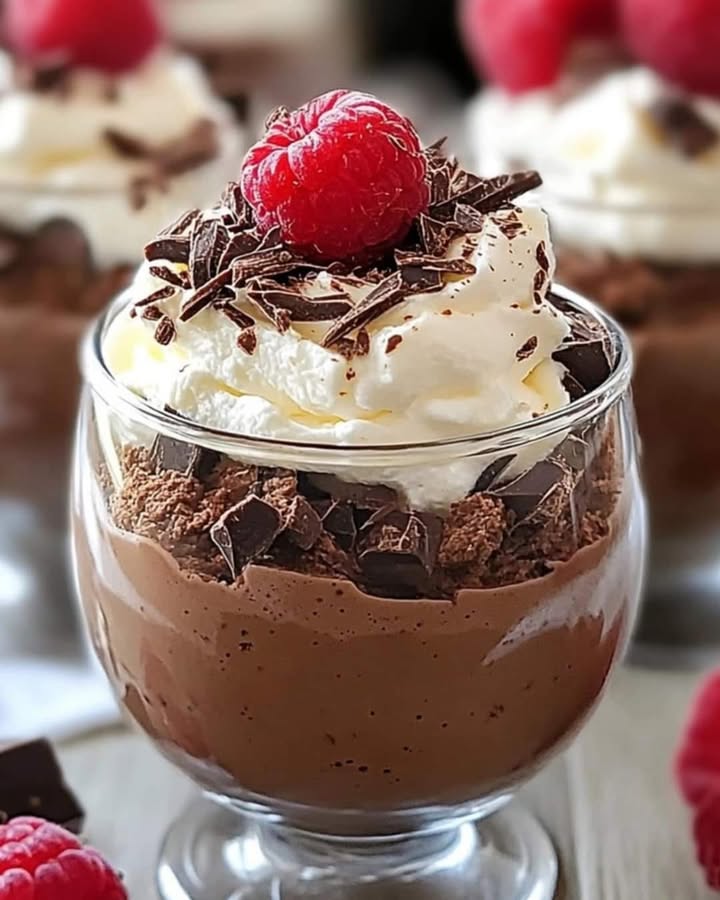
Step 4: Garnish and Serve
A final touch makes it special. A sprinkle of chocolate shavings on the top whipped cream layer is classic and elegant. You could also use a few fresh berries, a drizzle of caramel, or a dusting of more cocoa powder. Once garnished, chill the parfaits for at least 15 minutes before serving. This brief rest lets the layers settle and the flavors meld. Then, serve them with a long spoon so everyone can dig through all the layers. The first bite is a perfect combination of creamy, crunchy, and chocolatey.
Timing Your Dessert Creation
This is a swift project. Prep Time: 15 minutes. Chilling Time: 15 minutes (optional, but recommended). Total Time: 30 minutes. There is no cooking or baking time, which is the real joy of this recipe.
Chef’s Secret for the Best Chocolate Cheesecake Parfaits
The secret is in the cocoa. Don’t just dump it in. Sift your cocoa powder over the cream cheese mixture. This prevents little dry clumps of cocoa from forming and ensures your cheesecake layer is perfectly smooth and uniformly chocolatey every single time.
A Little Extra Info
The word “parfait” actually means “perfect” in French. While traditional French parfaits are frozen, this no-bake, layered version has become a beloved American interpretation. It’s a perfect example of how a simple method can create a dessert that feels both classic and new.
Necessary Equipment
You don’t need fancy tools.
- Two mixing bowls (one medium, one for whipping cream).
- Electric hand mixer or stand mixer (a whisk works but takes longer).
- Spatula.
- Measuring cups and spoons.
- Parfait glasses, mason jars, or small dessert bowls.
Storing Your Whipped Chocolate Cheesecake Parfaits
These parfaits store beautifully. Cover the assembled parfaits tightly with plastic wrap or place lids on the jars. They can be stored in the refrigerator for up to 2 days. The graham cracker crumbs will soften slightly over time, but the flavors will remain excellent. For best texture, assemble them no more than a few hours before serving. Do not freeze these parfaits. Freezing will cause the whipped cream layer to collapse and the textures to become watery when thawed. If you need to store components separately, the chocolate cheesecake mixture can be kept covered in the fridge for 3 days, and the whipped cream can be made fresh when you’re ready to assemble.
Tips and Advice for Success
- For added texture, mix crushed chocolate cookies or toasted nuts between the layers.
- If your kitchen is warm, chill your mixing bowls in the fridge for 10 minutes before starting.
- To make individual servings quickly, use a piping bag for the whipped cream layer.
- Let the cream cheese soften truly at room temperature for 30 minutes for easiest mixing.
Presentation Ideas
Make your parfaits look as good as they taste.
- Use clear, vintage glasses for a charming look.
- For a party, set up a parfait bar with bowls of the components and let guests build their own.
- Top with a single perfect raspberry or a mint leaf for a color pop.
- Serve with a long, vintage dessert spoon.
Healthier Alternative Recipes
You can adapt this concept for different dietary needs.
- Sugar-Free Chocolate Cheesecake Parfaits: Use a monk fruit sweetener blend in place of granulated and powdered sugar. The result is still sweet and creamy without the refined sugar.
- High-Protein Parfaits: Replace the cream cheese with whipped vanilla protein pudding and use a high-protein Greek yogurt in place of sour cream. It’s a satisfying post-workout treat.
- Vegan Chocolate Parfaits: Use a firm vegan cream cheese alternative and whip chilled coconut cream with maple syrup. The layers are just as decadent.
- Keto-Friendly Version: Employ a keto-approved sweetener, full-fat ingredients, and use crushed nuts instead of graham crackers for the crunchy layer.
- Berry-Infused Parfaits: Fold a few tablespoons of pureed raspberries into the cheesecake layer for a chocolate-berry twist and a boost of fruit.
- Mini Parfait Shooters: Make tiny versions in shot glasses for a large party. It’s a perfect bite-sized dessert that helps with portion control.
Related Recipes You Might Love
If you enjoy making simple, crowd-pleasing desserts, you might also want to try a classic cheesy beef casserole for a hearty meal, or a stunning berry upside-down cake. For a savory snack, these crispy cabbage fritters are fantastic. And if you’re ready for a baking project, the ultimate chocolate cheesecake is a deeply rewarding experience.
Common Mistakes to Avoid
A few small missteps can change your parfait. Avoid these to ensure perfection.
Mistake 1: Using Cold Cream Cheese
Starting with cold, firm cream cheese is the biggest hurdle. It will not blend smoothly with the sugar and cocoa, leaving you with a lumpy, grainy cheesecake layer instead of a silky one. Always let your cream cheese soften on the counter for at least 30 minutes. If you forget, you can microwave it for 10-15 seconds, but do not let it get hot or melt.
Mistake 2: Over-whipping or Under-whipping the Cream
The whipped cream layer should be stiff but still smooth. Under-whipped cream will be too soft and will slump between the layers, making the parfait messy. Over-whipped cream becomes grainy and butter-like, losing its fluffy texture. Watch carefully: stop beating as soon as the cream forms firm peaks that hold their shape when you lift the beaters.
Mistake 3: Skipping the Chilling Step Before Serving
It’s tempting to serve these parfaits immediately after assembly. But if you don’t let them chill for at least 15 minutes, the layers won’t have settled. The whipped cream might be too soft, and the parfait can feel unstable when you spoon into it. A brief chill in the refrigerator firms up the components slightly and makes the eating experience much better.
Mistake 4: Using Dry, Stale Graham Cracker Crumbs
The crunchy layer is vital. If your graham cracker crumbs are old or have been opened for a while, they can taste dry and bland. For the best flavor, use fresh crumbs. You can quickly crush whole graham crackers in a bag with a rolling pin. This ensures a buttery, sweet, and truly crunchy element in every bite.
Nutrition and Balance
This dessert is an indulgence, and that’s wonderful. For everyday eating, balancing treats with nutritious meals is key. You can find great ideas for building healthy meals that satisfy and nourish, helping you enjoy your chocolate cheesecake parfaits as part of a happy, balanced lifestyle.
More Cheesecake Inspirations
The parfait is just one way to enjoy cheesecake flavors. If you love this recipe, you’ll find a world of other no-bake and baked ideas in our full collection of cheesecake recipes, from classic to wildly creative.
Frequently Asked Questions
Can I make these parfaits ahead of time?
Yes, you can assemble them up to 2 days ahead. Keep them covered tightly in the refrigerator. The graham cracker crumbs will soften a bit over time, but the flavor will still be excellent. For the best texture, I recommend making the components ahead but assembling them the day you plan to serve them.
What can I use instead of graham cracker crumbs?
Many things work! Crushed digestive biscuits, vanilla wafers, shortbread cookies, or even pretzels for a salty-sweet twist. For a gluten-free option, use your favorite gluten-free crispy cookie or cracker. The goal is that crunchy layer between the creamy ones.
My whipped cream turned runny. What happened?
Whipped cream can fail if your cream, bowl, or beaters are not cold enough. Warm tools will prevent the cream from forming stable peaks. Also, ensure you are using heavy cream or whipping cream, not a lighter product like half-and-half. If it’s a warm day, chill everything before you start.
Can I make this recipe sugar-free?
Absolutely. Use a granulated sugar substitute like monk fruit or erythritol in the cheesecake layer. For the whipped cream, use a powdered sugar substitute or a small amount of the same granulated substitute. Just be aware that some substitutes can have a slightly different volume or texture, so you may need to adjust slightly.
Is there a way to make this dessert lighter?
You can use light cream cheese and light sour cream. For the whipped cream layer, you can use a light whipping cream. The result will be a bit less rich but still delicious. Another idea is to increase the proportion of whipped cream to cheesecake in each layer for an airier feel.
Can I use a different flavor besides chocolate?
Of course! This recipe is a fantastic base. Omit the cocoa powder and add other flavors to the cheesecake layer. Try lemon zest, strawberry puree, or a swirl of caramel. The parfait method works with any cheesecake flavor you love.
Do I need an electric mixer?
An electric hand mixer or stand mixer makes the job very quick and easy, especially for whipping the cream. You can use a sturdy whisk and strong arm power, but it will take longer and require more effort to get the cream to stiff peaks.
How do I get really smooth chocolate cheesecake filling?
Two tips: First, ensure your cream cheese is truly softened. Second, sift your cocoa powder into the mixture. Sifting breaks up any clumps in the cocoa and guarantees a silky, smooth texture without any dry pockets.
Can I freeze these parfaits?
I do not recommend freezing the assembled parfaits. The whipped cream layer will collapse and become watery when thawed, and the overall texture will suffer. However, the chocolate cheesecake mixture alone can be frozen for up to a month. Thaw it in the refrigerator and whip it briefly before using.
What’s the best way to serve these at a party?
I love setting up a “parfait station.” Keep the three components—the chocolate cheesecake mixture, the whipped cream, and the graham cracker crumbs—in separate bowls with spoons. Let your guests assemble their own in provided glasses. It’s interactive, fun, and ensures everyone gets the layers they want.
A Final Spoonful
These Whipped Chocolate Cheesecake Parfaits are more than a recipe. They are a little celebration you can make anytime. They bring the joy of cheesecake without the wait or heat of an oven. The layers are a pleasure to build and a delight to eat. I hope this recipe finds a place in your kitchen for lazy Sundays, happy gatherings, and those moments when you just need a sweet, creamy, chocolatey hug. Enjoy every spoonful.
Equipment
- Bol moyen
- Fouet électrique
- Spatule
- Verres à parfait
- Cuillères à mesurer
Ingredients
- 226 g fromage à la crème ramolli
- 67 g sucre granulé
- 30 g cacao en poudre
- 60 g crème aigre
- 5 ml extrait de vanille
- 240 ml crème épaisse
- 30 g sucre glace pour saupoudrer
- 5 ml extrait de vanille pour le goût
Instructions
- Dans un bol moyen, battez le fromage à la crème ramolli et le sucre granulé jusqu'à obtenir un mélange lisse et sans grumeaux.
- Ajoutez le cacao en poudre, la crème aigre et l'extrait de vanille, et mélangez jusqu'à ce que le tout soit bien combiné.
- Dans un autre bol, battez la crème épaisse, le sucre glace et l'extrait de vanille jusqu'à formation de pics fermes.
- Dans des verres à parfait, superposez le mélange de cheesecake au chocolat, les miettes de biscuits Graham, et la crème fouettée.
- Répétez les couches jusqu'à ce que les verres soient pleins, en terminant par la crème fouettée.
- Garnir de copeaux de chocolat, de baies fraîches ou de caramel si désiré.
- Réfrigérez pendant au moins 15 minutes avant de servir.
Notes
Nutrition

Hi, I’m Olivia Parker, the founder of BakingSecret.com and a lifelong lover of all things sweet and homemade. I grew up in a small town in Oregon, where the smell of fresh cookies in my family’s kitchen sparked my passion for baking. Over the years, I turned that passion into a mission: to help home bakers feel confident, inspired, and creative.
After studying food science and working in several artisan bakeries across the U.S., I decided to create a space where everyone from beginners to seasoned bakers can find reliable recipes, expert tips, and a warm, welcoming community. BakingSecret.com is my way of sharing the magic of baking with the world. When I’m not testing new recipes, you’ll find me exploring farmers’ markets, collecting vintage cookbooks, or perfecting my sourdough technique.