
Cheesecake Fruit Roll-Ups: Your New Favorite Summer Treat!
Let me tell you about the day my picnic planning hit a wall. I needed something that felt like a party but didn’t need plates or forks. I stared at my tortillas, then at a bowl of summer fruit, and a wild idea was born. Mixing creamy cheesecake filling with juicy berries and wrapping it all up? It was a genius moment! These Cheesecake Fruit Roll-Ups are the no-fuss, fun-to-eat dessert that makes everyone smile.
A Twist on Two Classics
We all love the creamy tang of a classic cheesecake, and who can resist a fresh fruit salad on a hot day? These roll-ups are my playful mash-up of those two beloved ideas. Instead of a crumbly graham cracker base, I use a soft tortilla for easy rolling. It’s a modern, handheld version perfect for our on-the-go lives. Think of it as the fun cousin of a dessert taco or a sweet summer burrito! It takes the grand tradition of cheesecake and makes it picnic-friendly and downright adorable.
Why You’ll Go Nuts for This Recipe
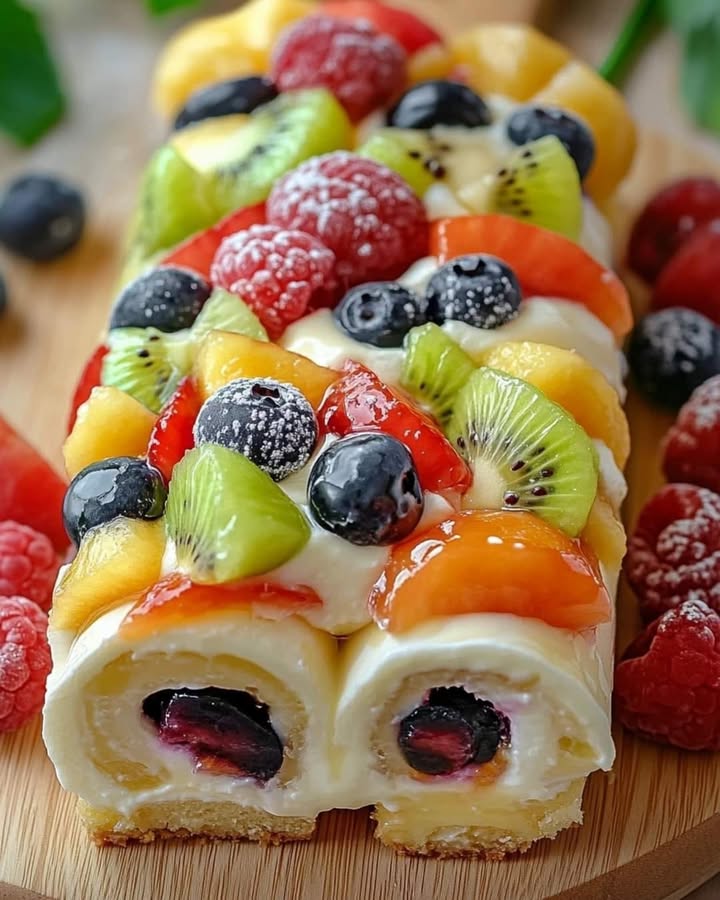
First, they are incredibly easy. No oven, no fancy equipment. Second, the flavor combo is unreal. Sweet-tart fruit with rich, fluffy cheesecake filling is a match made in heaven. Third, they look fantastic! The cinnamon-sugar coating sparkles, and the colorful fruit peeks through when you slice them. They’re a guaranteed conversation starter. Plus, you can mix and match fruits based on what’s in season or what your kids love most.
The Perfect Time for Cheesecake Fruit Roll-Ups
These roll-ups are your secret weapon for so many occasions! They’re a star at backyard BBQs, potlucks, and birthday parties. Pack them for a hike or a day at the beach—they travel like a dream. I love making them for a light weekend lunch dessert or a special after-school snack. They turn an ordinary Tuesday into a little celebration.
What You’ll Need
Gathering your ingredients is the first fun step. Here’s everything for our delicious Fruit Dessert adventure:
- For the Cheesecake Filling: Unsalted butter, powdered sugar, cream cheese, vanilla extract.
- For the Whipped Cream: Heavy whipping cream and a bit more powdered sugar (or use pre-made).
- The Fruit Medley: Fresh blueberries, strawberries, peaches, kiwis, and raspberries.
- The Secret Thickener: A small box of sugar-free instant vanilla pudding mix.
- For the Wrap & Coat: Large flour tortillas, melted butter, granulated sugar, and cinnamon.
No Problem! Handy Substitutions
Don’t have a specific fruit or ingredient? No worries! Cooking is about creativity.
- Fruit: Use any seasonal mix! Blackberries, mango, or pineapple work wonderfully.
- Cream Cheese: For a lighter taste, try Neufchâtel cheese.
- Tortillas: Spinach or tomato tortillas add fun color. For a gluten-free option, use your favorite GF wraps.
- Sugar-Free Pudding: Regular instant vanilla pudding works too; your filling will just be sweeter.
Let’s Make Some Cheesecake Fruit Roll-Ups!
Ready for the fun part? Follow these simple steps to dessert heaven. The key is to keep everything cool and have your fruit prepped.
Step 1: Whip the Cream to Stiff Peaks
Start by chilling your mixing bowl and beaters for 10 minutes. This helps the cream whip up faster and higher. Pour in the cold heavy cream and powdered sugar. Beat on medium-high speed until you see beautiful, soft peaks that hold their shape when you lift the beater. The cream will look fluffy and cloud-like. Set this aside for later—it’s the key to our creamy filling.
Step 2: Create the Creamy Cheesecake Base
In a large bowl, combine the softened cream cheese and butter. Beat them together until perfectly smooth and lump-free. Now, add the vanilla and the rest of the powdered sugar. Keep beating until the mixture is light and creamy. Gently fold in the whipped cream you just made. Use a spatula and a light hand to keep all that air in the mixture. You’ll see it transform into a dreamy, spreadable cloud.
Step 3: Gently Fold in the Rainbow of Fruit
This is where the colors pop! Add your diced strawberries, peaches, kiwis, and blueberries to the cream mixture. Fold them in carefully so you don’t crush the berries. We save the raspberries for last. Their vibrant red juice can bleed if mixed in too early. A gentle fold keeps everything pretty and distinct. The filling will be bursting with color and fresh fruit bits.
Pro tip: Pat your diced fruit dry with a paper towel. This keeps the filling from getting too watery.
Step 4: Thicken with Pudding Mix
Sprinkle the entire packet of sugar-free instant vanilla pudding mix over the fruit and cream filling. This is the magic step! The pudding mix will start to absorb excess moisture from the fruit and thicken the filling right before your eyes. Stir it in until it’s fully combined. You’ll notice the texture becoming more stable, which is perfect for spreading.
Step 5: Chill and Firm Up the Filling
Patience, my friend! This short rest is crucial. Cover the bowl and pop it in the fridge for 30 minutes. This chill time lets the pudding work its thickening magic and firms everything up. A firm filling is much easier to spread on the tortillas without making a soggy mess. Use this time to clean up and get your tortillas ready.
Step 6: Assemble and Roll Them Up
Take your chilled filling and room-temperature tortillas. Spread a generous, even layer of filling over each tortilla, leaving a small border at the edges. Scatter a few raspberry halves across the top. Now, roll it up tightly, like you would a wrap or a burrito. Tuck in the ends as you go to keep all that goodness inside. The contrast of the white cream, colorful fruit, and golden tortilla is just lovely.
Step 7: The Sweet, Sparkly Finish
Mix the cinnamon and sugar in a shallow dish. Lightly brush the outside of each rolled tortilla with melted butter. Then, roll it in the cinnamon-sugar mixture until it’s coated in sparkly sweetness. The butter helps the sugar stick and adds a wonderful flavor. Finally, use a sharp knife to slice each roll into 1-inch pinwheels. Serve them immediately on a platter and watch them disappear!
Chef’s tip: For super clean slices, wipe your knife clean between each cut.
Your Cheesecake Roll-Up Timeline
This is a wonderfully quick Quick Dessert! Active prep time is about 15-20 minutes of fun assembly. The 30-minute chill time is mostly hands-off. There’s no cooking bake time, just the few minutes it takes to roll and coat them. From start to glorious finish, you’re looking at under an hour for a dessert that looks like you spent all day.
My Secret for the Best Fruit Roll-Ups
Here’s my little secret: temperature is everything. Room-temperature cream cheese and butter blend smoothly without lumps. Cold, chilled whipped cream and filling spread neatly without melting. And room-temperature tortillas won’t crack when you roll them. Mastering these simple temps is the key to perfect, fuss-free roll-ups every single time.
A Berry Interesting Fact
Did you know the kiwi—that fuzzy little brown fruit with bright green flesh—is officially a berry? It’s true! Originally called the Chinese gooseberry, it was renamed for New Zealand’s national bird in the 1950s for marketing. Its vibrant green color and tart-sweet flavor make it a perfect, playful addition to our fresh fruit mix, adding a lovely pop of color and a boost of vitamin C to our dessert.
Helpful Tools for the Job
You don’t need fancy gear! A good electric hand mixer or stand mixer makes whipping cream and blending the filling a breeze. You’ll also need:
- Mixing bowls (one chilled!)
- A sturdy spatula for folding
- A sharp serrated knife for clean slicing
- Pastry brush for the butter
- Shallow dish for the cinnamon-sugar
Storing Your Sweet Creations
These Cheesecake Roll-Ups are best enjoyed the day they are made. The tortilla can soften over time from the moisture in the filling. If you have leftovers, place them in a single layer in an airtight container. Store them in the refrigerator for up to 24 hours.
For longer storage, you can freeze the roll-ups before slicing and coating them in cinnamon-sugar. Wrap each unsliced roll tightly in plastic wrap, then place in a freezer bag. They will keep for up to 2 months.
When ready to serve, thaw in the refrigerator overnight. Then, give them a fresh brush of butter, a roll in cinnamon-sugar, and slice. The texture will be slightly softer but still delicious!
Tips for Roll-Up Success
- Don’t skip the chill time for the filling. It’s the difference between a mess and magic.
- Use a thick, sturdy tortilla. The thin “street taco” size can tear easily.
- If your filling seems too soft after chilling, you can fold in an extra tablespoon of pudding mix.
- Serve on a platter lined with parchment or lettuce leaves for a pretty presentation.
Presentation Ideas to Impress
Make your dessert table shine! Arrange the sliced pinwheels on a large platter in a sunburst pattern. For individual servings, place a few slices on small plates with a dollop of extra whipped cream and a mint leaf. For a party, create a dessert board with the roll-ups, extra fruit skewers, and bowls of chocolate sauce for dipping. Get creative!
Love This? Try These Other Amazing Recipes!
If you enjoyed making these fun roll-ups, I have a treasure trove of other tested recipes you’ll adore. For a savory contrast, these Crispy Savory Cabbage Fritters are a fantastic, quick side dish. When you’re ready for the ultimate chocolate indulgence, you must try my decadent Ultimate German Chocolate Cheesecake. For another no-bake treat, these elegant Whipped Chocolate Cheesecake Parfaits are perfect in a glass. And for a family-friendly dinner, these Garlic Parmesan Chicken Meatloaves are always a hit. Happy cooking!
Common Mistakes to Avoid
Avoiding these simple pitfalls will guarantee perfect roll-ups every time you make them.
Mistake 1: Using Cold or Over-softened Cream Cheese
This is the biggest culprit for lumpy filling. Straight-from-the-fridge cream cheese won’t blend smoothly. Microwave-softened cheese can become runny and ruin the structure. The goal is “room temperature soft.” Leave the blocks on the counter for about 30-60 minutes before you start. They should feel slightly soft when poked but still hold their shape. This ensures a silky, lump-free cheesecake base.
Mistake 2: Over-mixing the Fruit into the Filling
We want pretty fruit pieces, not fruit mush! Vigorously stirring or using a mixer will crush your delicate berries and turn the whole filling pink or purple. Always use a gentle folding motion with a spatula. Add the softest fruits, like raspberries, last. This preserves their texture and keeps the colors vibrant and distinct in your final Summer Treat.
Mistake 3: Spreading Filling on Cold Tortillas
If your tortillas are cold from the fridge, they become stiff and are prone to cracking when you try to roll them. Always let your tortillas sit out wrapped in a kitchen towel for 15-20 minutes before assembling. Flexible, room-temperature tortillas roll up beautifully without tearing, keeping your filling neatly inside where it belongs.
Mistake 4: Skipping the Pudding Mix
It might seem like a small ingredient, but the instant pudding mix is the stabilizing hero. Fruit releases juice, especially as it sits with sugar. The pudding powder absorbs that excess moisture and thickens the filling. Without it, your filling can become watery and make the tortilla soggy very quickly. Don’t leave it out!
Mistake 5: Not Letting the Roll-Ups Set Before Slicing
You’ve rolled them, and they look amazing! But if you slice immediately, the filling can squish out the sides. After rolling and coating them in cinnamon-sugar, let the whole roll-ups rest on the cutting board for 5-10 minutes. This brief rest lets the filling set a bit more against the tortilla, resulting in cleaner, prettier pinwheel slices when you cut.
Your Cheesecake Fruit Roll-Up Questions, Answered
Can I make these Cheesecake Fruit Roll-Ups ahead of time?
You can prepare the filling up to a day in advance! Keep it tightly covered in the refrigerator. I recommend assembling the actual roll-ups no more than a few hours before serving. This prevents the tortillas from getting too soft. You can also freeze the unsliced, uncoated rolls for up to 2 months. Thaw in the fridge overnight, then coat in butter and cinnamon-sugar right before slicing and serving for the best texture.
Can I use frozen fruit instead of fresh?
You can, but you must thaw and drain it very thoroughly. Frozen fruit holds a lot of water. If you don’t drain it well, your filling will become soupy. Spread the thawed fruit on several layers of paper towels and press gently to remove as much liquid as possible. For the best texture and to avoid a soggy mess, fresh fruit is highly recommended for this particular recipe.
What’s the best way to roll these up without tearing?
Start with room-temperature, flexible tortillas. Don’t overfill them—leave about an inch border at the top. Place your fillings slightly below the centerline. Fold the bottom flap up over the filling, tuck it in snugly, then fold in the sides like a burrito. Roll firmly from the bottom to the top, applying even pressure. A tight roll holds together better when slicing.
My filling is too runny. How can I fix it?
The most common cause is fruit with too much moisture or not enough chill time. First, put the whole bowl of filling back in the fridge for another 20-30 minutes. If it’s still runny, you can gently fold in an extra tablespoon of instant pudding mix. This will help absorb the liquid. Also, next time, be sure to pat your diced fruit dry with a paper towel before adding it to the cream mixture.
Can I make these gluten-free or low-carb?
Absolutely! For a gluten-free version, simply use your favorite brand of gluten-free tortillas or wraps. For a lower-carb option, look for coconut or almond flour-based tortillas. Just be aware that alternative tortillas can sometimes be more fragile, so handle them gently when rolling. The filling itself is easily adaptable to many dietary needs.
Is there a dairy-free alternative for this recipe?
Yes, you can make a delicious dairy-free version. Use plant-based cream cheese and butter sticks. For the whipped cream, chill a can of full-fat coconut cream overnight, then scoop out the solid part to whip. Be sure your instant pudding mix is also dairy-free, as some contain milk solids. The fruit, of course, is naturally dairy-free!
How long can I store leftovers, and how?
Store leftover sliced roll-ups in a single layer in an airtight container in the refrigerator. They are best eaten within 24 hours. The tortilla will continue to soften, but they will still taste delicious. I do not recommend storing them at room temperature due to the dairy in the filling. For longer storage, freeze the uncoated, unsliced rolls as described above.
Can I use a different flavor of pudding mix?
You can experiment! Cheesecake-flavored instant pudding would be fantastic. White chocolate or lemon pudding could also add a fun twist. Keep in mind that using a flavored, sweetened pudding will change the overall sweetness of your filling, so you may want to slightly reduce the powdered sugar in the base to balance it out.
Why is my cinnamon-sugar not sticking to the roll-ups?
The butter is your glue! Make sure you are using melted butter and brushing a light, even coat over the entire outside surface of the tortilla roll. If the butter soaks in too quickly or isn’t enough, the sugar won’t adhere. A good brush of butter ensures every roll-up gets that sweet, sparkly, crunchy coating we all love.
Can I add other ingredients, like nuts or chocolate?
Of course! Mini chocolate chips, chopped toasted pecans or almonds, or even a drizzle of Nutella inside the roll would be delightful additions. If adding nuts, fold them in with the fruit. If adding chocolate chips, sprinkle them over the filling before you roll. Feel free to get creative and make this recipe your own. A sprinkle of mini chips on top of the filling adds a wonderful texture.
Wrapping It All Up
I hope you feel inspired to whip up a batch of these joyful Cheesecake Fruit Roll-Ups. They truly are the perfect mix of easy, impressive, and downright delicious. They capture all the bright flavors of summer in one fun, handheld package. Remember, the foundation of any great dish starts with quality ingredients and a little know-how, which is why considering your everyday nutrition choices is a great habit. If you fell in love with the creamy cheesecake part of this recipe, you’ll find so many more delicious ideas in my complete collection of cheesecake-inspired treats. Now, go grab those tortillas and that summer fruit—it’s time to roll, coat, and enjoy every sweet, fresh bite!
Equipment
- Mélangeur électrique
- Grand bol
- Spatule
- Couteau dentelé
- Pinceau à pâtisserie
Ingredients
- 4 oz beurre non salé, ramolli
- 1 cup sucre glace
- 8 oz fromage à la crème, ramolli
- 1 tsp extrait de vanille
- 1 cup crème épaisse
- 2 tbsp sucre glace ou utiliser pré-fait
- 1 small box mélange de pudding à la vanille sans sucre
- 4 large tortillas de farine
- 2 tbsp beurre fondu
- 1/4 cup sucre granulé
- 1 tsp cannelle
- 1/2 cup myrtilles fraîches
- 1/2 cup fraises, coupées
- 1/2 cup pêches, coupées
- 1 kiwi, coupé
- 1/2 cup framboises, coupées en deux
Instructions
- Refroidir votre bol de mélange et vos batteurs pendant 10 minutes.
- Verser la crème épaisse froide et le sucre glace dans le bol refroidi.
- Battre à vitesse moyenne-haute jusqu'à ce que des pics mous se forment.
- Dans un grand bol, mélanger le fromage à la crème ramolli et le beurre, puis battre jusqu'à obtenir une consistance lisse.
- Ajouter l'extrait de vanille et le reste du sucre glace, et battre jusqu'à ce que le mélange soit crémeux.
- Incorporer délicatement le mélange de crème fouettée.
- Ajouter les fraises, pêches, kiwis et myrtilles coupés au mélange de crème et plier délicatement.
- Parsemer le mélange de pudding à la vanille sans sucre sur le mélange et remuer jusqu'à ce que combiné.
- Couvrir le bol et réfrigérer pendant 30 minutes.
- Étaler une couche de garniture sur chaque tortilla, en laissant une bordure.
- Éparpiller les moitiés de framboises sur le dessus et rouler les tortillas bien serrées.
- Dans un plat peu profond, mélanger le sucre et la cannelle.
- Badigeonner les tortillas roulées de beurre fondu et les rouler dans le mélange sucre-cannelle.
- Trancher chaque rouleau en morceaux de 1 pouce et servir immédiatement.
Notes
Nutrition

Hi, I’m Olivia Parker, the founder of BakingSecret.com and a lifelong lover of all things sweet and homemade. I grew up in a small town in Oregon, where the smell of fresh cookies in my family’s kitchen sparked my passion for baking. Over the years, I turned that passion into a mission: to help home bakers feel confident, inspired, and creative.
After studying food science and working in several artisan bakeries across the U.S., I decided to create a space where everyone from beginners to seasoned bakers can find reliable recipes, expert tips, and a warm, welcoming community. BakingSecret.com is my way of sharing the magic of baking with the world. When I’m not testing new recipes, you’ll find me exploring farmers’ markets, collecting vintage cookbooks, or perfecting my sourdough technique.