
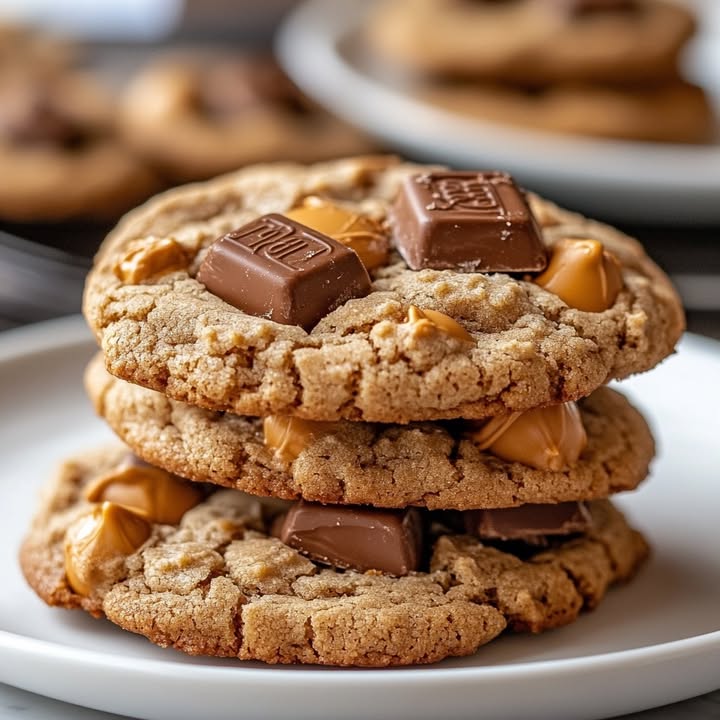
The Ultimate Reward: Peanut Butter Reese’s Cookies
Is anything better than that classic combo of chocolate and peanut butter? I honestly don’t think so. There’s something magical about it that makes me feel like a kid again. Now, imagine taking that perfect pairing and baking it into a warm, chewy cookie. That’s exactly what these Peanut Butter Reese’s Cookies do. They are the cookie version of my favorite candy, and they never fail to make everyone in my house smile. I’ve tested this recipe countless times, tweaking it until it became the foolproof family favorite I’m sharing with you today.
From Candy Bar to Cookie Jar: A Sweet Evolution
The story of these cookies is really the story of a candy obsession. Reese’s Peanut Butter Cups were invented in the 1920s. Their genius lay in pairing two great tastes. It wasn’t long before home bakers, like me, started dreaming up ways to bake them into things. I remember trying my first “Reese’s cookie” at a friend’s bake sale years ago. It was dry and the candy chunks were scarce. I knew I could make a better, more generous version. My goal was a cookie that was soft, packed with peanut butter flavor, and loaded with those iconic chocolatey bits. That’s the heart of this Reese’s peanut butter cookies recipe.
Why You’ll Absolutely Love These Reese’s Cookies
Let me tell you why this batch is a winner every single time.
- Flavor Bomb: It’s a double dose of peanut butter – from the cookie dough itself and from the chopped cups!
- Easy & Fun: The process is straightforward and a joy, especially folding in those colorful Reese’s Pieces.
- Perfect Texture: They bake up with a soft center and slightly crisp edge, the ideal cookie texture.
- Crowd-Pleaser: From kids to adults, these cookies are universally loved. They disappear fast!
Perfect Occasions for These Homemade Cookies
This recipe is your secret weapon for many happy events.
- Game Day Gatherings: Serve them alongside snacks for a sweet touch that beats store-bought.
- School Bake Sales: They are irresistible and will sell out quicker than you can imagine.
- Potlucks & Parties: A reliable dessert that always gets compliments and requests for the recipe.
- Just a “Tuesday”: Sometimes, you just need a midweek baking project to lift spirits. This is it.
Gathering Your Ingredients for Reese’s Peanut Butter Cookies
Here’s everything you’ll need to make about 24 glorious cookies.
- 1 cup unsalted butter, softened
- 1 cup creamy peanut butter
- 1 cup granulated sugar
- 1 cup brown sugar, packed
- 1 large egg
- 1 teaspoon vanilla extract
- 1 ½ cups all-purpose flour
- ½ teaspoon baking soda
- ½ teaspoon salt
- 1 cup chopped Reese’s peanut butter cups
- ½ cup mini Reese’s Pieces (optional, but fun!)
Smart Substitution Options
Don’t fret if you’re missing something. Here are some easy swaps.
- Butter: Salted butter works fine. Just omit the added salt in the recipe.
- Peanut Butter: You can use a natural style, but the dough might be a bit oilier. Chunky peanut butter adds extra texture!
- Reese’s Cups: If you’re in a pinch, other peanut butter chocolates or even dark chocolate chunks can work.
- Reese’s Pieces: Regular M&M’s can add a similar colorful, candy-coated crunch.
- Flour: For a slightly different texture, you can use 1 ¾ cups of whole wheat flour.
Let’s Bake! Your Step-by-Step Guide
Step 1: Preheat and Prep
Start by warming your oven to 350°F (175°C). This ensures it’s ready when your dough is perfectly mixed. Line your baking sheets with parchment paper. This little step is a lifesaver. It prevents sticking and makes cleanup a breeze. I never bake cookies without it. Pro tip: If you don’t have parchment, a light coating of non-stick spray on the pan works too.
Step 2: Mix the Wet Ingredients
In a large bowl, combine your softened butter, creamy peanut butter, granulated sugar, and brown sugar. Beat them together until the mixture becomes light, fluffy, and wonderfully creamy. You’ll see the color change from deep brown to a lighter, caramel hue. The smell of peanut butter and sugar at this stage is already heavenly. Adding the egg and vanilla next binds everything together and adds that warm, familiar aroma.
Step 3: Combine the Dry Ingredients
In a separate bowl, whisk together the flour, baking soda, and salt. This ensures the baking soda and salt are evenly distributed. No one wants a cookie with a salty spot! Whisking also aerates the flour a bit, which helps create a tender cookie. You’ll see the dry ingredients become one uniform, pale mixture. Now you’re ready to bring the two bowls together.
Step 4: Bring Dry and Wet Together
Gradually add your dry flour mixture to the wet peanut butter mixture. Mix it gently until the ingredients are just combined. Overmixing can lead to tough cookies, so stop as soon as you see no more dry flour patches. The dough will be thick, soft, and hold its shape beautifully. It’s a rich, peanutty dough that’s begging for its candy additions.
Step 5: Add the Candy Party
This is the fun part! Fold in your chopped Reese’s peanut butter cups and the mini Reese’s Pieces if you’re using them. Use a spatula to gently turn the dough, distributing those chocolatey treasures throughout. The dough becomes speckled with brown candy chunks and bright orange pieces. It looks festive and tastes even better. Chef’s tip: Chop the Reese’s cups into uneven chunks. Some big, some small. This gives varied chocolate pockets in the baked cookie.
Step 6: Scoop and Shape
Scoop tablespoon-sized portions of dough onto your prepared baking sheet. I like to use a cookie scoop for even sizes. Space them about 2 inches apart. This gives them room to spread and bake evenly without merging into one giant cookie. The dough balls look like little treasure mounds, packed with candy surprises. You can gently press them down slightly if you prefer a less domed cookie.
Step 7: Bake to Perfect Goldenness
Bake your cookies for 8 to 10 minutes. Watch for the edges to become set and take on a light golden color. The centers should still look a bit soft. This is key for that perfect soft-and-chewy texture. They will firm up as they cool. Pro tip: Since oven temperatures vary, start checking at 8 minutes. If you like a crisper cookie, bake for the full 10-11 minutes.
Step 8: Cool and Enjoy
Let the cookies cool on the baking sheet for 5 minutes. This allows them to finish setting without falling apart. Then, transfer them to a wire rack to cool completely. This stops the bottom from getting soggy. The wait is tough, but a warm cookie is a true delight. Once cool, stack them up or serve them right away. The aroma in your kitchen will be incredible.
Your Baking Timeline
- Prep Time: 15 minutes (chopping candy, mixing dough)
- Cook Time: 10 minutes per batch
- Cool Time: 15 minutes
- Total Time: About 40 minutes
Chef’s Secret for the Best Cookies
My secret? Freeze the chopped Reese’s cups for 10 minutes before adding them to the dough. Cold candy chunks melt less during baking. This keeps those distinct, gooey peanut butter cup pockets inside your cookie. It makes the texture even better.
A Little Extra Sweet Info
Did you know the original Reese’s Peanut Butter Cup was made by Harry Burnett Reese? He was a former dairy employee and farmer who started making candy in his basement. He used leftover chocolate from Hershey’s. Now, his creation is a star in our baking. That’s a pretty sweet bit of history for your cookie jar!
Necessary Equipment
You don’t need fancy tools. Here’s the simple list:
- Large mixing bowl
- Medium mixing bowl
- Electric mixer or sturdy wooden spoon
- Whisk
- Measuring cups and spoons
- Baking sheets
- Parchment paper
- Wire cooling rack
- Cookie scoop or tablespoon
Storing Your Peanut Butter Reese’s Cookies
Short-Term Storage: Keep your cookies in an airtight container at room temperature. They will stay soft and delicious for up to 5 days. Place a piece of parchment between layers if stacking to prevent sticking. A cookie jar is perfect for this.
Long-Term Freezing: These cookies freeze beautifully for up to 3 months. Ensure they are completely cooled first. Wrap them tightly in plastic wrap or place them in a freezer-safe bag. Thaw at room temperature for an hour before serving. They taste almost freshly baked.
Freezing the Dough: You can also freeze unbaked dough balls for a future treat. Scoop the dough onto a sheet, freeze solid, then transfer to a freezer bag. Bake straight from frozen, adding 1-2 extra minutes to the bake time. It’s like having instant cookie happiness on demand.
Tips and Advice for Success
- Ensure your butter is softened, not melted. Room temperature butter blends best.
- Don’t overmix the dough after adding the flour. Mix just until combined.
- For extra flavor, use a peanut butter with a bit of salt in it.
- Let your baking sheets cool between batches. Hot pans can cause dough to spread too fast.
Presentation Tips to Impress
Make your cookies look as good as they taste!
- Stack them on a vintage cake stand for a classic look.
- Package a few in a clear cellophane bag tied with a ribbon for a lovely gift.
- Serve them warm on a plate with a small glass of cold milk for the ultimate combo.
- Add a few extra Reese’s Pieces on top of the cookies right after baking for extra color.
Healthier & Fun Alternative Recipes
Love the idea but want to tweak it? Try these six fun variations.
- Gluten-Free Reese’s Cookies: Substitute the all-purpose flour with a 1:1 gluten-free baking blend. The result is a cookie everyone can enjoy.
- Vegan Peanut Butter Cookies: Use vegan butter, a flax egg, and ensure your peanut butter and candy are vegan-friendly. It’s a plant-based delight.
- Lower-Sugar Version: Reduce the granulated and brown sugar by ¼ cup each. The peanut butter and candy still provide plenty of sweetness.
- Reese’s Cookie Bars: Press the dough into a greased 9×13 pan and bake at 350°F for 20-25 minutes. Cut into squares for easy serving.
- Reese’s Thumbprint Cookies: Make the dough, form balls, and press a mini Reese’s cup into the center before baking. It’s a cute, focused candy burst.
- Double Chocolate Reese’s Cookies: Add ½ cup of cocoa powder to the dry ingredients for a rich chocolate dough base. It’s a chocolate lover’s dream.
Connecting to Other Sweet Recipes
If you adored this recipe, you might also love exploring other ways to use Reese’s candy. For instance, a classic Reese’s Peanut Butter Blossom cookie uses a Hershey’s Kiss instead of chopped cups. Or, try a more decadent Reese’s Peanut Butter Brownie for a fudgy treat. For a no-bake option, Reese’s Peanut Butter Pie is always a crowd-pleaser. And if you’re a fan of bars, this Reese’s Peanut Butter Cup Bar recipe is incredibly easy and delicious.
Common Mistakes to Avoid
Mistake 1: Using Melted Butter
This is a big one. If your butter is melted or too warm, your dough will be greasy. It will spread way too much in the oven. Your cookies will end up flat and possibly burnt on the edges. Always use softened butter. It should be cool to the touch but easy to press with a finger. Pro tip: If you forgot to take butter out, cut it into small chunks and let it sit for 15-20 minutes.
Mistake 2: Overmixing the Dough
Once you add the flour, you only need to mix until it’s just combined. Overmixing activates the gluten in the flour too much. This leads to tough, dense cookies instead of soft, tender ones. Stop mixing as soon as you see no dry flour patches. It’s okay if the dough looks a bit shaggy. It will come together when you fold in the candy.
Mistake 3: Overbaking the Cookies
These cookies are meant to be soft. They might look underdone when you take them out. That’s perfect! The edges should be set and slightly golden, but the centers should look soft. They will finish setting as they cool on the sheet. Overbaking leads to dry, crunchy cookies. Remember, 8-10 minutes is usually enough. Trust the process.
Mistake 4: Skipping the Parchment Paper
Baking directly on a greased pan can cause uneven browning and spreading. The butter in the dough can make the pan too greasy. Parchment paper creates a perfect non-stick surface. It also makes cleanup instant. If you don’t have parchment, a silicone baking mat is a great alternative. It’s a small step with a big payoff.
Mistake 5: Adding Warm Candy Chunks
Chopping Reese’s cups can warm them up. If you add warm candy to the dough, it melts faster in the oven. This can cause the chocolate to bleed and create oily spots. My chef’s secret is to chill the chopped candy for a few minutes before adding it. This keeps those lovely distinct pockets of candy in your finished cookie.
A Note on Freshness and Nutrition
Getting the best texture in baked goods often hinges on proper technique, much like how gentle steaming preserves nutrients and texture in vegetables. For cookies, careful mixing and not overbaking preserve that perfect soft, chewy quality we love so much.
If you’re looking for more incredible sweet ideas, don’t forget to browse our full collection of cookie and biscuit recipes for everything from classic shortbread to modern mash-ups.
Frequently Asked Questions
Can I use crunchy peanut butter instead of creamy?
Absolutely! Using crunchy peanut butter will add little bits of peanut throughout the cookie dough. It gives an extra texture and nutty flavor. The dough will behave the same way. Just make sure it’s a standard commercial brand, not a super oily natural style, for the best consistency. Your cookies will have a nice peanut crunch alongside the Reese’s chunks.
Flat cookies usually point to two issues. First, your butter might have been too soft or even melted. This makes the dough too loose. Second, your baking sheet might have been too hot. Always use cool pans for each batch. Also, ensure your dough is properly chilled if you feel it’s too soft. A 10-minute rest in the fridge can help firm it up before baking.
Yes, you can definitely make them with a sturdy wooden spoon and some elbow grease. The key is to really beat the butter, peanut butter, and sugars until they are well combined and fluffy. It will take a bit more time and effort, but it works perfectly. Mixing the dry ingredients in might require a bit more care to avoid overworking the dough with your arms.
The best sign is the edges. Look for a light golden brown color around the very edge of each cookie. The centers should still look pale, soft, and slightly puffed. They will not look fully set. If you touch the edge lightly, it should feel firm. Remember, they continue to cook on the hot baking sheet after you take them out. So taking them out at this stage guarantees a soft center.
Can I add other candies to this recipe?
You can! This recipe is a great base for many candy additions. Try chopped chocolate bars, toffee bits, or even white chocolate chunks. Keep the total added candy to about 1 ½ cups so the dough can still hold together. If you add something very sweet, like caramel pieces, you might reduce the sugar in the dough slightly. Experiment and find your favorite combo.
What’s the best way to chop the Reese’s peanut butter cups?
Use a sharp knife on a cutting board. You can chop them into rough, uneven chunks. Some pieces can be quite large, others small. This variety gives great texture. Pro tip: Unwrap them and let them sit for a minute. Sometimes a slightly cooler cup is easier to chop. If they’re very soft, pop them in the fridge for five minutes first.
At room temperature in an airtight container, they stay fresh for about 5 days. For longer storage, freeze them. They freeze exceptionally well for up to 3 months. Thaw them at room temperature. You can also freeze the unbaked dough balls. Bake them directly from frozen, adding a minute or two to the baking time.
Why is the salt important in the recipe?
The salt balances the sweetness. It enhances all the flavors, especially the peanut butter and chocolate. Without it, the cookies can taste one-dimensionally sweet and flat. Even if you use salted butter, I recommend keeping the added salt. It’s a small amount that makes a big difference in the final taste profile of your Reese’s peanut butter cookies.
You can adjust the size easily. For bigger cookies, use a larger scoop (about 2 tablespoons). Space them farther apart on the sheet and bake for maybe 1-2 minutes longer. For smaller, bite-sized cookies, use a teaspoon-sized scoop. They will bake a little quicker, around 6-7 minutes. Just watch the edges for that golden color as your guide.
What if I don’t have Reese’s Pieces? Are they necessary?
The Reese’s Pieces are optional but fun. They add color and a little extra candy-coated peanut flavor. If you don’t have them, just use the full amount of chopped Reese’s cups. You can also substitute with other small candies like M&M’s. Or, simply increase the chopped cups to 1 ½ cups for an even more intense peanut butter cup experience.
Your Baking Adventure Awaits
So there you have it! My tried-and-true recipe for the ultimate Peanut Butter Reese’s Cookies. They combine two of the best flavors in the world into one warm, comforting treat. Baking them is a simple joy, and sharing them brings even more happiness. I hope this recipe becomes a staple in your home, just like it is in mine. Grab your bowl, soften your butter, and get ready to make some magic. Your kitchen will smell amazing, and your cookie jar will be full of love. Happy baking!
Equipment
- Grand bol
- Fouet électrique
- Spatule
- Plaque à pâtisserie
- Papier sulfurisé
Ingredients
- 1 tasse beurre non salé, ramolli
- 1 tasse beurre de cacahuète crémeux
- 1 tasse sucre blanc
- 1 tasse sucre brun, tassé
- 1 œuf gros
- 1 cuil. à café extrait de vanille
- 1.5 tasse farine tout usage
- 0.5 cuil. à café bicarbonate de soude
- 0.5 cuil. à café sel
- 1 tasse Reese's cup hachés
- 0.5 tasse mini Reese's Pieces (facultatif)
Instructions
- Préchauffez le four à 175°C (350°F) et tapissez les plaques à pâtisserie de papier sulfurisé.
- Dans un grand bol, combinez le beurre ramolli, le beurre de cacahuète, le sucre blanc et le sucre brun; battez jusqu'à ce que le mélange soit léger et crémeux.
- Ajoutez l'œuf et l'extrait de vanille; mélangez jusqu'à ce que le tout soit bien combiné.
- Dans un autre bol, mélangez la farine, le bicarbonate de soude et le sel.
- Incorporez progressivement le mélange de matières sèches au mélange humide; mélangez doucement jusqu'à ce que tout soit juste combiné.
- Incorporez les morceaux de Reese's hachés et les mini Reese's Pieces jusqu'à ce qu'ils soient uniformément répartis.
- Déposez des portions de la taille d'une cuillère à soupe de pâte sur la plaque préparée, en les espaçant de 5 cm.
- Faites cuire pendant 8 à 10 minutes jusqu'à ce que les bords soient pris et légèrement dorés; laissez refroidir pendant 5 minutes sur la plaque à pâtisserie, puis transférez sur une grille pour refroidir complètement.
Notes
Nutrition

Hi, I’m Olivia Parker, the founder of BakingSecret.com and a lifelong lover of all things sweet and homemade. I grew up in a small town in Oregon, where the smell of fresh cookies in my family’s kitchen sparked my passion for baking. Over the years, I turned that passion into a mission: to help home bakers feel confident, inspired, and creative.
After studying food science and working in several artisan bakeries across the U.S., I decided to create a space where everyone from beginners to seasoned bakers can find reliable recipes, expert tips, and a warm, welcoming community. BakingSecret.com is my way of sharing the magic of baking with the world. When I’m not testing new recipes, you’ll find me exploring farmers’ markets, collecting vintage cookbooks, or perfecting my sourdough technique.