
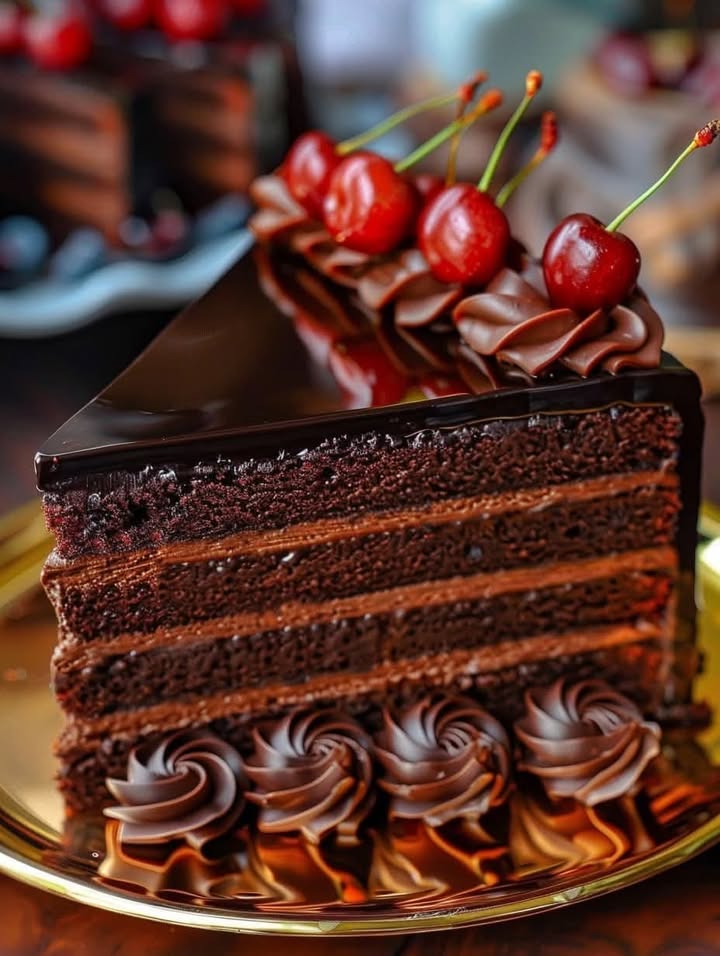
The Ultimate Decadent Dark Chocolate Layer Cake
You know that feeling when a serious chocolate craving hits? I’m not talking about a polite little nibble. I’m talking about a deep, soul-satisfying need for pure, unadulterated chocolate bliss. That’s exactly what led me to perfect this Dark Chocolate Layer Cake. After many, many happy “tests” with my family (they never complained once!), I landed on this version. It’s rich, it’s moist, and that silky ganache? Pure magic. Let’s bake a memory together.
A Slice of Chocolate History
The layer cake is a classic American celebration dessert. But this Decadent Chocolate Delight is my personal tribute to that tradition. I remember my grandma’s chocolate cake, which was always a bit dense and very sweet. I wanted to create something with a more grown-up, intense dark chocolate flavor, but still incredibly tender. Adding hot water to the batter, a trick I learned from an old cookbook, unlocks the cocoa’s deepest notes. It’s like a hug from the inside.
Why You’ll Fall in Love With This Chocolate Dream
- Intense Chocolate Flavor: Using high-quality cocoa and dark chocolate makes every bite a rich experience.
- Unbelievably Moist: Thanks to oil and that secret hot water, this cake stays soft for days.
- Stunningly Simple: It looks fancy, but the steps are straightforward. You can absolutely do this!
- Crowd-Pleasing Power: Whether it’s a birthday or a Tuesday, this cake makes everyone smile.
Perfect Occasions for Your Chocolate Masterpiece
This cake isn’t just for birthdays! It’s perfect for anniversaries, holiday dinners, or as a spectacular “just-because” treat. I love bringing it to potlucks—it always disappears first. It’s also my go-to for when friends need a pick-me-up. A slice of this chocolate layer cake says, “I care about you,” in the most delicious way possible.
Gathering Your Ingredients
For the Cake:
- 1 ¾ cups all-purpose flour
- 1 ¾ cups granulated sugar
- ¾ cup unsweetened cocoa powder (go for the good stuff!)
- 2 tsp baking powder
- 1 tsp baking soda
- 1 tsp salt
- 2 large eggs, at room temperature
- 1 cup whole milk
- ½ cup vegetable oil
- 2 tsp vanilla extract
- 1 cup boiling water
For the Chocolate Ganache:
- 1 ½ cups heavy cream
- 12 oz dark chocolate, finely chopped
- 1 tsp vanilla extract
Smart Substitutions
Out of something? No worries! You can use buttermilk instead of regular milk for a slight tang. If you’re out of dark chocolate, semi-sweet works beautifully for the ganache. For a dairy-free version, use coconut milk in the cake and a dairy-free cream alternative for the ganache. The cake might be a bit different, but it will still be wonderful.
Creating Your Decadent Chocolate Delight
Step 1: Mixing the Dreamy Batter
First, heat your oven to 350°F (175°C). Grease and line your two 9-inch cake pans. This little step is a lifesaver for clean releases! In a big bowl, whisk together your dry ingredients: flour, sugar, cocoa, baking powder, baking soda, and salt. Watch as the dark cocoa dust swirls into the white flour. It’s like a chocolate storm in a bowl. Add the eggs, milk, oil, and vanilla. Beat it all on medium until the batter is smooth and shiny. Now, slowly pour in the boiling water. Pro tip: The batter will become beautifully thin and liquid. This is what gives us that amazing, moist texture later. Don’t be alarmed!
Step 2: Baking to Perfection
Pour that luscious, thin batter evenly between your two pans. Slide them into the oven. Your kitchen will soon smell like a chocolate factory. Bake for 30-35 minutes. You’ll know it’s done when a toothpick poked in the middle comes out with just a few moist crumbs, not wet batter. Let the cakes cool in the pans for 10 minutes. Then, gently turn them out onto a wire rack to cool completely. Patience is key here! A warm cake with ganache is a slippery, messy business.
Step 3: Crafting the Silky Ganache
While the cakes cool, make the magic: the ganache. Heat the heavy cream in a saucepan until tiny bubbles form around the edges—it should be steaming, not boiling. Pour the hot cream over your finely chopped dark chocolate in a heatproof bowl. Let it sit for a few minutes. This melts the chocolate gently. Then, start stirring from the center outwards. You’ll see it transform into a glossy, luxurious pool. Stir in the vanilla. Let it cool and thicken slightly until it’s spreadable, like soft peanut butter.
Step 4: The Grand Assembly
This is the fun part! If you want an extra-tall, impressive cake, carefully slice each cooled cake layer in half horizontally. You’ll get four thin layers. Place the first layer on your plate. Spread a generous, swoopy layer of that luscious ganache on top. Repeat, stacking layer upon layer. Finally, cover the top and sides with the remaining ganache. Use your spatula to create smooth sides or a swirly, rustic look. Chef’s tip: A turntable or lazy Susan makes frosting a thousand times easier!
Step 5: The Final Flourish
Your Decadent Dark Chocolate Layer Cake is already a masterpiece. But a little garnish makes it sing. Top it with fresh raspberries, a sprinkle of sea salt, or some simple chocolate curls. I love using a vegetable peeler on a block of chocolate to make the curls. It adds such a professional, beautiful touch with zero effort.
Your Baking Timeline
- Prep Time: 30 minutes
- Cook Time: 35 minutes
- Cooling Time: 1 hour (so important!)
- Assembly Time: 20 minutes
- Total Time: About 2 hours 25 minutes
Chef’s Secret
The secret to an intensely flavored, incredibly moist cake is the boiling water. It “blooms” the cocoa powder, deepening its flavor. It also creates a thin batter that steams in the oven, resulting in the most tender crumb you can imagine. Don’t skip this step!
A Chocolatey Fact
Dark chocolate isn’t just delicious; it contains antioxidants! The higher the cocoa percentage, the more benefits. So while we’re indulging in this Decadent Chocolate Delight, we’re also giving ourselves a little bit of a healthy treat. It’s a win-win in my book.
Your Cake-Making Toolkit
You don’t need fancy gear. Just gather: Two 9-inch round cake pans, mixing bowls, a whisk, an electric mixer (handheld is fine), a spatula for folding and frosting, a wire rack for cooling, and a serrated knife for splitting the layers if you’re feeling brave.
Keeping Your Cake Fresh
This cake stores wonderfully, if it lasts! Keep any leftovers covered at room temperature for up to 2 days. The ganache will stay perfectly soft.
For longer storage, you can refrigerate it for up to 5 days. Just let individual slices come to room temperature for about 30 minutes before serving. This brings back the soft texture and full flavor.
You can also freeze the unfrosted cake layers tightly wrapped for up to 2 months. Thaw overnight in the fridge and make fresh ganache when you’re ready to assemble.
My Best Tips & Advice
- Room Temp is Key: Using room-temperature eggs and milk helps your batter come together smoothly and bake evenly.
- Sift Your Cocoa: Cocoa loves to clump. Sifting it with your dry ingredients guarantees a lump-free, silky cake.
- Chill for Clean Slices: Want a perfect, clean slice for guests? Pop the assembled cake in the fridge for 20 minutes before cutting.
Presentation Inspiration
A beautiful cake deserves a beautiful plate! Serve it on a cake stand for a special touch. Dust the edges with powdered sugar using a small sieve. For a party, add edible gold leaf flakes. You can also pipe little whipped cream rosettes around the base. A simple mint leaf next to each slice adds a fresh pop of color.
Common Mistakes to Avoid
Mistake 1: Measuring Flour Incorrectly
Scooping flour directly from the bag packs it down, leading to too much flour in your cup. This is the #1 reason cakes turn out dry and dense. Instead, spoon the flour lightly into your measuring cup and level it off with a knife. For absolute accuracy, use a kitchen scale. Your cake will be much lighter and fluffier.
Mistake 2: Adding Ganache to a Warm Cake
Impatience is the enemy of a pretty cake! If your cake layers are even slightly warm, the rich ganache will melt on contact. It will slide right off and create a messy, thin coating. Let the layers cool completely on a wire rack. This can take a solid hour. Use this time to clean up and make your ganache.
Mistake 3: Overmixing the Batter After Adding Water
Once you add the boiling water, the batter will be very liquid. That’s normal! Overmixing at this stage can develop the gluten in the flour, making your cake a bit tough or rubbery. Just stir gently until the water is fully incorporated, then stop. A few small lumps are perfectly fine.
Mistake 4: Using Low-Quality Cocoa or Chocolate
This cake is all about celebrating deep chocolate flavor. Using a bland, low-quality cocoa powder or baking chocolate for the ganache will give you a bland result. It’s worth spending a little more on a good-quality Dutch-process cocoa and a dark chocolate bar you’d enjoy eating on its own. The flavor difference is incredible.
Healthier Chocolate Twists
Love chocolate but want some lighter options? Here are a few delicious ideas:
- Whole Wheat Version: Swap half the all-purpose flour for whole wheat pastry flour. It adds a nutty depth and more fiber.
- Reduced Sugar: You can often reduce the sugar in the cake by ¼ cup without major texture changes. The ganache will still be plenty sweet.
- Avocado Swaps: For a healthier fat, replace the vegetable oil with an equal amount of mashed ripe avocado. You won’t taste it, and the cake stays super moist.
- Berry Compote Filling: Lighten up between layers by using a sugar-free raspberry or strawberry compote with just a thin layer of ganache.
- Mini Cake Layers: Bake the batter in a sheet pan and use a round cutter to make small, portion-controlled individual layer cakes.
- Greek Yogurt Frosting: Make a lighter frosting by whipping Greek yogurt with a little honey and cocoa powder for a tangy, protein-packed topping.
More Sweet Inspiration
If you love simple, impressive desserts, you should definitely explore our other recipes. For a miraculously easy treat, try this 2-Ingredient Yogurt Cake. When you need a no-bake showstopper, our Baileys Chocolate Cheesecake Trifle is always a hit. And for a fun breakfast or snack, these Nutella Swirl Muffins are pure joy. You can find even more ideas in our full collection of delicious cake and cupcake recipes.
Frequently Asked Questions
Can I make this cake ahead of time?
Absolutely! You can bake the cake layers up to 2 days in advance. Let them cool completely, wrap them tightly in plastic wrap, and store at room temperature. You can also freeze them for a month. Make the ganache the day you plan to assemble the cake for the freshest taste and best texture. The assembled cake holds up beautifully at room temperature for a day.
What’s the best cocoa powder to use?
For the deepest, richest chocolate flavor, I recommend using a Dutch-processed cocoa powder. It has been treated to neutralize its acidity, resulting in a darker color and smoother, more mellow taste. It makes a big difference in a cake where chocolate is the star. Natural cocoa powder will work, but the flavor will be more sharp and rustic.
My ganache is too runny! How can I fix it?
Don’t worry, this happens! If your ganache is too thin to spread, it just needs more time to cool and thicken. You can leave it at room temperature, stirring occasionally, for about an hour. For a quicker fix, pop it in the refrigerator for 10-15 minutes, stirring every 5 minutes. Be careful not to let it get too firm. If it becomes too hard, you can gently re-warm it over a double boiler.
Can I use milk chocolate instead of dark?
You can, but the flavor profile will change significantly. Milk chocolate is much sweeter and less intense. Your ganache will be sweeter and have a lighter color. If you do use milk chocolate, you might want to reduce the sugar in the cake batter slightly to balance the overall sweetness of the dessert.
Why did my cake layers dome in the middle?
This is common! It’s usually caused by the oven heat being too high at the start, which makes the edges set before the center has finished rising. To prevent doming, make sure your oven is accurately calibrated. You can also try using baking strips—they insulate the pans for more even baking. Or, simply level the domes with a serrated knife after cooling for perfectly flat layers.
How do I know when the cake is perfectly baked?
The toothpick test is your best friend. Insert a wooden toothpick or a small paring knife into the center of the cake. It should come out with a few moist crumbs clinging to it, but not with wet, shiny batter. The edges of the cake will also start to pull away slightly from the sides of the pan. Remember, it’s always better to slightly under-bake than over-bake a chocolate cake for maximum moisture.
Can I turn this into cupcakes?
Yes, this recipe adapts wonderfully to cupcakes! Fill lined muffin cups about ⅔ full with the batter. Bake at the same temperature (350°F) for 18-22 minutes, or until a toothpick comes out clean. You’ll get about 24-28 cupcakes. Top them with a dollop of the whipped ganache instead of fully frosting them.
Does the type of pan affect baking time?
It definitely does. Dark or non-stick pans absorb more heat and can cause the edges to bake faster, potentially leading to drier edges. Light-colored aluminum pans are ideal for even baking. If you only have dark pans, reduce the oven temperature by 25 degrees Fahrenheit to compensate. Always start checking for doneness a few minutes before the recommended time.
How important is it to use room temperature ingredients?
Very important for a uniform, well-emulsified batter! Cold ingredients, especially eggs and milk, don’t blend as easily into the fat and dry ingredients. This can result in a curdled-looking batter and a denser, less tender cake texture. Plan ahead by taking your eggs and milk out of the fridge about 30-60 minutes before you start baking.
Is there a way to make the ganache shiny?
For a super glossy, professional finish, add a tiny bit of light corn syrup or honey to the ganache after mixing—about 1 teaspoon. Also, pouring the hot cream over the chocolate and letting it sit without stirring for a full 5 minutes allows the chocolate to melt evenly, which promotes a high-gloss finish when you finally stir it.
Time to Bake Your Masterpiece!
There you have it, friends! Every tip and trick I’ve learned to make this Decadent Dark Chocolate Layer Cake a guaranteed success. It’s a labor of love, but each step is so worth it when you see that first slice come out perfectly. Remember, baking is about joy. Don’t stress over perfection. A slightly lopsided cake covered in delicious chocolate is still a triumph. Now, preheat that oven, put on your favorite apron, and get ready for the best chocolate cake you’ve ever made. Happy baking!
Equipment
- Grand bol
- Fouet
- Spatule
- Plaque à pâtisserie
- Papier sulfurisé
Ingredients
- 2 œufs
- 350 g sucre
- 90 g cacao en poudre
- 270 g farine tout usage
- 10 g poudre à lever
- 5 g sel
- 400 ml crème épaisse
- 250 ml sauce caramel
- 200 g pépites de chocolat
- q.s. sucre glace pour saupoudrer
- q.s. cacao en poudre pour saupoudrer
- q.s. sauce caramel pour le décor
Instructions
- Préchauffez votre four à 175°C. Graissez et tapissez deux moules à gâteau de 23 cm.
- Dans un grand bol, mélangez les ingrédients secs : farine, sucre, cacao, poudre à lever, bicarbonate de soude et sel.
- Ajoutez les œufs, le lait, l'huile et la vanille aux ingrédients secs et battez à vitesse moyenne jusqu'à l'obtention d'un mélange lisse.
- Incorporer doucement l'eau bouillante jusqu'à ce qu'elle soit entièrement intégrée.
- Versez la pâte uniformément dans les moules préparés et faites cuire pendant 30-35 minutes.
- Laissez refroidir les gâteaux dans les moules pendant 10 minutes, puis démoulez-les et laissez-les refroidir complètement sur une grille.
- Pendant ce temps, pour la ganache, faites chauffer la crème épaisse jusqu'à ce qu'elle commence à fumer et versez-la sur le chocolat haché, laissez reposer quelques minutes.
- Mélangez la crème et le chocolat jusqu'à l'obtention d'un mélange homogène, puis incorporez l'extrait de vanille.
- Une fois les gâteaux refroidis, coupez-les en deux horizontalement si désiré pour créer des couches.
- Étalez la ganache entre les couches et sur le dessus et les côtés du gâteau.
- Décorez le gâteau avec des framboises fraîches, du sel de mer ou des copeaux de chocolat.
Notes
Nutrition
Hi there! I’m Emma Lawson, and I’m thrilled to be part of the BakingSecret.com team! Baking has been a part of my life since I was a little girl, growing up in a family that loved to bake together. From birthday cakes to cookies, I learned early on that the kitchen was a place of creativity and connection.
After studying culinary arts at The Culinary Institute of America, I fell in love with the science behind baking. Understanding how different ingredients interact and how slight adjustments can change the final product is something that continues to fascinate me. My background in pastry arts and food science has helped me develop recipes that are not only delicious but also reliable.
At BakingSecret.com, I’m excited to share recipes that cater to all levels, from beginners to seasoned bakers. My goal is to make sure that you feel confident in the kitchen and have fun with every bake. When I’m not in the kitchen, you can find me experimenting with new flavor combinations, hiking, or trying out new coffee shops in town!