
Introduction: The Magic of Drizzle Cheesecake
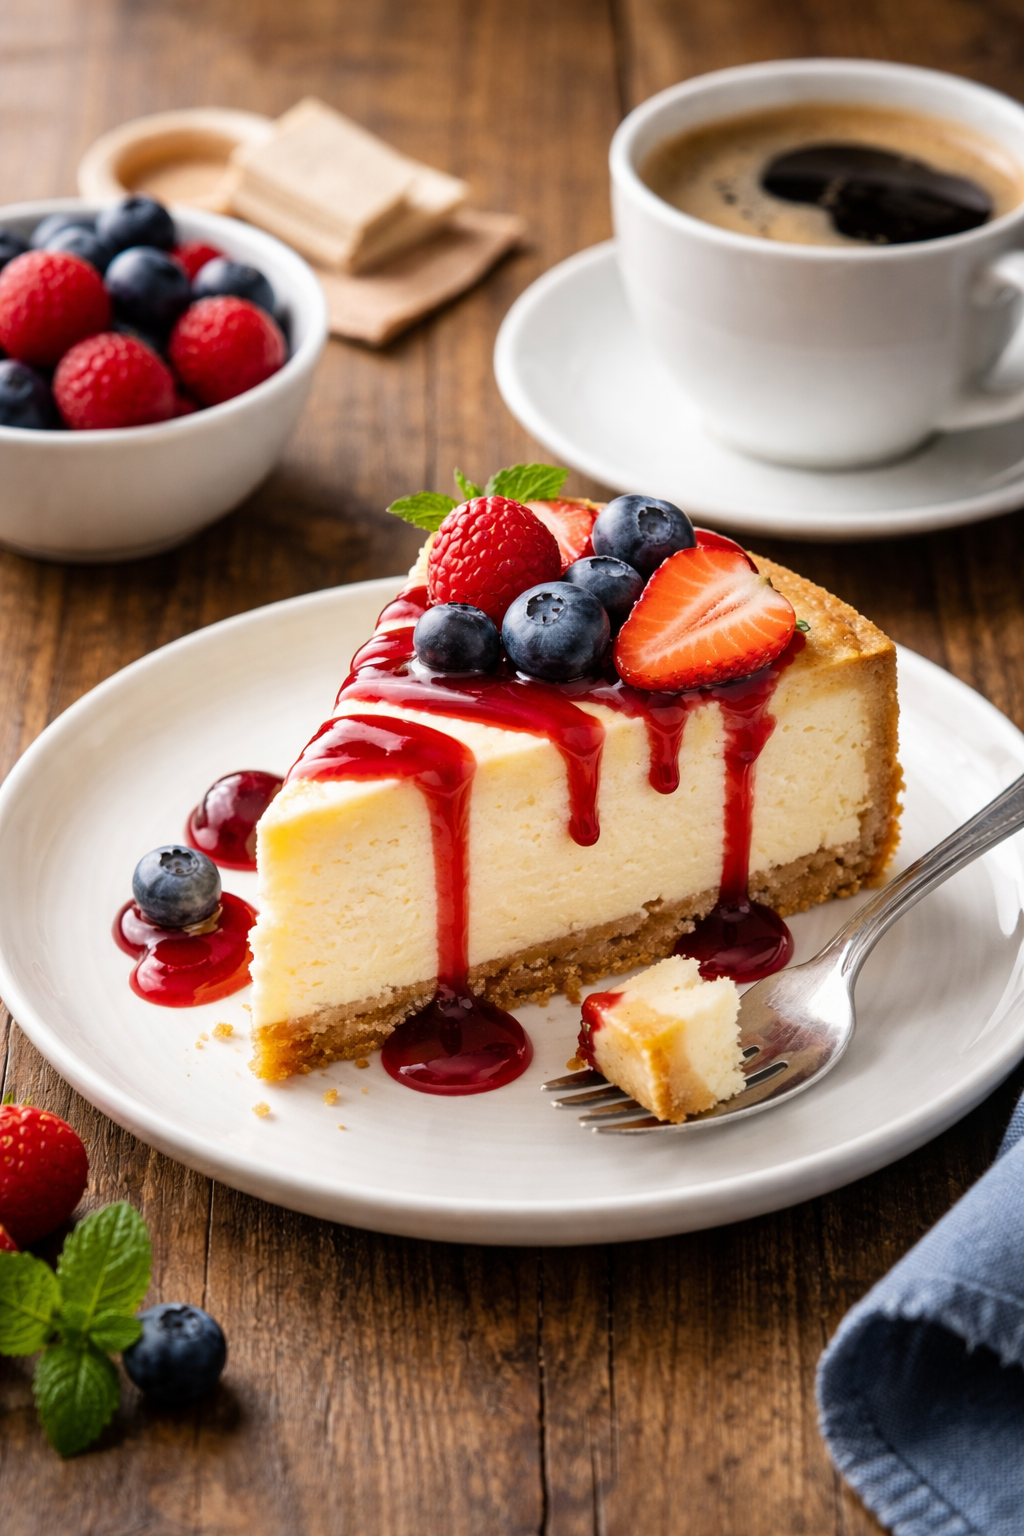
I’ll never forget the first time I saw a cheesecake with a glossy chocolate drizzle cascading down its sides. My aunt had made it for Thanksgiving, and I honestly couldn’t take my eyes off it. The dessert table was packed with pies and cookies, but that cheesecake with its dark, shiny drizzle stole the show. When I finally got a slice, I understood why. The rich chocolate sauce mixed with the creamy cheesecake in every bite, and it was absolute perfection.
That’s when I realized something important. A simple drizzle cheesecake can turn a good dessert into something amazing. You don’t need fancy decorating skills or expensive ingredients. Just a well-made sauce and a steady hand can make your cheesecake look like it came from a bakery.
The best part about drizzling is how easy it is. You’re not piping flowers or making sugar sculptures. You’re just letting a delicious sauce flow over your cheesecake in a natural, beautiful way. And the flavor boost? It’s incredible. A plain cheesecake is wonderful on its own, but adding a drizzle gives it another layer of taste and texture that makes people come back for seconds.
I’ve made dozens of drizzled cheesecakes over the years. Some for birthday parties, some for holidays, and some just because I wanted dessert on a random Tuesday. Every single time, people ask for the recipe. They’re always surprised when I tell them how simple it is to make their cheesecake look and taste this good.
What is Drizzle Cheesecake?
Let me explain what makes a drizzle cheesecake different from your standard dessert. At its core, it’s a regular cheesecake topped with a sauce that’s been drizzled across the surface in a decorative pattern. The drizzle can cover the whole top, cascade down the sides, or create elegant lines across individual slices.
Think of it this way: a regular cheesecake stands alone with maybe a plain fruit topping or nothing at all. A drizzle cheesecake gets dressed up with a sauce that adds both visual appeal and extra flavor. It’s like the difference between a plain white t-shirt and one with a cool design on it. Both are good, but one has that extra something.
The drizzle itself is usually a smooth, pourable sauce. It needs to be thin enough to flow nicely but thick enough to create those pretty patterns without just pooling at the bottom. When you get the consistency right, you can create those professional-looking zigzags and swirls that make people think you went to pastry school.
Benefits of Adding a Drizzle to Your Cheesecake
I’ve found so many reasons to love drizzled cheesecakes. Here’s why I think you should try making one:
- Flavor variety: You can completely change the taste profile of your cheesecake with just one drizzle. A plain cheesecake becomes a chocolate lover’s dream or a fruity delight depending on what you choose.
- Visual impact: Let’s be honest, we eat with our eyes first. A drizzled cheesecake looks impressive and fancy without requiring hours of decoration work.
- Texture contrast: The smooth sauce adds a different mouthfeel that complements the creamy cheesecake filling perfectly.
- Easy customization: You can match the drizzle to any theme or season. Caramel for fall, berry sauce for summer, chocolate for winter holidays.
- Covers imperfections: Got a crack in your cheesecake? A generous drizzle will hide it completely. I’ve saved many cracked cheesecakes this way.
Common Types of Drizzles Used on Cheesecake
The world of drizzle options is huge. I’ve tried probably every combination you can imagine. Here are the most popular choices that work beautifully:
Chocolate drizzle is probably the most classic choice. You can use dark chocolate for a rich, slightly bitter contrast, milk chocolate for sweetness, or white chocolate for something creamy and mild. I melt chocolate with a bit of cream to get the perfect drizzling consistency. It works on almost any flavor of cheesecake.
Caramel sauce is my personal favorite during autumn months. The buttery, sweet flavor pairs amazingly with plain or vanilla cheesecake. You can make salted caramel for a sophisticated twist or keep it classic with regular caramel. Either way, people will scrape their plates clean.
Fruit sauces bring brightness and color to your dessert. Strawberry, raspberry, blueberry, and mixed berry sauces are all fantastic options. They cut through the richness of the cheesecake with their natural tartness. Plus, they make the dessert look absolutely gorgeous with their vibrant colors.
Dulce de leche is similar to caramel but has a deeper, more complex flavor. It’s thicker than most drizzles, so you might need to warm it slightly. The result is worth it though.
Coffee or espresso sauce works great for coffee lovers. Mix some strong espresso with sugar and a bit of cream, and you’ve got a drizzle that tastes like your favorite coffee drink.
Peanut butter or nut butter drizzles create a completely different experience. Thin them out with a little cream or milk, and they become pourable. They’re perfect if you want something less sweet than chocolate or caramel.
How to Choose the Right Drizzle for Your Cheesecake
Picking the perfect drizzle isn’t rocket science, but there are a few things I consider every time I make a cheesecake.
First, think about the cheesecake flavor itself. A chocolate cheesecake might be too much with a chocolate drizzle. Try caramel or raspberry instead. Plain or vanilla cheesecake is like a blank canvas. It goes with everything.
Consider your audience. Are you serving kids? They’ll probably love chocolate or caramel. Making dessert for sophisticated dinner guests? A tart berry sauce or espresso drizzle might impress them more.
The season matters too. I reach for bright fruit sauces in spring and summer. When fall arrives, I’m all about caramel and chocolate. Winter holidays call for peppermint chocolate or spiced caramel.
Think about color as well. If you’re serving the cheesecake at a themed party, you can match the drizzle to the color scheme. Red strawberry sauce for Valentine’s Day, orange caramel for Halloween, you get the idea.
Don’t be afraid to mix flavors. Some of my best cheesecakes have had two different drizzles. Chocolate and caramel together is amazing. So is raspberry and white chocolate. Just make sure the flavors complement each other rather than fighting for attention.
What Are Some Popular Flavors for Drizzling on Cheesecake?
People ask me this question all the time at parties. They want to know what works best and what combinations taste good together.
The most popular drizzle flavors are chocolate, caramel, and strawberry. These three are classics for a reason. They’re familiar, delicious, and almost everyone loves them. You can’t go wrong starting with one of these options.
But if you want to get more creative, here are some combinations I’ve tested and loved:
- Salted caramel with pretzel pieces sprinkled on top
- Dark chocolate with orange zest mixed in
- White chocolate with crushed Oreo cookies
- Raspberry sauce with fresh mint leaves as garnish
- Nutella thinned with cream for a hazelnut chocolate drizzle
- Lemon curd for a tangy, bright option
- Maple syrup for a simple, natural sweetness
The truth is, almost any sauce that tastes good can work as a drizzle. I’ve even used honey, balsamic reduction, and passion fruit curd. The key is making sure it’s the right consistency to drizzle smoothly and that it complements your cheesecake flavor rather than overpowering it.
How to Make a Perfect Drizzle Cheesecake
Now that you’ve got some ideas about flavors, let me walk you through actually making one of these beauties from start to finish. I’m going to share the exact process I use every time, including all the little tricks I’ve learned from my mistakes over the years.
The foundation of any great drizzle cheesecake starts with the base itself. You can’t just slap a pretty drizzle on a mediocre cheesecake and expect magic. Trust me, I tried that once for a potluck and people were polite, but I knew it wasn’t my best work. The cheesecake needs to be solid before we even think about decoration.
First things first, you need to pick your cheese. I always use full-fat cream cheese, and I mean always. Some people try to save calories with low-fat versions, but honestly? It never works out the same. The texture gets grainy and the flavor falls flat. You want that brick-style cream cheese, and make sure it’s at room temperature before you start. I usually set mine out about two hours before baking. Cold cream cheese creates lumps, and nobody wants a lumpy cheesecake.
Here’s something I learned the hard way: let your cream cheese sit in the mixer bowl and beat it by itself for a minute before adding anything else. Just the cream cheese, nothing more. This breaks down any lumps and creates this super smooth base that makes everything easier later. Then add your sugar and beat it again until it’s fluffy. The more air you incorporate at this stage, the creamier your final texture will be.
When you add eggs, and this is crucial, add them one at a time. I know it feels tedious, but each egg needs to fully incorporate before the next one goes in. And here’s the secret: don’t overmix once the eggs are in. Mix just until you can’t see the egg anymore, then stop. Overmixing creates too much air, which leads to cracks when the cheesecake bakes. Those cracks aren’t the end of the world since we’re covering them with drizzle anyway, but why not avoid them if we can?
The crust deserves attention too. I usually go with graham crackers mixed with melted butter and a pinch of sugar. Press it firmly into the bottom of your pan. Use the bottom of a measuring cup to really pack it down. A loose crust will fall apart when you cut slices, and that’s just disappointing. If you want to get fancy, you can extend the crust up the sides of the pan a bit, which looks gorgeous when you remove the springform ring. Just like with our cookies and cream cheesecake variations, the crust provides that essential textural contrast.
Baking is where things get interesting. I always use a water bath, no exceptions. Wrap your springform pan in aluminum foil, set it in a larger pan, and pour hot water into the outer pan until it comes about halfway up the sides of your cheesecake pan. This creates steam and gentle, even heat that prevents cracks and ensures the cheesecake cooks uniformly. The top won’t brown or dry out, and the center will set perfectly.
Temperature matters more than you’d think. I bake at 325 degrees Fahrenheit, never higher. High heat is the enemy of smooth cheesecake. When it’s done, the edges should be set but the center should still jiggle slightly when you gently shake the pan. It looks underdone, but it’ll continue cooking as it cools. If you wait until the center is completely firm in the oven, you’ve overcooked it.
The cooling process is something people always rush, and it drives me crazy. You need to let the cheesecake cool in the turned-off oven with the door cracked open for about an hour. Then take it out and let it come to room temperature on the counter. This gradual cooling prevents the dramatic temperature change that causes cracks. Once it’s room temperature, refrigerate it for at least four hours, but overnight is better. A properly chilled cheesecake is firmer and easier to drizzle on.
Preparing and Applying Your Drizzle
Okay, so your cheesecake is baked and chilled. Now comes the fun part where we make it look like a professional bakery creation.
Making the drizzle itself depends on what flavor you’ve chosen. For chocolate, I melt chocolate chips with heavy cream in a double boiler, stirring constantly until it’s silky smooth. The ratio is usually about one cup of chocolate to a quarter cup of cream, but you can adjust based on how thick or thin you want it. Funny enough, I once used milk instead of cream and the drizzle seized up into this weird, grainy mess. Stick with heavy cream for chocolate drizzles.
Caramel sauce can be homemade or store-bought, I won’t judge. If it’s too thick straight from the jar, warm it gently in the microwave for ten to fifteen seconds and stir. You want it to pour smoothly off a spoon in a steady stream without being so thin that it just runs everywhere immediately. When you’re exploring different topping options, consistency is everything.
For fruit sauces, I simmer fresh or frozen berries with sugar and a splash of lemon juice until they break down. Then I strain out the seeds if I’m feeling fancy, or leave them in for a more rustic look. Let the sauce cool slightly before drizzling because hot sauce can melt the cheesecake surface.
How Do I Make a Smooth and Creamy Cheesecake Filling?
People ask me this constantly, so let me address it directly. The secret to that velvety, restaurant-quality texture comes down to three things: room temperature ingredients, proper mixing technique, and not overbaking.
Everything that goes into your filling should be at room temperature. Cold eggs, cold cream cheese, even cold sour cream if your recipe uses it, will create a lumpy batter no matter how much you mix. I set everything out on my counter in the morning if I’m baking that afternoon. Also, scrape down the bowl frequently while mixing. Ingredients hide in the bottom and sides, and those unmixed bits create texture problems later.
What Tools Do I Need to Drizzle My Cheesecake?
You don’t need anything fancy, honestly. I’ve drizzled cheesecakes with just a regular spoon, and they turned out beautiful. But if you want to know what I actually use, here’s my toolkit.
A squeeze bottle is my favorite method. You can buy them at kitchen stores or just save old condiment bottles and wash them thoroughly. Fill the bottle with your drizzle and squeeze it over the cheesecake in whatever pattern you want. You have complete control over where the sauce goes and how much comes out. The narrow tip creates those elegant thin lines that look so professional.
Piping bags work great too, especially if you cut a small hole in the tip. You don’t need a fancy piping tip, just snip off the corner of the bag. This gives you similar control to a squeeze bottle but might feel more natural if you’ve done any cake decorating before.
If you’re going rustic and simple, a regular spoon works perfectly fine. Dip it in your drizzle and wave it back and forth over the cheesecake, letting the sauce fall in random patterns. It won’t be as precise, but it has a charming, homemade look that I actually prefer sometimes. Similar to how we might serve cheesecake in more casual presentations, there’s beauty in simplicity.
For really thin drizzles, a fork can create beautiful delicate lines. Dip the fork in the sauce and quickly wave it over the cheesecake. The tines create multiple thin streams that look intricate and detailed.
Creative Drizzle Ideas
By the way, once you’ve mastered the basic technique, the creative possibilities become endless. I’ve made cheesecakes with drizzles that reflect seasons, holidays, and even specific color schemes for parties.
Layering multiple drizzles creates depth and complexity that’s really impressive. Start with your first drizzle and let it set in the fridge for about fifteen minutes. Then add the second drizzle in a different pattern. I love doing white chocolate first, then dark chocolate over it. The contrast is stunning. Or try caramel first with chocolate on top. The key is making sure the first layer is set enough that the second one doesn’t just blend into it completely.
For a marbled effect, drizzle both sauces on at the same time, then use a toothpick to swirl them together gently. Don’t overdo it or they’ll just mix into one muddy color. Just a few strategic swirls create that beautiful marble pattern.
Can I Use Natural Ingredients for Drizzling Cheesecake?
Absolutely, and I do it all the time. Honey makes a gorgeous drizzle that’s completely natural and requires zero preparation. It’s thick enough to create nice patterns and adds a floral sweetness that’s different from regular sugar. Maple syrup works the same way, especially on cheesecakes with autumn flavors.
Pureed fruit is another natural option. Blend fresh strawberries or mangoes until smooth, strain if you want, and drizzle away. You might need to reduce them slightly on the stove to thicken them up, but the flavor is incredibly fresh and bright. Date syrup is something I’ve recently discovered, and it’s amazing. It has this deep, caramel-like flavor but it’s just concentrated dates. Much like making bite-sized cheesecake treats, using quality natural ingredients elevates everything.
Coconut cream can be sweetened and reduced to make a dairy-free drizzle that still feels indulgent. And nut butters thinned with a bit of almond milk create protein-rich drizzles that are less sweet but incredibly satisfying.
Seasonal themes are where I really have fun. In summer, I go crazy with berry drizzles mixed with fresh mint. Autumn means everything pumpkin spice, apple cider caramel, and maple pecan. Winter holidays get peppermint chocolate, eggnog-flavored white chocolate, or cranberry sauce drizzles. Spring calls for lemon curd, passionfruit, and light floral flavors like lavender honey.
For themed parties, match your drizzle to the occasion. Baby showers get pink or blue drizzles depending on the gender reveal. Halloween gets orange caramel or black chocolate dyed with food coloring. Fourth of July can have red, white, and blue drizzles using strawberry, white chocolate, and blueberry sauces.
The best advice I can give you is to experiment. Make a plain cheesecake and try different drizzles on different slices. Take notes on what you like. That’s honestly how I developed most of my favorite combinations, just playing around and tasting everything.
Serving and Presenting Your Drizzle Cheesecake
After all the work you’ve put into making your masterpiece, the way you serve it can make or break the whole experience. I learned this at my sister’s engagement party when I brought what I thought was a gorgeous drizzled cheesecake, only to have it look like a mangled mess by the time I sliced it up. The presentation matters just as much as the taste, trust me.
When you’re ready to serve your drizzle cheesecake, take it out of the fridge about ten to fifteen minutes before slicing. A slightly softened cheesecake cuts much cleaner than one that’s ice cold. I know this seems counterintuitive because you want it firm, but that extra bit of give makes the knife glide through instead of dragging and creating jagged edges.
The knife you use is critical. I always fill a tall glass with very hot water and keep it next to my cutting board. Before each cut, I dip the knife in the hot water, then wipe it completely dry with a clean towel. Make your cut in one smooth motion from back to front without sawing. Then dip and wipe again before the next slice. This hot knife trick changed my life, honestly. The heat melts through the cheesecake and drizzle like butter, giving you those perfect, clean edges that look like they came from a fancy bakery.
For serving, I like to place each slice on individual dessert plates. If you have white plates, even better, because the drizzle really pops against that clean background. Add a little garnish that matches your drizzle. Fresh berries for fruit sauces, a sprinkle of sea salt for caramel, shaved chocolate for chocolate drizzle. Just a small touch on the plate next to the slice makes it look intentional and beautiful.
Here’s something I do that always gets compliments: I add an extra drizzle on the plate itself. Put your slice down, then take your squeeze bottle and make a quick artistic swirl on the empty part of the plate. It looks like something from a restaurant and takes literally two seconds. Sometimes I’ll dust a tiny bit of cocoa powder or powdered sugar over the whole thing too, just for that final professional touch.
If you’re serving a crowd at a party or gathering, you can pre-slice the whole cheesecake but leave it assembled in the pan. That way people can see the full beauty of your creation before taking their slice. Just run your hot knife through to mark the slices, then use a pie server to lift each piece out when someone wants it. This method keeps the cheesecake looking gorgeous throughout the whole event instead of becoming a demolished pile halfway through.
Tips for Perfect Slicing and Plating
Beyond the hot knife trick, there are a few other things that’ll make your slicing game so much better. First off, think about how many slices you want before you start cutting. A standard nine-inch cheesecake typically gives you twelve decent-sized slices or sixteen smaller ones. I actually make light marks on the top with a knife to plan out my portions before committing to full cuts. Nothing worse than ending up with one weird tiny slice at the end because your measurements were off.
The first slice is always the hardest to remove without it falling apart. I’ve found that if you cut two slices and remove them both at once, it’s way easier than trying to wrestle out that first piece alone. The second slice gives you more room to maneuver, and they both come out cleaner. Weird but true.
When you’re lifting the slice out, use an offset spatula or a thin pie server. Slide it under the crust gently, making sure you’ve got the whole bottom supported. Then lift straight up and transfer to your plate in one smooth motion. If you tilt or wiggle too much, the drizzle can slide off or the slice can lose its shape. I keep a damp cloth nearby to wipe the spatula between slices so drizzle doesn’t build up on it.
For special occasions, you can get really fancy with plating. I’ve done mirror-glazed plates where I spread a thin layer of fruit sauce on the plate first, then place the slice on top. Or you can create a design with multiple sauces using squeeze bottles, kind of like those abstract paintings you see in fine dining restaurants. It sounds intimidating, but seriously, just squiggle some sauces around and people will think you’re a culinary genius.
Storing Leftover Drizzle Cheesecake
Okay, assuming you actually have leftovers, which doesn’t always happen in my house, you need to know how to store your cheesecake properly. The drizzle adds a layer of complexity because some toppings store differently than others.
Always keep your cheesecake in the refrigerator. This isn’t like a regular cake that can sit on the counter. The cream cheese filling needs to stay cold to maintain food safety and texture. I cover mine tightly with plastic wrap or aluminum foil, making sure the covering touches the cut edges to prevent them from drying out. If you have the original springform pan, you can leave the cheesecake in there and just cover the whole thing.
For individual slices, I wrap each one separately in plastic wrap and store them in an airtight container. This way they don’t absorb weird refrigerator smells, and you can just grab one whenever you want a piece without unwrapping the whole thing. The drizzle might lose a tiny bit of its glossy appearance after a day or two in the fridge, but the taste stays perfect.
Here’s the thing about different drizzles: chocolate can get a bit firm in the fridge and might develop a slight white film called bloom, which is just cocoa butter separating. It’s completely safe and doesn’t affect taste, but if it bothers you, let the slice sit at room temperature for five minutes before serving. Caramel stays pretty much the same. Fruit sauces might make the top slightly softer if they sit too long, but we’re talking about days here, not hours.
Generally, a drizzle cheesecake will stay fresh in the refrigerator for about five to seven days. I’ve pushed it to a week and a half before with no issues, but I wouldn’t go much beyond that. The texture starts getting less creamy and the flavors can fade. Although honestly, I’ve never had one last that long because it always gets eaten first.
How Should I Store Leftover Drizzle Cheesecake?
Let me give you the complete storage breakdown since this question comes up constantly. Your refrigerator should be set at forty degrees Fahrenheit or below, which is standard food safety temperature. If your cheesecake has a fruit drizzle, it might be even more important to keep it properly chilled since fruit can spoil faster than chocolate or caramel.
Don’t leave your cheesecake sitting out at room temperature for more than two hours total. I know at parties it’s tempting to leave desserts on the table, but cheesecake really needs to stay cold. If you’re serving it for an extended period, consider keeping most of it in the fridge and only bringing out a few slices at a time. Better safe than sorry when it comes to dairy-based desserts, especially when considering nutrient reference values for dairy products and food safety guidelines.
One trick I use is to place the whole cheesecake on a cake stand with a dome cover. This keeps it protected but also makes it easy to access whenever someone wants another slice. The dome prevents the top from getting damaged or the drizzle from getting smeared by plastic wrap sticking to it.
Freezing and Thawing Your Drizzle Cheesecake
Funny enough, cheesecake is one of the best desserts for freezing. I actually make them ahead for holidays and freeze them weeks in advance. The texture holds up remarkably well, and it’s such a time-saver when you’re planning big events.
To freeze a whole drizzle cheesecake, first make sure it’s completely chilled in the refrigerator. Then wrap it tightly in plastic wrap, going around several times to create a good seal. After that, wrap it again in aluminum foil. This double wrapping prevents freezer burn and keeps out any weird freezer odors. If you want to be extra careful, put the whole wrapped cheesecake in a freezer-safe bag or container.
Individual slices freeze beautifully too. Wrap each slice in plastic wrap, then place all the wrapped slices in a freezer bag. This method is actually my favorite because you can thaw just one or two slices at a time instead of committing to the whole cheesecake. I’ve pulled out a single frozen slice for a random dessert craving more times than I can count.
A frozen drizzle cheesecake will keep for about two to three months without any loss in quality. I’ve gone up to four months and it was still good, but you start to notice some texture changes at that point. The drizzle might separate slightly or become grainy, depending on what type you used. Chocolate and caramel freeze the best. Fruit sauces can get a little watery when thawed, but it’s not a deal-breaker.
When you’re ready to eat your frozen cheesecake, thaw it slowly in the refrigerator overnight. Never try to speed-thaw it at room temperature or in the microwave because the texture will get weird and potentially separate. Just move it from the freezer to the fridge the night before you want it, and by morning it’ll be perfectly thawed and ready to serve. The slow thaw preserves that creamy texture we worked so hard to create.
Can I Freeze Drizzle Cheesecake?
Yes, and I highly recommend it if you’re meal prepping desserts or making them for future events. One thing I learned is that you can actually freeze the cheesecake before adding the drizzle if you want the drizzle to be super fresh. Make and bake your cheesecake, let it cool, wrap and freeze it. Then the day before serving, thaw it in the fridge and add your drizzle fresh. This gives you maximum control over the final presentation.
However, freezing with the drizzle already on works great too and saves you a step later. The choice really depends on your schedule and preference. I’ve done it both ways dozens of times with excellent results either way. If you’re exploring more creative cheesecake recipes and variations, you’ll find that most of them freeze just as well, making it easy to build up a dessert stash for unexpected guests or busy weeks.
For holiday baking when you’re making multiple desserts, freezing is a lifesaver. I make my cheesecakes two or three weeks before Thanksgiving or Christmas, freeze them, and then just thaw them out when needed. It spreads out the work so I’m not frantically baking everything in one crazy weekend. Plus, cheesecake actually benefits from sitting a bit because the flavors meld and develop even more.
My final piece of advice on serving and storing? Don’t stress about perfection. Even if your slice isn’t Instagram-worthy or your drizzle smeared a little during storage, it’s still going to taste amazing. I’ve served cheesecakes that looked less than perfect, and you know what? People devoured them anyway because good flavor always wins over perfect presentation. Though having both doesn’t hurt.
Now you’ve got everything you need to create, serve, and store beautiful drizzle cheesecakes that’ll make you the favorite person at every gathering. The techniques I’ve shared come from years of trial and error, kitchen disasters, and happy accidents that turned into new favorite methods. Take what works for you, adapt what doesn’t, and most importantly, have fun with it. Baking should bring you joy, not stress.
Final Thoughts on Creating Your Perfect Drizzle Cheesecake
Making a drizzle cheesecake isn’t just about following a recipe. It’s about creating something that makes people smile when they see it and makes them close their eyes in happiness when they taste it. Every time I pull a finished drizzle cheesecake out of my fridge and see those glossy ribbons of sauce cascading over the creamy surface, I feel proud. You should too. This is a dessert that looks complicated but becomes simple once you understand the basics, and now you do. So grab your ingredients, pick a drizzle that excites you, and create something delicious. Your future self at the next party or family dinner will thank you.
Frequently Asked Questions About Drizzle Cheesecake
What are some popular flavors for drizzling on cheesecake?
The most popular drizzle flavors are chocolate, caramel, and strawberry sauce because they’re classic and almost universally loved. Dark chocolate provides rich, slightly bitter notes that balance the sweet cheesecake perfectly. Salted caramel adds buttery depth with a sophisticated salty-sweet combination. Fresh strawberry or raspberry sauces bring bright, tart flavors that cut through the richness beautifully. You can also try creative options like dulce de leche, espresso sauce, or even Nutella thinned with cream for something different.
How do I make a smooth and creamy cheesecake filling?
The key to silky cheesecake filling is using room temperature ingredients, especially cream cheese and eggs. Beat the cream cheese alone first to remove any lumps before adding other ingredients. Add eggs one at a time and mix just until incorporated, avoiding overmixing which creates too much air and leads to cracks. Use full-fat cream cheese rather than low-fat versions for the best texture. Finally, bake at a low temperature in a water bath and avoid overbaking, removing the cheesecake when the center still jiggles slightly.
What tools do I need to drizzle my cheesecake?
You don’t need fancy equipment to create beautiful drizzles. A squeeze bottle gives you the most control and creates professional-looking thin lines and patterns. A piping bag with a small hole cut in the tip works similarly well. For a more rustic look, a regular spoon dipped in sauce and waved over the cheesecake creates lovely random drizzles. Even a fork can make delicate thin streams if you dip and wave it quickly. Choose whatever tool feels most comfortable and gives you the look you want.
Can I use natural ingredients for drizzling cheesecake?
Absolutely, and natural drizzles often taste even better than processed options. Honey and pure maple syrup make excellent drizzles straight from the bottle with no preparation needed. Pureed fresh fruit can be used as-is or reduced slightly to thicken. Date syrup provides deep caramel-like flavor from just concentrated dates. Coconut cream can be sweetened and reduced for a dairy-free option. Even nut butters thinned with a bit of milk create delicious, protein-rich drizzles that are less sweet but incredibly satisfying.
How should I store leftover drizzle cheesecake?
Always store drizzle cheesecake in the refrigerator at forty degrees Fahrenheit or below. Cover it tightly with plastic wrap or aluminum foil, making sure the covering touches cut edges to prevent drying. For individual slices, wrap each separately in plastic wrap and place in an airtight container to prevent absorption of refrigerator odors. Your drizzle cheesecake will stay fresh for five to seven days when properly stored. Never leave it at room temperature for more than two hours to maintain food safety and quality.
Can I freeze drizzle cheesecake?
Yes, cheesecake freezes exceptionally well and can be stored frozen for two to three months. Wrap the whole cheesecake or individual slices tightly in plastic wrap, then again in aluminum foil to prevent freezer burn. You can freeze the cheesecake with the drizzle already on or add the drizzle fresh after thawing. Always thaw frozen cheesecake slowly in the refrigerator overnight rather than at room temperature to maintain the best texture. This makes drizzle cheesecake perfect for make-ahead desserts for parties and holidays.
How do I prevent my cheesecake from cracking?
Cracks form from rapid temperature changes or overbaking. Use room temperature ingredients and avoid overmixing once eggs are added to minimize air bubbles. Bake in a water bath at a low temperature, around 325 degrees Fahrenheit, which provides gentle, even heat. Remove the cheesecake when the edges are set but the center still jiggles slightly. Let it cool gradually in the turned-off oven with the door cracked, then at room temperature before refrigerating. Even if cracks do appear, a generous drizzle covers them beautifully.
Can I make drizzle cheesecake ahead of time?
Drizzle cheesecake is actually one of the best make-ahead desserts. The cheesecake needs to chill for at least four hours anyway, so making it a day or two ahead is ideal. You can add the drizzle up to a day before serving without issues. For longer advance preparation, freeze the plain cheesecake and add the drizzle after thawing the day before your event. This spreads out the work and often results in better flavor as the cheesecake has time to settle and the flavors develop.
What’s the best way to get clean slices when serving?
The hot knife method is essential for clean slices. Fill a tall glass with very hot water and dip your knife before each cut, wiping it completely dry before slicing. Make one smooth motion from back to front without sawing. Let the cheesecake soften slightly at room temperature for ten to fifteen minutes before cutting for even cleaner edges. Use a thin offset spatula or pie server to lift slices out, supporting the entire bottom of each piece to prevent breaking or the drizzle sliding off.
How thick should my drizzle sauce be?
Your drizzle should be thin enough to pour smoothly but thick enough to create visible patterns without immediately running everywhere. When you lift a spoon from the sauce, it should fall in a steady stream rather than dripping slowly or gushing out. For chocolate drizzles, the ratio is typically one cup chocolate to one-quarter cup heavy cream. If your drizzle is too thick, warm it gently or add a little more liquid. If too thin, let it cool slightly or add more chocolate or thickening ingredient to reach the perfect consistency.
Equipment
- Mixing bowl
- Electric mixer
- Spatula
- Springform pan
- Aluminum foil
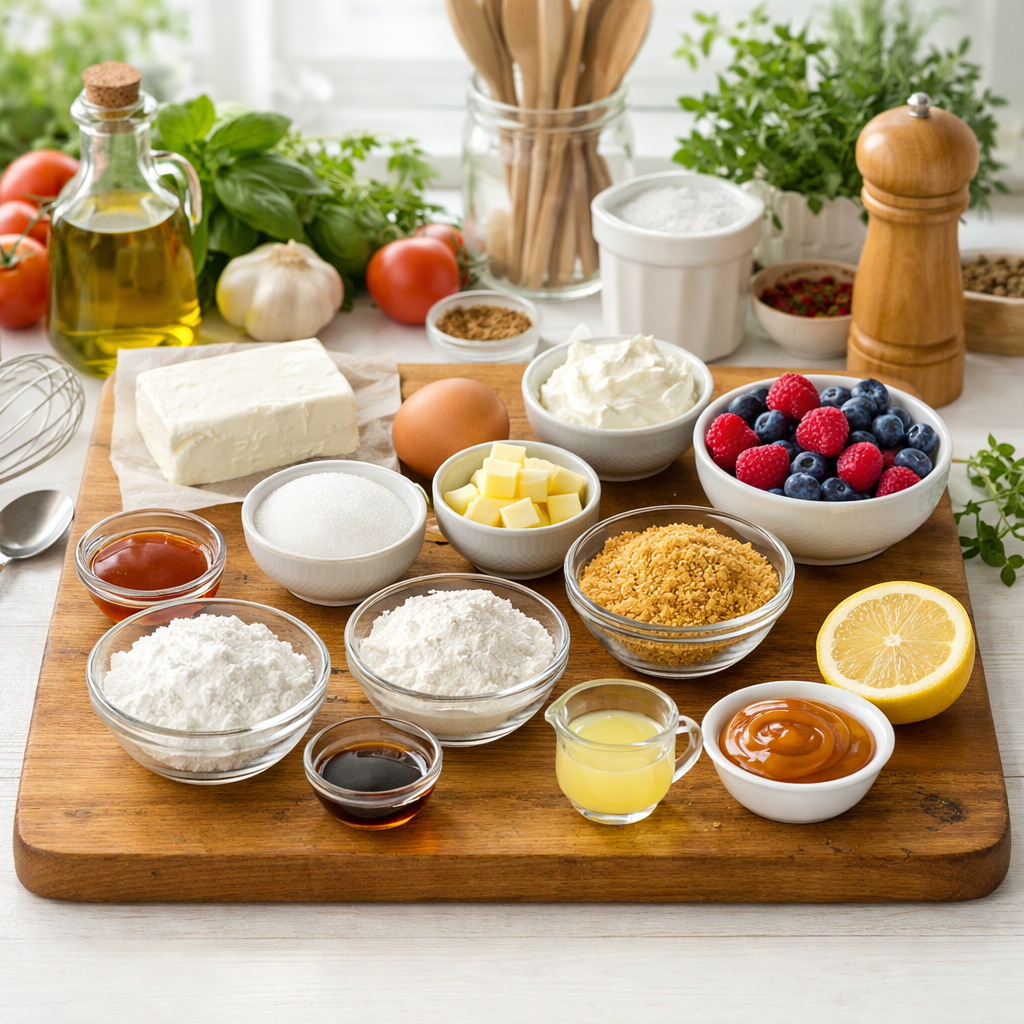
Ingredients
- 2 cups full-fat cream cheese at room temperature
- 1 cup granulated sugar
- 3 large eggs
- 1 cup graham cracker crumbs
- 1/4 cup unsalted butter melted
- 1/4 cup chocolate chips or preferred drizzle ingredient
- 1/4 cup heavy cream or needed for drizzle consistency
Instructions
- Preheat oven to 325°F (163°C).
- In a mixing bowl, beat the cream cheese until smooth.
- Gradually add sugar and beat until fluffy.
- Add eggs one at a time, mixing just until incorporated after each.
- Combine graham cracker crumbs, melted butter, and sugar and press into the bottom of a springform pan.
- Pour the cheesecake filling over the crust.
- Wrap the springform pan in aluminum foil and place it in a larger pan filled with hot water (water bath).
- Bake for 55-65 minutes, until edges are set but the center is slightly jiggly.
- Turn off the oven and let the cheesecake cool inside with the door slightly open for an hour.
- Bring the cheesecake to room temperature, then refrigerate for at least 4 hours (overnight is better).
- For drizzling, melt chocolate with heavy cream in a double boiler until smooth.
- Drizzle the sauce over the chilled cheesecake before serving.
Notes
Nutrition

Hello! I’m Sarah Mitchell, and I’m passionate about bringing creativity and innovation to baking. My love for baking started in high school when I first tried my hand at decorating cupcakes for a class project. What began as a fun hobby quickly became a full-time passion. I’ve spent the past decade working in bakeries and dessert shops, honing my skills in everything from simple cookies to intricate wedding cakes.
After working in some of the top bakeries across the country, I realized that baking was about more than just following recipes — it was about infusing your personality into each creation. At BakingSecret.com, I love creating recipes that push boundaries while staying true to the heart of classic baking. I specialize in creating delicious and visually stunning pastries that will wow your guests.
When I’m not baking, I enjoy teaching baking classes, trying out new cake decoration techniques, and traveling to find inspiration in global dessert traditions. I’m so excited to share my tips and tricks with you to help elevate your baking game!