
Say Hello to Raspberry Chocolate Delight: My New Favorite Dessert!
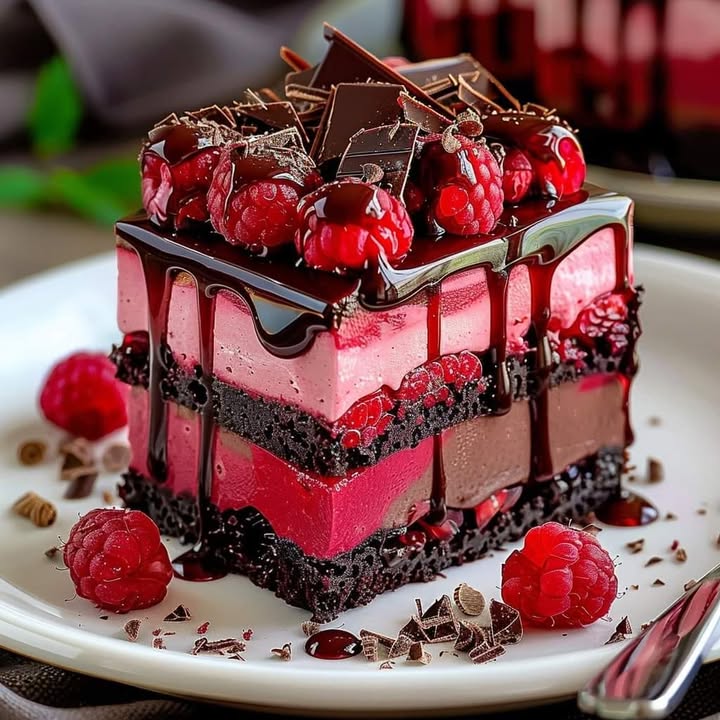
Have you ever had a dessert so good it makes you pause mid-bite? That was me, last Tuesday, holding a forkful of my very first test slice of this Raspberry Chocolate Delight. My family’s silence, followed by a chorus of “oh my goodness,” told me everything. This cake is pure magic. It’s a beautiful mix of deep chocolate, fluffy mousse, bright raspberry jelly, and a shiny ganache. Let me show you how to create this piece of edible art.
The Delicious Story of Layered Desserts
While I can’t trace this exact recipe to a French patisserie, its spirit is pure celebration cake. Think of those stunning European tortes in bakery windows. They love layering flavors and textures. I took that idea and ran with it in my home kitchen. The classic combo of raspberry and chocolate is timeless. My modern twist adds a light raspberry jelly layer and a cloud-like chocolate mousse. It feels fancy but it’s totally doable. This is tradition and fun, all on one beautiful plate!
Why You’ll Fall in Love with This Raspberry Chocolate Delight
This recipe is a surefire hit for a bunch of reasons! First, the textures are a party: soft cake, jiggly jelly, creamy mousse, and rich ganache. It’s a flavor adventure in every forkful. Second, you can make it your own. Use a store-bought chocolate cake base if you’re short on time. Or make everything from scratch for that proud baker feeling. Either way, the result is a stunning dessert that looks and tastes like you spent all day. I promise the “wow” factor is huge for the effort.
When to Serve Your Spectacular Cake
This Raspberry Chocolate Dessert is perfect for any time you want to make things special. It’s my go-to for birthdays (a real showstopper!). It’s elegant enough for a dinner party with friends, bringing a touch of sweetness to a lovely evening. It’s also perfect for holiday tables like Valentine’s Day – the red raspberries make it so romantic. Honestly, any regular weekend becomes a celebration with this cake in the fridge!
Gathering Your Raspberry Chocolate Delight Ingredients
Here’s your shopping list for this beautiful creation. Using good quality chocolate makes a big difference!
- Chocolate Cake Layer: 1 layer of chocolate cake (about 9 inches), baked and cooled. This forms the base and adds a deep chocolate flavor to balance the mousse and raspberry layers.
- Raspberry Jelly Layer: 1 cup fresh raspberries, 2 tbsp sugar, 1 tsp gelatin dissolved in 2 tbsp water. The raspberries add a bright, tangy layer to contrast with the chocolate.
- Chocolate Mousse: 1 cup heavy cream, 1 cup dark chocolate, melted and cooled. This mousse layer brings a creamy richness to the cake.
- Chocolate Ganache: 1/2 cup heavy cream, 1/2 cup dark chocolate, finely chopped. Ganache gives a shiny, glossy topping to the cake, adding elegance and an extra chocolate kick.
- Fresh Raspberries: 1/2 cup for garnish. Fresh raspberries add a vibrant, fresh touch to the cake.
Easy Ingredient Swaps
No worries if you’re missing something! This recipe is flexible.
- Raspberries: Use frozen raspberries for the jelly layer if fresh aren’t available. Just thaw and drain them a bit.
- Gelatin: A tablespoon of chia seeds soaked in the raspberry juice for 30 minutes can create a similar set texture for a vegetarian option.
- Dark Chocolate: Good quality semi-sweet chocolate chips work perfectly for both the mousse and ganache.
- Cake Base: A store-bought 9-inch chocolate cake or even dense brownies make a fantastic, time-saving foundation.
How to Make Your Raspberry Chocolate Layer Cake
Let’s build this beautiful dessert, step by step. It’s like creating a delicious piece of architecture!
Step 1: Prepare Your Cake Base
Start with your fully cooled 9-inch chocolate cake layer. If you baked it yourself, level the top with a serrated knife so it’s flat. This is important for the next layers to sit evenly. Place the cake on your serving plate or cake stand. I like to put a few strips of parchment paper underneath the edges to keep the plate clean. This base layer is the foundation of our entire Raspberry Chocolate Delight, providing that rich, cakey texture we all love. Pro tip: Bake the cake the day before and let it cool completely overnight. This makes it much easier to handle and won’t crumble.
Step 2: Create the Vibrant Raspberry Jelly Layer
This is where the bright flavor comes in! In a small saucepan, gently heat the fresh raspberries and sugar over medium heat. Smash them with a fork as they warm up until they become juicy and soft. Strain the mixture through a fine sieve to remove the seeds, pressing to get all that gorgeous red puree. Sprinkle the gelatin over 2 tablespoons of cool water in a small bowl and let it ‘bloom’ for 5 minutes. Stir this bloomed gelatin into the warm raspberry puree until it dissolves completely. Carefully pour this liquid ruby over your chocolate cake base. Chill in the refrigerator for at least 45 minutes, or until the jelly is firmly set and doesn’t wobble.
Step 3: Whip Up the Dreamy Chocolate Mousse
Now for the cloud of chocolatey goodness! Whip the heavy cream in a cold bowl until it forms soft peaks. You want it fluffy but not stiff. In a separate bowl, you should have your melted dark chocolate that’s cooled to room temperature. If the chocolate is too warm, it will melt the cream. Take a big scoop of the whipped cream and fold it gently into the chocolate to lighten it. Then, pour this chocolate mix back into the rest of the whipped cream. Use a spatula and fold gently from the bottom up until no white streaks remain. Be patient—folding keeps the mousse airy and light. Spread this dreamy mixture evenly over the set raspberry jelly layer with a gentle hand.
Step 4: Pour the Glossy Chocolate Ganache Topping
This is the finishing touch that makes the cake look professionally done! Place the finely chopped dark chocolate in a heatproof bowl. Heat the heavy cream in a small saucepan until it just starts to simmer around the edges. You’ll see little bubbles form. Pour the hot cream over the chopped chocolate and let it sit for one minute without touching it. Then, slowly whisk it from the center out until you have a smooth, velvety, and shiny chocolate mixture. This is your ganache. Let it cool for about 5-10 minutes so it thickens slightly. Then, pour it over the center of the mousse layer. Use an offset spatula or just tilt the cake to guide the ganache to the edges, letting it drip down the sides artfully.
Step 5: The Final Garnish
The fun part is here! Take your fresh, beautiful raspberries and arrange them on top of the still-wet ganache. You can make a ring around the edge, pile them in the center, or scatter them artfully. The red against the dark chocolate is simply stunning. Now, the hardest part: let the whole Raspberry Chocolate Delight cake set in the refrigerator for at least 3-4 hours, or ideally overnight. This allows all the layers to firm up perfectly, so you get a clean slice showing off every beautiful stripe of flavor. A long chill is the secret to a perfect slice.
Chef’s Tip
For an extra professional touch, warm a sharp knife under hot water and wipe it dry before cutting each slice. This will give you perfectly clean layers without squishing the beautiful mousse.
Timing Breakdown for This Raspberry Chocolate Cake
Let’s plan your time. The beauty of this dessert is the make-ahead magic!
- Prep Time: 45 minutes (active kitchen time)
- Cooking/Baking Time: Cake baking time (varies, about 30-35 mins) + gelatin setting
- Chilling Time: 45 mins (jelly) + 4 hours (final set)
- Total Time: About 6 hours, mostly hands-off chilling. I strongly recommend making it the day before for best results.
A Sweet Secret from My Kitchen
My secret is in the raspberry jelly layer. Don’t skip straining the seeds! It takes an extra minute, but it creates a jewel-like, perfectly smooth layer that looks professional and feels elegant on the tongue. That smooth pop of pure raspberry flavor is what makes this dessert sing.
Extra Fun Info: Why Raspberries and Chocolate are Best Friends
This flavor pairing isn’t just delicious, it’s science! Raspberries contain flavor compounds that naturally enhance the rich, deep notes in dark chocolate. It’s a match made in heaven, which is why you see it in so many fancy desserts. You’re not just making a cake; you’re creating a classic flavor harmony.
Equipment You’ll Need
- 9-inch cake pan
- Mixing bowls (various sizes)
- Electric hand mixer or whisk
- Saucepan and fine-mesh sieve
- Spatula and offset spatula
- Cake stand or serving plate
How to Store Your Masterpiece
This cake needs to stay cold because of the mousse and fresh layers. Always keep it covered in the refrigerator. A cake carrier with a lid is perfect, or you can tent it loosely with plastic wrap. Be careful the wrap doesn’t stick to the beautiful ganache top. The cake will keep wonderfully for up to 3-4 days in the fridge. The flavors actually blend and get even better after a day!
I do not recommend freezing this Raspberry Chocolate Delight. The mousse and jelly layers can become watery and lose their lovely texture when thawed. It’s best enjoyed fresh from the fridge.
If you have leftovers (a rare event in my house!), store them in an airtight container. For individual slices, you can separate them with parchment paper. They make for a fantastic secret treat the next afternoon.
My Best Tips and Advice for You
- Make sure your melted chocolate is truly cooled to room temperature before adding it to the whipped cream for the mousse. Warm chocolate will deflate your cream.
- When folding the mousse, use a gentle hand and a wide spatula. You want to keep as much air in the whipped cream as possible.
- For the ganache, using finely chopped chocolate helps it melt quickly and evenly, preventing any lumps.
- If your kitchen is warm, chill your mixing bowl and beaters before whipping the cream. Cold tools make whipping faster and easier.
Presentation Ideas to Wow Your Guests
- Dust the final plate with a little powdered sugar or cocoa powder just before serving.
- Add fresh mint leaves next to the raspberries for a pop of green color.
- Serve each slice with a small dollop of extra whipped cream on the side.
- Drizzle the individual plates with a little raspberry coulis or melted chocolate for a restaurant-style look.
Healthier Twists on the Raspberry Chocolate Dessert
Love the idea but want a lighter option? Here are some tasty variations!
- Greek Yogurt Mousse: Swap the heavy cream in the mousse for thick, full-fat Greek yogurt sweetened with a little honey. It’s tangy and rich with extra protein.
- Angel Food Cake Base: Use a light, fat-free angel food cake for the bottom layer. It soaks up the raspberry flavors beautifully and cuts calories.
- Avocado Chocolate Mousse: Replace the traditional mousse with a blend of ripe avocado, cocoa powder, and maple syrup for a creamy, dairy-free, and nutrient-packed layer.
- Chia Seed Raspberry Jam: Skip the gelatin and make a natural jam by mashing raspberries with chia seeds. Let it thicken in the fridge for a fiber-rich jelly alternative.
- Mini Parfaits: Create individual servings in glasses. Use crumbled chocolate cake, layers of the raspberry mixture, and a lighter whipped topping. It’s easier for portion control.
- Sweetener Swap: Use a natural sweetener like coconut sugar or monk fruit in the cake and jelly layers to reduce refined sugar.
If you love the balance of fruit and decadent cream, you’ll adore our mini cheesecakes with a bright matcha mousse for another elegant treat. For a truly indulgent experience, our red velvet Oreo cheesecake is a crowd-pleaser. For simpler layered desserts, try building a gorgeous caramelized banana butterscotch parfait. And for a stunning nutty flavor, our pistachio cream cheesecake is absolutely divine.
Common Mistakes to Avoid with Your Raspberry Chocolate Cake
Mistake 1: Adding Warm Chocolate to the Mousse
This is the number one reason a chocolate mousse turns soupy. If your melted chocolate is still warm when you fold it into the whipped cream, it will melt the cream on contact. You’ll lose all the airy volume and end up with a dense, heavy layer. Always let your melted chocolate cool to room temperature. You should be able to touch the bottom of the bowl comfortably. Practical tip: Spread the melted chocolate in a thin layer on a plate or bowl to help it cool faster before you start whipping your cream.
Mistake 2: Not Letting the Raspberry Jelly Layer Set Firmly
If you’re too eager and pour the mousse on top of a wobbly, soft jelly layer, they will bleed into each other. You won’t get those beautiful, distinct lines in your final slice. The jelly needs to be completely set. Test it by gently touching the center with a clean finger; it should feel firm and not stick to you. Patience here is key for that stunning visual effect.
Mistake 3: Over-whipping the Cream for the Mousse or Ganache
There’s a sweet spot for whipped cream. For the mousse, you want soft peaks that gently curl over when you lift the whisk. If you whip it to stiff, grainy peaks, your mousse will be thick and hard to spread. For the ganache, you only heat the cream until simmering—do not let it boil vigorously. Boiling cream can separate or scorch, giving your ganache a greasy or odd flavor. Keep a close eye on it!
Mistake 4: Skipping the Long Final Chill
You absolutely cannot serve this cake right after you finish assembling it. It will be a delicious but messy puddle. The long, final chill (at least 4 hours) is non-negotiable. This time allows the mousse to firm up, the ganache to set, and all the layers to bond together. This is what gives you that perfect, clean slice. Overnight is truly best.
When serving desserts, understanding portion information from trusted sources can help you enjoy treats mindfully as part of a balanced diet.
Your Raspberry Chocolate Delight Questions, Answered!
Can I use a different fruit instead of raspberries?
Absolutely! This recipe is very versatile. Strawberries, blackberries, or a mix of summer berries would work wonderfully. For strawberries, you might want to chop them a bit smaller. The key is to adjust the sugar in the jelly layer based on your fruit’s natural sweetness. Tart berries like raspberries or blackberries need a bit more sugar, while sweeter strawberries might need less. Just make sure to still strain out any seeds for that smooth jelly texture if you’re using seedy berries.
How do I make sure my cake layers are perfectly level?
A level cake is crucial for even layers. If you bake your own cake, once it’s completely cooled, use a long serrated knife. Hold it parallel to the counter and gently saw off any dome from the top. You can also use cake strips around your pan while baking to help it rise evenly. If you’re using a store-bought cake, you can often find flat, unfrosted layers that are ready to go. Placing your cake on a flat cake stand or plate is the first step to a beautiful build.
My ganache is too runny/thick. What can I do?
Ganache consistency depends on the ratio of cream to chocolate and its temperature. If it’s too runny and won’t coat the cake, it’s likely too warm. Just let it sit at room temperature for 10-15 more minutes, stirring occasionally, until it thickens slightly. If it’s too thick and won’t pour, it may have cooled too much. Gently re-warm it for 5-10 seconds in the microwave or over a double boiler, stirring constantly. Be very careful not to overheat it, or it can break.
Can I make this dessert ahead of time?
Yes, and I highly recommend it! This is the perfect make-ahead dessert. You can bake the cake base up to two days in advance. Wrap it well and keep it at room temperature. The entire assembled cake needs to chill for at least 4 hours, but it holds up beautifully for 2-3 days in the refrigerator. In fact, the flavors meld and improve. Just add the fresh raspberry garnish on the day you plan to serve it so they look their best.
Is there a way to make this without gelatin?
Yes, for a vegetarian version, you can use agar-agar, which is a plant-based thickener. Use about 1/2 teaspoon of agar powder, dissolved and boiled with the raspberry puree according to package directions. Alternatively, you can make a thicker raspberry chia jam. Simply mash the raspberries with sugar and stir in a tablespoon of chia seeds. Let it thicken in the fridge for an hour. The texture will be more jam-like than jelly, but it’s still delicious.
What type of chocolate is best for the mousse and ganache?
Use a good-quality dark chocolate baking bar or chips with a cocoa content between 55% and 70%. This gives a rich, deep chocolate flavor that isn’t too sweet, balancing the sweet cake and raspberries. Avoid using milk chocolate for the mousse and ganache, as it can be too soft and sweet, making the layers less distinct. The quality of your chocolate directly affects the taste of your final Raspberry Chocolate Delight, so choose one you enjoy eating on its own.
Why did my mousse layer deflate or turn grainy?
Deflating usually happens from over-mixing or folding warm chocolate into cold cream, as mentioned. Graininess can happen if the chocolate seizes (gets tiny hard bits) when melting. To melt chocolate safely, chop it finely and melt it gently over a double boiler or in short bursts in the microwave, stirring well between each burst. Also, ensure no water gets into the melting chocolate, as even a drop can cause it to seize. If your chocolate does seize, stir in a teaspoon of warm vegetable oil or shortening to help smooth it out.
Can I freeze this cake for later?
I don’t recommend freezing the fully assembled cake. The mousse and jelly layers contain a lot of moisture and can become icy and watery when thawed, which ruins the delicate texture. The cake base itself can be frozen, well-wrapped, for up to a month. If you need a long-term dessert, consider making and freezing the cake layer, then assembling the fresh mousse and jelly layers a day or two before you need it.
How do I get a clean slice without messing up the layers?
This is all about using the right tool and technique. Use a long, sharp, thin-bladed knife. Run it under very hot water for 10 seconds, wipe it completely dry with a towel, and then make a slow, gentle cut. The warm knife glides through the cold ganache and mousse without dragging. Wipe the knife clean and re-heat it between each slice for the prettiest results. It makes all the difference!
What can I do with leftover ingredients?
Leftover heavy cream can be whipped with a little sugar for serving on top of hot cocoa or pies. Extra raspberries are fantastic in oatmeal, yogurt, or smoothies. Leftover chocolate can be chopped for cookies or snacking. If you have extra cake scraps from leveling, you can let them dry out a bit, then pulse into crumbs to use as a topping for ice cream or in other desserts.
If this Raspberry Chocolate Delight has you hooked on layered cakes, you’ll find a treasure trove of inspiration in our full collection of cake and cupcake recipes to explore next.
Ready to Bake Some Happiness?
There you have it! My tried-and-true recipe for a Raspberry Chocolate Delight that’s sure to impress. It looks fancy, tastes incredible, and the process of building it is so much fun. Don’t let the layers intimidate you. Take it one step at a time. The joy on your friends’ and family’s faces when they see and taste it is worth every minute. So tie on your apron, put on some good music, and get ready to create a dessert memory. Happy baking!
Equipment
- Grand bol
- Fouet
- Spatule
- Plaque à pâtisserie
- Papier sulfurisé
Ingredients
- 1 couche gâteau au chocolat environ 9 pouces, cuit et refroidi
- 1 tasse framboises fraîches
- 2 cuil. à soupe sucre (pour la gelée de framboises)
- 1 cuil. à café gélatine dissoute dans de l'eau dans 2 cuil. à soupe d'eau
- 1 tasse crème épaisse (pour la mousse au chocolat)
- 1 tasse chocolat noir, fondu et refroidi (pour la mousse au chocolat)
- 1/2 tasse crème épaisse (pour le ganache au chocolat)
- 1/2 tasse chocolat noir, haché finement (pour le ganache au chocolat)
- 1/2 tasse framboises fraîches (pour la garniture)
Instructions
- Préparez et nivelez la couche de gâteau au chocolat refroidie.
- Chauffez les framboises fraîches et le sucre dans une casserole, en les écrasant jusqu'à ce qu'elles soient tendres et juteuses.
- Filtrez le mélange de framboises et incorporez la gélatine gonflée.
- Versez la gelée de framboises sur la base de gâteau au chocolat et réfrigérez jusqu'à ce qu'elle prenne (environ 45 minutes).
- Battez la crème épaisse jusqu'à ce qu'elle forme des pics souples.
- Incorporez un peu de crème fouettée au chocolat noir fondu refroidi, puis incorporez le reste jusqu'à obtenir un mélange lisse.
- Étalez la mousse au chocolat sur la gelée de framboises prise.
- Chauffez la crème épaisse et versez-la sur le chocolat noir haché pour créer le ganache.
- Versez le ganache sur la couche de mousse et laissez-le couler sur les côtés.
- Garnissez de framboises fraîches et réfrigérez pendant au moins 3-4 heures ou toute la nuit.
Notes
Nutrition

Hi, I’m Olivia Parker, the founder of BakingSecret.com and a lifelong lover of all things sweet and homemade. I grew up in a small town in Oregon, where the smell of fresh cookies in my family’s kitchen sparked my passion for baking. Over the years, I turned that passion into a mission: to help home bakers feel confident, inspired, and creative.
After studying food science and working in several artisan bakeries across the U.S., I decided to create a space where everyone from beginners to seasoned bakers can find reliable recipes, expert tips, and a warm, welcoming community. BakingSecret.com is my way of sharing the magic of baking with the world. When I’m not testing new recipes, you’ll find me exploring farmers’ markets, collecting vintage cookbooks, or perfecting my sourdough technique.