
Escape to a Tropical Paradise with This Creamy Coconut Bliss Cake
Sometimes, you just need a slice of sunshine. This Creamy Coconut Bliss Cake is exactly that—a sweet, fragrant escape to the tropics, no passport required. It’s the cake I turn to when life feels gray, and its fluffy texture and rich coconut flavor never fail to bring smiles to my family’s faces. Let’s bake some happiness together.
A Taste of the Islands in Your Kitchen
While coconut cake has roots in many coastal regions, from the Caribbean to Southeast Asia, this version is my home baker’s homage. I wanted to capture that feeling of a beach vacation—the scent of coconut oil on sun-warmed skin, the sound of palm leaves rustling. My twist uses both shredded coconut and creamy coconut milk, doubling down on that luxurious flavor and creating an unbelievably moist crumb.
Why You’ll Adore This Coconut Bliss Cake
This cake is a dream come true for three big reasons. First, it’s incredibly moist, thanks to the coconut milk. Second, it comes together in one bowl with simple steps—perfect for a spontaneous treat. Finally, that toasted coconut topping adds a wonderful crunch against the soft, tender cake. It’s a simple dessert that feels elegantly special.
The Perfect Occasion for Bliss
This cake is wonderfully versatile. It’s a star at summer barbecues, a lovely finish to a seafood dinner, or a beautiful centerpiece for a bridal or baby shower with a tropical theme. I’ve even served it on a chilly winter night, alongside a cup of coffee, to pretend we’re somewhere warmer. It’s a year-round mood-lifter.
Ingredients for Your Coconut Bliss
- 1 cup unsweetened shredded coconut
- 1 can (14 ounces) coconut milk
- 1 cup all-purpose flour
- 1 cup sugar
- 1/2 cup unsalted butter, softened
- 2 large eggs
- 1 tablespoon baking powder
- 1 teaspoon vanilla extract
- 1/4 teaspoon salt
No Coconut Milk? No Problem!
You can easily adapt this recipe based on what’s in your pantry.
- For the coconut milk: Full-fat canned coconut milk gives the richest flavor, but “lite” canned milk works well too. In a serious pinch, you can use regular dairy milk, but you’ll lose some coconut intensity (add a touch more shredded coconut to compensate).
- For the shredded coconut: If you only have sweetened coconut, reduce the sugar in the batter by 2 tablespoons.
- For the all-purpose flour: A 1-to-1 gluten-free baking blend can be used as a direct substitute.
How to Make Your Creamy Coconut Bliss Cake
Step 1: Preheat and Prepare
Start by heating your oven to 350°F (175°C). This ensures it’s perfectly hot when your batter is ready. Grease your 9-inch round cake pan and dust it lightly with flour, tapping out the excess. This simple step is your insurance policy for a clean release later. You’ll smell the nutty aroma of toasting flour for just a second–a promise of good things to come.
Step 2: Cream the Butter and Sugar
In a large mixing bowl, beat the softened butter and sugar together. Use an electric mixer on medium speed. Watch as the pale yellow butter and white sugar transform into a light, fluffy, and almost white cream. This takes about 3-5 minutes and is crucial for creating a fine, tender cake texture.
Pro tip: Your butter is perfectly softened when you can easily make an indentation with your finger, but it’s not oily or melted.
Step 3: Add Eggs and Vanilla
Add the eggs one at a time, beating well after each addition. You’ll see the mixture become even glossier and slightly thicker. Then, pour in the vanilla extract. That warm, sweet scent will mingle beautifully with the creamy butter. Scrape down the sides of the bowl with a spatula to make sure everything is evenly combined.
Step 4: Whisk the Dry Ingredients
In a separate bowl, whisk together the flour, baking powder, salt, and that beautiful mountain of unsweetened shredded coconut. The coconut will look like snow drifting through the flour. Whisking ensures the baking powder is evenly distributed, so your cake rises uniformly. You’ll get little whiffs of pure coconut essence as you mix.
Step 5: Combine Wet and Dry
Now, bring it all together. Add about one-third of your dry mixture to the butter and egg bowl. Mix on low speed until just combined. Next, pour in half of the coconut milk. The batter will look a bit curdled at first–that’s okay! Alternate adding the dry ingredients and milk, ending with the dry mix. Stop mixing as soon as you see no more streaks of flour. A few small lumps are better than overmixing.
Step 6: Pour and Smooth the Batter
Pour the thick, speckled batter into your prepared pan. Use a spatula to spread it evenly into all the corners and smooth the top. The batter will be silky and fragrant. Gently tap the pan on the counter once to release any large air bubbles.
Step 7: Bake to Golden Perfection
Place the pan in the center of your preheated oven. Bake for 30-35 minutes. When it’s done, the top will be a lovely golden brown, the edges will just be pulling away from the pan, and a toothpick inserted in the center will come out clean. Your kitchen will be filled with an incredible, warm coconut aroma.
Step 8: Cool the Cake
Let the cake cool in its pan on a wire rack for 10 minutes. This allows it to firm up slightly. Then, run a thin knife around the edge, place a plate or rack on top, and invert it. The cake should release with a gentle sigh. Let it cool completely before frosting. A warm cake will melt your frosting into a puddle.
Step 9: Frost and Finish
Once completely cool, it’s time to finish your masterpiece. You can frost it with a simple coconut cream cheese frosting, a glossy coconut glaze, or keep it rustic with a dusting of powdered sugar. For an extra flavor and texture boost, toast some of the remaining shredded coconut until golden and sprinkle it on top.
Chef’s Secret: For an extra-moist cake, brush the cooled layers with a tablespoon or two of extra coconut milk before frosting. It soaks in and intensifies the flavor.
Time Investment for Bliss
This cake respects your time.
- Prep Time: 15 minutes
- Bake Time: 35 minutes
- Cooling Time: 1 hour
- Total Time: About 1 hour 50 minutes (mostly hands-off)
A Coconutty Fact
Did you know the coconut isn’t actually a nut? It’s a drupe, a type of fruit with a hard, stony shell surrounding the seed. This amazing fruit provides “meat,” “milk,” and “water,” making it one of the most versatile ingredients in the world. Every part of it can be used, which is why it feels so generous and satisfying to bake with.
Tools You’ll Need
- 9-inch round cake pan
- Mixing bowls (2)
- Electric hand mixer or stand mixer
- Whisk
- Spatula
- Measuring cups and spoons
- Wire cooling rack
- Toothpick or cake tester
Keeping Your Cake Fresh and Delicious
Because this cake contains coconut milk, it’s best stored in the refrigerator. Cover it tightly with plastic wrap or place it in an airtight container. It will stay moist and delicious for up to 4 days. The flavors actually meld and improve after the first day.
You can also freeze this cake for longer storage. Wrap the unfrosted, cooled cake layers individually in plastic wrap and then in aluminum foil. They will keep well for up to 2 months. Thaw overnight in the refrigerator before frosting and serving.
For the best serving experience, let the refrigerated cake sit at room temperature for about 30 minutes before slicing. This allows the texture to soften and the flavors to bloom fully again.
Tips for Coconut Cake Success
- Shake the can! Always shake your canned coconut milk vigorously before opening to reincorporate the thick cream that separates and rises to the top.
- Toast for extra flavor. Spread the shredded coconut on a baking sheet and toast at 350°F for 5-7 minutes, stirring once, until golden. Let it cool completely before adding to the batter or using as a garnish. The flavor difference is incredible.
- Don’t rush the creaming. Taking the time to properly cream the butter and sugar is the secret to a light, fine crumb. Don’t shortcut this step.
Presenting Your Tropical Masterpiece
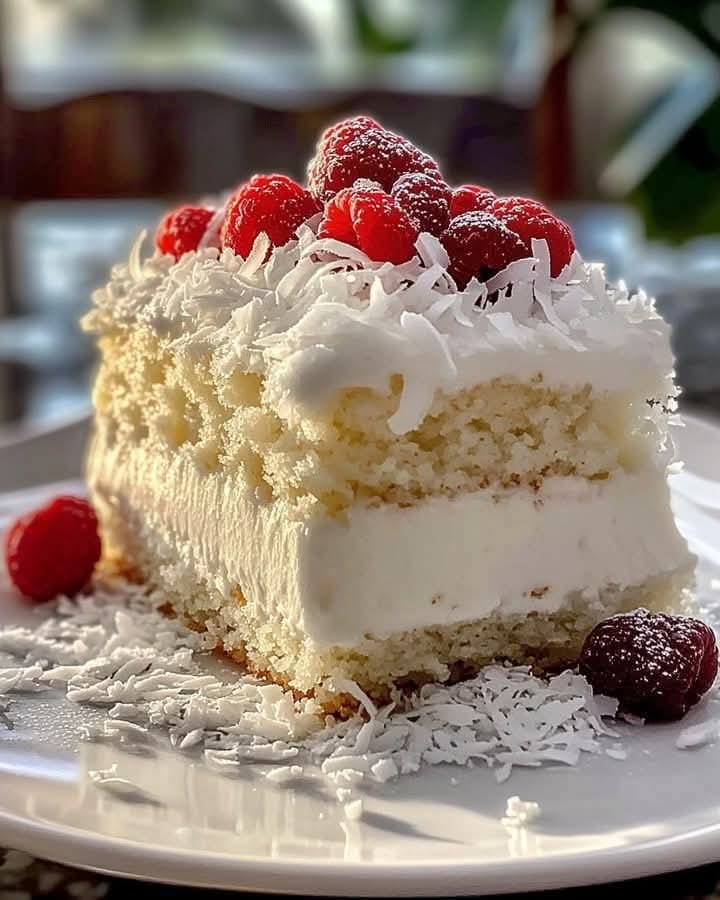
Presentation turns a great cake into a celebration. Try stacking it as a two-layer cake with frosting in the middle. Decorate the top with a ring of toasted coconut flakes and fresh edible flowers or lime zest. For a casual look, serve it as a single-layer sheet cake dusted with powdered sugar and decorated with fresh berries. Slice it on a beautiful platter alongside cups of strong coffee or tropical iced tea.
Explore More Blissful Bakes
If you loved the fruity, creamy notes of this Coconut Bliss Cake, you might enjoy exploring other delightful cakes. For a bright, tangy option, try this Lemon Cake with Cranberry Filling. Chocolate lovers won’t be able to resist an indulgent Matilda-inspired chocolate cake. For the ultimate fudgy experience, these decadent brownies are a must-bake. And if berries are your passion, this stunning raspberry cream cake is pure elegance on a plate. You can find more inspiration in our full collection of delicious cake recipes.
Common Mistakes to Avoid
Mistake 1: Using Cold Ingredients
Using eggs, milk, or butter straight from the fridge is a common error. Cold butter won’t cream properly with sugar, leading to a dense cake. Cold eggs can cause the batter to break or curdle. Always plan ahead to let your butter, eggs, and coconut milk sit on the counter for about 30-60 minutes before you start baking. They should be cool to the touch, not cold.
Mistake 2: Overmixing the Batter
Once you add the flour, it’s time to be gentle. Overmixing develops the gluten in the flour, which makes your cake tough and chewy instead of soft and tender. Mix on low speed and stop as soon as you no longer see streaks of dry flour. A few small lumps are perfectly fine and will bake out.
Mistake 3: Not Toasting the Coconut for the Topping
It’s tempting to just sprinkle plain shredded coconut on top, but toasting it is a game-changer. Raw coconut can be a bit chewy and bland. Toasting it for a few minutes in the oven deepens its flavor, adds a beautiful golden color, and provides a delightful crunch that contrasts wonderfully with the soft cake. It’s a simple step with a huge payoff.
Mistake 4: Frosting a Warm Cake
Patience is a baker’s virtue. Applying frosting, glaze, or even powdered sugar to a cake that’s still warm is a recipe for disaster. The heat will melt butter-based frostings into a runny mess and cause powdered sugar to dissolve into a wet spot. Always let your cake cool completely on a wire rack. You can even pop it in the fridge for 30 minutes to ensure it’s firm and ready.
Your Coconut Bliss Cake Questions, Answered
Can I use coconut cream instead of coconut milk?
Coconut cream is much thicker and richer than coconut milk. If you use it straight from the can, your batter may become too heavy, affecting the cake’s rise. For best results, stick to canned coconut milk. If you only have coconut cream, you can thin it with a little water to the consistency of milk before using it in the recipe.
My cake is very dense. What went wrong?
A dense cake is usually the result of a few key issues. The most common culprit is overmixing the batter after the flour is added. Another possibility is using expired baking powder, which loses its lifting power. Also, be sure you’re measuring your flour correctly—scooping directly from the bag can pack in too much. For accuracy, spoon the flour into your measuring cup and level it off with a knife.
How can I make a dairy-free version of this cake?
You absolutely can! Simply replace the butter with an equal amount of dairy-free butter substitute or refined coconut oil (solid state). Ensure your shredded coconut and coconut milk are your only dairy-free sources. Always check labels, as some brands may have additives. The cake will be just as delicious and moist.
Can I add other flavors to this coconut cake?
Certainly! This cake is a wonderful base for other tropical flavors. Fold in ½ cup of crushed pineapple (well-drained) into the batter. You could also add the zest of one lime for a bright, citrusy twist. A teaspoon of rum or almond extract blended with the vanilla can also add a lovely depth of flavor.
What’s the best way to store leftover cake?
Due to the coconut milk, store any leftover cake covered in the refrigerator. Place it in an airtight container or cover the serving plate tightly with plastic wrap. It will stay fresh for 3-4 days. For longer storage, you can freeze individual slices wrapped tightly for up to 2 months. For general freezer best practices to maintain food quality, the USDA is a great resource.
Can I make this into cupcakes?
Yes, this batter makes wonderful cupcakes! Line a muffin tin with paper liners and fill each about 2/3 full. Bake at the same temperature (350°F) for 18-22 minutes, or until a toothpick comes out clean. This recipe should yield about 18 standard cupcakes. They are perfect for parties!
Why did my coconut sink to the bottom of the cake?
This usually happens if the shredded coconut pieces are too large or heavy, or if the batter is too thin. Tossing the shredded coconut with a tablespoon of the measured flour before folding it in can help. This light coating helps “grip” the batter and suspend the coconut throughout the cake as it bakes.
Do I need to use sweetened or unsweetened coconut?
The recipe calls for unsweetened coconut to better control the sweetness level. If you only have sweetened coconut on hand, you can use it. Just reduce the sugar in the cake batter by 2-3 tablespoons to account for the extra sugar in the coconut. The texture might be slightly chewier.
Can I use a different size pan?
You can, but the baking time will change. For a 9×13-inch rectangular pan, the cake will be thinner and may bake in 25-30 minutes. For two 8-inch round pans, start checking at 25 minutes. For a bundt pan, ensure it’s well-greased and the batter fills no more than 2/3 full; bake time may extend to 40-45 minutes. Always use the toothpick test to check for doneness.
The top of my cake is browning too fast. What should I do?
Ovens can have hot spots. If you notice the top browning quickly before the center is done, simply lay a loose piece of aluminum foil over the top of the cake pan. This will act as a shield and slow down the browning, allowing the inside to finish baking without the top burning.
A Slice of Simple Joy
Baking this Creamy Coconut Bliss Cake is about more than just following a recipe. It’s about creating a moment of pure, simple joy. From the heavenly smell that fills your kitchen to the first moist, flavorful bite shared with someone you love, this cake is a little celebration. It’s proof that with a few basic ingredients and a little care, you can create something truly wonderful. Now, go preheat that oven—your tropical escape awaits.
Equipment
- Grand bol
- Fouet
- Spatule
- Moule à gâteau de 9 pouces
- Papier sulfurisé
Ingredients
- 1 tasse coco râpé non sucré
- 1 boîte lait de coco (14 onces)
- 1 tasse farine tout usage
- 1 tasse sucre
- 1/2 tasse beurre non salé, ramolli
- 2 grands œufs
- 1 cuillère à soupe poudre à lever
- 1 cuillère à café extrait de vanille
- 1/4 cuillère à café sel
Instructions
- Préchauffez votre four à 175°C et graissez et farinez un moule à gâteau de 9 pouces.
- Dans un grand bol, battez ensemble le beurre ramolli et le sucre jusqu'à ce que le mélange soit léger et mousseux (environ 3-5 minutes).
- Ajoutez les œufs un par un, en battant bien après chaque ajout, puis incorporez l'extrait de vanille.
- Dans un bol séparé, mélangez la farine, la poudre à lever, le sel et la noix de coco râpée.
- Ajoutez progressivement un tiers du mélange sec au mélange humide, incorporez ensuite la moitié du lait de coco, en alternant jusqu'à ce que tout soit bien combiné.
- Versez la pâte dans le moule préparé et lissez le dessus avec une spatule.
- Faites cuire dans le four préchauffé pendant 30-35 minutes jusqu'à ce qu'il soit doré et qu'un cure-dent inséré au centre en ressorte propre.
- Laissez le gâteau refroidir dans le moule pendant 10 minutes, puis démoulez-le sur une grille pour qu'il refroidisse complètement.
- Une fois refroidi, glacer avec un glaçage au cream cheese à la noix de coco ou un glaçage, et garnir de noix de coco grillée si désiré.