
Is there anything better than slicing into a perfectly dark, moist, and fudgy chocolate cake? The way that rich, velvety aroma fills your whole kitchen is pure magic. I’ve baked this exact recipe more times than I can count. It’s the cake my kids request for every birthday and the dessert that disappears first at book club. This isn’t just a chocolate cake; it’s a warm hug on a plate. Let me show you how to create this Decadent Chocolate Indulgence that promises to be the star of your table.
A Slice of Chocolate History: From Humble to Heavenly
Chocolate cake has a wonderfully rich history. It started centuries ago when cacao beans were ground into a bitter drink. The sweet, cake-like version we love today became popular in the late 1800s. That’s when cocoa powder became easier to find. This recipe is my take on a classic “Devil’s Food” cake. That old-fashioned name hints at how sinfully good it is. The modern twist here? Using boiling water in the batter. It might sound odd, but it truly intensifies the chocolate flavor and creates an incredibly tender crumb. It’s a trick bakers have used for generations, and it still works perfectly.
Why You’ll Adore This Decadent Chocolate Cake
You’ll love this recipe because it’s unfailingly reliable. I’ve tested it in different ovens and with my friends who swear they “can’t bake.” It works every single time. The cake itself is deeply chocolatey, not too sweet, and incredibly moist. Paired with the creamy, dreamy frosting, each bite feels like a celebration. It’s also surprisingly straightforward. You don’t need fancy equipment or rare ingredients. Everything is probably in your pantry right now. This recipe builds confidence in the kitchen and delivers pure joy with every forkful.
Perfect Occasions for a Chocolate Indulgence
- Birthdays & Milestones: This is my go-to birthday cake. Decorate it with sprinkles for a kid’s party or fresh berries for an elegant adult celebration.
- Potlucks & Gatherings: A whole cake travels well and is always a crowd-pleaser. It’s guaranteed to be the talk of the table.
- Just Because: A Wednesday night chocolate craving is a perfectly valid reason to bake this cake. Sometimes, you just need a slice of happiness.
Gathering Your Ingredients for Success
Using simple, quality ingredients makes all the difference. Here’s what you need to make this chocolate dream come true.
For the Cake:
- 2 cups (250g) all-purpose flour
- 2 cups (400g) granulated sugar
- 3/4 cup (75g) unsweetened cocoa powder
- 2 tsp baking powder
- 1 1/2 tsp baking soda
- 1 tsp salt
- 1 cup (240ml) whole milk
- 1/2 cup (120ml) vegetable oil
- 2 large eggs
- 2 tsp vanilla extract
- 1 cup (240ml) boiling water
For the Chocolate Frosting:
- 1 cup (225g) unsalted butter, softened
- 3/4 cup (75g) unsweetened cocoa powder
- 4 cups (500g) powdered sugar
- 1/2 cup (120ml) whole milk
- 1 tsp vanilla extract
Ingredient Substitutions: Bake with What You Have
Don’t worry if you’re missing an item. Here are easy swaps you can make.
- Milk: Any milk (like 2%, skim, or a non-dairy alternative like almond milk) works in both the cake and the frosting.
- Vegetable Oil: Canola oil or melted coconut oil are great substitutes.
- Butter: For the frosting, you can use salted butter. Just omit the pinch of salt from the recipe.
- Cocoa Powder: Use natural unsweetened cocoa powder. “Dutch-processed” cocoa will work, but it may slightly darken the cake’s color and soften its rise.
Crafting Your Decadent Chocolate Indulgence: Step-by-Step
Step 1: Make the Cake Batter
Start by preheating your oven to 350°F (175°C). Grease and flour two 9-inch round cake pans. I also like to add a round of parchment paper to the bottom for guaranteed release. Now, let’s mix. In your biggest bowl, whisk together the flour, sugar, cocoa powder, baking powder, baking soda, and salt. You’ll see the dry ingredients transform into a beautiful, dark brown powder. Add the wet ingredients: the milk, oil, eggs, and vanilla. Beat with a hand mixer or by hand until the batter becomes smooth and glossy. Finally, pour in the boiling water. The batter will become very thin and liquid. This is good! This hot water “blooms” the cocoa, unlocking its deepest flavor. Pro tip: Slowly stir the boiling water in with a spatula to avoid splashes.
Step 2: Bake the Cake
Carefully divide the thin batter between your two prepared pans. They should be about half full. Slide them into the center of your preheated oven. The smell that starts to waft through your kitchen in about 20 minutes is divine. Bake for 30-35 minutes. The cakes are done when the top springs back lightly to a touch and a toothpick inserted in the center comes out with just a few moist crumbs. Let the cakes cool in the pans for a full 10 minutes. This lets them firm up. Then, run a knife around the edge and gently turn them out onto a wire rack to cool completely. Chef’s tip: To ensure flat cake layers for easy stacking, you can wrap the warm cake layers in plastic wrap. This traps steam and keeps them supremely moist.
Step 3: Make the Frosting
While the cakes cool, let’s make that luscious frosting. In a large bowl, beat the softened butter and cocoa powder together. They will form a thick, dark, and incredibly fragrant paste. This is the base of your frosting. Now, add about half of the powdered sugar and half of the milk. Beat on medium speed until combined. Scrape down the bowl. Add the remaining powdered sugar, milk, and the vanilla extract. Beat again, starting slow to avoid a sugar cloud, then increasing speed. Whip it for 2-3 minutes until it’s light, fluffy, and perfectly spreadable.
Step 4: Assemble the Cake
This is the fun part! Place one completely cool cake layer on your serving plate. Scoop about a cup of frosting onto the center. Use an offset spatula to spread it out evenly to the edges. Gently place the second layer on top, bottom-side up for a flat surface. Now, apply a thin “crumb coat” of frosting all over the cake. This seals in crumbs. Pop the cake in the fridge for 15 minutes to set this coat. Finally, use the remaining frosting to cover the cake completely, creating beautiful, swooping swirls on top and smooth sides. Step back and admire your chocolate masterpiece.
Timing Your Delicious Project
- Prep Time: 25 minutes
- Bake Time: 30-35 minutes
- Cooling Time: 1 hour (crucial!)
- Frosting & Assembly Time: 20 minutes
- Total Time: About 2 hours 15 minutes
Chef’s Secret: The Magic of Hot Liquid
The single biggest secret to this cake’s deep flavor and moist texture is the boiling water. Don’t be tempted to skip it or use cold water. The hot liquid reacts with the cocoa powder and flour. It makes the gluten more tender and helps the sugar dissolve fully. This creates that signature velvety texture that defines the ultimate Decadent Chocolate Indulgence.
A Sweet Fact About Chocolate
Did you know the cocoa bean is actually a seed from the fruit of the cacao tree? These pods grow directly on the trunk and main branches. Each pod holds about 40-50 beans. It takes nearly 400 beans to make just one pound of chocolate! Knowing this makes me appreciate every single chocolatey bite of this cake even more.
Necessary Equipment
You don’t need a professional bakery setup for this cake. Here is the basic equipment to have ready:
- Two 9-inch round cake pans
- Mixing bowls (large and medium)
- Hand mixer or stand mixer
- Whisk and rubber spatula
- Measuring cups and spoons
- Wire cooling rack
- Offset spatula for frosting (a butter knife works too!)
Storing Your Masterpiece
If you have any leftovers (a big “if” in my house!), store the cake properly to keep it fresh. First, place the cake in an airtight cake carrier. You can also cover it gently with plastic wrap or foil. Make sure the covering doesn’t touch the frosting.
Store the cake at cool room temperature for up to 3 days. If your kitchen is very warm, it’s better to refrigerate it. The cold will firm up the frosting, so let slices sit out for 15 minutes before serving to soften up perfectly.
For longer storage, you can freeze this cake beautifully. Freeze the unfrosted cake layers individually, wrapped tightly in plastic and then foil, for up to 3 months. Thaw overnight in the fridge. Frosting can also be frozen in a sealed container. Thaw and rewhip before using.
Tips and Advice for Baking Bliss
- Quality Cocoa: The flavor of your cake lives and dies with the cocoa powder. Splurge on a good-quality, fresh brand for the richest taste.
- Room Temperature Matters: Use room temperature eggs, milk, and butter (for the frosting). They incorporate into the batter much more smoothly.
- Don’t Overmix: Once you add the flour, mix just until the batter is combined. Overmixing can make the cake tough.
- Cool Completely: I know it’s hard to wait, but frosting a warm cake is a recipe for a melted, sliding mess. Patience is key.
Presentation Tips to Wow Your Guests
- Create a simple yet elegant top with a dusting of cocoa powder or powdered sugar through a fine-mesh sieve.
- Press chocolate shavings, sprinkles, or crushed nuts onto the sides of the frosted cake.
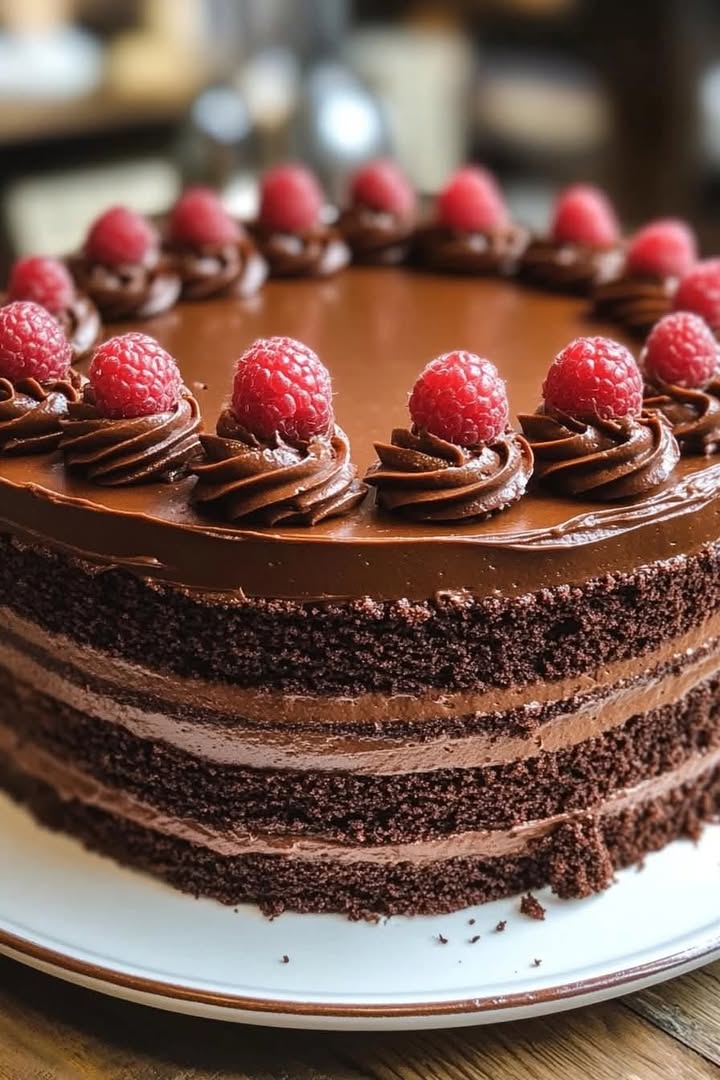
- A ring of fresh raspberries or strawberries around the top edge adds beautiful color and a fruity contrast.
- For a final touch, drizzle with a little leftover chocolate ganache or caramel sauce just before serving.
Love This Cake? Try These Other Decadent Ideas!
Once you’ve mastered this classic, the baking world is your oyster! If you love fusion flavors, you must try this refreshing Tropical Pineapple Coconut Cake. It’s a sunny escape in dessert form. For the days you want something incredibly simple but satisfying, this miraculous 2-Ingredient Yogurt Cake is a game-changer. Looking for a no-bake showstopper? My Baileys Chocolate Cheesecake Trifle layers creamy, boozy bliss with chocolate cake crumbs. And for a quick, single-serving treat, my kids adore these Nutella Marbled Muffins—they’re dangerously good!
Common Mistakes to Avoid
Mistake 1: Measuring Flour Incorrectly
Scooping flour directly from the bag with your measuring cup packs it down. This leads to using too much flour. Your cake can become dry and dense. Always spoon the flour lightly into your measuring cup. Then, level it off with the back of a knife. For absolute accuracy, using a kitchen scale is the best method.
Mistake 2: Baking in a Hurry with a Cold Oven
Putting cake batter into an oven that hasn’t fully preheated is a common error. The heat shock isn’t consistent. This can cause uneven rising or a sunken middle. Always let your oven preheat for a full 15-20 minutes. Use an oven thermometer to check it’s truly at 350°F. This ensures your cakes rise beautifully and evenly.
Mistake 3: Frosting a Warm Cake
That creamy frosting melts instantly on a warm cake. You’ll end up with crumbs mixed in and a layer that slides right off. It’s so disappointing. Let the cakes cool in the pans for 10 minutes. Then, transfer them to a wire rack. Allow them to cool completely, which can take a full hour. Your patience will be rewarded with a perfectly frosted cake.
Mistake 4: Overbeating the Batter After Adding Flour
Once you add the dry ingredients to the wet, you need to mix gently. Overbeating at this stage develops the gluten in the flour. This makes the cake tough and chewy instead of tender and soft. Mix just until you no longer see streaks of dry flour. A few small lumps are okay; they will bake out.
A Note on Nutrient Density in Baking
While this cake is a treat, I think it’s wonderful to understand our ingredients. Choosing high-quality cocoa powder isn’t just about flavor. It also contributes to the overall nutrient density of your dessert. Good cocoa is a source of antioxidants and minerals. Pairing a slice with a handful of berries adds fiber and vitamins. It’s all about balance and enjoying good food mindfully.
Frequently Asked Questions (FAQ)
Can I make this cake into cupcakes?
Absolutely! This batter makes fantastic cupcakes. Line your muffin tin with paper liners. Fill each cup about 2/3 full with batter. Bake at the same temperature (350°F) for 18-22 minutes. Check with a toothpick for doneness. The recipe should yield about 24-28 standard cupcakes. Let them cool completely before frosting. You’ll have the perfect portable Decadent Chocolate Indulgence for parties or lunchboxes.
Why is the cake batter so thin? Did I do something wrong?
You did everything perfectly! The thin batter is totally normal for this recipe. Adding the cup of boiling water at the end is intentional. It makes the batter very liquidy. This helps create an exceptionally moist and tender cake crumb. It also helps the cocoa powder fully dissolve and bloom. This maximizes the deep chocolate flavor. Don’t worry, it will bake up into a perfect, sturdy cake.
How can I make the frosting less sweet?
If you prefer a less sweet frosting, you have a couple of great options. First, you can reduce the powdered sugar by 1/2 cup to 3/4 cup. Add a pinch of salt to help balance the sweetness. Second, you can swap the frosting for a chocolate ganache. Ganache is just heated cream poured over chocolate. It’s rich, creamy, and less cloyingly sweet than buttercream. It’s a more adult, sophisticated finish for the cake.
My cake layers stuck to the pan! How do I prevent this?
Sticking is so frustrating. To prevent it, be generous when preparing your pans. Grease the entire inside with soft butter or baking spray. Then, add a tablespoon of flour to the pan. Shake and tilt the pan until the flour coats every greased surface. Tap out any excess. For extra insurance, cut a round of parchment paper to fit the bottom of the pan. Grease the pan, place the paper, then grease the paper. Your cake will release like a dream.
Can I use a different size pan?
Yes, but the baking time will change. For a 9×13 inch rectangle pan, bake for 35-40 minutes. For three 8-inch round pans, bake for 25-30 minutes. For a Bundt pan, make sure to grease it very thoroughly. Bake for 45-55 minutes. Always use the toothpick test to check for doneness. The center should come out clean or with a few moist crumbs attached.
What’s the best way to get flat cake layers for stacking?
To prevent domed cake layers, you can use cake strips. These are fabric strips you soak in water and wrap around the outside of the pan. They insulate the edges so the cake bakes evenly. No strips? You can also bake the cakes. Then, as soon as they come out of the oven, gently press down the dome with a clean kitchen towel or the bottom of a flat plate. Do this while the cakes are still hot and flexible.
My frosting is too runny/thick. How do I fix it?
Frosting consistency is easy to adjust. If it’s too runny, it’s likely too warm. Chill it in the fridge for 15-20 minutes, then rewhip. You can also add a little more powdered sugar, a tablespoon at a time. If it’s too thick and difficult to spread, add more milk. Start with just one teaspoon. Beat it in well before adding more. You want a smooth, spreadable consistency that holds its shape.
Can I make this cake a day ahead?
Making it ahead is a fantastic idea. Bake and cool the cake layers completely. Wrap them tightly in plastic wrap. Store them at room temperature overnight. You can also make the frosting a day ahead. Keep it in an airtight container in the refrigerator. Let it come to room temperature and rewhip it briefly before using. Assemble and frost the cake the day you plan to serve it for the freshest look and texture.
Is there a dairy-free version of this recipe?
You can easily make a dairy-free version. For the cake, replace the whole milk with a non-dairy milk like almond, soy, or oat milk. Use a neutral-flavored oil. For the frosting, use a high-quality dairy-free butter substitute. Make sure it’s labeled for baking. Use non-dairy milk here as well. The boiling water and other ingredients remain the same. You’ll still get a wonderfully moist and delicious cake everyone can enjoy.
What can I do with leftover frosting?
Leftover chocolate frosting is a treasure, not a problem! Use it as a dip for fresh fruit like strawberries or pretzels. Spread it between graham crackers for a quick treat. You can also thin it out with a little extra milk to make a delicious chocolate sauce for ice cream. If you love baking, store it in the freezer for up to 3 months. Use it to frost cupcakes or cookies another day.
I hope this recipe becomes a beloved classic in your home, just like it is in mine. There’s something so special about sharing a homemade cake. It’s a gesture of love that never goes out of style. This Decadent Chocolate Indulgence is more than a dessert. It’s a memory maker. For more inspiration and all my favorite bakes, explore the wonderful world of cakes and cupcakes. Now, go preheat that oven and get ready for the best chocolate cake of your life. Happy baking!
Equipment
- Deux moules à gâteaux ronds de 9 pouces
- Grand bol
- Fouet
- Spatule en caoutchouc
- Tampon de refroidissement en fil
Ingredients
- 250 g farine tout usage
- 400 g sucre cristallisé
- 75 g cacao en poudre non sucré
- 2 cuil. à café poudre à lever
- 1.5 cuil. à café bicarbonate de soude
- 1 cuil. à café sel
- 240 ml lait entier
- 120 ml huile végétale
- 2 oeufs
- 2 cuil. à café extrait de vanille
- 240 ml eau bouillante
Instructions
- Préchauffez votre four à 175°C et graissez deux moules à gâteaux de 9 pouces avec de la farine.
- Dans un grand bol, mélangez la farine, le sucre, le cacao en poudre, la poudre à lever, le bicarbonate de soude et le sel.
- Ajoutez les ingrédients humides : lait, huile, œufs et vanille au mélange sec. Battez jusqu'à obtenir une consistance lisse.
- Incorporez l'eau bouillante jusqu'à ce que le mélange soit bien homogène (la pâte sera liquide).
- Versez la pâte uniformément dans les moules préparés.
- Faites cuire pendant 30-35 minutes, jusqu'à ce qu'un cure-dent en ressorte avec quelques miettes humides.
- Laissez refroidir les gâteaux dans les moules pendant 10 minutes, puis transférez-les sur une grille pour qu'ils refroidissent complètement.
- Pour préparer le glaçage, battez ensemble le beurre ramolli et le cacao en poudre jusqu'à consistance lisse.
- Ajoutez progressivement la moitié du sucre glace et la moitié du lait, en mélangeant jusqu'à obtenir une texture lisse. Répétez avec le reste.
- Étalez le glaçage entre les couches de gâteaux refroidis et sur le dessus et les côtés du gâteau.