
Tropical Pineapple Coconut Cake: Your Ticket to Paradise
There’s something magical about the smell of coconut toasting and sweet pineapple baking. It instantly whisks me away to a sunny beach, even if I’m just in my kitchen. I created this Tropical Pineapple Coconut Cake for my daughter’s birthday luau, and let me tell you, it was a superstar! It’s the kind of cake that makes people close their eyes and sigh with happiness. And the best part? It starts with a simple box mix, making it a breeze for any home baker.
A Slice of Sunshine: The Story Behind the Cake
While you might find fancy versions in high-end bakeries, the spirit of this cake is pure home kitchen joy. It draws inspiration from classic Hawaiian haupia (coconut pudding) and the beloved pineapple upside-down cake. I wanted to capture those warm, tropical flavors in a layer cake that’s perfect for sharing. My modern twist uses a box mix as a trusty base, which we then jazz up with real crushed pineapple and lots of coconut. This way, you get incredible flavor without any fuss. It’s a celebration of easy, happy baking that brings a taste of the islands to your table.
Why You’ll Fall in Love With This Pineapple Coconut Cake
This cake is a total crowd-pleaser for so many reasons! First, the texture is dreamy—incredibly moist from the pineapple and rich from the butter. The cream cheese frosting is tangy and sweet, perfectly balancing the tropical fruit. It’s also surprisingly simple. By starting with a mix, you skip the measuring stress and get to the fun part faster. Whether you’re a baking newbie or a seasoned pro, this recipe delivers a stunning, delicious result every time.
Perfect Occasions for a Tropical Treat
This cake isn’t just for birthdays! It’s the ideal centerpiece for summer barbecues, baby showers, or just a regular Saturday when you need a dose of sunshine. I love serving it at pool parties or as a sweet ending to a spicy taco night. It brings a festive, “you’re on vacation” feeling to any gathering. Honestly, any day is a good day for this pineapple coconut delight.
Gathering Your Tropical Cake Ingredients
Let’s gather everything you need. Most items are pantry staples, and the fresh touches make all the difference.
For the Cake:
- 1 box (approx. 15.25 oz) yellow cake mix
- Ingredients listed on the cake mix box (typically water, oil, and eggs)
- 1 can (8 oz) crushed pineapple, well drained
- 1 cup shredded sweetened coconut
- 3 large eggs
- 1/2 cup unsalted butter, melted and slightly cooled
- 1/2 cup milk
For the Frosting & Garnish:
- 1 cup unsalted butter, softened to room temperature
- 8 oz cream cheese, softened to room temperature
- 4 cups powdered sugar
- 1/2 cup shredded coconut (for topping)
- 1/4 cup crushed pineapple, well drained (for garnish)
Simple Substitutions for Your Pantry
Don’t worry if you’re missing an item! Baking is flexible.
- Cake Mix: White or butter golden cake mix works great too.
- Dairy: Use any fat percentage of milk you have. For a dairy-free version, use plant-based butter, milk, and cream cheese.
- Coconut: Unsweetened shredded coconut can be used for a less sweet cake. Toasted coconut adds a wonderful nutty flavor for garnish.
- Pineapple: Fresh pineapple, finely chopped and patted very dry, can replace canned.
Let’s Bake! Step-by-Step Instructions
Step 1: Prep and Preheat
Start by preheating your oven to 350°F (175°C). This ensures it’s perfectly hot when your batter is ready. Now, grab your two 9-inch round cake pans. Grease them generously with butter or non-stick spray, then dust with a little flour, tapping out the excess. This little ritual is your insurance policy for clean cake releases later. Place a circle of parchment paper at the bottom for extra security.
Step 2: Mix the Tropical Cake Batter
In a large mixing bowl, combine the yellow cake mix with the ingredients listed on its box. Now, here’s where we make it special! Add in the three eggs, the melted butter, and the milk. The melted butter will give us a richer crumb than oil alone. Use a hand mixer on medium speed to blend until just smooth, about 2 minutes. The batter will be pale and inviting. Pro tip: Drain your crushed pineapple in a fine-mesh strainer, and even press it gently with a spoon to remove excess juice. Too much liquid can make the cake gummy. Fold the drained pineapple and the 1 cup of shredded coconut into the batter with a spatula. You’ll see those lovely yellow flecks throughout.
Step 3: Divide and Conquer
Pour the beautiful, speckled batter evenly between your two prepared pans. I like to use a kitchen scale to be precise, but eyeballing it works too! Gently tap the pans on the counter to settle the batter and pop any large air bubbles. This helps the cakes bake up nice and level, giving you a stable base for stacking.
Step 4: Bake to Golden Perfection
Carefully place the pans in the center of your preheated oven. Bake for 25-30 minutes. Your kitchen will start to smell absolutely heavenly. The cakes are done when the edges pull away from the pan and a toothpick inserted into the center comes out clean or with a few moist crumbs—not wet batter. Pro tip: Avoid opening the oven door before the 25-minute mark to prevent the cakes from falling.
Step 5: The Art of the Cool Down
This step is crucial! Let the cakes cool in their pans on a wire rack for about 15 minutes. They need this time to set and firm up. Then, run a butter knife around the edges to loosen them. Invert the pans onto the cooling rack, gently lift them off, and peel away the parchment paper. Let the cakes cool completely, about an hour. Frosting a warm cake is a recipe for a melted, slippery mess.
Step 6: Whip Up the Dreamy Frosting
While the cakes cool, make the frosting. In a clean bowl, beat the softened butter and cream cheese together with an electric mixer until it’s completely smooth, creamy, and lump-free. This takes about 2-3 minutes. Gradually add the powdered sugar, one cup at a time, mixing on low speed at first to avoid a sugar cloud, then increasing to high until the frosting is light and fluffy. Taste it—it’s okay, I won’t tell!
Step 7: Assemble Your Masterpiece
Place one completely cooled cake layer on your serving plate or cake stand. Spread a generous, even layer of frosting over the top. Carefully place the second layer on top. Now, frost the entire outside of the cake. You can go for a rustic look with swoops and swirls or aim for a smooth finish. There’s no wrong way here—it all tastes amazing.
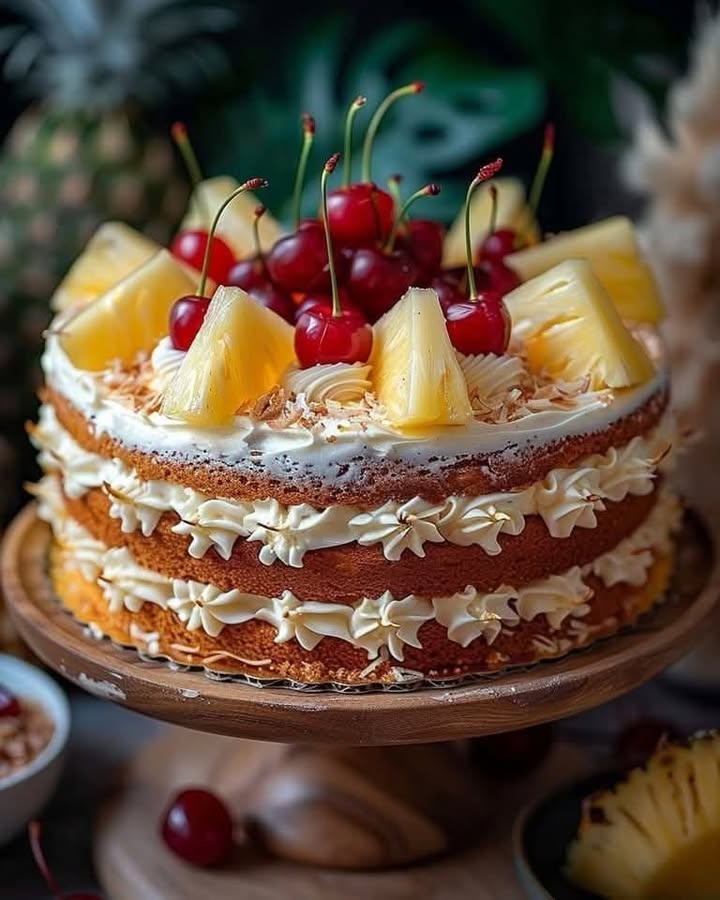
Step 8: The Final Tropical Touches
This is the fun part! Immediately after frosting, gently press the 1/2 cup of shredded coconut onto the sides and top of the cake. I like to toast half of it for a pretty color contrast. Finally, artfully place the remaining 1/4 cup of well-drained crushed pineapple in the center or around the border. Chef’s Tip: For a show-stopping look, add a ring of fresh pineapple slices or maraschino cherries around the top edge.
Time Investment for Tropical Bliss
Good things take a little time, but it’s mostly hands-off!
- Prep Time: 20 minutes
- Bake Time: 30 minutes
- Cooling Time: 1 hour (essential!)
- Frosting/Assembly Time: 15 minutes
- Total Time: About 2 hours 5 minutes
My Secret for Intense Flavor
Here’s my little secret: I save the juice from draining the pineapple. Instead of tossing it, I reduce it! Simmer the juice in a small saucepan over medium heat until it thickens and reduces by half to a syrupy consistency. Let it cool, then brush it lightly over the cake layers before you frost them. It gives an incredible punch of concentrated pineapple flavor that makes every bite sing.
A Fun Pineapple Fact
Did you know a pineapple is actually a collection of hundreds of individual berries that fuse together around a central core? That’s why it has those distinctive “eyes.” This also means every bit of that sweet, tangy flavor is nature’s own little miracle, perfect for baking into our coconut cake.
Your Baking Toolbox
You don’t need fancy gear for this cake!
- Two 9-inch round cake pans
- Mixing bowls (large and medium)
- Electric hand mixer or stand mixer
- Rubber spatula
- Wire cooling racks
- Measuring cups and spoons
- Fine-mesh strainer (for draining pineapple)
Storing Your Tropical Pineapple Coconut Cake
Because of the cream cheese frosting and fresh pineapple garnish, this cake must be stored in the refrigerator. Cover it loosely with a cake dome or inverted bowl, or place toothpicks around the top to hold up plastic wrap so it doesn’t stick to the frosting. It will keep beautifully for up to 4 days in the fridge.
For longer storage, you can freeze the unfrosted cake layers. Wrap each cooled layer tightly in two layers of plastic wrap and then in aluminum foil. Freeze for up to 3 months. Thaw overnight in the refrigerator before frosting and serving.
Let the refrigerated cake sit at room temperature for about 30 minutes before serving. This softens the frosting and brings out the cake’s full flavor and texture, making it taste just-baked fresh.
Tips & Tricks for Cake Success
- Room Temperature is Key: Your butter, cream cheese, and eggs for the cake mix should be at room temperature. This helps ingredients blend smoothly and creates a better cake texture.
- Drain, Drain, Drain: I can’t say it enough. Taking the time to thoroughly drain the crushed pineapple is the single most important step to prevent a soggy cake.
- Level Your Layers: If your cakes have a slight dome, use a serrated knife to gently slice off the rounded top to create a flat surface. This makes stacking much easier and prevents a lopsided cake.
Presentation Ideas to Wow Your Guests
- Serve on a vibrant turquoise or green platter to enhance the tropical vibe.
- Garnish with edible flowers, like hibiscus or orchids, for a truly island feel.
- Add a rim of whole toasted macadamia nuts around the base of the cake for crunch.
- Cut slices and serve on plates with a drizzle of passionfruit syrup or a sprinkle of lime zest.
Want to Mix It Up? Try These Variations!
Love this tropical flavor profile? There are so many ways to play with it! For a no-bake, chilled option perfect for summer, you must try this Cold Pineapple Cake with a creamy cheese filling. If you’re a fan of fruit and chocolate, a decadent Raspberry Truffle Layer Cake might be your next project. For a quicker, fruit-forward dessert, a Tropical Strawberry Pineapple Shortcake is refreshing and easy. And for a rich, nutty alternative, a Flourless Pistachio Cake with Chocolate Ganache is always impressive.
Other ideas include adding 1/2 cup of mashed ripe banana to the batter for a piña colada twist, mixing 1/2 cup of toasted macadamia nuts into the batter for crunch, or swapping the cream cheese frosting for a simple coconut whipped cream for a lighter touch.
Common Mistakes to Avoid
Mistake 1: Not Draining the Pineapple Enough
This is the big one! Canned crushed pineapple holds a lot of liquid. If you just dump it in, that extra juice throws off the liquid balance in your cake batter. The result can be a dense, gummy, or even soggy cake center that doesn’t bake properly. To avoid this, drain the pineapple in a fine-mesh strainer and really press down on it with the back of a spoon or a spatula to squeeze out as much juice as possible. Your cake will be moist, but not wet.
Mistake 2: Frosting a Warm Cake
We’ve all been tempted to frost a cake as soon as it’s out of the pan. But patience pays off here! The structure of a warm cake is still soft and fragile. Spreading frosting on it will pull off crumbs and create a messy look. Worse, the heat will melt the butter and cream cheese in your frosting, making it thin, runny, and impossible to work with. Always let your layers cool completely on a wire rack. This can take a full hour, but it’s non-negotiable for a beautiful finish.
Mistake 3: Overmixing the Batter
When using a box mix, it’s easy to get overzealous with the mixer. Overmixing after you’ve added the flour components develops too much gluten. This can make your cake tough and chewy instead of light and tender. Mix just until the ingredients are combined and no large dry streaks remain. When you fold in the pineapple and coconut, do it gently by hand with a spatula. A few lumps are perfectly fine!
Mistake 4: Using Cold Dairy Ingredients
Starting with cold butter, cream cheese, or eggs straight from the fridge causes problems. Cold butter and cream cheese won’t whip up smooth and fluffy; they’ll stay lumpy in your frosting. Cold eggs can cause your cake batter to curdle, especially when mixed with melted butter. Plan ahead! Take these ingredients out about 30-60 minutes before you start baking. They should feel slightly cool to the touch, not cold.
A Note on Sweetness and Energy
This cake is a celebration dessert, perfect for special occasions. While it’s a delightful treat, being mindful of your overall energy intake from added sugars is part of a balanced approach to enjoying food. You can find great resources on food and nutrition from trusted sources like the USDA.
Frequently Asked Questions
Can I make this cake ahead of time?
Absolutely! You can bake the cake layers up to two days in advance. Let them cool completely, then wrap each layer tightly in plastic wrap and store at room temperature. You can also make the frosting a day ahead, store it covered in the fridge, and let it come to room temperature before re-whipping it to spreadable consistency. Assemble the cake the day you plan to serve it for the freshest taste and best texture. This makes party day much less stressful.
Can I use fresh pineapple instead of canned?
Yes, you can use fresh pineapple, but it requires an extra step. You need about 1 cup of finely chopped fresh pineapple. The key is to remove as much moisture as possible. After chopping, pat the pineapple pieces very dry with several layers of paper towels, pressing down firmly. Fresh pineapple also contains an enzyme called bromelain that can prevent gelatin from setting, but it won’t affect your cake baking, so don’t worry about that for this recipe.
Why is my cake dense and heavy?
A dense cake is usually caused by one of three things. First, check your leavening agents—make sure your cake mix isn’t old. Second, you may have overmixed the batter after adding the dry mix, which develops too much gluten. Third, and most likely, there was too much liquid from undrained pineapple. Always drain and press your pineapple thoroughly. Also, ensure your oven temperature is accurate with an oven thermometer.
How do I toast coconut for the garnish?
Toasting coconut is easy and adds amazing flavor! Spread shredded coconut in a thin, even layer on a dry baking sheet. Bake in a preheated 325°F oven for 5-10 minutes, stirring every couple of minutes. Watch it closely, as it can go from golden brown to burned very quickly. It’s done when it’s fragrant and mostly golden. Let it cool completely on the sheet before sprinkling it on your cake.
My frosting is too runny. How can I fix it?
A runny frosting usually means the butter or cream cheese was too soft or the kitchen was very warm. Don’t panic! First, try chilling the frosting bowl in the refrigerator for 20-30 minutes, then re-beat it. If it’s still too soft, you can add a little more powdered sugar, a quarter cup at a time, until it thickens up. Be careful not to add too much, or it can become overly sweet.
Can I make this into cupcakes?
Yes, this recipe makes wonderful tropical cupcakes! Line a muffin tin with paper liners. Fill each liner about 2/3 full with the batter. Bake at 350°F for 18-22 minutes, or until a toothpick comes out clean. Let them cool completely, then frost. You’ll get about 24 standard cupcakes. They’re perfect for parties where individual servings are easier.
Do I have to use cream cheese frosting?
No, you don’t! While the tangy cream cheese pairs wonderfully with the sweet pineapple, other frostings work well too. A simple vanilla buttercream, a whipped coconut frosting, or even a silky Swiss meringue buttercream would be delicious. For a less sweet option, try sweetened whipped cream stabilized with a little instant pudding mix or cream of tartar.
How can I tell when the cake is perfectly baked?
Look for three signs. First, the edges of the cake will start to pull away slightly from the sides of the pan. Second, the top will spring back lightly when you gently press it with your finger. Third, and most reliably, insert a toothpick or a thin skewer into the center of the cake. It should come out with a few moist crumbs clinging to it, but not with wet, gooey batter. If it’s clean, that’s fine too.
Can I add rum to the cake for an adult version?
You can add a lovely rum flavor! To do this safely without affecting the batter’s liquid balance, brush 1-2 tablespoons of dark rum or coconut rum over the top of each cooled cake layer before you frost them. The cake will absorb it. For a non-alcoholic version, you could use a teaspoon of rum extract mixed into the batter or the frosting.
What’s the best way to slice a layer cake cleanly?
For picture-perfect slices, use a long, thin knife. Run the knife under very hot water, wipe it dry with a clean towel, and make your cut. The heat helps the knife glide smoothly through the frosting and cake without dragging. Wipe the knife clean and reheat it between each slice for the cleanest results. This is especially helpful with a moist cake like this one.
I hope this recipe brings as much joy to your home as it has to mine. Baking this Tropical Pineapple Coconut Cake is like giving your loved ones a sweet, sunny hug. If you’re looking for more inspiring ideas, explore our full collection of favorite cake and cupcake recipes for every occasion. Now, preheat that oven, put on some island music, and get ready to bake your way to paradise. Don’t forget to share a slice with a friend!
Equipment
- Deux moules à gâteau de 9 pouces
- Fouet électrique
- Spatule en caoutchouc
- Grille de refroidissement
- Tasses et cuillères à mesurer
Ingredients
- 1 boîte mélange de gâteau jaune (environ 15,25 oz)
- 3 grands œufs
- 1/2 tasse beurre non salé, fondu et légèrement refroidi
- 1/2 tasse lait
- 1 boîte ananas concassé (8 oz), bien égoutté
- 1 tasse coco râpé sucré
- 1/2 tasse coco râpé pour la garniture
- 8 oz fromage à la crème, ramolli (pour le glaçage)
- 4 tasses sucre en poudre (pour le glaçage)
- 1/4 tasse ananas concassé pour la garniture
Instructions
- Préchauffez votre four à 350°F (175°C) et préparez deux moules à gâteau de 9 pouces.
- Dans un grand bol, combinez le mélange de gâteau jaune avec les ingrédients indiqués sur la boîte.
- Ajoutez les œufs, le beurre fondu et le lait au mélange et battez avec un batteur pendant environ 2 minutes.
- Incorporez délicatement l'ananas concassé égoutté et 1 tasse de coco râpé dans la pâte.
- Divisez la pâte uniformément entre les deux moules préparés et tapez-les doucement sur le comptoir.
- Faites cuire dans le four préchauffé pendant 25-30 minutes jusqu'à ce que les bords se détachent et qu'un cure-dent en ressorte propre.
- Laissez les gâteaux refroidir dans les moules pendant environ 15 minutes, puis retournez-les sur une grille de refroidissement.
- Tout en refroidissant, battez le beurre ramolli et le fromage à la crème ensemble jusqu'à obtention d'un mélange lisse dans un bol propre.
- Ajoutez progressivement le sucre en poudre au mélange de glaçage, en battant jusqu'à ce qu'il soit léger et crémeux.
- Placez une couche de gâteau refroidie sur un plat de service, étalez une couche de glaçage sur le dessus, puis placez la deuxième couche par-dessus.
- Glacez l'ensemble du gâteau avec le glaçage restant.
- Appuyez 1/2 tasse de coco râpé sur le gâteau glacé et garnissez avec l'ananas concassé restant.