
Ever since my first bite of a slice creamy, velvety New York cheesecake at a diner in Manhattan, I knew it was love. It was dense, yet light. Rich, yet refreshingly simple. I came home obsessed with recreating that perfect balance in my own kitchen. After many trials (and a few tragic cracks!), I finally perfected a foolproof Classic New York Cheesecake recipe. It’s now the star of every family gathering and my most requested dessert. Let’s bake that iconic slice of heaven together!
From Deli Counter to Dessert Icon
This cheesecake isn’t just a dessert; it’s a piece of culinary history. The Classic New York Cheesecake is famous for its dense, smooth texture and minimal crust. It evolved from European cheesecake traditions but got its big personality in New York City’s Jewish delis and restaurants. They ditched the fruity toppings and frills, focusing on the pure, luxurious flavor of cream cheese. My recipe honors that tradition. It uses simple ingredients to create something spectacular. Modern twists abound, like adding chocolate or fruit swirls. But for me, the pure, unadorned version is where its soul truly shines.
Why You’ll Absolutely Adore This Classic New York Cheesecake
You will love this recipe because it delivers that iconic, restaurant-quality slice without any fuss. The flavor is perfectly balanced—creamy, sweet, and with just a hint of bright lemon. It’s surprisingly straightforward. The steps are clear, and the slow baking and cooling method is your guardian against cracks. This cheesecake is a showstopper that looks incredibly professional. Yet, it’s built on humble, familiar ingredients. Making it feels like a baking triumph every single time.
Perfect Occasions for Your Homemade Cheesecake
This cheesecake is your secret weapon for celebrations. It’s perfect for birthdays, anniversaries, or holiday dinners like Thanksgiving. Bring it to a potluck and watch it become the center of conversation. It’s also a wonderful weekend project to share with your kids or partner. A slice with coffee makes any afternoon feel special. Honestly, any day you want to feel a little extra joy is a good day for a Classic New York Cheesecake.
Ingredients for Your Perfect Cheesecake
Gathering these simple ingredients is the first step to success. Having everything ready and at the right temperature is key.
For the Crust:
- 1 ½ cups graham cracker crumbs
- ⅓ cup granulated sugar
- 5 tablespoons unsalted butter, melted
For the Filling:
- 32 ounces (4 blocks) cream cheese, softened
- 1 ½ cups granulated sugar
- 1 cup sour cream
- 4 large eggs
- 2 teaspoons vanilla extract
- 2 tablespoons all-purpose flour
- 2 teaspoons lemon juice (optional, for brightness)
Smart Ingredient Substitutions
Don’t worry if you need to swap something out! Here are some easy fixes:
- Cream Cheese: Use full-fat blocks only. Low-fat or spreadable versions have more water and will ruin the texture.
- Sour Cream: Full-fat Greek yogurt can work in a pinch for a slightly tangier result.
- Graham Cracker Crust: You can use digestive biscuits or even vanilla wafer crumbs for a different flavor.
- Flour: The tablespoon of flour helps stabilize the cake. Cornstarch can be used as a 1:1 substitute if needed.
- No Springform Pan? A deep 9-inch cake pan lined with parchment paper can work, but slicing and serving is trickier.
Creating Your Classic New York Cheesecake: Step-by-Step
Follow these steps carefully, and you’ll have a flawless cheesecake. Remember, patience is your best ingredient here.
Step 1: Prepare the Pan and Preheat
Start by preheating your oven to 325°F (160°C). Take your 9-inch springform pan and wrap the outside bottom and sides tightly with aluminum foil. This creates a waterproof barrier for the water bath method, which we’re using to prevent cracks. Grease the inside of the pan lightly. This little effort now makes sure your gorgeous cheesecake releases easily later.
Step 2: Make and Bake the Crust
In a bowl, mix the graham cracker crumbs and sugar. Pour in the melted, golden butter. Stir until every crumb is coated and the mixture looks like wet sand. Press this firmly and evenly into the bottom of your prepared pan. Use a flat-bottomed cup to get it really compact. Bake it for 10 minutes. This quick bake sets the crust so it won’t get soggy. Let it cool on a rack. The warm, toasty smell is your first reward.
Step 3: Build the Luxurious Filling
Beat the softened cream cheese in a large bowl with an electric mixer until it’s completely smooth and creamy. No lumps allowed! Add the sugar and beat again until it’s fluffy and well combined. Now, mix in the sour cream, vanilla, flour, and lemon juice. The mixture will become beautifully smooth and glossy.
Step 4: Incorporate the Eggs Gently
This is the most critical step for a smooth texture. Add the eggs one at a time. Beat on low speed after each addition until just combined. Over-beating here incorporates too much air and can lead to cracks. The batter will be thick, pale, and impossibly silky.
Step 5: Assemble and Smooth
Pour this lush batter over your cooled crust. Use a spatula to spread it evenly and smooth the top. Tap the pan gently on the counter to release any big air bubbles. Place the pan into a larger roasting pan. Pour hot water into the roasting pan until it comes about halfway up the side of the springform pan. This water bath creates a gentle, steamy oven environment.
Step 6: The Patient Bake and Cool
Bake the cheesecake for about 1 hour. The top should be set but may still have a slight jiggly spot in the very center. Turn off the oven. Now, do not open the door! Let the cheesecake sit inside the closed, turned-off oven for another hour. This gradual cooling is the magic trick to prevent sinking and cracking. After that hour, remove it from the oven and water bath, and let it cool completely on a rack.
Step 7: The Final Chill
Once the cheesecake is room temperature, cover it and refrigerate it. You must chill it for at least 4 hours, but overnight is truly best. This long chill firms up the texture to that perfect, sliceable density. The flavors also meld beautifully. Your patience will be rewarded with the ultimate Classic New York Cheesecake.
Timing Your Cheesecake Journey
Good baking is about planning your time.
- Prep Time: 20 minutes (measuring, mixing crust, making batter)
- Baking & In-Oven Cooling: 2 hours (1 hour bake + 1 hour in turned-off oven)
- Cooling & Chilling: At least 4 hours, ideally overnight
- Total Time (to serving): About 6 hours minimum
Chef’s Secret: The Water Bath is Your Best Friend
The single best tip for a crack-free top is the water bath (also called a bain-marie). The hot water around the pan provides gentle, even heat. It prevents the edges from cooking too fast and pulling away from the center, which causes cracks. Don’t skip it! Just ensure your foil wrap is tight so no water seeps into the pan.
A Sweet Slice of Cheesecake History
Did you know cream cheese itself was invented in New York? In 1872, a dairyman named William Lawrence in Chester, NY, accidentally created it while trying to make a French cheese called Neufchâtel. His richer, creamier product was packaged and sold as “Philadelphia Brand” cream cheese. This local ingredient became the heart of the iconic New York-style cheesecake we love today.
Necessary Equipment
You don’t need fancy tools, but these are essential:
- 9-inch springform pan
- Aluminum foil
- Large roasting pan for water bath
- Electric mixer (hand or stand)
- Measuring cups and spoons
- Mixing bowls
- Spatula
- Cooling rack
Storing Your Creamy Creation
Once chilled and served, you can store any leftovers tightly covered in the refrigerator. The cheesecake will stay fresh and delicious for up to 5 days. Make sure it’s covered with plastic wrap or in an airtight container to prevent it from drying out.
For longer storage, this cheesecake freezes remarkably well. Wrap the whole cheesecake or individual slices tightly in plastic wrap, then in foil. Place it in a freezer-safe bag. It can be frozen for up to 2 months. Thaw it overnight in the refrigerator before serving.
If you’ve topped it with fresh fruit or a sauce, note that these toppings may not freeze as well. Consider adding fresh toppings after thawing for the best texture and appearance.
Pro Tips and Friendly Advice
- Room Temperature is Key: Let your cream cheese, eggs, and sour cream sit out for at least 30 minutes before starting. Cold ingredients won’t blend smoothly and can cause lumps.
- Don’t Overmix: Once you add the eggs, mix on low speed and only until just combined. Over-beating adds air bubbles that can expand and crack the surface.
- No Peeking: Resist opening the oven door during baking or the initial cool-down. Sudden temperature changes are a cheesecake’s enemy.
- Use a Sharp Knife: For clean slices, use a thin, sharp knife. Dip it in hot water and wipe it clean between each cut.
Presentation Ideas to Make it Sparkle
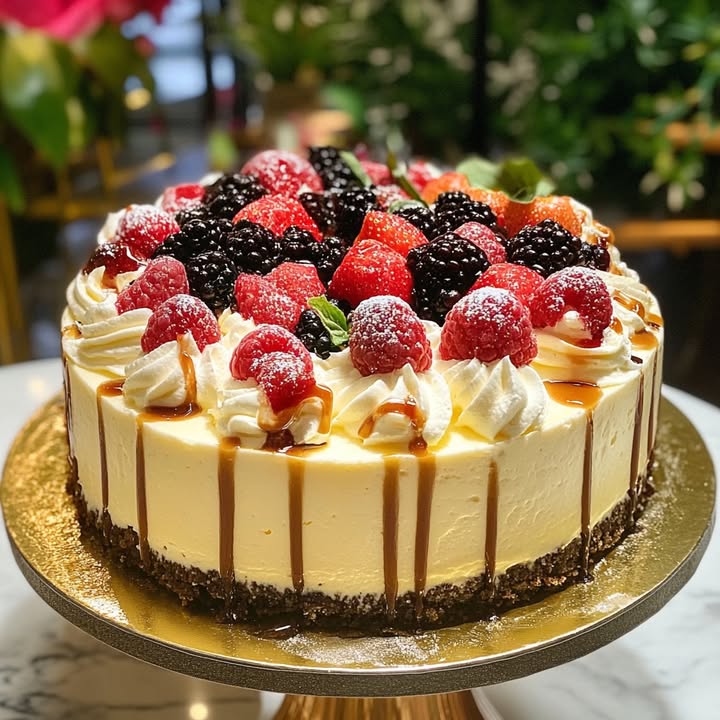
This cheesecake is beautiful plain, but a little garnish makes it festive:
- Top with a simple mountain of fresh red strawberries or a mix of berries.
- Drizzle with a glossy homemade raspberry or strawberry sauce.
- A dollop of whipped cream and a sprinkle of lemon zest adds freshness.
- For a chic look, dust the top lightly with powdered sugar just before serving.
- Serve with a side of tart cherry compote for a classic New York deli-style pairing.
Healthier Twists on the Classic New York Cheesecake
If you’re looking for a lighter version, here are some delicious alternatives:
- Lightened-Up Cheesecake: Use a blend of half full-fat and half reduced-fat cream cheese, and swap sour cream for low-fat Greek yogurt. The texture will be slightly less dense but still delicious.
- Sugar-Free Version: Replace granulated sugar with a monk fruit or erythritol blend suitable for baking. Be sure to follow conversion guides as some substitutes are less sweet.
- Gluten-Free New York Cheesecake: Simply use gluten-free graham cracker crumbs or oats for the crust, and ensure your flour substitute (like cornstarch) is gluten-free. The filling is naturally gluten-free.
- Mini Cheesecake Bites: Bake the batter in a muffin tin with mini crusts. Portion control is easier, and they’re perfect for parties. Check out our adorable Easter No-Bake Mini Swirl Cheesecakes for no-bake inspiration.
- Flavor Infusions: Add zest without extra sugar. Mix in 2 tablespoons of lemon or orange zest into the filling for a bright, citrusy cheesecake.
- Chocolate Marble Cheesecake: For a decadent twist, melt some chocolate and swirl it into part of the batter before baking. It’s a wonderful combination, like our Blueberry Brownies marry fruit and chocolate.
Common Mistakes to Avoid
Avoid these common pitfalls to ensure your cheesecake is perfect.
Mistake 1: Using Cold Ingredients
Starting with cold cream cheese or eggs is a top cause of lumpy batter. The cold fat in the cream cheese won’t blend smoothly with the sugar. Always let your cream cheese, eggs, and sour cream sit on the counter until they are no longer chilly. This ensures a silky, homogeneous filling that bakes evenly.
Mistake 2: Over-beating the Batter After Adding Eggs
Once you add the eggs, too much beating is dangerous. Eggs incorporate air. That air expands in the hot oven and then collapses as the cake cools, creating cracks. After adding each egg, mix on low speed only until the yolk disappears into the batter. Pro tip: Switch to a paddle attachment if using a stand mixer for gentler mixing.
Mistake 3: Skipping the Water Bath
Baking the cheesecake directly on an oven rack often leads to a dry, cracked surface. The edges bake too fast. The water bath provides gentle, moist heat that cooks the cake evenly from edge to center. Don’t be intimidated—just wrap your pan well in foil. It’s the simplest guarantee of a flawless top.
Mistake 4: Opening the Oven Door During Baking or Cooling
It’s tempting to check on your beautiful cake. But opening the door causes a sudden drop in temperature. This shock can make the cheesecake sink or crack. Trust the process and the timer. Use the oven light to peek if you must. Remember, the slow cool-down inside the turned-off oven is part of the baking process.
Mistake 5: Not Chilling Long Enough
Cutting into a cheesecake that hasn’t fully chilled is a recipe for a mess. The center will be soft and won’t hold a clean slice. The flavor also needs time to settle. Four hours is the minimum, but overnight chilling makes for the perfect, firm texture and richest flavor. Plan ahead for this waiting period.
Frequently Asked Questions
Why is my cheesecake cracked on top?
Cracks usually happen from sudden temperature changes or over-mixing. Over-beating the batter adds too much air. Baking without a water bath makes the edges cook too fast. Cooling too quickly by taking it straight out of the oven can also cause cracks. Following the water bath method and the slow, in-oven cooling step in this recipe will prevent most cracking. If a small crack appears, don’t worry! A topping of fruit or sauce will cover it beautifully.
Can I make this cheesecake without a springform pan?
You can, but it’s more challenging. A deep 9-inch regular cake pan lined with parchment paper can work. You’ll need to grease the sides well and use the parchment to help lift the cake out after chilling. A springform pan is designed to release the cake easily by removing the side wall. It’s the best tool for this job and worth having for your future cheesecake adventures.
What’s the difference between New York cheesecake and other styles?
New York-style is known for its dense, rich, and tall texture. It uses a lot of cream cheese and often includes sour cream for tang and stability. It typically has a simple graham cracker crust and is baked. Other styles, like Italian cheesecake, might use ricotta cheese for a lighter, grainier texture. No-bake cheesecakes are lighter and fluffier, often using whipped cream or gelatin.
How do I know when the cheesecake is done baking?
It should bake for about 1 hour. The edges will look set and may be slightly puffed. The center, about a 2-inch circle, should still jiggle slightly when you gently tap the pan. It should not be liquidy, but it should have a soft, wobbling motion. This set-but-jiggly center will firm up perfectly during the slow cooling and long chill.
Can I freeze a cheesecake?
Yes, cheesecake freezes very well. Cool it completely and chill it fully first. Wrap the whole cake or individual slices tightly in plastic wrap, then in aluminum foil. Place it in a freezer bag. It will keep for up to 2 months. Thaw it overnight in the refrigerator. Avoid freezing cheesecakes with fresh fruit toppings, as they can become mushy.
Why do I need to add flour to the filling?
The small amount of flour acts as a stabilizer. It helps bind the ingredients and provides a little structure, reducing the chance of cracks and helping the cheesecake set properly. If you need a gluten-free version, you can substitute it with an equal amount of cornstarch.
My cheesecake is lumpy. What went wrong?
Lumps come from two main issues: cold cream cheese that didn’t soften enough, or not beating the cream cheese long enough before adding other ingredients. Ensure your cream cheese is truly soft at room temperature. Beat it alone until it is completely smooth, creamy, and free of any lumps before adding the sugar.
Can I use a different crust?
Absolutely. While graham cracker is classic, you can use crushed digestive biscuits, vanilla wafers, or even shortbread cookies. For a nutty crust, try finely ground pecans mixed with a little butter and sugar. A crumb crust adds texture but keeps the focus on the filling, unlike a pastry crust used in some other styles.
Is sour cream essential?
It is highly recommended. Sour cream adds a wonderful tangy flavor that balances the sweetness. It also contributes to the smooth, creamy texture. For a similar effect, you could use full-fat Greek yogurt. Do not omit it entirely without replacing it, as it affects both flavor and texture.
How can I make sure my slices are neat and clean?
Use a thin, sharp knife. Dip it in very hot water and wipe it dry before each cut. The heat helps the knife glide through the dense, cold filling without sticking and tearing. For the first slice, cut gently through the crust as well. Clean the knife after each slice for a picture-perfect plate every time. For more dessert inspiration, check out our simple One Bowl Chocolate Cake or the decadent Kentucky Derby Pecan Pie Cheesecake.
A Final Sweet Word
Baking this Classic New York Cheesecake is more than just following a recipe. It’s about creating a moment of pure, shared joy. The rich, creamy slice you serve is a labor of love and patience. Remember, even if a tiny crack appears, it doesn’t affect the incredible flavor. This dessert is about indulgence and celebration. Enjoy the process, share the results, and savor every bite. After all, achieving the perfect balance of ingredients—like the luxurious cream cheese and creamy texture in this dessert—is a delight, much like finding a good macronutrient balance in a satisfying diet is about harmony and enjoyment. Now, go bake your masterpiece and make someone’s day wonderfully sweet.
Equipment
- Grand bol
- Fouet
- Spatule
- Plaque à pâtisserie
- Papier sulfurisé
Ingredients
- 32 oz fromage à la crème ramolli
- 1.5 c sucre
- 1 c crème aigre
- 4 œufs
- 2 t extrait de vanille
- 2 c morceaux de citron facultatif
- 2 t farine tout usage
- 1.5 t sucre en poudre pour le goût
Instructions
- Préchauffez votre four à 160°C et préparez un moule à ressort de 9 pouces avec du papier aluminium.
- Graisser légèrement l'intérieur du moule.
- Mélangez les miettes de biscuit Graham et le sucre dans un bol, puis incorporez le beurre fondu jusqu'à ce qu'ils soient enrobés.
- Appuyez fermement sur le mélange de biscuits dans le fond du moule préparé et enfournez pendant 10 minutes.
- Laissez refroidir la croûte sur une grille.
- Battrais le fromage à la crème ramolli jusqu'à obtenir une consistance lisse dans un grand bol.
- Ajoutez le sucre et battez jusqu'à obtenir un mélange léger et mousseux, puis incorporez la crème aigre, la vanille, la farine et le jus de citron jusqu'à ce que le mélange soit homogène.
- Ajoutez les œufs un par un en mélangeant à basse vitesse jusqu'à ce qu'ils soient juste intégrés.
- Versez la préparation sur la croûte refroidie et lissez le dessus avec une spatule.
- Tapotez doucement le moule sur le comptoir pour libérer les bulles d'air.
- Placez le moule à ressort dans une grande casserole et remplissez-la d'eau chaude jusqu'à mi-hauteur des côtés du moule à ressort.
- Faites cuire le cheesecake pendant environ 1 heure jusqu'à ce que le dessus soit pris mais légèrement tremblotant.
- Éteignez le four, en laissant le cheesecake à l'intérieur pendant une heure sans ouvrir la porte.
- Retirez le cheesecake du four et du bain-marie, et laissez-le refroidir complètement sur une grille.
- Une fois à température ambiante, couvrez et réfrigérez pendant au moins 4 heures, de préférence toute la nuit.
Notes
Nutrition

Hi, I’m Olivia Parker, the founder of BakingSecret.com and a lifelong lover of all things sweet and homemade. I grew up in a small town in Oregon, where the smell of fresh cookies in my family’s kitchen sparked my passion for baking. Over the years, I turned that passion into a mission: to help home bakers feel confident, inspired, and creative.
After studying food science and working in several artisan bakeries across the U.S., I decided to create a space where everyone from beginners to seasoned bakers can find reliable recipes, expert tips, and a warm, welcoming community. BakingSecret.com is my way of sharing the magic of baking with the world. When I’m not testing new recipes, you’ll find me exploring farmers’ markets, collecting vintage cookbooks, or perfecting my sourdough technique.