
Ever notice how the best desserts are born from a fusion of leftover bits and a sudden craving? Last Sunday, with a few lonely apples on the counter and a sheet of puff pastry whispering from the freezer, I decided to play. I wanted the cozy feel of apple pie but without the fuss of a pie crust. The result? These swoon-worthy Caramel Apple Pastries. They’re like little pockets of autumn itself—warm, flaky, and filled with gooey caramel-spiced apples. My family polished them off in under ten minutes, and my neighbor texted asking for the recipe. That’s always the best sign, isn’t it?
The Story Behind Caramel Apple Puff Pastry
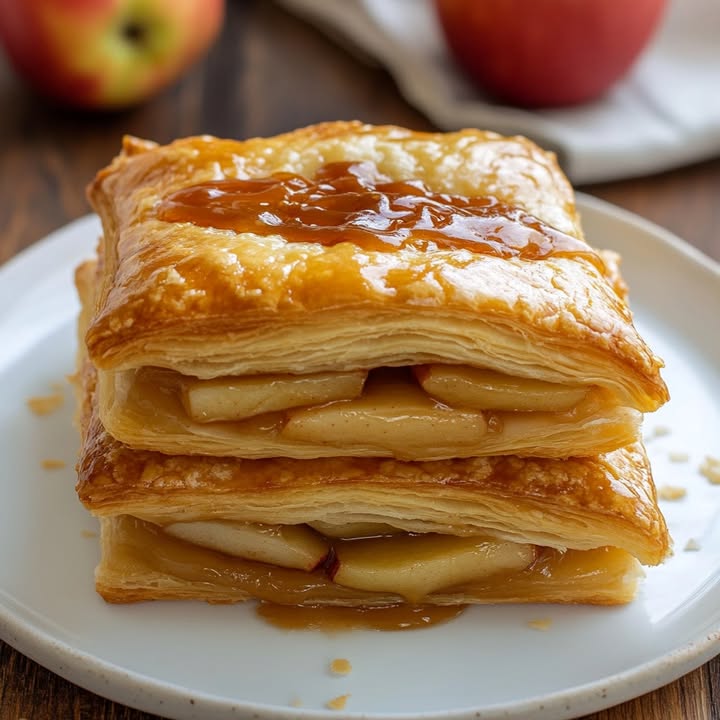
Let’s talk about one of my favorite flavor pairings: caramel and apple. It’s a classic for a reason. Think about county fairs and those shiny, sticky caramel apples on a stick. Now, imagine taking all that sweet, tart goodness and tucking it into a buttery, flaky, French-inspired puff pastry. That’s the modern magic of this recipe! It’s a fantastic shortcut dessert that feels incredibly fancy. While it might not be a historical dish passed down for centuries, it’s a brilliant example of how we can take simple, beloved components—like store-bought puff pastry and homemade apple filling—and create something new and spectacular for busy families and happy gatherings.
Why You’ll Adore This Easy Caramel Apple Dessert
Friends, this recipe is a total win for so many reasons. First, the flavor is absolute perfection: sweet, spiced apples and rich caramel in every bite. Second, it’s shockingly easy. With pre-made puff pastry, the hardest part is dicing the apples. It’s the kind of recipe that looks like you spent hours in the kitchen, but your secret is safe with me. Finally, they are incredibly versatile. Serve them warm for dessert, at room temperature for a brunch treat, or even pack them in a lunchbox (if they last that long!). They’re little bundles of joy.
Perfect Occasions for These Pastry Pockets
These pastries are your new secret weapon for almost any event. They’re a star at fall gatherings like Thanksgiving or Halloween parties. Bring a batch to a brunch potluck and watch them disappear. They make a cozy weekend baking project with kids—let them help crimp the edges with a fork! They’re also just the thing for a “treat yourself” afternoon with a cup of coffee or tea. Honestly, any day that needs a little sweetening up is the right day for Caramel Apple Pastries.
What You Need: Caramel Apple Puff Pastry Ingredients
- 1 sheet puff pastry, thawed – The flaky foundation of our dessert.
- 2 apples – I love Granny Smith for tartness or Honeycrisp for sweetness.
- 2 tablespoons unsalted butter
- 1/2 cup brown sugar – For that deep, molasses-like sweetness.
- 1 teaspoon ground cinnamon
- 1/4 teaspoon nutmeg – A warm, nutty hint.
- Pinch of salt – Balances all the sweetness.
- 1/4 cup caramel sauce, plus more for drizzling
- 1 egg for egg wash – For that beautiful golden shine.
- Powdered sugar for dusting (optional)
Handy Ingredient Substitutions
No worries if you’re missing something! Here are my favorite swaps:
- Apples: Any firm baking apple works—try Pink Lady or Braeburn.
- Caramel Sauce: Use store-bought for ease, or make a quick one by melting down wrapped caramels with a splash of heavy cream.
- Spices: Allspice or apple pie spice blend can stand in for nutmeg.
- Egg Wash: A little milk or cream brushed on top will still give a nice color, though not as shiny.
Making Your Caramel Apple Pastries: A Step-by-Step Guide
Step 1: Prep Your Oven and Pan
First things first, get that oven hot! Preheat it to 400°F (200°C). This high heat is crucial for getting the puff pastry to rise dramatically and turn a perfect golden brown. While it heats, line a baking sheet with parchment paper. This isn’t just for easy cleanup; it prevents any sticky caramel leaks from welding your pastries to the pan. Trust me, that’s a mess you want to avoid. A silicone baking mat works wonderfully here too.
Step 2: Cook the Apple Filling
Now for the soul of the dish. Grab a skillet and melt the butter over medium heat. Listen for that gentle sizzle. Toss in your diced apples, brown sugar, cinnamon, nutmeg, and salt. The air will instantly smell like a cozy autumn cafe. Cook this for 5-7 minutes, stirring often. You want the apples to be tender but not mushy, and the sugar and butter to meld into a beautiful, syrupy glaze. Pro tip: Don’t rush this step. Letting the apples cook properly ensures they’re soft and flavorful inside the pastry.
Step 3: Add Caramel and Cool
Take the skillet off the heat. Stir in that 1/4 cup of caramel sauce. It will loosen the mixture and make it gloriously glossy and gooey. Let this filling cool for a few minutes. A hot filling will melt the butter in your puff pastry before it even hits the oven, preventing a good rise. A slightly warm filling is perfect. This is a great time to roll out your pastry.
Step 4: Roll and Fill the Pastry
On a lightly floured surface, unfold or roll your puff pastry sheet into a rough rectangle. Use a sharp knife or pizza cutter to slice it into 6 equal smaller rectangles. They don’t have to be perfect! Spoon a generous amount of the apple-caramel mixture onto the center of one half of each rectangle, leaving a clear border around the edges. This border is your sealing zone.
Step 5: Seal and Crimp the Edges
Gently fold the empty half of the pastry over the filling to create a little pocket. Now, press the edges together firmly with your fingers. For a pretty, sealed edge, take the tines of a fork and press down all around the border. This crimping action not only looks professional, it locks in the delicious filling. Place each finished pastry on your prepared baking sheet.
Step 6: Egg Wash and Bake to Perfection
In a small bowl, beat your egg with a teaspoon of water to make an egg wash. Use a pastry brush to lightly coat the top of each pastry. This gives them that incredible bakery-style golden sheen. Slide the baking sheet into your preheated oven. Bake for 15-18 minutes. Watch as they puff up into golden, flaky masterpieces. Chef’s tip: Ovens vary, so start checking at 15 minutes. They’re done when they’re beautifully puffed and a deep golden brown.
Step 7: The Final, Decadent Touches
Let the pastries cool on the pan for just a few minutes—they will be molten lava inside! Then, it’s time for the final magic. Drizzle extra caramel sauce over the top in a zig-zag pattern. For a snowy, elegant finish, dust them lightly with powdered sugar using a fine-mesh sieve. Serve them warm and watch the smiles appear.
Quick Glance: Your Caramel Apple Puff Pastry Timeline
This recipe moves fast, which is part of its charm!
- Prep Time: 15 minutes
- Cooking Time: 18 minutes
- Total Time: About 33 minutes
- Servings: 6 beautiful pastries
- Calories: Approximately 260 per pastry
My Secret for Super Flaky Pastry
Here’s my little secret for the flakiest results: make sure your puff pastry is cold when it goes into the oven. After you assemble the pastries, if your kitchen is warm, pop the entire baking sheet into the freezer for 5-10 minutes before baking. The sudden heat hitting the cold butter layers in the pastry creates maximum steam, which equals maximum flakiness. It’s a game-changer for texture!
A Fun Fact About Puff Pastry
Did you know that classic puff pastry has an astonishing 729 layers? It’s made through a process called “laminating,” where butter is folded into dough again and again. Thankfully, the frozen store-bought version does all that hard work for us, giving us that incredible, airy texture with minimal effort. It’s one of the greatest convenience products for home bakers!
Equipment You’ll Need to Make This
- Baking Sheet
- Parchment Paper or Silicone Baking Mat
- Medium Skillet
- Sharp Knife and Cutting Board
- Rolling Pin (helpful, but not always necessary)
- Pastry Brush
- Fork (for crimping)
How to Store Your Caramel Apple Treats
These pastries are truly best enjoyed the day they are made, when the pastry is at its peak flakiness. If you have leftovers, let them cool completely first. Then, store them in a single layer in an airtight container at room temperature for up to one day. Placing them on top of each other while still warm will make the pastry soggy from the steam.
For longer storage, you can refrigerate them for 2-3 days. To reheat, place them on a baking sheet in a 350°F oven for about 5-8 minutes to crisp up the pastry again. The microwave will make them soft, so the oven is your best bet.
You can also freeze the unbaked pastries! Assemble them, place the baking sheet in the freezer until solid, then transfer the frozen pastries to a freezer bag. Bake straight from frozen, adding just 3-5 extra minutes to the baking time. It’s a fantastic way to have a nearly instant dessert on hand.
My Top Tips for Puff Pastry Success
- Thaw Properly: Let puff pastry thaw in the fridge overnight or on the counter for about 30-40 minutes. It should be pliable but still cool.
- Don’t Overfill: That tempting extra spoonful of filling will almost certainly leak out during baking. Be generous, but leave a good sealable border.
- Seal Tightly: A good crimp with a fork is your best defense against oozing caramel.
- Space Them Out: Place pastries at least an inch apart on the baking sheet so hot air can circulate and they puff evenly.
Presentation Ideas to Impress Your Guests
- Serve warm on a beautiful platter with a small bowl of extra caramel sauce for dipping.
- Add a scoop of vanilla ice cream or a dollop of freshly whipped cream on the side.
- For a brunch vibe, dust with powdered sugar and serve with coffee.
- Place individual pastries on small plates with a sprinkle of flaky sea salt over the caramel drizzle.
6 Delicious Variations to Try
Love this concept? Here are six fun twists on the Caramel Apple Puff Pastry idea:
- Pear and Ginger: Swap apples for ripe pears and add 1/2 teaspoon of ground ginger to the filling.
- Berry Bliss: Use a mix of blueberries and raspberries with a dash of lemon zest instead of apples.
- Savory-Sweet: Add a handful of sharp cheddar cheese to the apple filling before sealing.
- Nutty Crunch: Stir 2 tablespoons of chopped toasted pecans or walnuts into the cooled filling.
- Chocolate Drizzle: Skip the caramel drizzle and melt some chocolate chips to pour over the top instead.
- Mini Versions: Use a round cutter for smaller circles, fill, fold into half-moons, and bake for less time—perfect for parties!
If you love the combination of fruit and rich, creamy components, you should definitely explore our collection of international pastry recipes for more inspired ideas from around the world.
Common Mistakes to Avoid
Mistake 1: Using a Warm or Overly Soft Filling
Placing piping hot apple filling onto the puff pastry is a common error. The heat melts the delicate butter layers in the pastry before baking. This results in a greasy, dense pastry that won’t puff up properly. Always let your cooked filling cool until it’s just warm to the touch, not hot. This small wait makes a huge difference in achieving those hundreds of beautiful, separate layers.
Mistake 2: Not Sealing the Edges Well Enough
It’s easy to just fold and press with your fingers, but that’s often not enough. Caramel sauce is liquid and will find any tiny gap to escape during baking. A burst pastry not only looks messy but can cause a sticky, burnt mess on your baking sheet. After pressing the edges with your fingers, take the extra five seconds to crimp firmly all the way around with the tines of a fork. This double-seal is your best insurance policy.
Mistake 3: Overcrowding the Baking Sheet
We want these pastries to puff and expand in all their glory! If they’re placed too close together on the pan, the hot air from the oven can’t circulate evenly. This leads to uneven baking—some sides might be pale while others are overdone. It also traps steam, which can make the pastry soggy. Give each pastry about 1 to 2 inches of personal space on all sides for the best, most consistent results.
Mistake 4: Skipping the Egg Wash
That egg wash isn’t just for show. It acts like a glue for any seasoning (like a sprinkle of coarse sugar) and, most importantly, it promotes browning through the Maillard reaction. Pastries baked without an egg wash can look pale and underwhelming, even if they’re fully cooked inside. A quick brush with beaten egg gives them that professional, golden-brown, shiny finish that makes them irresistible.
Frequently Asked Questions
Can I make Caramel Apple Pastries ahead of time?
Absolutely! You have two great options. First, you can prepare the apple filling up to two days ahead and store it covered in the fridge. Let it come to room temperature before assembling. Second, you can assemble the entire pastries, place them on a baking sheet, and freeze them solid. Once frozen, transfer them to a freezer bag. Bake from frozen, adding 3-5 extra minutes. This is perfect for having fresh-baked dessert ready in under 30 minutes for unexpected guests or a cozy night in.
What’s the best type of apple to use for baking?
You want an apple that holds its shape and offers a balance of sweet and tart flavor when cooked. My top picks are Granny Smith (for a lovely tart contrast to the sweet caramel), Honeycrisp (sweet and firm), or Braeburn. Avoid very soft apples like Red Delicious, as they can turn to mush in the filling. Mixing two different types, like one tart and one sweet, can create a really complex and delicious flavor profile in your pastry.
My pastry didn’t puff up much. What went wrong?
There are a few common culprits. The most likely is that the pastry got too warm before baking, melting the butter layers. Ensure your pastry is cold when it goes in the oven. Also, check your oven temperature with an oven thermometer—if it’s not hot enough, the pastry won’t steam and puff properly. Finally, avoid overworking the dough when rolling or cutting, as this can compress the layers. Using a sharp knife for clean cuts helps.
Can I use homemade puff pastry for this recipe?
You certainly can if you’re feeling ambitious! Homemade puff pastry will yield an exceptionally flaky and buttery result. Just roll it to about 1/8-inch thickness before cutting. However, high-quality store-bought frozen puff pastry is a fantastic and reliable shortcut that delivers excellent results. For busy home bakers, it’s my go-to recommendation for keeping this recipe quick, easy, and stress-free.
Is there a way to make this recipe a bit healthier?
You can make a few simple tweaks. Use whole wheat puff pastry if you can find it. Reduce the brown sugar in the filling by a tablespoon or two—the caramel sauce and natural apple sweetness will still be delicious. You can also opt for a lower-sugar caramel sauce. For more information on balancing treats with overall nutrition, resources like the Office of Dietary Supplements provide great guidance on dietary reference intakes. Remember, it’s all about balance and enjoying your food!
Can I add other fruits or ingredients to the filling?
Please do! This recipe is wonderfully adaptable. Diced pears are a fantastic substitute for apples. A handful of fresh cranberries added to the apples creates a gorgeous sweet-tart flavor. For texture and richness, stir in some chopped toasted nuts like pecans or walnuts after the filling has cooled. A teaspoon of vanilla extract or a pinch of cardamom can also add a lovely new flavor dimension.
How do I prevent the caramel from burning on the baking sheet?
Using parchment paper or a silicone baking mat is your first and best defense. They create a non-stick barrier. Also, make sure your pastries are well-sealed (crimp with a fork!) to minimize leaks. If a little caramel does bubble out, don’t worry—it will harden as it cools and the parchment paper will make it easy to peel off. Just be sure to let the sheet cool completely before trying to clean it.
What should I serve with these pastries?
They are delightful on their own, but a scoop of vanilla bean ice cream melting over the warm pastry is pure heaven. For a lighter touch, a dollop of unsweetened whipped cream is perfect. They also pair beautifully with a sharp cheddar cheese for a classic flavor combination. For a beverage, a hot cup of coffee, black tea, or even a glass of cold milk complements the sweet, rich flavors perfectly.
Can I use phyllo dough instead of puff pastry?
You can, but it will be a very different dessert. Phyllo dough is paper-thin and creates a crisp, shatteringly flaky texture, while puff pastry is thick and creates airy, buttery layers. If using phyllo, you would typically layer several sheets with butter in between to create a package or pouch for the filling. The method and baking time would need adjustment, so I’d recommend following a recipe specifically designed for phyllo dough.
My filling is too runny. How can I thicken it?
A runny filling usually means the apples released a lot of juice. You can fix this by cooking the apple mixture for a minute or two longer to evaporate more liquid. If it’s still too loose after cooling, mix in half a teaspoon of cornstarch with the apples while they’re still cooking and let it bubble for 30 seconds to thicken. Let the filling cool completely—it will thicken further as it sits. Also, avoid over-stirring once the caramel is added, as this can sometimes thin it out.
Your New Go-To Easy Dessert
And there you have it! These Caramel Apple Pastries are more than just a recipe; they’re a little piece of kitchen magic that turns simple ingredients into something extraordinary. They’re proof that you don’t need all day to bake something that feels special and tastes incredible. Whether you’re cooking for a crowd, making a treat for your family, or just satisfying your own sweet tooth, this recipe is a guaranteed hit. So grab those apples, thaw that pastry, and get ready for some of the easiest and most delicious praise you’ll ever receive. Happy baking!
Equipment
- Plaque à pâtisserie
- Fouet
- Grand bol
- Spatule
- Papier sulfurisé
Ingredients
- 1 feuille pâte feuilletée décongelée
- 2 pommes (Granny Smith ou Honeycrisp)
- 2 cuillères à soupe beurre non salé
- 1/2 tasse sucre brun
- 1 cuillère à café cannelle en poudre
- 1/4 cuillère à café muscade
- une pincée sel
- 1/4 tasse sauce caramel plus pour le décor
- 1 oeuf pour dorure
- q.s. sucre glace pour saupoudrer (optionnel)
Instructions
- Préchauffez le four à 200°C et tapissez une plaque à pâtisserie de papier sulfurisé.
- Dans une poêle, faites fondre le beurre à feu moyen, puis ajoutez les pommes en dés, le sucre brun, la cannelle, la muscade et le sel. Faites cuire pendant 5-7 minutes jusqu'à ce que les pommes soient tendres.
- Incorporez la sauce caramel et retirez du feu. Laissez refroidir la garniture quelques minutes.
- Étalez la pâte feuilletée et découpez-la en 6 rectangles. Déposez la garniture aux pommes sur chaque rectangle.
- Pliez la pâte et scellez les bords en les crantant avec une fourchette.
- Badigeonnez le dessus avec l'œuf battu et enfournez pendant 15-18 minutes jusqu'à ce qu'ils soient dorés.
- Drizzle avec de la sauce caramel et saupoudrez de sucre glace si désiré. Servez chaud.
Notes
Nutrition

Hi, I’m Olivia Parker, the founder of BakingSecret.com and a lifelong lover of all things sweet and homemade. I grew up in a small town in Oregon, where the smell of fresh cookies in my family’s kitchen sparked my passion for baking. Over the years, I turned that passion into a mission: to help home bakers feel confident, inspired, and creative.
After studying food science and working in several artisan bakeries across the U.S., I decided to create a space where everyone from beginners to seasoned bakers can find reliable recipes, expert tips, and a warm, welcoming community. BakingSecret.com is my way of sharing the magic of baking with the world. When I’m not testing new recipes, you’ll find me exploring farmers’ markets, collecting vintage cookbooks, or perfecting my sourdough technique.