
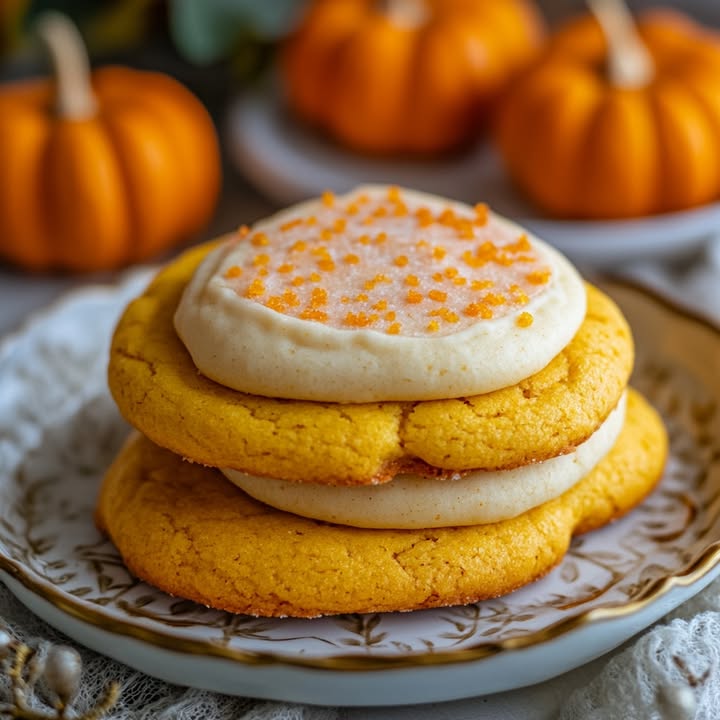
The Soft Batch Pumpkin Sugar Cookies Recipe
I remember the first time I smelled these cookies baking. It was a crisp October afternoon, and the scent of cinnamon, nutmeg, and pumpkin filled my kitchen like a warm hug. My kids came running, their noses leading the way. That’s the magic of these Soft Batch Pumpkin Sugar Cookies. They’re not just a treat; they’re a little piece of cozy autumn, baked into a cookie that stays wonderfully soft for days. Let’s bake some memories.
Why These Cookies are Special
This recipe started as a happy accident. I wanted a classic sugar cookie but with the heartwarming flavor of pumpkin pie. After a few trials, I found the secret: a touch of oil alongside butter keeps them supremely moist, and rolling them in cinnamon sugar gives that nostalgic, crackly top. They bridge the gap between a spiced pumpkin muffin and a tender cookie. Every fall, this recipe becomes a staple on my counter, ready for friends, school events, or just a quiet moment with a cup of tea.
Why You’ll Love This Recipe
You will adore these pumpkin sugar cookies for their simplicity and soul. The dough comes together in one bowl with no fancy equipment. The flavor is perfectly balanced—not too spicy, not too sweet. They bake up with a slightly crisp edge and a center that’s cloud-like and soft. Plus, they’re a fantastic way to use that seasonal pumpkin puree. These cookies are forgiving, quick, and universally loved.
Perfect Occasions for These Cookies
These cookies are your go-to for any cozy gathering. They shine at autumn potlucks and Halloween parties. Pack them for a fall picnic or serve them after a family Thanksgiving meal. I love putting them in a basket as a “welcome to the neighborhood” gift. Their friendly, familiar flavor makes them perfect for cookie swaps, book club meetings, or simply as a happy Tuesday afternoon surprise.
Ingredients
- 2 cups all-purpose flour
- ½ teaspoon baking soda
- ½ teaspoon cream of tartar
- ½ teaspoon salt
- 1 teaspoon ground cinnamon
- ½ teaspoon ground nutmeg
- ¾ cup unsalted butter, softened
- ¼ cup vegetable oil
- ½ cup pumpkin puree
- ¾ cup granulated sugar
- ½ cup powdered sugar
- 1 egg
- 2 teaspoons vanilla extract
- For rolling: ¼ cup granulated sugar mixed with ½ teaspoon cinnamon
Ingredient Substitution Options
Don’t fret if your pantry isn’t perfect. Here are easy swaps:
- Pumpkin Puree: Sweet potato puree works beautifully for a similar color and moisture.
- Vegetable Oil: Melted coconut oil adds a subtle, lovely flavor.
- Cream of Tartar: If you don’t have it, you can replace it with an extra ¼ teaspoon of baking soda, though the texture will be slightly less tender.
- Nutmeg: Allspice or a pinch of cloves can stand in.
- For Rolling: Use brown sugar instead of granulated for a deeper, molasses-spiced crust.
How to Make Soft Batch Pumpkin Sugar Cookies
Follow these steps for perfect cookies every time.
Step 1: Prepare Your Oven and Dry Ingredients
Start by preheating your oven to 350°F. This ensures a consistent bake. Line a baking sheet with parchment paper—no sticking and easy cleanup. In a medium bowl, whisk together your flour, baking soda, cream of tartar, salt, cinnamon, and nutmeg. Seeing those spices blend with the flour is a promise of the flavor ahead. This dry mix is the foundation for your cookies’ structure and spice profile.
Step 2: Cream the Wet Ingredients
In a large bowl, combine the softened butter, oil, pumpkin puree, granulated sugar, and powdered sugar. Use a hand mixer or sturdy spoon. Cream them until the mixture is smooth, pale, and fluffy. The pumpkin will turn it a lovely orange hue. Then, beat in the egg and vanilla extract. The vanilla aroma will bloom, mingling with the earthy pumpkin. This wet base is what gives the cookies their signature moistness.
Step 3: Combine Wet and Dry
Now, gently add your dry ingredient mix to the wet ingredients. Stir just until the flour disappears and a soft dough forms. Don’t overmix! Overworking the dough can lead to tough cookies. The dough will be soft, slightly sticky, and beautifully aromatic. Pro tip: If the dough feels too soft to handle, let it rest in the fridge for 10-15 minutes. This firms it up slightly for easier rolling.
Step 4: Shape and Roll the Cookies
In a small bowl, mix the ¼ cup sugar and ½ teaspoon cinnamon for rolling. Scoop the dough, about 1.5 tablespoons per cookie, and roll it into a ball in your hands. Then, roll each ball generously in the cinnamon-sugar mixture. The sugar will coat the dough, creating those delightful sweet, spicy crystals on the surface. Place the balls on your prepared baking sheet, leaving about 2 inches between them for spreading.
Step 5: Bake to Perfect Softness
Bake the cookies for 10-12 minutes. Watch for the edges to set and look lightly golden. The centers should still look soft and puffy. This is the key to the “soft batch” texture. Remove them from the oven and let them cool on the pan for 5 minutes. This allows them to finish setting without overcooking. Then, transfer them to a wire rack. They will be impossibly tender.
Chef’s Secret
The real secret to these cookies’ longevity? The combination of butter *and* oil. Butter gives rich flavor, while oil ensures they stay moist and soft for days, never drying out into a crumbly texture. It’s a little trick I learned from muffin recipes that works wonders here.
Preparation Time
- Prep Time: 15 minutes
- Cooking Time: 12 minutes
- Total Time: 27 minutes
- Kcal: 140 per cookie
- Servings: 24
Extra Info: The Story of Pumpkin in Baking
Pumpkin wasn’t originally the star of sweet pies. Early American colonists often used pumpkin as a base for beer! Its transition to beloved baking ingredient, especially in pies and cookies, is a testament to its versatility and sweet, earthy flavor. Using pumpkin puree in cookies like these is a modern twist on a very old, nutritious ingredient. Proper ingredient preparation, like ensuring your puree is smooth and not watery, is key to great results.
Necessary Equipment
- Large mixing bowl
- Medium mixing bowl
- Whisk
- Hand mixer or sturdy wooden spoon
- Measuring cups and spoons
- Baking sheet
- Parchment paper
- Wire cooling rack
Storage Instructions
These cookies store wonderfully. At room temperature, keep them in an airtight container for up to 5 days. They will remain soft due to the oil in the recipe. For longer storage, you can freeze the baked cookies. Place them in a single layer in a freezer-safe bag or container. They will keep for up to 3 months. Thaw at room temperature for an hour before serving.
You can also freeze the unbaked dough balls. After rolling them in cinnamon sugar, place them on a tray and freeze until solid. Then transfer to a freezer bag. You can bake them straight from the freezer, adding a minute or two to the baking time. This is perfect for having fresh cookies on demand.
If your cookies seem a little dry after a few days, a trick is to place a slice of apple in the container with them. The apple’s moisture will gently revitalize the cookies without making them soggy.
Tips and Advice
- Ensure your butter is softened, not melted. Soft butter creams better with the sugars.
- Use pure pumpkin puree, not pumpkin pie filling, which has added sugars and spices.
- For uniform cookies, I use a #40 cookie scoop (about 1.5 tablespoons).
- Don’t skip the cream of tartar. It reacts with the baking soda to create a lighter, more tender texture.
- Let the cookies cool completely on the rack before stacking them. This prevents steam from making them sticky.
Presentation Ideas
Make these cookies a showstopper. Stack them on a vintage cake stand for a party. Tie a few in a cellophane bag with a ribbon for a gift. For a Halloween twist, add a drizzle of white chocolate or a candy corn on top before serving. Arrange them on a plate with some fresh fall leaves or mini pumpkins for a beautiful seasonal centerpiece.
Healthier Alternative Recipe Variations
If you want to tweak the recipe, here are six inspired variations:
- Gluten-Free Pumpkin Cookies: Substitute the all-purpose flour with a 1:1 gluten-free baking blend. The texture remains great.
- Lower-Sugar Version: Reduce the granulated sugar to ½ cup and use a natural powdered sugar alternative. The pumpkin’s natural sweetness carries the flavor.
- Pumpkin Spice Latte Cookies: Add 1 tablespoon of instant espresso powder to the dry ingredients for a coffee kick.
- Pumpkin Chocolate Chip Cookies: Fold in ¾ cup of semi-sweet chocolate chips after mixing the dough.
- Vegan Pumpkin Cookies: Use vegan butter, replace the egg with ¼ cup of additional pumpkin puree, and ensure your sugars are vegan.
- Pumpkin Oatmeal Cookies: Replace 1 cup of the flour with 1 cup of old-fashioned rolled oats for a hearty, chewy texture.
Related Recipes You Might Love
If you adore these soft, spiced cookies, you might also enjoy other cozy bakes. For a decadent dessert, try these Whipped Chocolate Cheesecake Parfaits. For a savory family meal, Baked Garlic Parmesan Chicken Meatloaves are a winner. A fun, fruity treat are these Cheesecake Fruit Roll-Ups. And for another perfect fall pastry, don’t miss these Caramel Apple Puff Pastries. You can find more inspiration in our full collection of cookie and biscuit recipes.
Common Mistakes to Avoid
Mistake 1: Using Melted Butter
If your butter is melted or too warm, it won’t “cream” properly with the sugars. This results in a greasy, flat dough that spreads too much in the oven. The cookies can become thin and oily. Always let your butter sit at room temperature until it’s soft enough to indent easily with your finger, but not liquid.
Mistake 2: Overmeasuring the Pumpkin
Pumpkin puree is dense and wet. If you pack it into the measuring cup or use too much, the dough becomes overly moist and heavy. The cookies won’t rise properly and can taste soggy. Use the “spoon and level” method: spoon the puree into your measuring cup without packing, then level it off with a knife.
Mistake 3: Overbaking for a “Done” Look
It’s tempting to bake until the cookies look fully firm. But for soft batch cookies, that means they’re overdone. They should come out when the edges are just set and the centers look soft and underdone. They finish setting as they cool. Baking the full 12 minutes might be too long for some ovens. Start checking at 10 minutes.
Mistake 4: Skipping the Cream of Tartar
Cream of tartar is a key but often overlooked ingredient. It reacts with the baking soda to create tiny air bubbles, giving the cookie a lighter, more tender crumb. Without it, the cookies rely solely on baking soda and can be denser and less soft. If you must substitute, use a little extra baking soda, but try to keep the cream of tartar if you can.
Mistake 5: Not Letting Cookies Cool on the Pan
Moving cookies directly from the oven to a rack can cause them to break apart. They are too soft and fragile at that stage. Letting them rest for 5 minutes on the baking sheet allows them to firm up slightly, making transfer easy and preserving their perfect shape.
Frequently Asked Questions
Yes, you can substitute the oil with an equal amount of additional softened butter. However, the cookies will have a richer, more buttery flavor but may not stay as soft for as many days. The oil is a moisture-retainer. For the classic soft-batch texture that lasts, I recommend keeping the oil.
Why do I need both granulated and powdered sugar?
Granulated sugar provides structure and sweetness, while powdered sugar dissolves more easily and helps create a finer, more tender texture in the cookie. The combination gives a balanced sweetness and contributes to the soft, melt-in-your-mouth quality.
My dough is very sticky. How can I handle it?
This is normal! The pumpkin and oil make a moist dough. If it’s too sticky to roll, simply chill it in the refrigerator for 10-15 minutes. This firms up the fats slightly. You can also lightly dampen your hands with water before rolling the balls to prevent excessive sticking.
Absolutely. After forming the dough balls and rolling them in cinnamon sugar, place them on a tray and freeze until solid. Then transfer to a freezer bag. Bake directly from frozen, adding about 1-2 extra minutes to the baking time. This is a fantastic way to have ready-to-bake cookies anytime.
Look for the edges to be lightly golden and set. The centers should still look puffy, soft, and may even have a slight sheen. They will not look fully “dry.” Trust the process—they will set perfectly as they cool on the pan. Overbaking is the main enemy of soft cookies.
What’s the best way to store them to keep them soft?
Store them in an airtight container at room temperature. The oil in the recipe will help them retain moisture. Do not store them in the fridge, as that can dry them out. If you need to store them for longer than 5 days, freezing is the best option.
Can I add nuts or chocolate to this recipe?
You can! Fold in ½ cup of chopped pecans or walnuts after mixing the dough. For chocolate, add ¾ cup of semi-sweet chocolate chips. Be mindful that adding too many extra ingredients can change the dough’s moisture balance and spreading behavior.
Is pumpkin pie filling okay to use instead of puree?
No, I do not recommend it. Pumpkin pie filling has added sugars, spices, and often thickeners. It will alter the flavor balance and sweetness of your cookies unpredictably. Always use 100% pure pumpkin puree for the best results.
This usually points to butter that was too soft or melted, or an oven that wasn’t fully preheated. Ensure your butter is just softened, not runny. Also, make sure your oven reaches 350°F before you put the cookies in. A hot start helps them set quickly.
Yes, with a few substitutions. Use a plant-based butter stick, replace the egg with ¼ cup of additional pumpkin puree or a commercial egg replacer, and confirm your sugars are vegan (some processed white sugars are not). The cookies will be slightly more delicate but still delicious.
Final Thoughts on Soft Batch Pumpkin Sugar Cookies
Baking should be about joy and sharing. These Soft Batch Pumpkin Sugar Cookies embody that. They are simple enough for a beginner yet special enough for any seasoned baker. The process is forgiving, and the result is a cookie that feels like a warm, spicy embrace. I hope this recipe finds its way into your kitchen and becomes a part of your own family’s fall traditions. Happy baking!
Equipment
- Grand bol
- Fouet
- Spatule
- Plaque à pâtisserie
- Papier sulfurisé
Ingredients
- 2 tasses farine tout usage
- 0.5 cuillère à café bicarbonate de soude
- 0.5 cuillère à café crème de tartre
- 0.5 cuillère à café sel
- 1 cuillère à café cannelle moulue
- 0.5 cuillère à café muscade moulue
- 0.75 tasses beurre non salé, ramolli
- 0.25 tasses huile végétale
- 0.5 tasses purée de citrouille
- 0.75 tasses sucre granulé
- 0.5 tasses sucre en poudre
- 1 oeuf oeuf
- 2 cuillères à café extrait de vanille
- 0.25 tasses sucre granulé mélangé avec 0.5 cuillère à café de cannelle pour rouler
Instructions
- Préchauffez votre four à 175°C et tapissez une plaque à pâtisserie de papier sulfurisé.
- Dans un bol moyen, fouettez ensemble la farine, le bicarbonate de soude, la crème de tartre, le sel, la cannelle et la muscade.
- Dans un grand bol, crémez ensemble le beurre ramolli, l'huile, la purée de citrouille, le sucre granulé et le sucre en poudre jusqu'à obtenir un mélange lisse et crémeux.
- Ajoutez l'œuf et l'extrait de vanille et mélangez jusqu'à incorporation.
- Incorporez doucement les ingrédients secs dans les ingrédients humides en remuant juste assez pour former une pâte molle.
- Si la pâte est trop molle, laissez-la reposer au réfrigérateur pendant 10-15 minutes.
- Mélangez 0.25 tasse de sucre avec 0.5 cuillère à café de cannelle dans un petit bol pour le roulage.
- Prélevez environ 1.5 cuillères à soupe de pâte et roulez-la en boule, puis enrobez-la du mélange de sucre et de cannelle.
- Disposez les boules de pâte sur la plaque à pâtisserie préparée en laissant 5 cm entre chaque boule.
- Faites cuire au four pendant 10-12 minutes jusqu'à ce que les bords soient pris et que les centres soient moelleux.
- Laissez refroidir sur la plaque de cuisson pendant 5 minutes avant de transférer sur une grille pour refroidir complètement.
Notes
Nutrition

Hi, I’m Olivia Parker, the founder of BakingSecret.com and a lifelong lover of all things sweet and homemade. I grew up in a small town in Oregon, where the smell of fresh cookies in my family’s kitchen sparked my passion for baking. Over the years, I turned that passion into a mission: to help home bakers feel confident, inspired, and creative.
After studying food science and working in several artisan bakeries across the U.S., I decided to create a space where everyone from beginners to seasoned bakers can find reliable recipes, expert tips, and a warm, welcoming community. BakingSecret.com is my way of sharing the magic of baking with the world. When I’m not testing new recipes, you’ll find me exploring farmers’ markets, collecting vintage cookbooks, or perfecting my sourdough technique.