
Buttery Raspberry Crumble Cookies: A Little Jar of Sunshine
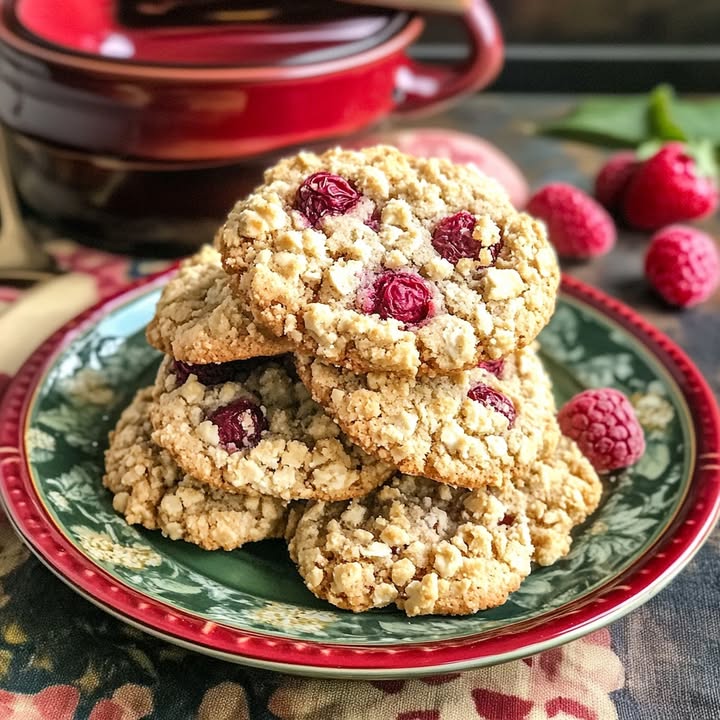
You know those days when you want a sweet treat that feels like a hug? Something warm from the oven that looks a little fancy but is secretly super simple? That is precisely the magic of these Buttery Raspberry Crumble Cookies. They are soft, buttery shortbread, filled with a dollop of tangy raspberry jam and finished with a crumble topping that adds the perfect texture. I first made these for a last-minute ladies’ brunch, and let me tell you, they disappeared faster than the gossip! Everyone loved the combination—like a thumbprint cookie and a crumble bar got married and had the cutest cookie baby.
The Story of a Happy Accident
While thumbprint cookies are a classic, the crumble topping idea was born from a kitchen “oops.” I was making a batch of jam-filled cookies and accidentally set aside a small bowl of dough, thinking I had measured wrong. Instead of trying to mix it back in, I decided to sprinkle it over the tops before baking. The result was this delightful, rustic texture that made the cookies look (and taste) extra special. It is now my signature touch. These Buttery Raspberry Cookies marry the old-world charm of a simple jam cookie with a modern, crumbly twist that makes them utterly irresistible.
Why You’ll Fall in Love With These Raspberry Cookies
If you are looking for a cookie that balances elegance with ease, this is your winner. The dough comes together in minutes with no fancy equipment. The vibrant red jam centre creates a beautiful pop of colour and flavour. The crumble topping adds a lovely rustic look and a satisfying bite. They are perfect for bakers of all levels, and the buttery, sweet-tart flavour profile is universally adored. Plus, they are fantastic for gifting—they look homemade in the best possible way!
Perfect Occasions for Your Crumble Cookies
These cookies are wonderfully versatile. Here are some moments where they will shine:
- Afternoon Tea or Coffee: They are the ideal companion to a hot cup of tea or coffee.
- Potlucks and Picnics: Transportable and not overly fragile, they travel well.
- Holiday Cookie Trays: Their festive red centre makes them a lovely addition to Christmas or Valentine’s Day baking.
- Just-Because Baking: Sometimes, a Tuesday afternoon deserves a buttery treat.
Ingredients for Buttery Raspberry Cookies
Simple pantry staples create something extraordinary. Here is what you need:
- 1 cup unsalted butter, softened
- 2/3 cup granulated sugar
- 1 teaspoon vanilla extract
- 2 cups all-purpose flour
- 1/4 teaspoon salt
- 1/2 cup raspberry jam
- Optional: powdered sugar for dusting
Quick Substitution Options
If you need to swap something out, here are some easy ideas:
- Butter: Salted butter can be used; just omit the added salt in the recipe.
- Jam: Any jam or preserves work beautifully. Try strawberry, blackberry, or apricot.
- Flour: For a slightly nutty flavour, you can substitute up to half of the all-purpose flour with spelt flour.
- Sugar: The granulated sugar can be replaced with fine coconut sugar for a deeper, caramel-like note.
Step-by-Step Guide to Perfect Cookies
Step 1: Prep Your Kitchen
Start by preheating your oven to 350°F (175°C). This ensures it’s ready when your dough is perfectly shaped. Line your baking sheet with parchment paper. This little step is a lifesaver—no sticking, easy cleanup, and even baking. As your oven warms, you’ll feel that happy anticipation of baking. It’s the best part!
Step 2: Cream the Butter and Sugar
In a large bowl, cream together the softened butter and granulated sugar. Use a hand mixer or stand mixer until the mixture is light, fluffy, and pale yellow. This process incorporates air, which gives your cookie base a tender texture. Mix in the vanilla extract. Its sweet aroma will begin to fill your kitchen, promising delicious things to come.
Step 3: Form the Dough
Gradually add the flour and salt to the butter mixture. Mix on a low speed until a soft, cohesive dough forms. It will be somewhat firm but still pliable. Now, here’s the key move: scoop out about ½ cup of this dough and set it aside in a small bowl. This will become your magical crumble topping later.
Step 4: Shape and Fill
Take the remaining dough and roll tablespoon-sized balls. Place them on your prepared baking sheet. Gently flatten each ball slightly with your palm. Then, use your thumb or the back of a small spoon to press a clear indentation into the centre of each cookie. Be careful not to press all the way through to the sheet. Fill each little well with a small spoonful of raspberry jam. The bright red jam looks like a jewel in the pale dough. Pro tip: If your jam is very thick, warm it slightly for easier spooning.
Step 5: Add the Crumble and Bake
Take the reserved ½ cup of dough. Using your fingers, crumble it into small bits and pieces. Sprinkle this crumbled dough generously over the top of each jam-filled cookie. It creates a delightful, textured topping that will bake into golden nuggets. Bake the cookies for 12-15 minutes. Watch for the edges to become a light, golden brown while the centres remain soft.
Step 6: Cool and Finish
Let the cookies cool completely on the baking sheet. This allows them to set and prevents crumbling when you move them. If you desire an extra touch of sweetness and a pretty finish, dust them lightly with powdered sugar just before serving. The white sugar over the red jam and golden crumble is simply beautiful.
Chef’s tip: For an extra flavour boost, add a tiny pinch of lemon zest to the dough. It brightens the raspberry flavour perfectly.
Timing Your Baking Session
This recipe is wonderfully quick from start to finish. Prep time is about 15 minutes of active work. Baking time is 12-15 minutes per batch. Since there’s no required chilling time for the dough, your total time from deciding to bake to enjoying a cookie is roughly 30 minutes. Perfect for a spontaneous baking mood!
A Little Extra Info: The Joy of Jam
Using jam in baking is a tradition that spans cultures, from English jam tarts to Polish kołaczki. It’s a wonderful way to preserve and enjoy fruit flavours year-round. Raspberry jam brings a lovely balance of sweetness and tartness that cuts through the rich, buttery cookie dough, creating a harmony in every bite.
Necessary Equipment
You don’t need any specialty tools. A large mixing bowl, a hand mixer or stand mixer (though you can mix by hand with a wooden spoon), measuring cups and spoons, a baking sheet, and parchment paper will get you there. A small spoon for the jam is helpful too.
Storing Your Buttery Raspberry Cookies
Once completely cooled, store your cookies in an airtight container at room temperature. They will stay fresh and delicious for up to 3 days. The jam centre may soften the cookie a bit over time, but they will still taste wonderful.
For longer storage, you can freeze these cookies. Place them in a single layer in a freezer-safe container or bag. They can be frozen for up to 2 months. Thaw at room temperature for an hour before serving.
If you plan to gift them, stack them carefully in a box with layers separated by parchment paper. A ribbon and a note make them a heartfelt homemade present.
Tips and Advice for the Best Results
- Ensure your butter is properly softened (cool room temperature, not melted) for the best creaming.
- Don’t overmix the dough once the flour is added. Mix just until combined to keep the texture tender.
- Feel free to adjust the amount of jam filling based on your preference—a little more or less is fine.
- Let the cookies cool fully before dusting with powdered sugar, otherwise the sugar can melt into the surface.
Presentation Ideas to Impress
These cookies are pretty on their own, but you can elevate them for special events:
- Arrange them on a vintage cake stand for a tea party.
- Place them in small cellophane bags tied with a ribbon for party favors.
- Serve them alongside a scoop of vanilla ice cream for a decadent dessert.
- Pair them with other baked treats like a showstopping Cinnamon Roll Cheesecake for a dessert buffet.
Healthier and Fun Variations
Love this recipe? Try these six fun twists:
- Gluten-Free Raspberry Crumble Cookies: Substitute the all-purpose flour with a 1:1 gluten-free baking blend. The result is just as delightful.
- Lemon-Raspberry Version: Add 1 tablespoon of lemon zest to the dough and use lemon curd instead of jam for a citrusy punch.
- Chocolate-Drizzled Cookies: After baking and cooling, drizzle the cookies with a little melted dark chocolate for a gourmet touch.
- Nutty Crumble Topping: Mix finely chopped almonds or pecans into the reserved dough before crumbling for a nutty crunch.
- Mini Cookie Bites: Make teaspoon-sized balls for petite, two-bite cookies perfect for large gatherings.
- Savory-Sweet Twist: Add a pinch of thyme or rosemary to the dough and use a fig jam filling for a sophisticated flavour profile.
Common Mistakes to Avoid
Mistake 1: Using Butter That’s Too Soft or Melted
If your butter is melted or overly soft, it won’t cream properly with the sugar. This can lead to a greasy dough that spreads too much during baking, resulting in flat cookies. Your butter should be softened to a cool room temperature—it should indent easily when pressed but still hold its shape. Leave it out for about 30-60 minutes before starting.
Mistake 2: Overworking the Dough After Adding Flour
Once you add the flour, mix just until the dough comes together. Overmixing develops the gluten in the flour, which can make your cookies tough and less tender instead of soft and crumbly. Stop mixing as soon as no dry flour patches remain.
Mistake 3: Making the Jam Indentation Too Deep or Too Shallow
If you press the indentation too deep, you risk the jam leaking out the bottom during baking. If you press too shallow, the jam filling will be scant and might overflow when you add the crumble topping. Aim for a clear well that is about halfway through the thickness of the cookie ball.
Mistake 4: Baking at the Wrong Oven Temperature
An oven that hasn’t properly preheated, or one that runs too hot or cold, can ruin your cookies. Too hot, and the edges burn before the centre sets. Too cold, and they might spread and become greasy. Always use an oven thermometer to verify your oven’s temperature is accurate for safe meal preparation and perfect results.
Mistake 5: Skipping the Cooling Step Before Dusting
If you dust the cookies with powdered sugar while they are still warm, the sugar will melt and create a wet, sticky layer instead of a pretty, snowy dusting. Let the cookies cool completely on the baking sheet before adding the final decorative touch.
Frequently Asked Questions
Can I use frozen raspberries instead of jam?
Using fresh or frozen raspberries directly isn’t recommended for this specific recipe. The jam is concentrated and thickened, which prevents it from leaking and creating a soggy cookie. If you want a fresh fruit flavour, you could make a quick compote by cooking down raspberries with a little sugar until thickened, then using that as your filling. But for simplicity and guaranteed results, good-quality jam is your best friend here.
My dough seems too crumbly and dry. What did I do wrong?
A overly crumbly dough usually means you measured the flour incorrectly, likely packing too much flour into your measuring cup. Always spoon flour into your measuring cup and level it off with a knife for the most accurate measurement. If your dough is already mixed and seems dry, you can try adding a teaspoon of cold water or milk at a time, mixing gently, until it just comes together. Be careful not to add too much liquid.
Absolutely! This dough is excellent for chilling. After making the dough, you can shape the balls, indent them, fill with jam, and add the crumble topping. Then, cover the entire baking sheet with plastic wrap and refrigerate for up to 24 hours before baking. You can also freeze the prepared unbaked cookies on the sheet, then transfer to a freezer bag. Bake directly from frozen, adding a couple extra minutes to the baking time.
What’s the best type of raspberry jam to use?
For the best flavour and visual appeal, use a seedless raspberry jam or preserves. It gives a smooth, vibrant red filling. If you enjoy the texture of seeds, a regular jam works perfectly too. Avoid jelly, as it’s often too runny and may not provide the same intense fruit flavour. A high-quality jam truly makes a difference.
Why do I need to reserve dough for the crumble topping?
Reserving a portion of the dough is the clever trick that creates the signature “crumble” on top. If you used all the dough for the base cookie, you’d just have a standard thumbprint cookie. Sprinkling the reserved dough over the jam adds texture, visual interest, and a little extra buttery cookie flavour in every bite. It’s the step that transforms this recipe!
These are naturally festive with their red centres! To amp up the holiday spirit, you could dust them with red or green coloured sugar instead of powdered sugar. You could also use a star-shaped cookie cutter to cut out a small piece from the centre of the dough ball before filling, creating a star-shaped jam window. Pair them on a tray with other holiday bakes like a rich Pecan Pie Bread Pudding.
Spread is often caused by butter that is too soft, an oven that’s too cold, or not enough flour. Ensure your butter is softened but not melted, your oven is fully preheated, and you’ve measured your flour correctly. Also, make sure you’re not over-creaming the butter and sugar—just until fluffy, not for minutes on high speed.
Can I use a different fruit filling?
Yes, any thick fruit preserve or curd works wonderfully. Strawberry, blueberry, apricot, or even a tangy lemon curd are all fantastic alternatives. Each will give you a new flavour profile while keeping the same delightful buttery cookie and crumble texture. It’s a great way to use what you have in your pantry.
They freeze very well after baking. Ensure they are completely cooled, then place them in a single layer in an airtight freezer container. They can be frozen for up to 2 months. Thaw at room temperature for about an hour. The jam centre may soften slightly after thawing, but the flavour will be just as delicious.
What’s the secret to getting the crumble topping to look so rustic and perfect?
The secret is not to overthink it! Simply take the reserved dough and break it into small, irregular pieces with your fingers. Don’t try to roll it into perfect balls or make it uniform. The uneven, ragged bits create that beautiful, homemade, rustic crumble appearance. Sprinkle it generously, letting some bits fall onto the jam and some onto the cookie base.
I hope you enjoy baking and sharing these delightful cookies as much as I do. They truly are a simple joy. For more inspiration on wonderful treats to bake, explore our full collection of cookie and biscuit recipes where you’ll find everything from classic shortbread to innovative ideas.
The Final Sweet Word
These Buttery Raspberry Crumble Cookies are more than just a recipe—they’re a little moment of happiness you can create and share. They prove that with a few basic ingredients and a simple technique, you can make something that feels special and tastes absolutely divine. So grab your bowl, soften your butter, and get ready to fill your kitchen with the warm, sweet aroma of baking. And don’t forget to share them! Whether with family over coffee or friends at a party, like maybe alongside a crowd-pleasing Reese’s Peanut Butter Cup Pie, they’re bound to bring smiles. Happy baking!
Equipment
- Grand bol
- Fouet ou batteur
- Plaque à pâtisserie
- Papier sulfurisé
- Cuillère petite
Ingredients
- 1 tasse beurre non salé, ramolli
- 2/3 tasse sucre granulé
- 1 cuil. à thé extrait de vanille
- 2 tasses farine tout usage
- 1/4 cuil. à café sel
- 1/2 tasse confiture de framboises
- q.s. sucre glace pour saupoudrer
Instructions
- Préchauffez votre four à 175°C et tapissez une plaque à pâtisserie de papier sulfurisé.
- Dans un grand bol, crémez le beurre ramolli et le sucre jusqu'à obtenir un mélange léger et mousseux. Incorporez l'extrait de vanille.
- Ajoutez progressivement la farine et le sel au mélange de beurre, en mélangeant à basse vitesse jusqu'à obtenir une pâte homogène. Réservez environ ½ tasse de pâte dans un bol séparé.
- Façonnez le reste de la pâte en boules de la taille d'une cuillère, puis aplatissez légèrement. Appuyez au centre de chaque biscuit pour créer un creux, puis remplissez-le de confiture de framboises.
- Émiettez la pâte réservée sur les biscuits garnis. Cuisez au four pendant 12 à 15 minutes jusqu'à ce que les bords soient dorés.
- Laissez les biscuits refroidir complètement sur la plaque, puis saupoudrez de sucre glace si désiré.
Notes
Nutrition

Hi, I’m Olivia Parker, the founder of BakingSecret.com and a lifelong lover of all things sweet and homemade. I grew up in a small town in Oregon, where the smell of fresh cookies in my family’s kitchen sparked my passion for baking. Over the years, I turned that passion into a mission: to help home bakers feel confident, inspired, and creative.
After studying food science and working in several artisan bakeries across the U.S., I decided to create a space where everyone from beginners to seasoned bakers can find reliable recipes, expert tips, and a warm, welcoming community. BakingSecret.com is my way of sharing the magic of baking with the world. When I’m not testing new recipes, you’ll find me exploring farmers’ markets, collecting vintage cookbooks, or perfecting my sourdough technique.