
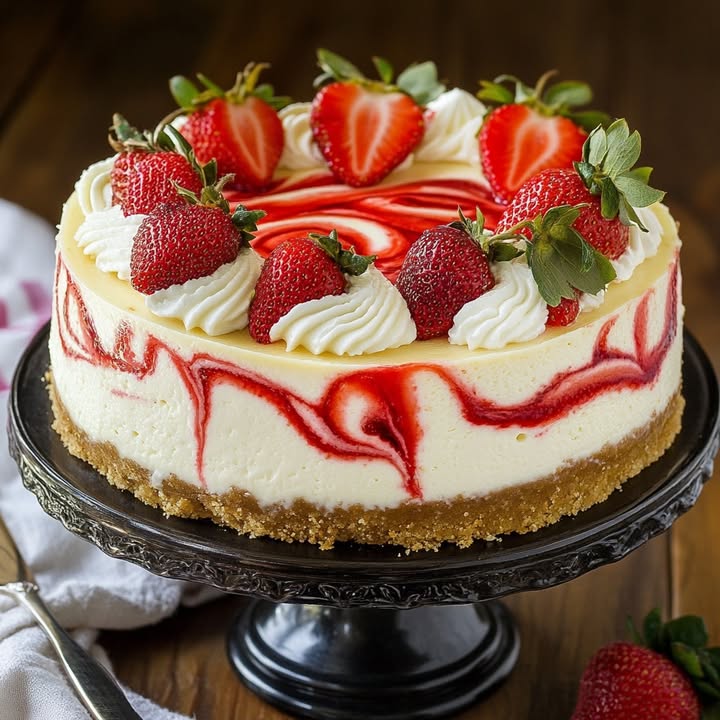
A Sweet Story in a Springform Pan
I have a confession to make. I judge every potluck or family gathering by the quality of its cheesecake. It’s my personal benchmark for celebration. So, when my strawberry plants went crazy one summer, I knew I had to create a recipe that captured that ripe, sun-warmed flavor in my favorite dessert. After many tests (tough job, I know!), I landed on this gorgeous Strawberry Swirl Cheesecake. The vibrant red swirls dancing through that creamy, dreamy filling are pure happiness on a plate. It’s more than just a dessert; it’s a showstopper that makes everyone feel special.
From Ancient Cheese to Modern Berry Bliss
Cheesecake history is a long and delicious one, starting way back in ancient Greece. Of course, they weren’t using cream cheese or strawberry puree! The modern, creamy version we love today really took off in America with the invention of cream cheese in the 1870s. Adding fruit swirls is a newer twist, a brilliant way to bridge the rich, tangy filling with the bright, fresh taste of fruit. My Strawberry Cheesecake Delight is a nod to that tradition, but with a playful, visual twist that’s perfect for today’s bakers who love a beautiful bake as much as a tasty one.
Why You’ll Fall for This Strawberry Cheesecake Delight
This isn’t a fussy, intimidating recipe. It’s a friendly, reliable one that promises amazing results. You’ll love it because the crust is a simple, buttery press-in situation—no rolling pin in sight. The strawberry swirl is made from just three ingredients and creates the most beautiful marbled art right in your oven. The filling is luxuriously smooth but surprisingly simple to mix. Best of all, it bakes up creamy and set, with no pesky cracks, thanks to our trusty water bath method. It’s the kind of recipe that makes you look like a pastry pro.
When to Bake This Berry Beauty
This cheesecake is always a good idea, but it truly shines on special occasions. It’s my go-to for Mother’s Day brunches, elegant anniversary dinners, and Fourth of July celebrations (those red swirls are so festive!). It’s the perfect “welcome to the neighborhood” gift or the ultimate treat for a birthday person who isn’t a fan of cake. Honestly, just seeing it in the fridge on a Wednesday makes the whole week feel a bit more celebratory.
Gathering Your Ingredients for Strawberry Swirl Success
Here’s your grocery list for this delightful dessert. Using full-fat, room-temperature ingredients is the secret to that perfect texture!
- For the crust: 1 ½ cups graham cracker crumbs, ⅓ cup granulated sugar, ⅓ cup unsalted butter (melted)
- For the strawberry swirl: 1 ½ cups fresh or frozen strawberries, 2 tablespoons sugar, 1 teaspoon lemon juice
- For the filling: 24 ounces cream cheese (softened), 1 cup granulated sugar, 3 large eggs, 1 teaspoon vanilla extract, ½ cup sour cream, ½ cup heavy cream
Flexible Swaps for Your Kitchen
Don’t have something on hand? No problem! Here are some easy substitutions:
- Graham Cracker Crumbs: Use digestive biscuits, vanilla wafers, or even shortbread cookies.
- Strawberries: Frozen berries work perfectly here. Raspberries or a blackberry blend would make a stunning “Crimson Choco-Berry” style twist.
- Sour Cream: Full-fat plain Greek yogurt is a great one-to-one swap.
- Heavy Cream: You can substitute with additional sour cream or yogurt for similar tang and richness.
Crafting Your Strawberry Cheesecake Delight: Step-by-Step
Step 1: Prep and Crust
First, get your oven preheated to 325°F. Now, let’s protect that creamy filling from any water! Wrap the outside of your 9-inch springform pan tightly with aluminum foil. This is your water bath armor. Inside the pan, mix the graham cracker crumbs and sugar with the golden, melted butter. It should feel like wet sand. Press it firmly and evenly into the bottom of the pan. Bake this for just 10 minutes—it will smell toasty and wonderful. Let it cool while you work on the swirl. This step gives your cheesecake a solid, flavorful foundation.
Pro tip: Use the bottom of a flat cup or measuring cup to press the crumbs. It creates a perfectly even crust.
Step 2: The Star Swirl
While the crust cools, let’s make the ruby-red star of the show. In a small saucepan, combine the strawberries, sugar, and lemon juice. Cook this over medium heat. You’ll hear a gentle sizzle as the sugar dissolves and the berries start to break down, releasing their gorgeous juices. Cook for about 5-7 minutes until the berries are soft and the liquid is syrupy. Let it cool slightly, then blend it until completely smooth. Set this puree aside to cool completely. A warm puree can start to cook the eggs in your filling, and we don’t want that!
Step 3: The Luxurious Filling
In a large bowl, beat the softened cream cheese until it’s completely smooth and lump-free. This is crucial for a silky texture. Scrape down the bowl! Add the sugar and beat again until it’s fully incorporated. Now, add the eggs one at a time, beating just until each yolk disappears into the mix. Finally, mix in the vanilla, sour cream, and heavy cream. Stop mixing once the batter is beautifully smooth and homogenous. Over-beating adds too much air, which can lead to cracks.
Chef’s tip: All your dairy ingredients should be at room temperature. Cold cream cheese never mixes smoothly, no matter how long you beat it!
Step 4: The Art of the Swirl
Pour your creamy, pale filling over the cooled crust. Now, take big dollops of your cooled strawberry puree and drop them evenly over the top. Take a thin knife or a skewer and gently drag it through the batter. Make figure-eight patterns or simple swirls. Don’t overdo it! A few gentle passes create that beautiful marbled effect. If you mix too much, the colors will just turn pink and the swirls will vanish.
Step 5: The Gentle Bake and Cool
Place your foil-wrapped springform pan into a larger roasting pan. Carefully pour hot water into the roasting pan until it comes about halfway up the sides of the springform. This water bath creates a gentle, steamy environment for baking. It’s the #1 trick to prevent cracks! Bake for 55 to 65 minutes. The edges will be set, but the center should still have a slight jiggle, like Jell-O. Turn the oven off, crack the door open with a wooden spoon, and let the cheesecake cool slowly inside for one hour. This gradual cooldown is the second secret to a crack-free top.
Step 6: The Final Chill
After its oven nap, remove the cheesecake from the water bath. Take off the foil, then let it cool completely on the counter. Once it’s room temperature, cover it and refrigerate it for at least 4 hours, but overnight is truly best. This long, cold rest allows the flavors to meld and the texture to become perfectly firm and sliceable. Patience is the final, and hardest, ingredient!
Your Cheesecake Timeline
Prep Time: 25 minutes of active work
Cook Time: About 1 hour for baking
Cooling Time: 1 hour in the oven, then time to reach room temperature
Chill Time: Minimum 4 hours, ideally overnight
Total Time: About 5 hours (including minimum chill)
Servings: 12 happy people
Kcal per serving: Approximately 430
My Golden Rule for Creamy Perfection
Here’s my biggest secret: Room temperature everything. I take my cream cheese, eggs, sour cream, and heavy cream out of the fridge at least 2 hours before I start. This single tip guarantees a smooth, lump-free batter that bakes evenly. Cold ingredients are the main cause of a grainy filling and those dreaded cracks. Plan ahead for the creamiest Strawberry Cheesecake Delight imaginable.
A Berry Interesting Fact
Did you know the tiny seeds on the outside of a strawberry are actually its true fruits? The sweet, red part we love is called the “receptacle.” Despite their name, strawberries aren’t true berries from a botanical standpoint, but bananas and avocados are! Regardless of the science, their sweet-tart flavor is the perfect partner for rich cheesecake. For the best flavor, I try to use seasonal foods like strawberries at their peak, which often taste better and can be more budget-friendly.
Your Cheesecake Tool Kit
- 9-inch springform pan
- Heavy-duty aluminum foil
- Large roasting pan for the water bath
- Small saucepan
- Blender or food processor
- Electric hand mixer or stand mixer
- Large mixing bowl
- Rubber spatula
- Thin knife or skewer for swirling
Storing Your Masterpiece
This cheesecake is a dream for make-ahead planning. Once it’s fully chilled and set, you can keep it right in the springform pan. Simply cover the top tightly with plastic wrap or place the whole pan in a large cake carrier. It will stay fresh and delicious in the refrigerator for up to 5 days.
For longer storage, cheesecake freezes beautifully. Place the whole chilled cheesecake (or individual slices) on a baking sheet until solid. Then, wrap it tightly in several layers of plastic wrap and a final layer of foil. Freeze for up to 2 months. This method is perfect for having a spectacular dessert ready for unexpected guests or a future celebration.
To serve a frozen cheesecake, thaw it slowly in the refrigerator overnight. It will taste just as fresh and creamy as the day you made it. Never thaw it at room temperature, as this can cause condensation to form and make the crust soggy.
Tips for Strawberry Swirl Cheesecake Success
- For the cleanest slices, dip a sharp knife in hot water and wipe it clean between each cut.
- If your strawberry puree seems too runny, you can simmer it for a few extra minutes to thicken it slightly.
- Don’t skip the foil wrap on the springform pan. A leaky water bath is a sad water bath.
- If you see small cracks forming on top during baking, don’t panic! A gorgeous topping of whipped cream and fresh berries will cover it all up beautifully.
Presentation That Wows
- Top each slice with a dollop of freshly whipped cream and a single perfect strawberry.
- Drizzle a little extra strawberry puree on the plate before placing the slice.
- For a fancy touch, garnish with white chocolate shavings or a fresh mint leaf.
- Serve on pretty cake plates to make even a weeknight slice feel like an event.
Mix It Up! Healthier & Fun Variations
Love this recipe? Try these spin-offs for different diets and tastes:
- Gluten-Free Swirl: Use gluten-free graham crackers for the crust. Everything else stays the same for a safe, celiac-friendly treat.
- Lower-Sugar Version: Reduce the sugar in the filling by ¼ cup and use a sugar substitute in the strawberry swirl. The berries add plenty of natural sweetness.
- Lemon Berry Bliss: Add 2 tablespoons of lemon zest to the cream cheese filling. The combo of lemon and strawberry is incredibly fresh and bright.
- No-Bake Strawberry Delight: Use a similar crust, but set the filling with gelatin and fold in whipped cream for a lighter, chilled summer dessert without turning on the oven.
- Mini Cheesecakes: Bake the batter in a muffin tin with liners for adorable personal portions. Perfect for parties! Reduce the baking time to about 20 minutes.
- Chocolate-Dipped Wonder: Add ½ cup of melted dark chocolate to the filling for a chocolate-strawberry combo. It’s like our berry-chocolate cousin but with a classic graham cracker base.
If you love the combination of fruit and rich dessert layers, you absolutely must try my decadent Banana Bread Brownies. They have that same wonderful swirled look with a totally different, comforting flavor.
Common Mistakes to Avoid
Mistake 1: Using Cold Ingredients
This is the most common pitfall. Pulling cold cream cheese and eggs straight from the fridge leads to a lumpy batter. No amount of mixing will fully smooth it out. Those tiny lumps can cause uneven baking and a grainy texture. Always plan to let your dairy and eggs sit on the counter for at least 1-2 hours before you start. Your reward will be a velvety smooth filling.
Mistake 2: Skipping the Water Bath
I know, it feels like an extra step and a bit of a hassle. But baking a cheesecake without a water bath is like walking a tightrope without a net. The direct, dry heat of the oven cooks the edges too quickly, causing them to pull away from the sides and often crack right down the middle. The water bath creates gentle, indirect steam. This cooks the cheesecake evenly from all sides, resulting in that perfect, creamy consistency from edge to center.
Mistake 3: Over-baking the Cheesecake
A cheesecake is not done when it’s solid all the way through. It’s done when the edges are puffed and set, but the center—about a 3-inch circle—still has a slight jiggle. It will look underdone, but trust the process! The residual heat will continue to cook it as it cools in the turned-off oven. If you bake it until the center is completely firm, it will be dry and dense by the time it chills.
Mistake 4: Over-mixing the Batter After Adding Eggs
Once you add the eggs, your mixing style should change. Beat them in one at a time on low speed, just until they are incorporated. Mixing on high speed or for too long whips too much air into the batter. This extra air expands in the oven and then collapses as it cools, which is another major cause of cracking. Mix for a smooth, creamy result, not a fluffy one.
Mistake 5: Not Cooling Gradually
Shocking a hot cheesecake with a blast of cold air (like taking it from the oven straight to the fridge) is a surefire way to make it crack from thermal stress. The gradual cooldown—first in the oven with the door ajar, then on the counter, then in the fridge—allows the structure to set slowly and gently. Patience here protects your beautiful swirls!
For more foundational baking skills that help with recipes like this, mastering a simple soft and rich Homemade Egg Bread teaches you all about gentle handling and patience with dough, skills that translate to perfect cheesecakes too.
Your Strawberry Cheesecake Questions, Answered
Can I use frozen strawberries for the swirl?
Absolutely! Frozen strawberries are a fantastic option, especially when fresh ones are out of season. There’s no need to thaw them first. Just add the frozen berries, sugar, and lemon juice to the saucepan. You might need to cook them for an extra minute or two to break them down completely. The puree will be just as flavorful and vibrant. In fact, frozen berries are often frozen at peak ripeness, so they can sometimes pack an even more concentrated berry flavor.
Why did my cheesecake crack on top?
Don’t be discouraged! Cracks happen to the best of us, usually from a sudden temperature change or over-baking. The most common reasons are: skipping the water bath, over-mixing the batter (adding too much air), baking it for too long, or cooling it too quickly. Follow the steps for the water bath, gentle mixing, the “jiggle test” for doneness, and the slow, staged cooling process. Even if it cracks, it will still taste incredible. Cover it with whipped cream and berries, and no one will ever know.
How do I know when the cheesecake is done baking?
This is the million-dollar question. About 10 minutes before the minimum bake time, perform the “jiggle test.” Gently shake the oven rack. The outer 2-3 inches of the cheesecake should look set, but the center (about the size of a golf ball to a lemon) should have a slight, soft jiggle, like Jell-O. It should not be liquidy, but it should not be firm either. Remember, it will continue to cook from residual heat as it cools in the turned-off oven. This method guarantees a creamy, not dry, center.
Can I make this cheesecake ahead of time?
Yes, and I highly recommend it! Cheesecake needs time to chill and set fully, so making it a day in advance is ideal. Bake it, let it go through the full cooling process, and then refrigerate it overnight. This extended chill time allows the flavors to deepen and meld beautifully. In fact, I think it tastes even better on the second day. You can make it up to two days ahead. Just keep it tightly covered in the fridge until you’re ready to serve.
My strawberry puree is too watery. What can I do?
If your puree seems thin and runny after blending, it might make your swirls sink or bleed. The fix is easy. Pour the puree back into the saucepan and simmer it over low heat for 5-10 extra minutes, stirring often. This will evaporate some of the excess liquid and concentrate the flavor. Let it cool completely again before swirling. A thicker puree holds its shape better in the thick batter, creating those defined, beautiful swirls.
Can I freeze strawberry swirl cheesecake?
You certainly can! Cheesecake freezes wonderfully. To freeze the whole thing, chill it completely first. Then, place it (unmolded but still on the pan base) on a baking sheet until solid. Wrap it tightly in several layers of plastic wrap, then a layer of foil. Label and freeze for up to 2 months. To serve, thaw it in the refrigerator overnight. You can also freeze individual slices the same way for a quick single-serving treat.
What’s the best way to get clean slices?
A messy slice can ruin a beautiful presentation. For pristine, restaurant-style slices, use a long, thin-bladed knife. Dip the blade in a tall glass of very hot water and wipe it dry with a clean towel before each cut. The hot knife will glide smoothly through the cold, firm filling and crust without dragging or pulling. This method gives you those perfect, clean-edged slices every single time.
Do I have to use a springform pan?
For this recipe, a springform pan is highly recommended. The high sides and removable ring make it possible to bake the tall filling and then release it cleanly without flipping or struggling. If you’re in a pinch, you could use a deep 9-inch cake pan lined with parchment paper slings for lifting, but it’s trickier. A springform is the right tool for this job and makes the whole process much simpler.
Can I use a different fruit for the swirl?
Of course! This recipe is a wonderful canvas for other fruits. Raspberries, blackberries, blueberries, or a mix would all be delicious. Mango or peach puree would make a lovely tropical version. Just follow the same process: cook the fruit with a little sugar and lemon juice until soft, then puree and cool. Adjust the sugar based on the natural sweetness of your chosen fruit. Each one creates a unique and beautiful “rhapsody” in your cheesecake.
Is sour cream necessary in the filling?
The sour cream is a key player. It’s not just for tangy flavor—it also adds to the creamy, luxurious texture and helps keep the filling smooth and tender. If you don’t have it, full-fat plain Greek yogurt is the best substitute. It provides a similar tang and richness. In a pinch, you could use all heavy cream, but you’ll miss that subtle, classic cheesecake tang that balances the sweetness so perfectly.
I hope this guide gives you the confidence to create your own stunning Strawberry Cheesecake Delight. It truly is one of the most rewarding desserts to make. For more creamy, dreamy ideas, explore all our favorite cheesecake recipes in our dedicated collection. From a rich Crimson Choco-Berry Rhapsody to a comforting Classic New Orleans Bread Pudding, there’s a special dessert waiting for every occasion.
The Final Slice
There you have it—my love letter to the perfect Strawberry Swirl Cheesecake. It’s a recipe built on simple techniques, quality ingredients, and a little bit of patience. Seeing that first gorgeous marbled slice come out of the pan never gets old. It’s the taste of summer, celebration, and home all in one bite. So grab your springform pan, get those ingredients to room temp, and get ready to bake something truly delightful. Your friends and family are going to be so impressed. Happy baking!
Equipment
- Grand bol
- Fouet
- Spatule
- Plaque à pâtisserie
- Papier sulfurisé
Ingredients
- 1 ½ tasse miettes de crackers en graham
- ⅓ tasse sucre granulé
- ⅓ tasse beurre non salé, fondu
- 1 ½ tasse fraises fraîches ou congelées
- 2 cuillères à soupe sucre
- 1 cuillère à café jus de citron
- 24 onces fromage à la crème, ramolli
- 1 tasse sucre granulé
- 3 œufs
- 1 cuillère à café extrait de vanille
- ½ tasse crème aigre
- ½ tasse crème épaisse
Instructions
- Préchauffez le four à 325°F et enveloppez l'extérieur d'un moule à charnière de 9 pouces avec du papier aluminium.
- Dans un bol, mélangez les miettes de crackers en graham, le sucre et le beurre fondu. Appuyez sur le mélange au fond du moule et faites cuire pendant 10 minutes. Laissez refroidir.
- Dans une casserole, combinez les fraises, le sucre et le jus de citron et faites cuire à feu moyen pendant 5 à 7 minutes jusqu'à ce qu'elles soient tendres. Mixez jusqu'à obtenir une consistance lisse et laissez refroidir.
- Dans un grand bol, battez le fromage à la crème ramolli jusqu'à obtenir une consistance lisse. Ajoutez le sucre et mélangez bien. Incorporez les œufs un par un, puis ajoutez la vanille, la crème aigre et la crème épaisse, et mélangez jusqu'à obtenir un mélange homogène.
- Versez la garniture sur la croûte et déposez des cuillerées de purée de fraises sur le dessus. Utilisez un couteau pour faire des tourbillons délicatement.
- Placez le moule à charnière dans une grande plaque à rôtir et ajoutez de l'eau chaude dans la plaque à rôtir jusqu'à mi-hauteur des côtés du moule à charnière. Faites cuire pendant 55 à 65 minutes jusqu'à ce que les bords soient bien cuits et que le centre tremble légèrement.
- Éteignez le four, entrouvrez la porte avec une cuillère en bois et laissez le cheesecake refroidir dans le four pendant 1 heure.
- Retirez du four et du bain-marie, laissez refroidir complètement à température ambiante, puis réfrigérez pendant au moins 4 heures ou toute la nuit avant de servir.
Notes
Nutrition

Hi, I’m Olivia Parker, the founder of BakingSecret.com and a lifelong lover of all things sweet and homemade. I grew up in a small town in Oregon, where the smell of fresh cookies in my family’s kitchen sparked my passion for baking. Over the years, I turned that passion into a mission: to help home bakers feel confident, inspired, and creative.
After studying food science and working in several artisan bakeries across the U.S., I decided to create a space where everyone from beginners to seasoned bakers can find reliable recipes, expert tips, and a warm, welcoming community. BakingSecret.com is my way of sharing the magic of baking with the world. When I’m not testing new recipes, you’ll find me exploring farmers’ markets, collecting vintage cookbooks, or perfecting my sourdough technique.