
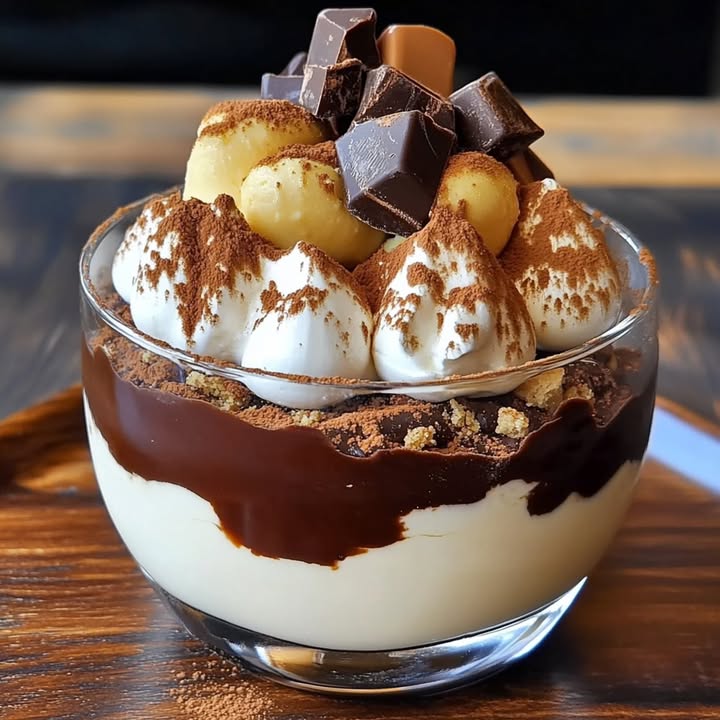

Let’s Make a Dreamy Chocolate Tiramisu Delight
You know that feeling when a classic dessert gives you a little wink and says, “Psst… try something new?” That’s exactly what happened when I first made a Chocolate Tiramisu Delight. My family’s eyes went wide after the first bite. They said it was like our favorite coffee dessert dressed up for a fancy chocolate party. The crunchy chantilly on top? That’s the magic touch that makes everyone ask for the secret. I’m so excited to share it with you.
A Sweet Twist on a Classic Tale
The original tiramisu, which means “pick me up” in Italian, is a beautiful layering of coffee-soaked ladyfingers and mascarpone. My version, the Chocolate Tiramisu Delight, is a love letter to all the chocolate lovers out there. I wanted the deep, rich flavor of dark chocolate to be the star, while keeping that fluffy, cloud-like mascarpone filling we all adore. The “chantilly croquante” (those delightful crunchy whipped cream shards) is my playful nod to adding texture. It turns every spoonful into a surprise.
Why This Chocolate Tiramisu Recipe Will Steal Your Heart
You will love this recipe because it feels fancy but is surprisingly simple to put together. No baking required! It’s a make-ahead dream, which means no stress when guests arrive. The contrast is everything: silky chocolate mascarpone, soft cocoa-dusted layers, and that crispy, crackly whipped cream topping. It’s a symphony of textures. Plus, it’s the perfect dessert to showcase your creativity without spending all day in the kitchen.
The Perfect Moments for Your Chocolate Delight
This isn’t just a dessert; it’s an event maker. It’s perfect for dinner parties where you want a “wow” finish. Bring it to a potluck and watch it become the center of attention. It’s a fabulous treat for the holidays, birthdays, or even a just-because Sunday family dinner. Honestly, any day you need a little chocolatey pick-me-up is the right day for this Chocolate Tiramisu Delight.
Gathering Your Ingredients for Chocolate Tiramisu Delight
Here’s what you’ll need to create this masterpiece for 6 to 8 happy people:
- 250 g of mascarpone cheese (full fat for the best flavor and texture)
- 3 large eggs (for separating)
- 80 g of granulated sugar
- 200 g of dark baking chocolate, minimum 60% cocoa
- 20 cl of cold whole liquid cream (very important that it’s cold!)
- About 24 ladyfinger cookies (savoiardi)
- Strong coffee or espresso, for dipping (about 1 cup, cooled)
- Unsweetened cocoa powder, for dusting
- A pinch of fine salt
No Stress Substitutions
Don’t worry if you’re missing something! Cooking is about joy, not panic.
- Mascarpone: In a real pinch, blend full-fat cream cheese with a tablespoon or two of heavy cream and a squeeze of lemon to mimic the tang and texture.
- Dark Chocolate: You can use semi-sweet chocolate chips or bars. The flavor will be slightly sweeter, but still delicious.
- Ladyfingers: Thin slices of pound cake or sponge cake can work. Just dip them quickly so they don’t fall apart.
- Espresso: Instant espresso powder dissolved in hot water is a great, quick alternative.
Let’s Create the Magic: Step-by-Step
Step 1: Preparing the Chocolate & Coffee
First, let’s get our key flavors ready. Chop the dark chocolate finely and melt it gently. You can use a double boiler or microwave in short bursts, stirring often. We want it smooth and glossy. Set it aside to cool slightly. Meanwhile, brew your strong coffee or espresso and let it cool completely in a shallow dish. I like to add a tiny splash of vanilla or a spoon of coffee liqueur to mine, but that’s our little secret.
Step 2: Making the Mascarpone Cream
This is the heart of our Chocolate Tiramisu Delight. Separate your eggs. In a clean bowl, whip the egg yolks with the sugar until the mixture is pale, thick, and falls in a ribbon. This takes about 3-5 minutes. Gently fold in the mascarpone with a spatula until just combined. Now, in another spotlessly clean bowl, whip the egg whites with a pinch of salt to stiff peaks. Gently fold them into the mascarpone mixture. This is what gives us that incredible airy, cloud-like texture.
Step 3: Folding in the Chocolate
Take your slightly cooled, melted chocolate. Add a big spoonful of the mascarpone cream to the chocolate and stir well. This tempers the chocolate and helps it blend smoothly without seizing. Now, pour this chocolate mixture back into the big bowl of mascarpone cream. Fold gently and slowly. Watch as beautiful chocolate marbling appears, then becomes a uniform, luscious, light brown cream. The aroma is already divine.
Pro tip: Use a large metal spoon or a silicone spatula for folding. A gentle cutting and turning motion keeps all that precious air in the mixture.
Step 4: Assembling the Layers
Time to build! Quickly dip each ladyfinger into the cooled coffee. You want it moist, not soggy and falling apart—just a quick in-and-out. Lay them in a single layer in your serving dish (an 8×8 dish or a pretty trifle bowl works great). Spread half of the chocolate mascarpone cream over the ladyfingers. Repeat with a second layer of dipped ladyfingers and the remaining cream. Smooth the top beautifully.
Step 5: Creating the Chantilly Croquante
This is the fun, crunchy crown! Pour your very cold heavy cream into a chilled bowl. Whip it to stiff peaks. Spread this whipped cream in a thick, even layer over the entire top of the tiramisu. Now, for the “croquante” part: place the whole dish, uncovered, directly in your freezer for exactly 90 minutes to 2 hours. This freezes the whipped cream into a delightful, crackable layer.
Chef’s Tip: For an extra flavor punch, add a teaspoon of vanilla or a tablespoon of sifted cocoa powder to the cream before whipping.
Step 6: The Final Touches
Once your crunchy chantilly top is set, remove the tiramisu from the freezer. Let it sit in the refrigerator for at least 4 more hours, or ideally overnight. This allows all the flavors to marry and the layers to become perfectly soft. Right before serving, dust the top generously with unsweetened cocoa powder through a fine sieve. Use a knife dipped in hot water to cut clean slices through the crunchy top.
Timing is Everything
- Prep Time:的国家30 minutes
- Freezing Time (for topping): 2 hours
- Chilling Time: 4 hours minimum (overnight is best)
- Total Time (including chilling): 6.5 hours
- Active Work Time: 30 minutes
My Secret Weapon for the Ultimate Chocolate Tiramisu
The true secret to an unforgettable Chocolate Tiramisu Delight is patience. I know it’s hard to wait when it looks so good, but that long rest in the fridge is non-negotiable. It transforms the dessert from good to spectacular, letting the ladyfingers soften perfectly into the cream and the flavors deepen into something truly magical.
A Little Cocoa Fact for You
Did you know the quality of your cocoa powder makes a huge difference in the final taste? Natural cocoa powder is acidic and gives a sharper chocolate flavor, while Dutch-processed cocoa is alkalized, resulting in a darker color and a milder, smoother taste. For dusting on top of this tiramisu, I prefer Dutch-processed for its lovely color and less bitter finish. It’s a small detail that makes your presentation look professional.
Your Kitchen Toolbox
You don’t need fancy gear, just a few basics:
- 2-3 mixing bowls (one heatproof for melting chocolate)
- Electric hand mixer or stand mixer
- Rubber spatula or large metal spoon for folding
- 8×8 inch square dish or a 2-quart glass serving bowl
- Fine-mesh sieve for dusting cocoa
- Shallow dish for coffee dipping
Storing Your Chocolatey Masterpiece
In the Refrigerator: Once set, your Chocolate Tiramisu Delight will keep beautifully in the fridge, covered with plastic wrap, for up to 3 days. The flavors actually improve on the second day. The crunchy chantilly top will soften to a lovely creamy layer after the first day, which is equally delicious.
Freezing for Later: You can freeze the assembled tiramisu (without the final cocoa dusting) for up to a month. Wrap it tightly in plastic wrap and then foil. To serve, thaw it overnight in the refrigerator and then dust with cocoa. Note that the texture of the mascarpone cream may be slightly different after freezing, but it’s still a great make-ahead option.
Serving Tip: Always use a clean, dry knife or serving spoon. Any moisture introduced can make the top layer soggy faster. Keep it covered between servings to maintain that perfect texture.
My Best Tips for Success
- Cold is Key: Use cold cream and cold bowls for whipping. It whips faster and holds its shape better.
- Fold, Don’t Stir: Treat your egg whites and mascarpone mixture gently. Over-mixing will deflate your cream.
- Dip with Confidence: A one-second dip per side for the ladyfingers is usually plenty. You can also brush the coffee on with a pastry brush for more control.
- For more decadent ideas, check out our collection of international pastry recipes that are sure to inspire your next baking adventure.
Presentation Ideas to Impress
- Serve in individual glasses or mason jars for a cute, personalized touch.
- Garnish with chocolate curls, a few coffee beans, or a fresh raspberry.
- Drizzle a little chocolate or caramel sauce on the plate before placing the slice.
- For a dinner party, use a large rectangular dish and dust the cocoa in a stencil pattern.
6 Delicious Variations to Try
Once you’ve mastered this classic Chocolate Tiramisu Delight, the fun really begins! The basic structure is a perfect canvas for creativity.
- Orange Bliss: Add the zest of one orange to the mascarpone cream and use Grand Marnier in the coffee dip.
- Berry Swirl: Layer a thin swirl of raspberry or strawberry jam between the cream and ladyfinger layers.
- Mint Chocolate: Fold finely chopped mint chocolate or a few drops of peppermint extract into the chocolate base.
- Nutty Crunch: Sprinkle a layer of finely chopped toasted hazelnuts or almonds between the cream layers.
- White Chocolate Dream: Substitute the dark chocolate for high-quality white chocolate for a sweeter, different twist.
- Decaf Version: Use a strong decaf coffee or even a chicory blend for the dipping liquid so everyone can enjoy.
Common Mistakes to Avoid
Mistake 1: Using Warm Ingredients for the Cream
This is so easy to do! If your mascarpone or eggs are straight from the fridge, the cream can turn grainy or too runny. Mascarpone should be slightly softened at room temperature for about 15 minutes, but your cream for whipping and bowls should be cold. Take your ingredients out in stages. Cold cream whips to better peaks, and room-temp mascarpone blends smoothly without lumps.
Mistake 2: Soggy, Mushy Ladyfinger Layers
The downfall of many a tiramisu! Dipping the ladyfingers for too long makes them absorb too much coffee. They then turn into a soggy mess that can water down your beautiful cream. The key is speed. A quick dip—just a second or two per side—is all you need. You want them moist and flavorful, not dripping wet. Try brushing the coffee on for even more control.
Mistake 3: Skipping the Long Chill
I get it, you want to eat it right away! But assembling and serving tiramisu too soon is a big mistake. The dessert needs time for the ladyfingers to soften properly into the cream and for all the flavors to blend. Serving it too early means you’ll get hard, crunchy cookies in your bite. Always, always plan for that minimum 4-hour chill, with overnight being the gold standard. It makes all the difference.
Mistake 4: Overwhipping or Rough Mixing
When you whip the egg whites or the heavy cream, stop as soon as you get stiff peaks. Overwhipping can make them grainy and difficult to fold in. Then, when you fold the egg whites and chocolate into the mascarpone, be gentle! Use a wide spatula and a slow, sweeping motion. Stirring aggressively will knock out all the air you just worked so hard to put in, resulting in a dense, flat dessert.
Frequently Asked Questions
Can I make this Chocolate Tiramisu Delight without raw eggs?
Yes, you can! For a cooked egg yolk version, whisk the yolks and sugar over a double boiler (with a bit of water) until hot and sugar is dissolved, then cool completely before adding mascarpone. You can also omit the egg whites entirely and just use the whipped heavy cream folded into the mascarpone-chocolate mix for lightness. The texture will be slightly different but still delicious.
What’s the best chocolate to use for this recipe?
Use a good quality dark baking chocolate (bar form) with a cocoa percentage between 60-70%. This gives a rich, deep flavor that isn’t overly sweet. You can use chocolate chips in a pinch, but bars often have a better texture and melt more smoothly. Avoid milk chocolate, as it can make the dessert too sweet and less stable.
My whipped cream for the topping is runny. What went wrong?
The most common culprit is that your cream, bowl, or beaters weren’t cold enough. Cream whips best when everything is chilled. Pop your bowl and beaters in the freezer for 15 minutes before you start. Also, ensure you’re using “heavy cream” or “whipping cream” with a high fat content (at least 30%). Low-fat creams will not whip properly.
How far in advance can I make this dessert?
This is a fantastic make-ahead dessert. You can assemble it completely, including the crunchy chantilly top and final cocoa dusting, 1-2 days before serving. Store it covered in the refrigerator. In fact, it often tastes even better the next day as the flavors fully develop.
Can I use something other than ladyfingers?
Yes, though the texture will change. You can use thin slices of plain sponge cake or pound cake. Just be even more gentle when dipping, as they can fall apart easier. Some bakeries also sell “boudoir” biscuits, which are the same as ladyfingers. In a real pinch, you can make a simple coffee-soaked sponge cake layer.
Why is my mascarpone cream mixture lumpy?
This usually happens if the mascarpone was too cold when you tried to mix it. Let it sit out of the fridge for 15.
Is there a way to make a smaller portion?
Absolutely! The recipe scales down easily. Just halve all the ingredients. Use a smaller dish, like a 6×6 pan, or assemble it in individual glasses. The process and timing remain exactly the same. It’s a great way to test the recipe or make a treat for a smaller group.
Can I add alcohol to this recipe?
Of course! This is a classic addition. You can add 1-2 tablespoons of your favorite liqueur to the cooled coffee dip. Marsala wine is traditional, but coffee liqueur (like Kahlúa), dark rum, or amaretto work wonderfully with chocolate. Just mix it into the coffee before dipping.
What does “chantilly croquante” mean?
It’s a French term that translates to “crunchy whipped cream.” Chantilly refers to sweetened whipped cream (like Crème Chantilly). Croquante means crunchy or crisp. In this recipe, we achieve it by spreading the whipped cream on top and briefly freezing it, creating a delightful brittle layer that cracks when you cut into it.
Is this dessert very heavy or rich?
It is a rich dessert, but the airy mascarpone cream and the coffee-cut chocolate keep it from feeling overly heavy. The portions are satisfying but not overwhelming. Using a higher cocoa percentage chocolate actually makes it taste more sophisticated and less sugary-sweet. For ingredient quality and nutrition insights, resources like the USDA provide great food-based nutrition information that can help you make informed choices about the dairy and cocoa you use.
Equipment
- Grand bol
- Fouet électrique
- Spatule
- Plat de service
- Tamis fin
Ingredients
- 250 g mascarpone
- 3 œufs à séparer
- 80 g sucre granulé
- 200 g chocolat noir minimum 60% cacao
- 20 cl crème liquide entière très importante qu’elle soit froide
- 24 biscuits à la cuillère savoiardi
- 1 tasse café fort ou espresso, pour tremper
- q.s. cacao en poudre pour saupoudrer
- pincée sel fin
Instructions
- Hachez finement le chocolat noir et faites-le fondre doucement au bain-marie ou au micro-ondes. Réservez pour refroidir légèrement.
- Préparez votre café ou espresso et laissez-le refroidir complètement dans un plat peu profond.
- Séparez les œufs. Dans un bol propre, battez les jaunes avec le sucre jusqu'à ce qu'ils deviennent clairs et épais.
- Incorporez doucement le mascarpone avec une spatule jusqu'à ce que ce soit bien mélangé.
- Dans un autre bol propre, montez les blancs d'œufs en neige avec une pincée de sel jusqu'à obtenir des pics fermes. Incorporez-les délicatement au mélange de mascarpone.
- Ajoutez une cuillerée de la crème de mascarpone au chocolat refroidi, mélangez pour tempérer, puis incorporez de nouveau au mélange de mascarpone en pliant délicatement jusqu'à obtenir un mélange homogène.
- Trempez rapidement chaque biscuit à la cuillère dans le café refroidi, en les plaçant dans un plat de service en une seule couche.
- Étalez la moitié de la crème chocolat mascarpone sur les biscuits, puis répétez avec une autre couche de biscuits trempés et le reste de la crème.
- Montez la crème liquide très froide en pics fermes et étalez sur le tiramisu.
- Placez le plat au congélateur non couvert pendant 90 minutes à 2 heures pour faire prendre la couche de crème fouettée.
- Retirez du congélateur et placez au réfrigérateur pendant au moins 4 heures, de préférence toute la nuit.
- Saupoudrez généreusement de cacao en poudre avant de servir et découpez avec un couteau plongé dans de l'eau chaude.
Notes
Nutrition

Hi, I’m Olivia Parker, the founder of BakingSecret.com and a lifelong lover of all things sweet and homemade. I grew up in a small town in Oregon, where the smell of fresh cookies in my family’s kitchen sparked my passion for baking. Over the years, I turned that passion into a mission: to help home bakers feel confident, inspired, and creative.
After studying food science and working in several artisan bakeries across the U.S., I decided to create a space where everyone from beginners to seasoned bakers can find reliable recipes, expert tips, and a warm, welcoming community. BakingSecret.com is my way of sharing the magic of baking with the world. When I’m not testing new recipes, you’ll find me exploring farmers’ markets, collecting vintage cookbooks, or perfecting my sourdough technique.