
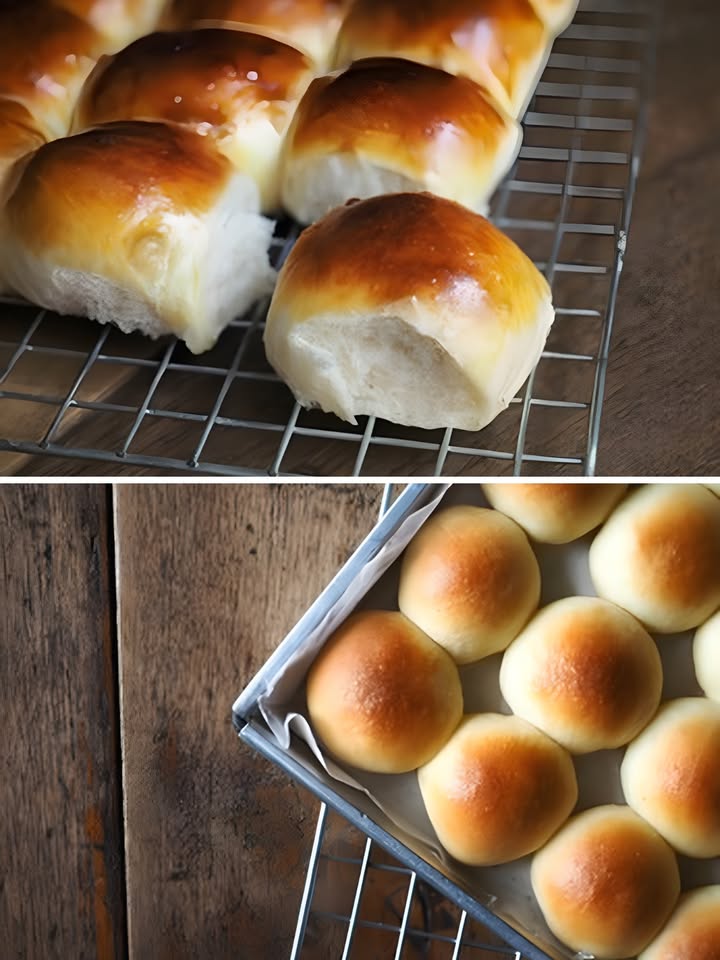
Easy & Delightful Fluffy Condensed Milk Bread 🥛
You know that feeling when your home fills with the smell of baking bread? It just feels like a hug. I live for that! And this fluffy condensed milk bread is my new go-to for creating that warmth without any stress. It’s soft, sweet, and so simple. I first made it for my neighbor, who was having a tough week, and she said it tasted like a sweet, edible cloud. That’s the magic of this recipe.
The Sweet Story of Condensed Milk Bread
Condensed milk has been a baker’s secret weapon for ages. Born from a need to preserve milk, it became beloved for the rich, caramel-like sweetness it adds. Think of classic treats like key lime pie or Vietnamese iced coffee. This bread takes that old-school ingredient and turns it into something wonderfully new. It’s like a modern twist on a classic milk bread, perfect for today’s home baker who wants big flavor with little fuss.
Why You’ll Fall in Love With This Fluffy Bread
Honestly, what’s not to love? First, it’s incredibly soft and stays that way for days. The condensed milk gives it a subtle, luxurious sweetness that isn’t overpowering. Second, it’s a dream to make! The dough comes together beautifully. And third, that shiny, sweet glaze on top? It’s pure bliss. This recipe is a guaranteed crowd-pleaser, from kids to grandmas.
Perfect Occasions for This Sweet Treat
This bread is your new best friend for so many moments! Tear into a warm loaf for a cozy weekend breakfast. Serve the smaller buns at a baby shower or brunch potluck. It’s a fantastic after-school snack that will make you the most popular house on the block. I also love packing a few slices for picnics—it’s sturdy yet soft, and always gets compliments.
What You’ll Need: Ingredients List
Gather these simple ingredients for your fluffy condensed milk bread adventure:
- Warm milk: 240 ml (1 cup) – think baby-bath warm, not hot.
- 1 large egg – at room temperature, please!
- Condensed milk: 75 g (1/4 cup) for the dough, plus more for topping.
- Granulated sugar: 30 g (2 tbsp).
- Active dry yeast: 7 g (2 tsp).
- All-purpose flour: 520 g (about 4 cups, but weigh it if you can!).
- Salt: 1 tsp (balances the sweetness).
- Unsalted butter: 50 g (1/4 cup), softened.
- Extra butter and condensed milk for the finishing glaze.
No Problem! Handy Substitution Options
Out of something? Don’t worry, here are some easy swaps:
- Milk: Any milk works—whole, 2%, or even a plain, unsweetened almond or oat milk.
- Egg: For an egg-free version, you can use 1/4 cup of plain yogurt or a commercial egg replacer.
- Butter: A neutral oil like vegetable or canola oil can be used, though butter gives the best flavor.
- All-purpose flour: You can use bread flour for an even chewier texture. For a denser, whole-grain version, substitute up to 1 cup of the flour with whole wheat flour.
Let’s Bake! Step-by-Step Guide to Fluffy Bread
Step 1: Wake Up the Yeast
In a large bowl, combine the warm milk, sugar, and that precious quarter-cup of condensed milk. Give it a good whisk. The sugar should dissolve into the milky mixture. Now, sprinkle the yeast over the top. Let it sit for about 5-10 minutes. You’ll see it become frothy and active—this is the yeast saying “hello, I’m ready to work!” Then, crack in the egg and whisk it all together until it’s a smooth, pale yellow liquid. Pro tip: If your milk is too hot, it will kill the yeast. Too cold, and it won’t wake up. Aim for around 105-110°F (40-43°C).
Step 2: Bring the Dough Together
Add the flour and salt to the yeast mixture. If you’re using a stand mixer, fit it with the dough hook. Start mixing on low speed until a shaggy dough forms. Now, with the mixer still running, add the softened butter a few pieces at a time. It might look messy at first, but keep faith! Once all the butter is incorporated, increase the speed to medium and knead for 8-10 minutes. The dough will transform from sticky to smooth and will pull away cleanly from the sides of the bowl.
Step 3: The First Rise (Let it Rest!)
Shape the dough into a smooth ball. Place it in a lightly oiled bowl, turning it once to coat it in oil. Cover the bowl with a clean kitchen towel or plastic wrap. Find a warm, draft-free spot in your kitchen. Let the dough rest and rise until it doubles in size. This usually takes about 1 to 1.5 hours. The waiting is the hardest part, but it’s when the magic happens—those yeast are creating air pockets for that signature fluffiness.
Step 4: Shape Your Loaves or Buns
Gently punch down the risen dough to release the air. Turn it out onto a lightly floured surface. Divide it in half. For a loaf, roll one half into a rectangle, then roll it up tightly into a log. Place it in a greased 9×5 inch loaf pan. For smaller buns, divide the other half into 6-8 pieces, roll each into a smooth ball, and place them in a round cake pan, touching each other. This gives you pull-apart rolls! Cover the pans and let the dough rise again for about 45-60 minutes, until puffy.
Step 5: Bake to Golden Perfection
While the dough is on its second rise, preheat your oven to 350°F (180°C). Just before baking, you can brush the tops with a simple egg wash (one egg beaten with a tablespoon of water) for a deep golden shine. Bake the loaf for 25-30 minutes, and the smaller buns for about 20-22 minutes. You’ll know it’s done when the top is a beautiful golden brown and the bottom sounds hollow when tapped.
Step 6: The Secret Glaze
As soon as the bread comes out of the oven, mix together equal parts of softened butter and condensed milk (about 2 tablespoons each is perfect). Whisk until smooth. Using a pastry brush, generously glaze the warm bread with this mixture. It will melt and soak in, creating an irresistible, slightly sticky, sweet crust. Chef’s tip: Let the bread cool in the pan for 10 minutes before glazing, then transfer to a wire rack. This prevents sogginess but ensures it’s still warm enough to absorb the glaze.
Timing Your Baking Success
Good baking is all about timing! Here’s your roadmap:
- Prep Time: 25 minutes
- Rising Time: 1 hour 45 minutes (approximately)
- Cook Time: 25 minutes
- Total Time: About 2 hours 35 minutes
My Secret for Ultimate Fluffiness
Here’s my little secret: after kneading, do the “windowpane test.” Take a small piece of dough and gently stretch it between your fingers. If you can stretch it thin enough to see light through it without it tearing, you’ve kneaded it perfectly. This strong gluten network is what traps the gas from the yeast, giving you that incredible, cloud-like texture in your fluffy condensed milk bread.
A Sweet Bit of History
Did you know the method of “tangzhong,” a water roux used in Asian milk breads, is all about maximizing fluffiness and moisture? While our recipe doesn’t use tangzhong, the condensed milk acts in a similar way! Its sugars and proteins help tenderize the dough and retain moisture, giving us that soft, pillowy crumb without the extra step. It’s a clever shortcut to a professional texture.
Essential Baking Equipment
- Large mixing bowl
- Stand mixer with dough hook (or sturdy arms for hand-kneading!)
- Measuring cups and spoons or a kitchen scale
- 9×5 inch loaf pan and/or an 8 or 9-inch round cake pan
- Pastry brush
- Wire cooling rack
How to Store Your Fluffy Condensed Milk Bread
Once completely cool, store your bread in an airtight container or a resealable plastic bag at room temperature. The sugar and fat from the condensed milk and butter help it stay soft for several days. I find it’s best enjoyed within 2-3 days for peak freshness and texture.
For longer storage, you can freeze this bread beautifully. Wrap the whole loaf or individual slices tightly in plastic wrap, then place them in a freezer bag. It will keep well for up to 2 months. When you’re ready, simply thaw it at room temperature or pop a slice straight into the toaster for a warm, revival treat.
Please do not refrigerate this bread. The cold temperature of the fridge accelerates starch retrogradation (that’s the scientific term for getting stale!), which will make the bread dry and crumbly much faster. Room temperature or freezing are the only ways to go!
Pro Tips for the Best Bread Ever
- Weigh your flour: It’s the most accurate way and ensures perfect results every time. Too much flour is the #1 reason for dense bread.
- Patience with the rise: Don’t rush the rising times. Let the dough double in size, even if it takes a little longer on a cool day.
- Customize the glaze: Add a drop of vanilla extract or a pinch of sea salt to the butter-condensed milk glaze for an extra flavor dimension.
- If you’re looking for other simple, sweet baking projects, you must try our classic One-Bowl Banana Bread or these fun Cinnamon Roll Muffins.
Pretty Presentation Ideas
- Dust the glazed loaf with a light snowfall of powdered sugar.
- For the pull-apart buns, serve them piled high on a rustic wooden board.
- Drizzle with a simple vanilla or maple glaze for extra decadence.
- Serve warm with a side of whipped honey butter or berry jam.
6 Fun & Easy Recipe Variations
Once you master the base, the world is your oyster! Try these twists:
1. Citrus Zest Delight: Add the zest of one orange or lemon to the dough. The bright citrus cuts the sweetness beautifully.
2. Chocolate Chip Swirl: After the first rise, roll out the dough, sprinkle with chocolate chips, roll into a log, and proceed. A family favorite!
3. Cinnamon Sugar Twist: Mix cinnamon and sugar, sprinkle it over the rolled-out rectangle, then roll and cut for gorgeous swirled buns.
4. Savory Herb Version: Omit the sugar in the dough and add grated Parmesan, garlic powder, and dried herbs like rosemary. Skip the sweet glaze and brush with garlic butter instead.
5. Fruit & Nut Loaf: Knead in 1/2 cup of dried cranberries and chopped pecans during the last minute of mixing.
6. Ube (Purple Yam) Bread: Replace 1/4 cup of milk with ube flavoring or puree for a stunning purple color and unique, nutty flavor.
Common Mistakes to Avoid
Mistake 1: Using Hot or Cold Milk for the Yeast
This is the most common pitfall. If your milk is too hot (over 115°F), it will kill the yeast and your bread won’t rise. If it’s too cold, the yeast won’t activate. The goal is “warm,” like the temperature of a baby’s bottle. Use a kitchen thermometer if you’re unsure, or test it on your wrist—it should feel comfortably warm, not hot. A good rule is to aim for 105-110°F (40-43°C).
Mistake 2: Skipping the Full Kneading Time
It’s tempting to stop kneading as soon as the dough comes together. But under-kneaded dough won’t develop a strong gluten network. This means it can’t trap the gases from the yeast effectively, leading to dense, flat bread. Whether by hand or machine, knead for the full 8-10 minutes until the dough is smooth, elastic, and passes the windowpane test.
Mistake 3: Adding Cold Butter or Egg
Butter and eggs straight from the fridge can shock the yeast and make the dough harder to mix. Cold butter won’t incorporate evenly, and a cold egg can lower the temperature of your liquid mix. Always take these ingredients out about 30-60 minutes before you start baking. The softened butter will blend in seamlessly, creating a smooth, pliable dough.
Mistake 4: Rushing the Proofing (Rising) Stages
Bread making is not a race. Putting the dough in the oven before it has properly doubled in size will give you small, heavy loaves. The timing in the recipe is a guide. Always let the dough rise until it’s truly doubled, which can vary based on your kitchen’s warmth. A great test is to gently poke the dough with a floured finger. If the indentation slowly springs back, it’s ready. If it springs back immediately, it needs more time.
Mistake 5: Overbaking the Loaf
Because this bread is enriched with sugar and dairy, it can brown quickly. Baking it too long will dry it out. Start checking for doneness 5 minutes before the suggested bake time. The top should be a deep golden brown, and the bottom should sound hollow when tapped. If you have an instant-read thermometer, the internal temperature should be around 190°F (88°C).
Remember, practicing good safe meal preparation habits, like washing your hands and surfaces before you start, ensures your delicious creation is also a safe one for everyone to enjoy.
Frequently Asked Questions (FAQ)
Can I make this fluffy condensed milk bread by hand without a mixer?
Absolutely, you can! While a stand mixer makes it easier, this dough is very manageable by hand. Simply mix the ingredients in a large bowl with a wooden spoon until a shaggy dough forms. Then, turn it out onto a lightly floured surface and knead. It will be sticky at first, but resist adding too much extra flour. Use a bench scraper to help you. Knead by pushing the dough away with the heel of your hand, folding it over, and turning it. After about 10-15 minutes of active kneading, you should have a smooth, elastic ball. It’s a great arm workout and very satisfying!
My dough didn’t rise. What went wrong?
Oh no, that’s disappointing! The most likely culprits are old/expired yeast or liquid that was too hot and killed the yeast. Always check the expiration date on your yeast. If your kitchen is cold, the rise will take longer. Create a warm proving spot by placing the covered bowl in your oven with the light on (but the oven OFF), or on top of a warm appliance like your fridge. Give it more time. If there’s absolutely no movement after 90 minutes, your yeast may be inactive, and you’ll need to start over with fresh yeast.
Can I use sweetened condensed milk instead of just condensed milk?
Yes, that’s exactly what the recipe calls for! In most parts of the world, “condensed milk” refers to the sweetened, thick, canned product. So, that sweet, syrupy milk in a can is the correct ingredient. Do not use evaporated milk, which is unsweetened and much thinner. The sweetened condensed milk provides both sweetness and a tender texture to the bread.
How can I tell when the bread is fully baked?
There are three great ways to check. First, look at the color; the top should be a rich, golden brown. Second, tap the bottom of the loaf (carefully turn it out). It should sound hollow, like a drum. Third, and most accurate, use an instant-read thermometer. Insert it into the center of the loaf. It should read between 190°F and 200°F (88°C to 93°C). If it’s there, your bread is perfectly baked.
Can I make this recipe into dinner rolls?
You sure can! It makes fantastic sweet dinner rolls. After the first rise, divide the dough into 12-16 equal pieces. Shape each into a smooth ball and place them in a greased 9×13 inch baking dish, spacing them about half an inch apart. Let them rise until puffy and touching, then bake at the same temperature for 18-22 minutes. Brush with the glaze as usual. They’re perfect for holiday meals!
Is it possible to make this bread ahead of time?
Yes, for a slower, overnight rise, you can use the “cold ferment” method. After kneading, place the dough in an oiled bowl, cover tightly, and put it in the refrigerator overnight (for 8-12 hours). The next day, let it sit at room temperature for about an hour, then shape, let it have its second rise, and bake. This method can develop even more flavor. You can also freeze the baked and cooled bread as described in the storage section.
Why is my bread dense and not fluffy?
Dense bread usually points to one of a few issues: too much flour (always measure by weight or use the spoon-and-level method), not enough kneading (weak gluten), or not enough rising time (the yeast didn’t have time to create air pockets). Another sneaky reason is over-proofing. If the dough rises too much, the gluten structure can overstretch and collapse in the oven, leading to a dense crumb. Follow the visual cues (doubled in size) rather than just the clock.
Can I add flavors like vanilla or spices to the dough?
Please do! This dough is a wonderful canvas. Add 1-2 teaspoons of pure vanilla extract to the wet ingredients. For spices, 1-2 teaspoons of ground cinnamon, cardamom, or pumpkin pie spice mixed with the flour would be delicious. Just be mindful that adding wet ingredients like fruit purees will change the hydration, so you may need a touch more flour.
What’s the purpose of the egg wash before baking?
The egg wash (a beaten egg with a little water or milk) is purely for appearance. It gives the baked bread a shiny, professional-looking, deep golden brown crust. It’s optional but recommended. If you skip it, the crust will be softer and paler. The sweet condensed milk and butter glaze applied after baking is for flavor and a sticky-sweet finish, and that one is not optional in my book—it’s the best part!
My bread is browning too fast on top. What should I do?
This can happen, especially if your oven runs hot or your pan is dark metal. About halfway through the baking time, loosely tent the top of the loaf with a piece of aluminum foil. This will shield it from direct heat and allow the inside to finish cooking without the top burning. Continue baking until the internal temperature is reached.
Baking this wonderful bread is just the start of your journey. For more inspiration and foolproof recipes, explore our entire collection of delicious bread and muffin recipes where you’ll find everything from savory loaves to decadent breakfast treats.
Your New Favorite Bread Awaits
There you have it, friends—the recipe for the softest, sweetest, most delightful bread you can make without any special skills. This fluffy condensed milk bread is more than just a recipe; it’s a way to create a moment of joy in your kitchen. The process is simple, the results are stunning, and the taste is pure comfort. I can’t wait for you to try it and fill your home with that incredible, sweet-bread aroma. Happy baking, and don’t forget to share your beautiful loaves!
Equipment
- Grand bol
- Fouet
- Spatule
- Plaque à pâtisserie
- Papier sulfurisé
Ingredients
- 240 ml lait chaud
- 1 œuf à température ambiante
- 75 g lait concentré sucré pour la pâte, plus pour le dessus
- 30 g sucre
- 7 g levure sèche active
- 520 g farine tout usage
- 1 cuil. à café sel
- 50 g beurre non salé ramolli
- q.s. beurre et lait concentré pour le glaçage
Instructions
- Combinez le lait chaud, le sucre et le lait concentré dans un grand bol et fouettez jusqu'à dissolution. Saupoudrez la levure sur le dessus et laissez reposer pendant 5 à 10 minutes jusqu'à ce qu'elle soit mousseuse.
- Ajoutez l'œuf et fouettez jusqu'à obtenir une consistance lisse.
- Mélangez la farine et le sel. Si vous utilisez un robot pâtissier, utilisez le crochet à pâte et mélangez à basse vitesse jusqu'à ce qu'une pâte brouillonne se forme. Ajoutez progressivement le beurre ramolli en mélangeant.
- Augmentez la vitesse à moyenne et pétrissez pendant 8 à 10 minutes jusqu'à ce que la pâte soit lisse et se détache du bol.
- Formez une boule avec la pâte et placez-la dans un bol huilé, en la couvrant d'une serviette. Laissez lever dans un endroit chaud jusqu'à ce qu'elle double de volume, soit environ 1 à 1,5 heures.
- Punch down la pâte levée et déposez-la sur une surface farinée. Divisez-la en deux.
- Pour un pain, étalez une moitié en un rectangle et enroulez-la fermement en un boudin, puis placez-la dans un moule à pain graissé de 22x12 cm. Pour des petits pains, divisez l'autre moitié en 6-8 morceaux, roulez chaque morceau en boule et placez-les dans un moule rond.
- Couvrez les moules et laissez de nouveau la pâte lever pendant 45 à 60 minutes jusqu'à ce qu'elle soit gonflée.
- Préchauffez le four à 180°C (350°F). Badigeonnez le dessus avec un œuf battu avant la cuisson pour une finition dorée.
- Faites cuire le pain pendant 25 à 30 minutes et les petits pains pendant 20 à 22 minutes, jusqu'à ce qu'ils soient dorés et résonnent vides quand on tape dessus.
- Mélangez des parts égales de beurre ramolli et de lait concentré pour obtenir le glaçage. Badigeonnez généreusement sur le pain chaud après l'avoir sorti du four.
Notes
Nutrition

Hi, I’m Olivia Parker, the founder of BakingSecret.com and a lifelong lover of all things sweet and homemade. I grew up in a small town in Oregon, where the smell of fresh cookies in my family’s kitchen sparked my passion for baking. Over the years, I turned that passion into a mission: to help home bakers feel confident, inspired, and creative.
After studying food science and working in several artisan bakeries across the U.S., I decided to create a space where everyone from beginners to seasoned bakers can find reliable recipes, expert tips, and a warm, welcoming community. BakingSecret.com is my way of sharing the magic of baking with the world. When I’m not testing new recipes, you’ll find me exploring farmers’ markets, collecting vintage cookbooks, or perfecting my sourdough technique.