
Discover the Sweetness of Guava Bliss Cake
Imagine a delightful, aromatic cake that brings a burst of tropical flavors to your kitchen. The Guava Bliss Cake is not just any ordinary dessert; it’s a symphony of sweet and tangy guava, creamy textures, and a rich, buttery base. This recipe has been a favorite in my family for generations, and I’m excited to share it with you.
A Brief History of Guava Bliss Cake
Guava has long been a beloved fruit in many cultures, especially in tropical regions like Brazil and the Caribbean. The Guava Bliss Cake is a modern twist on traditional recipes, combining the natural sweetness of guava with the comforting texture of a classic cake. Every time I make this cake, I’m reminded of sunny afternoons spent in my grandmother’s kitchen, helping her chop guava paste and mix batter. It’s a tradition I cherish, and I hope you’ll love it too.
Why You’ll Love This Recipe
The Guava Bliss Cake is a perfect blend of simplicity and flavor. The cake itself is light and fluffy, while the guava syrup adds a burst of sweet and tangy goodness. It’s easy to make, and the ingredients are straightforward, making it a go-to recipe for both beginners and experienced bakers. Plus, the aroma that fills your kitchen as it bakes is simply irresistible.
Perfect Occasions to Prepare This Recipe
Whether you’re celebrating a birthday, hosting a family gathering, or just craving a sweet treat, the Guava Bliss Cake is always a hit. It’s a versatile dessert that can be served at picnics, potlucks, or even as a special addition to your holiday table. The vibrant flavors and beautiful presentation make it a crowd-pleaser.
Ingredients for the Guava Bliss Cake
- 2 and 1/2 cups of wheat flour
- 1 and 1/2 cups of sugar
- 3 eggs
- 1/2 cup of butter or margarine
- 1 cup of milk
- 1 tablespoon of baking powder
- Firm guava paste (for the cake and syrup)
Substitution Options
- Wheat flour: You can use all-purpose flour or a gluten-free flour blend.
- Butter or margarine: Substitute with coconut oil or vegetable oil for a dairy-free option.
- Milk: Use almond milk, soy milk, or any other plant-based milk if you prefer.
Preparation Section
Step 1: Blend the Wet Ingredients
In a blender, place the eggs, milk, butter, and sugar. Blend on medium speed until the mixture is smooth and creamy. This step is crucial as it helps to emulsify the ingredients, creating a light and airy texture for your cake.
Step 2: Mix the Dry Ingredients
In a large mixing bowl, sift the wheat flour to remove any lumps. Pour the blended wet ingredients over the flour and mix well using a wire whisk. The batter should be smooth and free of lumps. The sifting step ensures a more refined and even texture in your cake.
Step 3: Add the Baking Powder
Add the baking powder to the batter and mix thoroughly. Baking powder is the key to a light and fluffy cake, so make sure it’s evenly distributed throughout the batter.
Step 4: Layer the Batter and Guava Paste
Pour half of the batter into a greased and floured 20 cm (8-inch) round pan. Place small cubes of firm guava paste on top of the batter, then pour the remaining batter over the guava paste. Do not press the cubes into the batter; they will sink naturally as the cake bakes.
Step 5: Bake to Perfection
Bake the cake in a preheated oven at 180°C (350°F) for about 40 minutes or until a toothpick inserted into the center comes out clean. The cake should be golden brown and spring back when gently pressed.
Step 6: Prepare the Guava Syrup
While the cake is baking, start preparing the guava syrup. Chop the guava paste and transfer it to a pan. Add 1/2 cup of water and cook over medium heat, stirring occasionally, until the guava paste is completely melted. Set aside to cool slightly before spreading over the cake.
Step 7: Spread the Syrup
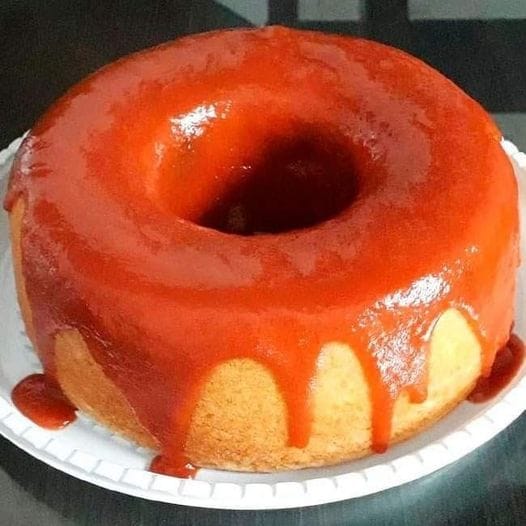
Once the cake is done, let it cool in the pan for a few minutes. Then, invert it onto a serving plate and spread the warm guava syrup over the top. The syrup should be thick but pourable, adding a glossy, delicious finish to your cake.
Chef’s Tip
To enhance the flavor and texture, you can add a pinch of salt to the batter. This simple trick brings out the sweetness of the guava and balances the flavors perfectly.
Timing
Prep Time: 15 minutes
Cooking Time: 40 minutes
Total Time: 55 minutes
Chef’s Secret
For an extra burst of flavor, you can add a splash of vanilla extract to the batter. This subtle addition complements the guava and adds a depth of flavor that elevates the entire cake.
Extra Info
Did you know that guava is not only delicious but also packed with nutrients? It’s a great source of vitamin C, which is essential for immune system health. Incorporating guava into your diet, like in this Guava Bliss Cake, can be a tasty way to boost your nutrient intake.
Necessary Equipment
- Blender
- Large mixing bowl
- Wire whisk
- 8-inch (20 cm) round cake pan
- Spatula
- Kitchen scale (optional)
Storage
To keep your Guava Bliss Cake fresh, store it in an airtight container at room temperature for up to 3 days. If you need to store it longer, you can refrigerate it for up to 5 days. Just make sure to let it come to room temperature before serving to enjoy the best texture and flavor. For even longer storage, you can freeze the cake for up to 3 months. Wrap it tightly in plastic wrap and aluminum foil, and thaw it in the refrigerator overnight before serving.
Tips and Advice
- Make sure to use firm guava paste for the best results. Soft or runny paste can make the cake too moist.
- Sift the wheat flour to ensure a smooth and lump-free batter.
- Let the cake cool slightly before spreading the syrup to prevent it from soaking into the cake too much.
Presentation Tips
- Garnish the cake with a sprinkle of powdered sugar and a few slices of fresh guava for a beautiful and appetizing presentation.
- Use a decorative cake stand to elevate the visual appeal of your Guava Bliss Cake.
- Serve each slice with a dollop of whipped cream or a scoop of vanilla ice cream for an extra indulgent treat.
Healthier Alternative Recipes
If you’re looking for ways to make your Guava Bliss Cake a bit healthier, here are some variations you might enjoy:
- Whole Wheat Guava Cake: Substitute the wheat flour with whole wheat flour for added fiber and nutrients.
- Reduced Sugar Version: Reduce the sugar by half and add a natural sweetener like honey or maple syrup.
- Low-Fat Guava Cake: Use applesauce or mashed bananas instead of butter for a lower-fat option.
- Dairy-Free Version: Replace the milk and butter with plant-based alternatives like almond milk and coconut oil.
- Vegan Guava Cake: Use vegan substitutes for eggs, such as mashed bananas or chia seeds, and choose plant-based milk and butter.
- Gluten-Free Guava Cake: Use a gluten-free flour blend to make the cake suitable for those with gluten sensitivities.
Common Mistakes to Avoid
Mistake 1: Overmixing the Batter
Overmixing the batter can result in a tough, dense cake. Mix the ingredients until just combined to keep the cake light and fluffy. A few lumps are okay and will usually disappear during baking.
Mistake 2: Not Preheating the Oven
Make sure to preheat your oven before baking. Placing the cake in a cold oven can lead to uneven baking and a less-than-perfect texture. Always preheat the oven to the specified temperature to ensure the best results.
Mistake 3: Using Room Temperature Butter
Using room temperature butter is crucial for a smooth and creamy batter. Cold butter won’t blend well with the other ingredients, resulting in a lumpy batter. Take the butter out of the refrigerator about 30 minutes before you start baking.
Mistake 4: Skipping the Sifting Step
Sifting the wheat flour helps to aerate it and remove any lumps, leading to a smoother and lighter cake. Don’t skip this step; it makes a big difference in the final texture of your Guava Bliss Cake.
Mistake 5: Not Letting the Cake Cool Before Adding the Syrup
Adding the syrup to a hot cake can make it overly moist and soggy. Let the cake cool for a few minutes before drizzling the syrup over it. This allows the syrup to stay on top and create a beautiful, glossy finish.
FAQ
Can I use frozen guava paste for this recipe?
Yes, you can use frozen guava paste, but make sure it’s fully thawed and at room temperature before using it in the recipe. This will ensure it blends smoothly with the other ingredients.
Is it possible to make this cake without eggs?
Absolutely! You can use egg substitutes like applesauce, mashed bananas, or chia seeds mixed with water. This will help bind the ingredients and create a similar texture to a traditional cake.
Can I use a different type of fruit paste?
Yes, you can experiment with other fruit pastes like mango or passion fruit. Just make sure the paste is firm and has a similar consistency to guava paste for the best results.
How do I store leftover guava paste?
Store leftover guava paste in an airtight container in the refrigerator. It should last for up to 2 weeks. If you need to store it longer, you can freeze it for up to 3 months.
What can I substitute for milk in this recipe?
You can use any plant-based milk like almond milk, soy milk, or oat milk. Just make sure it’s unsweetened to avoid making the cake too sweet.
Can I make this cake in advance?
Yes, you can make the cake a day in advance and store it in an airtight container at room temperature. Add the syrup just before serving for the best texture and flavor.
Is this cake suitable for people with dietary restrictions?
This cake can be adapted to suit various dietary restrictions. For example, you can use gluten-free flour, plant-based milk, and egg substitutes to make it suitable for those with allergies or specific dietary needs.
Can I use a different type of pan?
Yes, you can use a different type of pan, but make sure it’s the same size and shape. A 9×13-inch rectangular pan or a bundt pan can work well. Adjust the baking time accordingly and check for doneness with a toothpick.
How do I know when the cake is done?
The cake is done when a toothpick inserted into the center comes out clean, and the top is golden brown. Additionally, the cake should spring back when gently pressed with your finger.
Can I add other flavors to the cake?
Of course! You can add complementary flavors like lemon zest, coconut, or even a touch of cinnamon to the batter. These additions can enhance the overall flavor profile of the Guava Bliss Cake.
If you’re looking for more delightful cake recipes, check out our Tropical Pineapple Cake, Banana Cream Cake, Oreo Birthday Cake, and Prune Topped Bolu. Each one is a unique and delicious treat that your family and friends will love.
Remember, enjoying a balanced diet is key to maintaining good gut health. For more information on how to incorporate nutritious foods into your diet, visit Healthline.
I hope you enjoy making and savoring the Guava Bliss Cake. It’s a true delight that brings a taste of the tropics to your kitchen. Happy baking!
Equipment
- Blender
- Large mixing bowl
- Wire whisk
- 8-inch (20 cm) round cake pan
- Spatula
- Kitchen scale (optional)
Ingredients
- 2.5 cups wheat flour
- 1.5 cups sugar
- 3 eggs
- 0.5 cups butter or margarine
- 1 cup milk
- 1 tbsp baking powder
- q.s. firm guava paste for the cake and syrup
Instructions
- In a blender, place the eggs, milk, butter, and sugar. Blend on medium speed until smooth and creamy.
- In a large mixing bowl, sift the wheat flour to remove lumps. Pour the blended wet ingredients over the flour and mix well with a wire whisk.
- Add the baking powder to the batter and mix thoroughly.
- Pour half of the batter into a greased and floured 20 cm (8-inch) round pan. Place small cubes of firm guava paste on top, then pour the remaining batter over it.
- Bake the cake in a preheated oven at 180°C (350°F) for about 40 minutes or until a toothpick comes out clean.
- While baking, prepare the guava syrup by chopping the guava paste, adding it to a pan with 1/2 cup of water, and cooking until melted.
- Once the cake is done, let it cool. Invert on a serving plate and spread warm guava syrup over the top.
Notes
Nutrition

Hi, I’m Olivia Parker, the founder of BakingSecret.com and a lifelong lover of all things sweet and homemade. I grew up in a small town in Oregon, where the smell of fresh cookies in my family’s kitchen sparked my passion for baking. Over the years, I turned that passion into a mission: to help home bakers feel confident, inspired, and creative.
After studying food science and working in several artisan bakeries across the U.S., I decided to create a space where everyone from beginners to seasoned bakers can find reliable recipes, expert tips, and a warm, welcoming community. BakingSecret.com is my way of sharing the magic of baking with the world. When I’m not testing new recipes, you’ll find me exploring farmers’ markets, collecting vintage cookbooks, or perfecting my sourdough technique.