
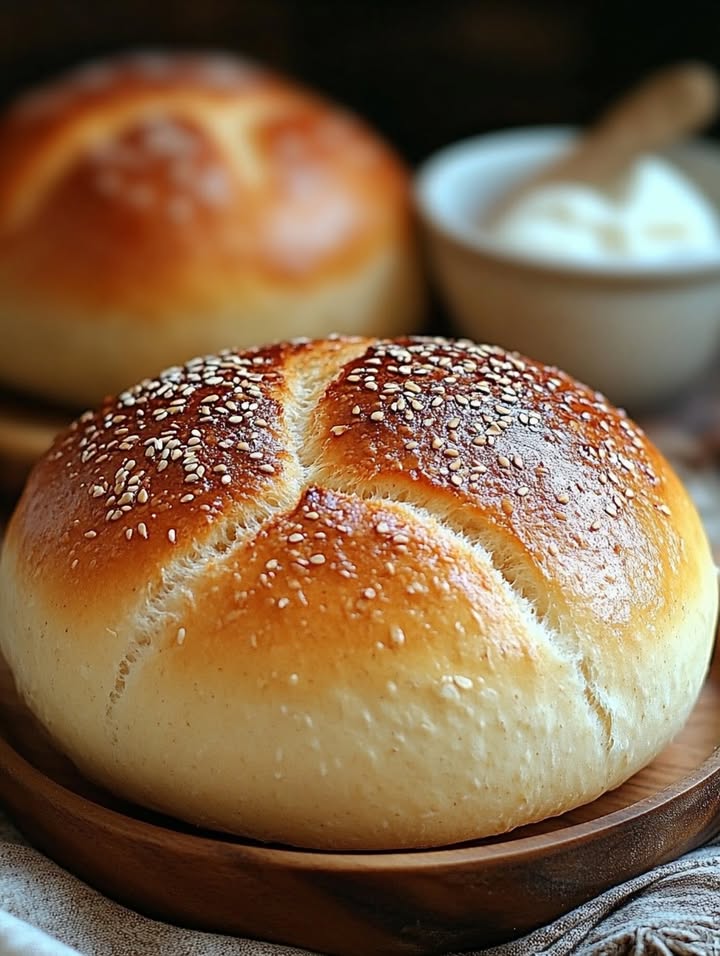
Rediscovering Grandma’s Vinegar Bread: A Family Treasure
There’s something magical about the aroma of freshly baked bread, isn’t there? It can transport you right back to your grandmother’s cozy kitchen. Today, I’m thrilled to share with you a cherished family recipe—Grandma’s Vinegar Bread. This bread is not just any loaf; it’s a slice of history and a burst of flavor that will make your taste buds sing.
A Little Bit of History Behind Grandma’s Vinegar Bread
My grandmother, a woman full of life and wisdom, used to tell me stories while we baked together. She said this bread recipe was passed down through generations in our family. The secret ingredient, vinegar, might seem unusual, but it helps the dough rise beautifully and gives the bread a slight tang. It’s a simple yet ingenious addition that makes this bread stand out.
Why You’ll Fall in Love with Grandma’s Vinegar Bread
This bread is a perfect blend of simplicity and robust flavor. The hint of tang from the vinegar adds a unique twist that elevates the overall taste. It’s also incredibly easy to make, making it a great choice for both beginners and seasoned bakers. Plus, the comforting aroma and the warm, crusty texture will make you feel like you’re wrapped in a cozy hug.
Perfect Occasions to Bake Grandma’s Vinegar Bread
Whether it’s a family Sunday brunch, a casual picnic, or a heartfelt gift for a friend, this bread fits right in. It’s the kind of bread that brings people together, sparking conversations and creating memories. Imagine serving it with some homemade jam at a holiday gathering or slicing it up for a weekend breakfast—it’s always a hit.
Ingredients for Grandma’s Vinegar Bread
- 3 cups all-purpose flour
- 1 packet (2 1/4 tsp) active dry yeast
- 1 cup warm water
- 1 tbsp sugar
- 1 tbsp vinegar
- 1 tsp salt
- 2 tbsp olive oil
Substitution Options
- Flour: You can use whole wheat flour for a healthier twist, but keep in mind it will have a denser texture.
- Vinegar: If you don’t have white vinegar, apple cider vinegar works well too.
- Olive Oil: Substitute with any neutral-flavored oil like canola or vegetable oil.
Preparation: Step-by-Step Guide to Grandma’s Vinegar Bread
Step 1: Activate the Yeast
In a small bowl, mix the sugar and yeast with warm water. Let it sit for 5-10 minutes until it becomes bubbly and foamy. This step is crucial as it activates the yeast, which will help your bread rise perfectly.
Step 2: Combine Dry Ingredients
In a large mixing bowl, combine the flour and salt. The flour provides the structure, and the salt enhances the flavor. Make sure to whisk them together well to distribute the salt evenly.
Step 3: Mix in the Wet Ingredients
Add the yeast mixture, vinegar, and olive oil to the flour and salt. Stir until a rough dough forms. The vinegar and olive oil add a unique flavor and help with the texture. The dough should start to come together and form a ball.
Step 4: Knead the Dough
Turn the dough out onto a lightly floured surface. Knead for about 8-10 minutes, until the dough is smooth and elastic. Kneading helps develop the gluten, which gives the bread its chewy texture. The dough should be soft and slightly tacky but not sticky.
Step 5: Let the Dough Rise
Place the dough in a greased bowl, cover it with a clean kitchen towel, and let it rise in a warm, draft-free place for 1-1.5 hours, or until it doubles in size. This step allows the yeast to do its magic and helps the bread become light and airy.
Step 6: Shape and Bake
Punch down the risen dough and shape it into a loaf. Place it in a greased loaf pan. Preheat your oven to 375°F (190°C). Bake the bread for 25-30 minutes, or until it’s golden brown and sounds hollow when tapped on the bottom. The smell of baking bread will fill your kitchen, and you’ll know it’s done when it’s golden and crispy on top.
Pro Tip: Brush the top of the bread with a little bit of olive oil before baking to get a nice, shiny crust.
Timing Breakdown for Grandma’s Vinegar Bread
- Prep Time: 10 minutes
- Cooking Time: 25-30 minutes
- Rising Time: 1-1.5 hours
- Total Time: About 2.5-3 hours
Chef’s Secret: The Magic of Vinegar
The real secret to this bread is the vinegar. It not only adds a subtle tang but also helps the dough rise by creating a more acidic environment, which the yeast loves. The result is a perfectly risen, flavorful loaf that keeps everyone coming back for more.
Extra Info: A Fun Fact About Vinegar
Did you know that vinegar has been used in baking for centuries? It’s known for its preservative properties and ability to enhance flavors. Adding a touch of vinegar to your bread is a little trick that can make a big difference in the final product.
Necessary Equipment for Grandma’s Vinegar Bread
- Mixing bowls
- Measuring cups and spoons
- Loaf pan
- Kitchen towel
- Whisk
- Pastry brush
Storage Tips for Grandma’s Vinegar Bread
To keep your bread fresh, store it in an airtight container or a resealable plastic bag at room temperature for up to 3 days. If you want to extend its shelf life, you can wrap it tightly in plastic wrap and then in aluminum foil, and store it in the fridge for up to a week. For long-term storage, slice the bread, place the slices in a single layer in a freezer bag, and freeze for up to 3 months. When you’re ready to use, simply thaw the slices at room temperature or reheat them in the oven for a few minutes.
Tips and Advice for Perfect Grandma’s Vinegar Bread
- Use lukewarm water to activate the yeast. Too hot or too cold water can kill the yeast or slow down the rising process.
- Make sure your kneading surface is well-floured to prevent the dough from sticking.
- Let the dough rise in a warm, draft-free place. An unheated oven with the light on is a great spot.
Presentation Tips for Grandma’s Vinegar Bread
- Slice the bread and serve it with a pat of butter, a sprinkle of sea salt, and a drizzle of honey.
- Create a beautiful charcuterie board with slices of this bread, assorted cheeses, dried fruits, and nuts.
- Toast the bread and top it with avocado, smoked salmon, and a dollop of cream cheese for a delicious and hearty breakfast.
Healthier Alternative Recipes
- Whole Wheat Version: Replace half of the all-purpose flour with whole wheat flour for a more nutritious option. The bread will be denser but packed with fiber and nutrients.
- Herb-Infused Bread: Add a tablespoon of your favorite dried herbs, like rosemary or thyme, to the dough for a savory twist. This version is perfect for serving with soup or stews.
- Seedy Bread: Mix in a quarter cup of sunflower seeds, pumpkin seeds, and sesame seeds for a crunchy, nutty flavor. This bread is especially delightful for breakfast or as a snack.
- Oatmeal Bread: Add a half cup of rolled oats to the dough for a hearty, rustic texture. This bread is perfect for a wholesome breakfast or a midday snack.
- Garlic and Cheese Bread: Fold in a half cup of shredded cheddar cheese and a tablespoon of garlic powder for a cheesy, garlicky delight. This version is a crowd-pleaser for any occasion. Check out our Garlic Cheese Bombs for another cheesy treat!
- Lemon Zest Bread: Add a tablespoon of lemon zest to the dough for a bright, citrusy flavor. This bread is perfect for a light, refreshing treat. If you love lemon, you might also enjoy our Lemon Cream Cheese Bread.
Common Mistakes to Avoid
Mistake 1: Using Water That’s Too Hot or Too Cold
If the water is too hot, it can kill the yeast, and if it’s too cold, the yeast won’t activate properly. Use lukewarm water that feels warm but not hot to the touch. This ensures the yeast is happy and ready to help your bread rise.
Mistake 2: Not Kneading Enough
Under-kneading can result in a dense, tough bread. Make sure to knead the dough for at least 8-10 minutes, until it’s smooth and elastic. This process develops the gluten, which gives the bread its chewy texture.
Mistake 3: Over-Rising the Dough
Over-rising can cause the dough to collapse and result in a dense, heavy loaf. Let the dough rise until it’s doubled in size, but don’t let it go beyond that. Keep an eye on it, especially in a very warm environment.
Mistake 4: Opening the Oven Door Too Often
Opening the oven door frequently can cause the bread to lose heat and not bake evenly. Try to resist the urge to peek and wait until the bread is fully baked. If you need to check on it, use the oven light instead.
Mistake 5: Not Letting the Bread Cool Before Slicing
Slicing the bread too soon can cause it to become gummy and squishy. Let it cool completely before slicing. This allows the steam to escape and the bread to set, giving you perfect, even slices.
FAQs About Grandma’s Vinegar Bread
What is the purpose of adding vinegar to the bread?
The vinegar in this bread serves two main purposes. First, it creates a more acidic environment, which helps the yeast ferment and rise, resulting in a lighter, fluffier loaf. Second, it adds a subtle tang that enhances the overall flavor of the bread. The combination of these factors makes Grandma’s Vinegar Bread unique and delicious.
Can I use other types of vinegar in this recipe?
Yes, you can use other types of vinegar, such as apple cider vinegar or white wine vinegar, if you don’t have white vinegar. The flavor profile will be slightly different, but it will still work well. Just keep in mind that stronger vinegars may give the bread a more pronounced tang, so start with a smaller amount and adjust to taste.
How can I make this bread without yeast?
If you don’t have yeast, you can try using a no-yeast alternative like a quick-rise method with baking powder. However, this will result in a different texture and flavor. For a true yeast bread, it’s best to use yeast, but if you’re in a pinch, you can experiment with a quick bread recipe.
What is the best way to store leftover bread?
To store leftover bread, wrap it in plastic wrap or place it in an airtight container. Store it at room temperature for up to 3 days. For longer storage, you can refrigerate it for up to a week or freeze it for up to 3 months. Just make sure to let it cool completely before storing to prevent moisture buildup.
Can I use this recipe to make rolls instead of a loaf?
Absolutely! You can use this recipe to make rolls. After the first rise, divide the dough into equal-sized balls and place them in a greased baking dish. Let them rise for another 30-45 minutes, then bake at 375°F (190°C) for about 15-20 minutes, or until golden brown. Serve them warm with a pat of butter or a drizzle of honey.
Is this bread suitable for those with dietary restrictions?
This bread contains wheat, so it is not suitable for those with celiac disease or gluten intolerance. However, you can make a gluten-free version by substituting the all-purpose flour with a gluten-free flour blend. Just be sure to check the labels of other ingredients to ensure they are gluten-free as well.
Can I add other ingredients to the dough for more flavor?
Definitely! Feel free to add other ingredients to the dough to customize the flavor. Some popular additions include chopped herbs like rosemary or thyme, grated cheese, or even diced dried fruits and nuts. Just fold them into the dough after the first rise for a delicious variation.
Why is my bread not rising properly?
If your bread is not rising properly, there are a few potential reasons. First, make sure your yeast is active and not expired. Also, check that the water you use to activate the yeast is the right temperature (lukewarm). Finally, ensure that the dough is placed in a warm, draft-free environment to rise. If the room is too cold, the yeast may not activate as well.
Can I make this bread without kneading?
While traditional kneading is recommended for the best texture, you can try a no-knead method. Simply mix the ingredients, let the dough rest for a longer period (up to 18-24 hours), and then shape and bake. This method results in a different, more rustic texture, but it can still be delicious.
What is the best way to reheat leftover bread?
To reheat leftover bread, preheat your oven to 350°F (175°C). Wrap the bread in aluminum foil and place it in the oven for about 10-15 minutes, or until it’s warm and toasted. Alternatively, you can slice the bread and toast it in a toaster or under the broiler for a quick and easy option.
Conclusion
Grandma’s Vinegar Bread is a timeless recipe that brings heartwarming flavors and memories to the table. Whether you’re baking for a special occasion or just craving a slice of comfort, this bread is sure to satisfy. Don’t forget to explore other delightful recipes in our Bread Recipes section for more inspiration. Happy baking, and may your kitchen always be filled with the wonderful aroma of freshly baked bread!
Equipment
- Mixing bowls
- Measuring cups and spoons
- Loaf pan
- Kitchen towel
- Whisk
- Pastry brush
Ingredients
- 3 cups all-purpose flour
- 1 packet active dry yeast (2 1/4 tsp)
- 1 cup warm water
- 1 tbsp sugar
- 1 tbsp vinegar
- 1 tsp salt
- 2 tbsp olive oil
Instructions
- In a small bowl, mix the sugar and yeast with warm water and let it sit for 5-10 minutes until bubbly.
- In a large mixing bowl, combine the flour and salt, whisking them together well.
- Add the yeast mixture, vinegar, and olive oil to the flour and salt, stirring until a rough dough forms.
- Turn the dough onto a floured surface and knead for about 8-10 minutes until smooth and elastic.
- Place the dough in a greased bowl, cover with a kitchen towel, and let it rise in a warm place for 1-1.5 hours or until doubled in size.
- Punch down the risen dough and shape it into a loaf, placing it in a greased loaf pan.
- Preheat the oven to 375°F (190°C) and bake the bread for 25-30 minutes until golden brown and sounds hollow when tapped.
Notes
Nutrition

Hi, I’m Olivia Parker, the founder of BakingSecret.com and a lifelong lover of all things sweet and homemade. I grew up in a small town in Oregon, where the smell of fresh cookies in my family’s kitchen sparked my passion for baking. Over the years, I turned that passion into a mission: to help home bakers feel confident, inspired, and creative.
After studying food science and working in several artisan bakeries across the U.S., I decided to create a space where everyone from beginners to seasoned bakers can find reliable recipes, expert tips, and a warm, welcoming community. BakingSecret.com is my way of sharing the magic of baking with the world. When I’m not testing new recipes, you’ll find me exploring farmers’ markets, collecting vintage cookbooks, or perfecting my sourdough technique.