
Why I Fell in Love with Ombre Cakes
I still remember the first time I saw an ombre cake at my cousin’s wedding. The cake stood tall on the dessert table, showing off these gorgeous layers that faded from deep rose at the bottom to the softest blush pink at the top. I couldn’t stop staring at it. Everyone at the party kept asking the same question: how did the baker create such a perfect color blend? That moment changed everything for me. I went home that night determined to master this beautiful technique myself.
Welcome to my blog! Today, I’m super excited to share with you all about the ombre cake, a beautiful and trendy dessert that’s perfect for any special occasion. Whether you’re a beginner or an experienced baker, this guide will help you create a stunning ombre cake that will impress your friends and family. Trust me, it’s way easier than it looks.
What is an Ombre Cake?
An ombre cake is a multi-layered cake where each layer transitions smoothly from one color to another, creating a gradient effect. It’s a visually striking and elegant way to add a touch of sophistication to your baking. The word “ombre” actually comes from French and means “shaded” or “shadowed,” which perfectly describes how the colors flow together.
Think of it like a sunset captured in cake form. Each layer builds on the previous one, creating depth and visual interest that makes people stop and admire your work before they even take a bite. The beauty of an ombre cake is that you can customize it for any event or color scheme you want.
You can make an ombre cake pink for a baby shower, an ombre cake blue for an ocean-themed party, or even an ombre cake purple for someone who loves that rich, royal look. Some bakers even create a rainbow ombre cake that transitions through multiple colors. The possibilities are truly endless.
Understanding the Ombre Cake Technique
The ombre cake technique involves blending colors in a way that looks natural and smooth. You’re not creating harsh lines between colors. Instead, you want each shade to melt into the next one. This can be achieved with both the cake layers and the frosting, though most bakers focus on the cake layers for that dramatic reveal when you slice into it.
I learned this technique through lots of trial and error. My first attempt at an ombre cake red for Valentine’s Day looked more like a zebra cake than a gradient. The colors were too different from each other, and I didn’t make enough layers. But that failure taught me everything I needed to know about getting it right.
The key is patience and planning. You need to think about your color progression before you start mixing any batter. Are you going light to dark? Dark to light? How many layers will you need? These decisions matter more than you might think.
How to Make an Ombre Effect
To create the ombre effect, you’ll need to mix different shades of food coloring into your batter or frosting. Start with a base color and gradually add more food coloring to create deeper shades. This is where the magic happens, and it’s actually pretty simple once you understand the process.
Here’s my tried-and-true method for creating perfect color gradients:
- Prepare your cake batter according to your favorite recipe
- Divide the batter into separate bowls (usually 4-6 bowls depending on how many layers you want)
- Leave one bowl completely white or the lightest shade
- Add a tiny drop of food coloring to the next bowl and mix well
- Keep adding more color to each subsequent bowl
- The last bowl should have the most intense color
When I make a chocolate ombre cake, I use the same technique but with cocoa powder instead of food coloring. I add different amounts of cocoa to each layer, creating a gradient from light chocolate to deep, rich dark chocolate. It tastes amazing and looks incredibly sophisticated.
One important tip: gel food coloring works much better than liquid food coloring for this technique. Liquid coloring can make your batter too thin and won’t give you those vibrant, saturated colors you want. I learned this the hard way after my first ombre cake blue turned out looking more like a pale sky blue instead of the ocean blue I wanted.
Essential Tools and Ingredients for Making an Ombre Cake
You don’t need fancy equipment to make a stunning ombre cake, but having the right tools makes the process so much smoother. Here’s what I always keep on hand when I’m planning to bake one:
Basic Equipment:
- Multiple cake pans (at least 4-6 of the same size)
- Mixing bowls (one for each layer)
- Offset spatula for frosting
- Cake turntable (makes frosting easier but not required)
- Toothpicks for testing doneness
- Cooling rack
Key Ingredients:
- Your favorite cake recipe (I recommend a simple vanilla or white cake for your first attempt)
- Gel food coloring in your chosen color
- Buttercream frosting (this works best for stacking and decorating)
- Any additional decorations you want to add
When you’re learning how to make ombre cake batter, I recommend starting with just 4 layers. This gives you a nice gradient without overwhelming you with too many bowls and pans. Once you get comfortable, you can add more layers for an even smoother color transition.
For mixing colors, remember that what colors make ombre work is all about having enough variation between shades. If your colors are too similar, the effect won’t show up well when the cake is assembled. But if they’re too different, it looks choppy instead of smooth.
I always do a test run with my food coloring before I add it to the actual batter. I put a tiny bit of white frosting on a plate and add drops of color until I get the shade I want. Then I know exactly how many drops to add to each bowl of batter. This simple step has saved me from so many color disasters.
The beauty of the ombre cake recipe is that you can use any cake base you love. Yellow cake, white cake, chocolate cake, red velvet—they all work. Just make sure your base is light enough to show the colors you’re adding, especially if you’re going for pastels or lighter shades.

Popular Ombre Cake Color Combinations
Now that you’ve got your tools and technique down, let’s talk about the fun part—choosing your colors! This is where your ombre cake really becomes your own creation, and honestly, it’s my favorite decision to make when planning a cake.
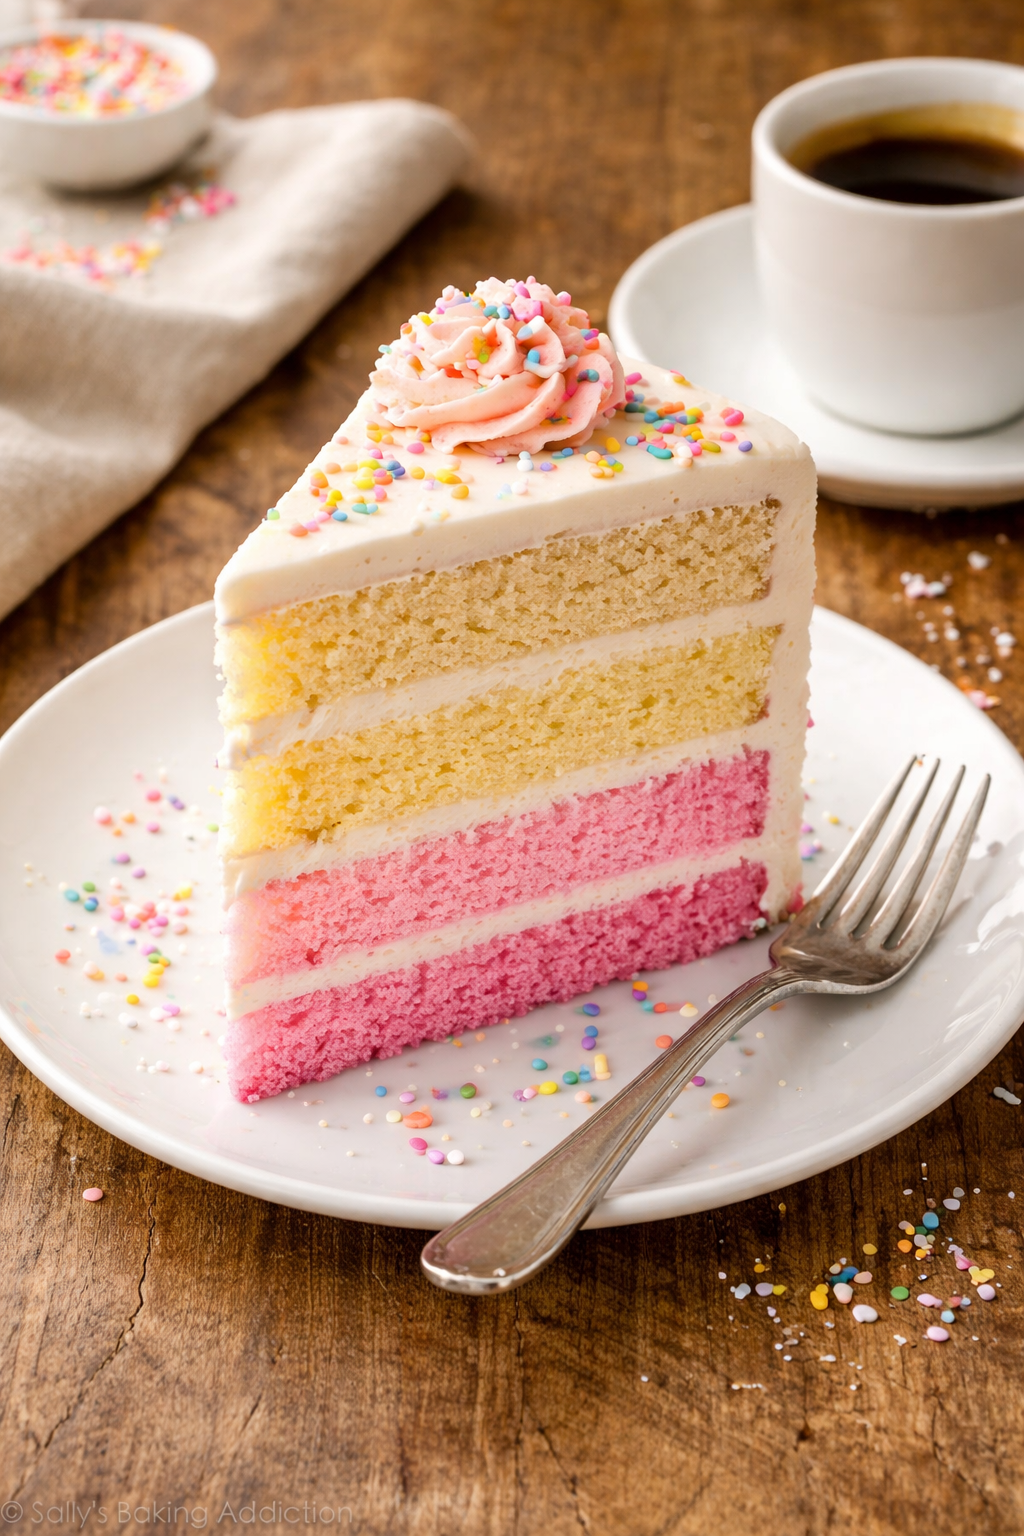
The ombre cake pink is hands down the most popular choice I see at celebrations. There’s something so romantic and dreamy about watching pink layers fade from deep magenta at the bottom to barely-there blush at the top. I made one for my best friend’s bridal shower last spring, and she literally cried when we cut into it. Pink works beautifully for weddings, baby showers (especially if you know it’s a girl), Valentine’s Day parties, or even just because you love pink. The thing about pink is that it photographs amazingly well, which is why you see it all over Instagram and Pinterest. I usually start with a deep rose color and work my way up to almost white, creating about five distinct shades in between.
For something cooler and more calming, the ombre cake blue never disappoints. I’ve done everything from navy to powder blue for ocean-themed parties, and the effect is stunning. Blue ombre cakes are perfect for boy baby showers, beach weddings, or summer birthdays. My nephew wanted a shark-themed party for his seventh birthday, and the blue ombre cake was the centerpiece. We went from dark teal at the bottom to sky blue at the top, and all the kids thought it looked like the ocean. Pro tip: blue can be tricky because too much food coloring can make your cake taste slightly bitter, so go easy and build up the color gradually. If you’re looking for other creative cake ideas for kids’ parties, you might want to check out this cookies n cream ice cream cake that’s always a hit.
When you want something that screams elegance and sophistication, reach for the ombre cake purple. Purple has this regal quality that makes any celebration feel more special. I love using purple for milestone birthdays, anniversary parties, or fancy dinner parties. The gradient from deep plum to lavender is absolutely gorgeous, and it pairs wonderfully with gold decorations if you want to go extra fancy. Last year, I made a purple ombre cake for my mom’s 60th birthday, and she still talks about it. The deep purple reminded her of her favorite flowers—irises—and the whole thing just felt luxurious.
Here’s the thing about getting adventurous: the rainbow ombre cake is where you can really let loose and have fun. Instead of sticking to shades of one color, you transition through the entire rainbow. Red at the bottom, then orange, yellow, green, blue, and purple at the top. Or you can go in reverse. It’s like creating edible art. Rainbow cakes are perfect for pride celebrations, kids’ birthday parties, or really any time you want to make a statement. Fair warning though—rainbow cakes require more planning because you’re working with six or seven different colors instead of just variations of one. My first rainbow attempt took me almost an entire day because I kept second-guessing my color choices, but it was absolutely worth it when I saw everyone’s faces light up.
And then there’s my personal favorite variation: the chocolate ombre cake. This one’s different because you’re not using food coloring at all. Instead, you create the gradient using different amounts of cocoa powder in each layer. Start with a vanilla or light chocolate base for the top layer, then gradually increase the cocoa powder as you go down. By the time you get to the bottom layer, you’re working with a rich, dark chocolate that’s almost fudgy. It tastes incredible and looks sophisticated without being overly showy. For serious chocolate lovers, you could even combine this concept with something decadent like these hot cakes with molten chocolate for a truly indulgent dessert experience.
Funny enough, I’ve also experimented with an ombre cake red for Valentine’s Day and Christmas parties. Red can be challenging because it often requires a lot of food coloring to get vibrant shades, and too much can affect the taste. I’ve found that starting with a red velvet cake base helps because you already have that reddish tint to work with. Then you just adjust the intensity from there.
Ombre Cake Recipe and Preparation
Alright, let’s get into the actual baking process. I’m going to walk you through my go-to ombre cake recipe that works every single time. This is a versatile vanilla base that takes color beautifully and tastes delicious no matter what shade you’re working with.
First things first: you’ll want to gather everything before you start mixing. Trust me on this. I once got halfway through dividing my batter and realized I was out of cake pans, and the whole thing turned into a disaster. So make sure you have at least four to six cake pans ready to go, all the same size. I prefer 8-inch rounds because they stack nicely without being too heavy.
When you’re figuring out how to make ombre cake batter, the process is pretty straightforward once you’ve got your basic cake recipe mixed. I use a simple white cake recipe as my base—nothing fancy, just butter, sugar, eggs, flour, baking powder, milk, and vanilla. You want something that bakes up light and fluffy because dense cakes don’t showcase the color gradient as well.
Here’s where the magic happens: after your batter is completely mixed and smooth, you divide it into separate bowls. For a four-layer cake, I use four bowls. For six layers, six bowls. You get the idea. Now, this is important—divide it as evenly as possible. I actually weigh my bowls on a kitchen scale to make sure each one has the same amount of batter. Otherwise, you’ll end up with some layers thicker than others, and it looks wonky when you stack them.
Start with your lightest shade in the first bowl. Sometimes I leave it completely white, sometimes I add just the tiniest hint of color. Then move to the second bowl and add a few drops of gel food coloring. Mix it thoroughly—and I mean really thoroughly—until there are absolutely no streaks. The color needs to be completely uniform. For the third bowl, add more drops. For the fourth, even more. You’re gradually building intensity with each bowl.
By the way, if you’ve ever wondered what colors make ombre work so well, it’s all about having enough distinct shades that people can see the transition, but not so many that the colors clash or look muddy. I aim for each layer to be noticeably different from the one next to it, but not dramatically different. Think of it like paint swatches at the hardware store where each shade flows naturally into the next.
Once all your batters are colored, pour each one into a prepared pan. I always grease and flour my pans, even if they’re nonstick, because there’s nothing worse than having a beautiful colored layer stick and tear when you’re trying to remove it. Some people use parchment paper circles at the bottom of each pan, which works great too.
Bake your layers according to your recipe’s instructions, but keep a close eye on them. Different amounts of food coloring can sometimes affect baking time slightly, though honestly, I’ve never noticed a huge difference. Just use the toothpick test—when it comes out clean, they’re done. Let them cool completely in the pans for about ten minutes, then turn them out onto cooling racks. This part requires patience. I know you’re excited to see your gradient, but warm cake layers will fall apart when you try to stack them.
While your layers are cooling, this is a great time to make your frosting. I always use buttercream for ombre cakes because it’s sturdy enough to hold the layers together and easy to work with. Some people get creative with fillings between layers—fruit preserves, chocolate ganache, or even variations like the filling in this poke cake with condensed milk for extra moisture and sweetness.
The assembly process is where you finally get to see your gradient come to life. I start with the darkest layer on the bottom and work my way up to the lightest on top. Some people do it in reverse, and honestly, both ways look great. It just depends on what visual effect you’re going for. Spread a layer of frosting between each cake layer, making sure it’s level so your cake doesn’t lean like the Tower of Pisa. I learned this lesson the hard way at a family gathering where my beautiful purple ombre cake slowly started tilting to one side throughout the party.
Once all your layers are stacked, do what’s called a crumb coat—a thin layer of frosting all over the outside that seals in any crumbs. Let that set in the fridge for about twenty minutes, then add your final coat of frosting. You can keep the outside simple with white frosting to really make that interior gradient pop when you slice it, or you can create an ombre effect on the outside too. For unique flavor combinations that might inspire your next creation, you might enjoy reading about this durian cake that takes a bold approach to cake flavors.
The best part about this whole process? When you finally cut into your cake and reveal those gorgeous layers. Every single time, people gasp. Every time. And that moment makes all the effort totally worth it.
Advanced Ombre Cake Techniques
Once you’ve mastered the basic ombre cake technique, it’s time to level up your skills. I remember thinking I had it all figured out after my first successful four-layer cake, and then I attended this fancy wedding where the cake was literally two feet tall with the smoothest gradient I’d ever seen. I went home that night completely inspired to push my boundaries and try something more ambitious.
Let me tell you about creating a tall ombre cake, because this is where things get really impressive. When people ask me how to ombre cream tall cake, I always tell them it’s all about stability and patience. You’re essentially building a tower, and if your foundation isn’t solid, the whole thing can become a leaning disaster. I learned this when my first attempt at a six-layer tall cake started sliding sideways about an hour before my sister’s graduation party. Talk about a stressful afternoon.
For a truly tall ombre cake, you want at least six to eight layers. This gives you enough height to make a statement while allowing for a smooth color transition that really shows off your gradient. The key is using dowels or cake supports in the lower layers to prevent the weight of the upper layers from crushing everything below. I push about four wooden dowels down through the cake layers, spacing them evenly, and cutting them flush with the top of the cake before adding the next layer. It sounds complicated, but it literally takes two minutes and saves you from potential cake catastrophe.
The frosting technique for tall cakes is where your turntable becomes your best friend. I coat each layer as I stack it, making sure the frosting between layers is about a quarter-inch thick—thick enough to add flavor and moisture, but not so thick that it squishes out the sides and makes your cake wobbly. After all layers are stacked, I do a generous crumb coat and pop the whole thing in the fridge for at least thirty minutes. Cold cake is infinitely easier to frost smoothly than room temperature cake.
For the final frosting, I use a bench scraper held at a 45-degree angle against the cake while slowly spinning the turntable. The motion should be smooth and continuous. Don’t stop and start, or you’ll get ridges. My first few attempts looked like the cake had speed bumps all around it because I kept stopping to check my work. Just trust the process and keep that turntable spinning steadily.
Here’s something cool I started doing last year: creating an ombre effect on the outside frosting too. You can make the exterior gradient match the interior, or do something completely different. I once made a rainbow ombre cake on the inside with a simple pink-to-white ombre on the outside, and people lost their minds when we cut into it and revealed the surprise rainbow. The contrast between the soft exterior and bold interior was stunning.
To create an exterior ombre effect with your frosting, you’ll need different shades of buttercream. I usually prepare three to four bowls with varying intensities of color. Start by frosting the bottom third of your cake with the darkest shade, the middle third with a medium shade, and the top third with the lightest. Then—and this is where the magic happens—use your bench scraper to blend where the colors meet. The spinning turntable and the scraper work together to create that seamless transition. It takes practice, but once you get the hang of it, you’ll want to do it on every cake.
By the way, adding texture and design elements can take your ombre cake from beautiful to absolutely breathtaking. I love using different piping tips to create patterns on the exterior. Rosettes that transition from dark to light up the side of the cake look incredibly elegant. Or you can do ruffles that mimic fabric—these work especially well on ombre cake pink designs for weddings or baby showers.
One technique I’m obsessed with right now is the watercolor effect. After you’ve applied your ombre frosting, you take a clean, damp paintbrush and gently brush it across the frosting in random strokes. This creates this gorgeous, artistic look that seems way more complicated than it actually is. I did this on a chocolate ombre cake using different shades of chocolate buttercream, and it looked like something from a fancy bakery. People assumed I’d spent hours on it when it really only took an extra fifteen minutes.
Edible decorations are another way to elevate your design. Fresh flowers are probably my go-to because they’re elegant and relatively easy to work with. Just make sure you’re using food-safe flowers and that they haven’t been treated with pesticides. I usually place them on top or cascading down one side of the cake. For a ombre cake blue with an ocean theme, I’ve used white chocolate seashells and edible pearls. For a ombre cake purple at a fancy dinner party, I used edible gold leaf and candied violets. The decorations should complement your color scheme and the overall vibe of your celebration.
Something I’ve noticed about advanced techniques is that they often require thinking about not just how the cake looks, but how it photographs. We live in an Instagram world, and whether we like it or not, people are going to take pictures of your cake. Natural lighting is your friend. I always try to photograph my cakes near a window with indirect sunlight because it shows the true colors without harsh shadows. The gradient effect photographs beautifully when lit properly.
Another advanced trick I’ve picked up is flavoring each layer differently while keeping the ombre visual effect. Imagine a rainbow ombre cake where each color also represents a different flavor—strawberry for pink, orange for orange, lemon for yellow, lime for green, blueberry for blue, and grape for purple. It’s like a flavor journey with every bite. This requires more planning and separate batters, but the wow factor is through the roof. I did this for a friend’s thirtieth birthday, and people are still talking about it two years later.
Here’s the thing about getting fancy with your techniques: don’t forget that sometimes simple is stunning too. I’ve made elaborate cakes with tons of decorations, and I’ve made simple cakes with just a beautiful gradient and nothing else. Both get equally enthusiastic reactions. The ombre effect itself is so visually striking that you don’t always need to add a bunch of extras. Sometimes a perfectly smooth ombre cake pink with just a simple border of pearls around the base is more elegant than something covered in decorations.
One last advanced tip I want to share is about creating ombre layers inside individual cake slices. This is wild but so cool. You bake a sheet cake with your ombre layers, then use cookie cutters to cut out shapes before stacking them into a larger cake. So when someone cuts a slice, they see not just horizontal ombre layers but also geometric patterns within those layers. I know it sounds confusing, but there are some amazing examples online, and it’s definitely on my list of techniques to master next.
If you’re serious about taking your cake decorating skills to the next level, it’s worth exploring different cake and cupcake recipes to find bases that work perfectly with various techniques and hold up well when stacked. Speaking of ingredients and health considerations, it’s interesting to note that while we’re creating these beautiful treats, being mindful of ingredient quality matters—especially since research shows certain food ingredients can affect inflammation and diet, so choosing quality butter, eggs, and natural colorings when possible benefits both taste and wellbeing.
Frequently Asked Questions
What is the best type of cake for making an ombre cake?
White or vanilla cake works best because it provides a neutral base that shows colors beautifully. You want something with a light crumb that won’t interfere with your chosen colors. I’ve found that butter-based cakes hold their shape better than oil-based ones when stacking multiple layers. Avoid chocolate cake unless you’re specifically making a chocolate ombre, because the dark color will muddy your lighter shades. A sturdy pound cake recipe also works well if you’re making a tall cake that needs extra structural integrity.
Can I make an ombre cake ahead of time?
Absolutely! In fact, I recommend it for big events. You can bake your layers up to two days ahead, wrap them tightly in plastic wrap, and store them in the refrigerator. Some bakers even freeze their layers for up to a month. Frosted cakes keep well in the fridge for about three to four days. Just make sure to bring the cake to room temperature about an hour before serving so the frosting softens and the flavors come through. I always make my cakes the day before an event so I’m not rushing on the actual day.
Why isn’t my ombre effect showing up clearly?
This usually happens when your color shades are too similar to each other. You need enough contrast between layers for the gradient to be visible. Make sure you’re adding progressively more food coloring to each bowl of batter. Another common issue is using liquid food coloring instead of gel—liquid just doesn’t give you the vibrant, saturated colors needed for a dramatic ombre effect. Also, if your lighting is poor when you’re looking at the finished cake, the gradient might not show up well in photos even though it’s there in person.
What’s the best frosting for an ombre cake?
American buttercream is my go-to because it’s stable, easy to work with, and holds up well at room temperature. It’s also sturdy enough to support multiple layers without sliding. Swiss meringue buttercream is another excellent choice if you want something less sweet and more silky. I avoid whipped cream frosting for tall ombre cakes because it’s too soft and can cause structural problems. Cream cheese frosting works but needs to be kept refrigerated, and the cake should be served cold. For best results, stick with traditional buttercream, especially when you’re first learning.
How many layers should an ombre cake have?
For a noticeable gradient effect, I recommend at least four layers. This gives you enough variation to create that beautiful color transition. Six layers is kind of the sweet spot—it looks impressive without being too tall to handle. If you go beyond eight layers, the cake becomes really challenging to stack and transport, though it does look spectacular. For your first attempt, stick with four or five layers. You can always add more once you’re comfortable with the technique.
Can I create an ombre effect with different flavors instead of just colors?
Yes, and this is actually one of my favorite advanced techniques! You can make each layer a different intensity of the same flavor—like light vanilla to strong vanilla bean, or milk chocolate to dark chocolate. You can also do completely different flavors that complement each other, like strawberry fading to vanilla. Just make sure your batters have similar consistencies so they bake evenly. The flavor ombre adds an extra dimension of surprise when people taste the cake, not just when they see it. It does require making multiple batters, so plan for extra prep time.
How do I transport an ombre cake without ruining it?
This is such an important question because I’ve seen beautiful cakes destroyed in transit. First, chill your frosted cake thoroughly so the frosting firms up. Transport it in a sturdy cake box on a flat surface in your car—never on someone’s lap. I put a non-slip mat under the box to prevent sliding. If the cake is really tall, I sometimes insert a wooden dowel straight down through the center before transporting. Drive carefully, avoiding sudden stops. For really important events, I actually transport the layers separately and assemble the cake on-site if possible.
What’s the difference between ombre and gradient?
Technically, they’re very similar—both involve transitioning from one shade to another. “Ombre” specifically refers to going from light to dark (or dark to light) of the same color family, while “gradient” can refer to any smooth transition, including between different colors entirely. In cake decorating, we often use the terms interchangeably. A rainbow cake with colors transitioning through the spectrum is technically a gradient, while a pink cake going from pale to hot pink is a true ombre. But honestly, most people understand what you mean regardless of which term you use.
Why did my cake layers turn out uneven thicknesses?
This usually happens when you don’t measure your batter equally between pans. I can’t stress enough how helpful a kitchen scale is for this. Weigh each portion of batter to ensure they’re identical. Also, make sure all your pans are the same size and that your oven temperature is accurate—hot spots can cause uneven baking. If you do end up with uneven layers, you can level them with a serrated knife or cake leveler before stacking. I always level my cakes anyway because it creates a more professional look and makes stacking easier.
Can I use natural food coloring for my ombre cake?
You can definitely try, and I’ve experimented with natural options like beet juice for pink, spirulina for green, and blueberry powder for blue. The challenge is that natural colorings tend to be much less vibrant and can affect the flavor of your cake. You’ll also need to use more to achieve noticeable color, which can change the consistency of your batter. Natural options work better for pastel shades than bold, dramatic colors. If you’re committed to using natural ingredients, just manage your expectations about color intensity and be prepared to do some experimenting to get the shades you want.
Before you head off to create your masterpiece, remember that every beautiful cake you see online or in bakeries was made by someone who started exactly where you are right now. Your first attempt might not be perfect, and that’s completely okay. Each cake you make teaches you something new—about color mixing, about frosting consistency, about what works and what doesn’t. Take pictures of your progress, celebrate your successes, and learn from the parts that don’t go as planned. The joy of baking isn’t just in the final product; it’s in the entire creative process. So grab those mixing bowls, choose your favorite colors, and get ready to make something beautiful. Happy baking!
Equipment
- Mixing bowls
- Offset spatula
- Cake turntable optional but helpful
- Cake pans at least 4-6
- Cooling rack
Ingredients
- 4-5 large eggs
- 2 cups all-purpose flour
- 1.5 cups sugar
- 1 cup unsalted butter, softened
- 1 cup milk
- 2 tablespoons vanilla extract
- 2 teaspoons baking powder
- 1 teaspoon salt
Instructions
- Gather all ingredients and equipment (at least 4-6 same-sized cake pans).
- Prepare your cake batter according to the recipe.
- Divide the batter evenly into separate bowls (4-6 bowls).
- Leave one bowl white or as the lightest shade.
- Add a tiny drop of food coloring to the next bowl and mix well.
- Gradually add more drops to each subsequent bowl, increasing color intensity.
- Grease and flour the cake pans and pour each colored batter into a prepared pan.
- Bake according to recipe instructions, using a toothpick to test doneness.
- Let the layers cool in pans for about ten minutes, then remove and cool completely on racks.
- Prepare buttercream frosting while cake layers cool.
- Assemble the cake starting with the darkest layer on the bottom.
- Spread a layer of frosting between each cake layer, ensuring it's level.
- Apply a crumb coat of frosting over the entire cake and refrigerate for 20 minutes.
- Apply the final coat of frosting.
- Decorate as desired, then slice to reveal the ombre layers.
Notes
Nutrition

Hello! I’m Sarah Mitchell, and I’m passionate about bringing creativity and innovation to baking. My love for baking started in high school when I first tried my hand at decorating cupcakes for a class project. What began as a fun hobby quickly became a full-time passion. I’ve spent the past decade working in bakeries and dessert shops, honing my skills in everything from simple cookies to intricate wedding cakes.
After working in some of the top bakeries across the country, I realized that baking was about more than just following recipes — it was about infusing your personality into each creation. At BakingSecret.com, I love creating recipes that push boundaries while staying true to the heart of classic baking. I specialize in creating delicious and visually stunning pastries that will wow your guests.
When I’m not baking, I enjoy teaching baking classes, trying out new cake decoration techniques, and traveling to find inspiration in global dessert traditions. I’m so excited to share my tips and tricks with you to help elevate your baking game!