
The Sweet Story Behind Dobash Cake
Last summer, I walked into a local bakery in Honolulu and spotted the most beautiful chocolate cake I’d ever seen. The layers were perfectly even, the frosting gleamed like silk, and the chocolate aroma made my mouth water. That was my first encounter with a real dobash cake, and I haven’t been the same since.
This gorgeous dessert changed how I think about chocolate cake. One bite transported me to a place where chocolate dreams come true. The soft, tender layers melted on my tongue while the rich frosting coated my taste buds in pure happiness. I knew right then I had to learn everything about this cake and share it with anyone who would listen.
Since that day, I’ve made dobash cake countless times for birthdays, holidays, and random Tuesday afternoons when life needed a little sweetness. My friends now request it by name. My neighbors hint around dessert time. Even my picky teenage nephew asks for it instead of store-bought treats.
The beauty of dobash cake lies in its perfect balance. It’s rich but not heavy. Sweet but not cloying. Impressive but surprisingly doable for home bakers like you and me. This cake has earned its place as a beloved dessert across the Pacific and beyond.
What is a Dobash Cake?
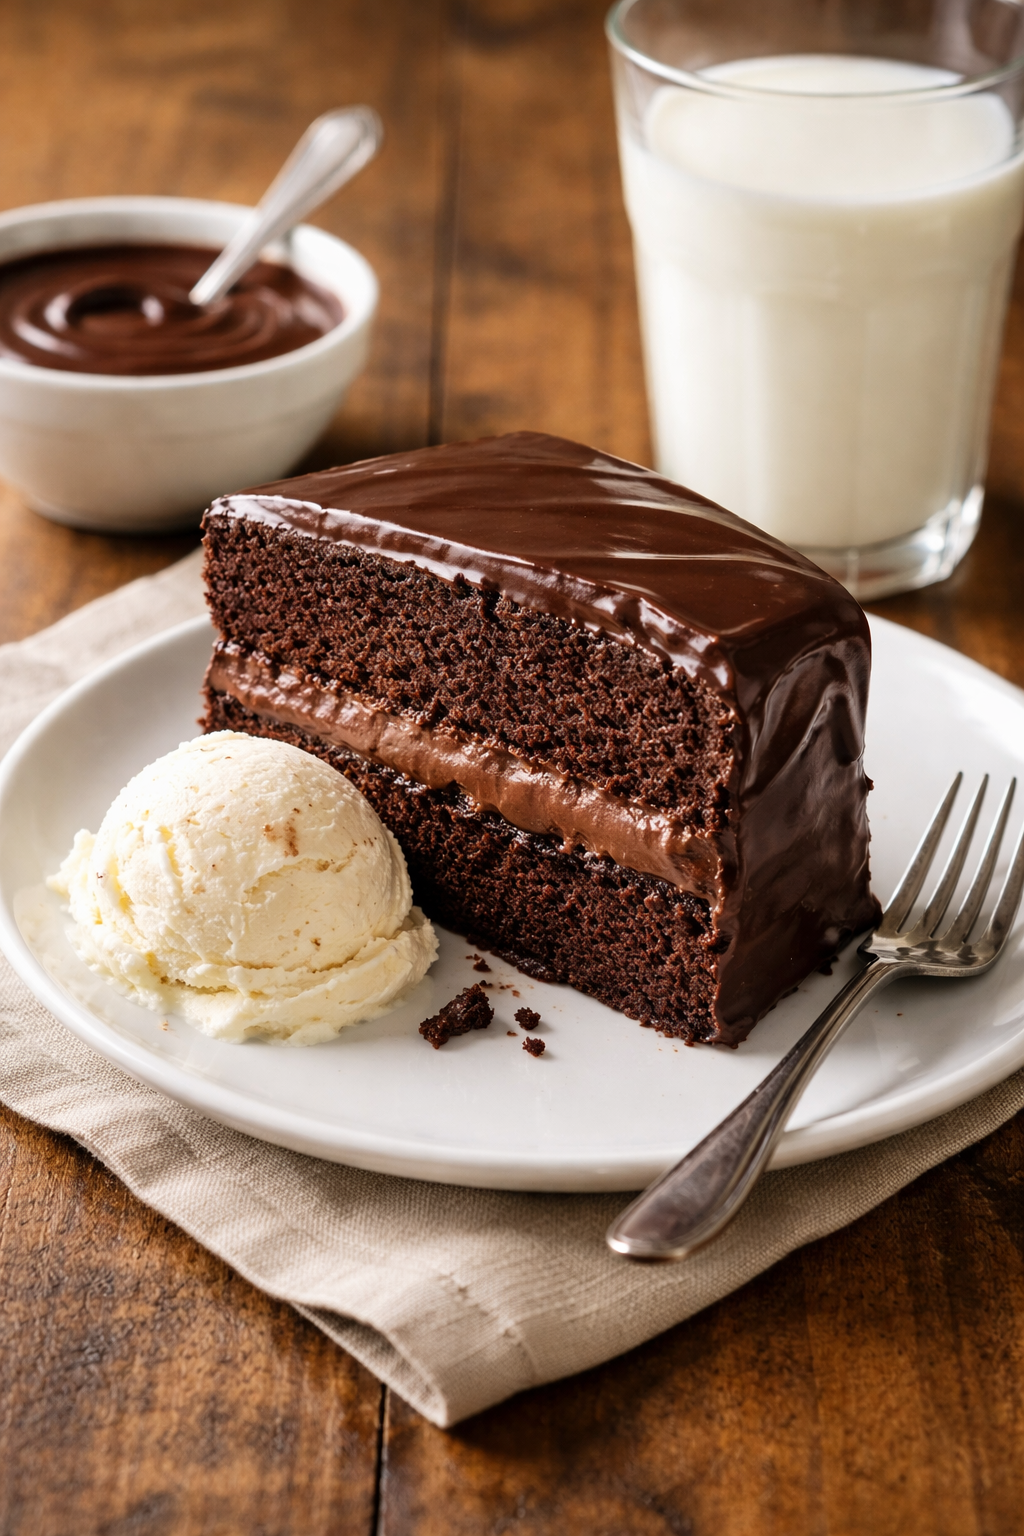
A dobash cake is a showstopping layered dessert that features tender sponge cake layers filled and frosted with a silky chocolate buttercream. Unlike regular chocolate cakes, this one has a specific character that sets it apart from everything else in the bakery case.
The cake itself uses a light, airy sponge that contrasts beautifully with the dense, fudgy frosting. Most versions stack four or five layers high, creating that dramatic height that makes people gasp when you bring it to the table. Each layer gets a generous smear of chocolate pudding-like frosting that seeps into the cake just enough to keep everything moist.
The frosting deserves special attention. It’s not your typical buttercream or ganache. Instead, it combines cooked chocolate pudding with butter to create something magical. The texture falls somewhere between frosting and mousse, smooth enough to spread easily but stable enough to hold those layers in place.
The Hawaiian Connection: Dobash Cake Kings Hawaiian
When people talk about dobash cake kings hawaiian, they’re touching on something special in island culture. This cake became a staple at King’s Bakery in Hawaii, and from there it spread throughout the islands like wildfire.
Hawaiian bakeries perfected the dobash cake and made it their own. Local families serve it at graduations, weddings, and baby showers. You’ll find it at potlucks, church gatherings, and birthday parties from Kauai to the Big Island. It’s become as much a part of Hawaiian food culture as poke or plate lunch.
The dobash cake honolulu shops sell reflects this deep connection. Walk into almost any bakery in the city, and you’ll spot dobash cake sitting pretty in the display case. Places like Zippy’s have become famous for their version, with people asking for the zippys chocolate dobash cake recipe constantly.
What makes the Hawaiian version special? Many bakers add their own touches while keeping the core elements intact. Some use local ingredients or adjust the sweetness level to match island preferences. The result is a cake that feels both classic and uniquely Hawaiian.
Dobash vs. Dobos: Clearing Up the Confusion
Here’s where things get interesting. Many people wonder about the relationship between dobash cake and its European cousin, the dobos torte. Let me break down the differences because they’re not the same thing at all.
The dobash cake budapest connection actually points to the dobos torte, a hungarian dobash cake creation named after Hungarian chef József Dobos. He invented his version back in 1885, and it took Europe by storm. This cake features thin sponge layers with chocolate buttercream and a signature caramel top that cracks when you cut it.
So what’s the difference? Here’s what I’ve learned:
- Dobos torte uses very thin layers, often seven or more
- Dobash cake typically has four to five thicker layers
- Dobos torte tops off with hard caramel
- Dobash cake finishes with chocolate frosting all over
- Dobos is European in origin, specifically from dobash cake hungary
- Dobash became famous in Hawaii and the American Pacific
The name similarity causes endless confusion. Some people spell it “dobosh” when they mean dobos. Others use the terms interchangeably. But once you taste them side by side, you’ll notice they’re different experiences entirely.
Both cakes are absolutely delicious. I won’t pick favorites because that would be like choosing between chocolate and more chocolate. But knowing the difference helps when you’re searching for recipes or ordering from a bakery.
The Chocolate Dobash Cake 7 Up Variation
Now let’s talk about a quirky twist that caught my attention: the chocolate dobash cake 7 up version. This regional variation adds lemon-lime soda to the cake batter, creating something unexpected and delightful.
The 7 Up addition might sound weird at first. I thought so too when I heard about it. But the soda does something magical to the texture. The carbonation helps create an extra-light crumb while the citrus notes add a subtle brightness that balances the rich chocolate.
This version gained popularity in certain parts of the South and Midwest. Bakers discovered that using soda in cakes wasn’t just a gimmick. It actually improved the texture and kept the cake moist for days. Some versions even skip other leavening agents and rely solely on the carbonation.
Speaking of variations, the gambinos lemon doberge cake recipe represents yet another branch of this layered cake family tree. Popular in New Orleans, doberge cakes share the multi-layer concept but often feature different flavors like lemon, creating a whole different taste experience.
Finding Your Perfect Dobash Cake
If you’re wondering where can i buy dobash cake, you have several options depending on your location. Hawaiian bakeries obviously stock it regularly. Many Asian bakeries on the mainland also carry versions of this cake.
Searching for chocolate dobash cake near me might turn up local bakeries that make it, even if they don’t advertise it heavily. Call ahead and ask. I’ve found amazing dobash cakes in unexpected places just by making a few phone calls.
Online ordering has also opened up new possibilities. Some Hawaiian bakeries ship their cakes to the mainland, though the cost can be steep. Local bakers in areas with large Hawaiian populations often make dobash cake on request.
Of course, making your own dobash cake at home remains the most rewarding option. You control the ingredients, adjust the sweetness, and get to lick the bowl. Plus, your kitchen will smell absolutely amazing for hours.

Where Did Dobash Cake Originate?
Now that you know what makes dobash cake special, let me take you on a journey through its fascinating history.
The origin story of dobash cake actually combines two worlds in the most delicious way possible. Most food historians trace the cake’s roots back to Hawaii during the mid-20th century, but the plot thickens when you dig deeper into its European ancestry.
Here’s what I discovered after talking to several Hawaiian bakers and doing way too much late-night recipe research: The dobash cake we know today likely evolved from the Hungarian dobos torte that József Dobos created in 1885. When Hungarian immigrants and European pastry techniques made their way across the world, elements of that hungarian dobash cake tradition traveled with them.
But Hawaii transformed it into something entirely new. Local bakers simplified the construction, made the layers thicker and more practical for tropical climates, and adapted the recipe to local tastes. They ditched the hard caramel top because, honestly, caramel doesn’t hold up well in Hawaiian humidity. Instead, they doubled down on that incredible chocolate pudding frosting.
By the way, the dobash cake honolulu bakeries started selling in the 1950s became an instant hit with locals and tourists alike. The timing was perfect too, right when Hawaii was experiencing a boom in bakery culture and fusion desserts. People were experimenting, combining techniques from different traditions, and creating new classics.
The cultural significance of this cake in Hawaii cannot be overstated. It became more than just a dessert. Families started ordering it for every major celebration. Kids grew up requesting it for their birthday parties instead of whatever trendy cake was popular that year. Grandmothers passed down their versions of the recipe with handwritten notes in the margins.
Funny enough, similar layered cakes popped up in other parts of America around the same time. Down in New Orleans, bakers created the doberge cake, which also traces its ancestry back to the dobos torte. The gambinos lemon doberge cake recipe became legendary in Louisiana, offering a citrusy alternative to the chocolate version. That lemon variation shows how this style of cake adapted to different regional preferences, much like how an ombre cake can be customized with different flavor combinations and colors.
I actually tried making a lemon doberge once after visiting New Orleans, and while it was phenomenal, my heart still belongs to the chocolate dobash. The lemon version uses a bright, tangy custard between layers that completely changes the eating experience. Both are incredible, just different moods entirely.
The evolution of dobash cake didn’t stop in the 1950s either. As Hawaiian culture spread to the mainland, particularly to the West Coast, the cake traveled with it. Bakeries in California, Oregon, and Washington started making their own versions. Some stayed traditional while others experimented with new flavors and techniques.
One baker in Seattle told me she adds espresso to her chocolate frosting, creating a mocha dobash that has people lining up before she even opens. Another bakery in Los Angeles does a ube version that’s absolutely stunning, with purple layers that look almost too pretty to eat. These creative spins remind me of how versatile chocolate cakes can be, similar to what you see with fun variations like chocolate cake recipe from scratch easy halloween themed desserts.
The zippys chocolate dobash cake recipe deserves its own paragraph because Zippy’s restaurants became synonymous with dobash cake in Hawaii. They’ve been serving it since the 1960s, and their version has achieved legendary status. People ask for the recipe constantly, though the restaurant keeps their exact formula under lock and key.
What I love about Zippy’s version is the consistency. You can order it at any location across the islands and get the same perfect cake every single time. The layers are always moist, the frosting always smooth, and the chocolate flavor always hits just right. That reliability has built serious customer loyalty over decades.
The influence of dobash cake hungary heritage remains visible even in modern versions. The technique of layering thin cakes with rich filling came directly from European pastry traditions. The attention to smoothness in the frosting, the emphasis on texture contrast, and even the way the cake is presented all echo those Old World techniques.
But Hawaiian bakers added their own magic. They made it more accessible for home bakers. They adjusted sweetness levels. They created a cake that could withstand island temperatures without falling apart. The result is something that honors its roots while standing proudly on its own.
Finding and Buying Dobash Cake
Let’s get practical now because knowing about dobash cake and actually eating dobash cake are two very different things.
When people ask me where can i buy dobash cake, my first suggestion is always to check local Hawaiian or Asian bakeries. These spots often carry dobash cake even if they don’t advertise it prominently. I’ve found amazing versions in strip mall bakeries that looked totally ordinary from the outside.
Searching for chocolate dobash cake near me on your phone can yield surprising results. Don’t just look at the first few Google results either. Sometimes the best bakeries have terrible websites or no online presence at all. They rely on word-of-mouth and regular customers who know what’s good.
Here’s the thing about finding dobash cake on the mainland: your success often depends on your local demographics. Areas with significant Hawaiian or Pacific Islander populations usually have at least one bakery making it. Cities like Las Vegas, Portland, San Diego, and Sacramento often have multiple options.
If you’re specifically looking for dobash cake honolulu quality but live elsewhere, you might consider ordering online. Some Hawaiian bakeries ship to the mainland, though shipping costs can make your eyes water. I once paid almost as much for shipping as I did for the cake itself, but it was totally worth it for a special occasion.
For those actually in Honolulu, you’re living in dobash cake paradise. Besides Zippy’s, try these spots: Liliha Bakery, Cake Works, and Saint Germain Bakery. Each has their own style and loyal following. I recommend trying several to find your favorite because the variations can be subtle but meaningful.
Some grocery stores in Hawaii also carry dobash cake in their bakery sections. Foodland and Times Supermarket often stock it, especially around holidays when demand spikes. The quality varies, but I’ve had some grocery store versions that impressed me more than fancy bakery cakes.
Making your own dobash cake at home opens up a whole world of possibilities. You need patience more than advanced skills, honestly. The techniques aren’t complicated, but they require attention to detail and proper timing.
Essential ingredients for homemade dobash cake include cake flour for that tender crumb, high-quality cocoa powder for deep chocolate flavor, and real butter for the frosting. Don’t skimp on ingredient quality here because there’s nowhere for mediocre chocolate to hide in this cake.
The frosting requires eggs, sugar, cornstarch, cocoa, milk, and butter. Some recipes add vanilla, some add a touch of salt, and some even include a splash of coffee to enhance the chocolate. The key is cooking the pudding base completely before adding butter, otherwise you’ll end up with a runny mess. Just like making a durian cake requires careful attention to unique ingredients, dobash cake demands respect for its special frosting technique.
Temperature matters enormously with dobash cake. Your cake layers need to cool completely before frosting, or the chocolate will melt and slide right off. I learned this the hard way during my third attempt when I got impatient and ended up with a leaning tower of chocolate disaster.
The frosting itself should be spreadable but not warm. Too cold and it won’t spread smoothly. Too warm and it won’t hold the layers. Room temperature butter is your friend here, which means planning ahead and taking it out of the fridge a couple hours before you start.
Assembly requires a gentle touch and a good offset spatula. Place your first layer on a cake board or plate, spread frosting evenly across the top, then carefully position the next layer. Repeat until you’ve stacked all your layers, then do a crumb coat before the final frosting layer. This technique, similar to what you’d use for visual effects in an ombre cake, helps create that professional-looking finish.
One trick I picked up from a Hawaiian baker: refrigerate the assembled cake for at least four hours before serving. This lets everything set properly and makes slicing so much cleaner. The flavors also meld together beautifully during that rest time, creating an even better eating experience.
Storage is surprisingly forgiving with dobash cake. It keeps well in the fridge for up to five days, covered loosely with plastic wrap. The frosting actually protects the cake layers from drying out. Some people even say it tastes better on day two or three after the flavors have really settled in together.
Making Your Own Dobash Cake at Home
Alright, let’s get our hands dirty and actually make this incredible cake. I promise it’s not as scary as it looks when you see those perfect bakery versions.
The first time I attempted making dobash cake, I was terrified. All those layers, that glossy frosting, the pressure of creating something that looked professional. But here’s what I learned: if you break it down into manageable steps and don’t rush, you’ll end up with something absolutely spectacular.
Start with the cake layers. You’ll need cake flour, eggs, sugar, baking powder, salt, vanilla extract, and whole milk. The zippys chocolate dobash cake recipe inspiration means keeping things simple but precise. I use four layers for mine because five feels excessive unless I’m feeding a crowd.
Preheat your oven to 350°F and prepare four 8-inch round pans. Grease them well and line the bottoms with parchment paper. This prevents sticking disasters that can ruin your whole day. Trust me, I’ve cried over broken cake layers before.
In a large bowl, sift together 2 cups of cake flour, 1 and a half cups of sugar, 2 teaspoons of baking powder, and half a teaspoon of salt. Sifting isn’t optional here. It aerates the flour and prevents lumps that’ll mess up your texture. My grandmother always said if you skip the sifting, you’re basically telling the cake gods you don’t care.
In another bowl, whisk together 4 eggs, 3/4 cup of milk, half a cup of melted butter, and 2 teaspoons of vanilla extract. The butter should be melted but not hot, otherwise you’ll scramble your eggs. Room temperature ingredients mix better too, so plan ahead and let everything sit out for about 30 minutes before you start.
Pour the wet ingredients into the dry and fold gently until just combined. Overmixing develops gluten, which makes your cake tough instead of tender. I use a rubber spatula and fold in a figure-eight pattern until I don’t see any more dry flour. A few small lumps are fine, seriously.
Divide the batter evenly among your four pans. I actually weigh each pan on my kitchen scale to make sure they’re equal because uneven layers drive me nuts. Bake for 18 to 22 minutes until a toothpick comes out clean and the tops spring back when touched lightly.
Here’s the thing about cooling: patience pays off big time. Let the cakes cool in their pans for 10 minutes, then turn them out onto wire racks to cool completely. This takes at least an hour, maybe two. Go watch a show, take a walk, do anything except try to frost warm cake.
Now for the star of the show, that incredible chocolate pudding frosting. Grab a medium saucepan and whisk together 3/4 cup of sugar, 1/3 cup of cocoa powder, 1/3 cup of cornstarch, and a pinch of salt. Add 2 cups of whole milk and 3 egg yolks, whisking until smooth.
Cook this mixture over medium heat, stirring constantly with a wooden spoon or silicone spatula. Don’t walk away, don’t check your phone, just stir. The mixture will thicken suddenly after about 8 to 10 minutes. You want it pudding-thick, coating the back of your spoon heavily.
Remove from heat and stir in 2 teaspoons of vanilla and 1 tablespoon of butter. Pour the pudding into a bowl, press plastic wrap directly onto the surface to prevent skin formation, and refrigerate until completely cool. This takes about 2 hours minimum.
Once your pudding base is cold, beat in 1 cup of softened butter using an electric mixer. Beat it for several minutes until light and fluffy. This is where the magic happens. The mixture transforms from pudding into this silky, spreadable frosting that makes dobash cake special. If it looks curdled at first, keep beating. It’ll come together.
Assembly time gets me excited every single time. Place your first cake layer on a serving plate or cake board. Spread about 3/4 cup of frosting evenly across the top, going right to the edges. Position your second layer carefully on top and repeat. Stack all four layers this way, then use the remaining frosting to cover the top and sides.
A thin crumb coat first makes the final frosting layer much smoother. Spread a very thin layer of frosting all over the cake, catching any loose crumbs. Refrigerate for 20 minutes until firm, then apply your final generous coat of frosting. Use an offset spatula and smooth strokes for that professional bakery look.
By the way, maintaining proper kitchen sanitation throughout this process keeps your cake safe and delicious. Wash your hands frequently, keep your work surfaces clean, and don’t let that pudding sit at room temperature for too long before refrigerating.
Delicious Variations to Try
Once you’ve mastered the classic chocolate version, the world of layered cakes opens up with endless possibilities.
The gambinos lemon doberge cake recipe offers a completely different flavor profile that’s absolutely worth exploring. Instead of chocolate pudding frosting, you make a lemon custard with fresh lemon juice, lemon zest, egg yolks, sugar, and cornstarch. The brightness cuts through richness in the most refreshing way.
For the lemon version, I use the same basic cake layers but add lemon zest to the batter for extra citrus punch. The custard filling gets made similarly to the chocolate pudding, but you add 1/2 cup of fresh lemon juice and the zest of two lemons. It’s tangy, sweet, and utterly addictive.
Funny enough, my sister actually prefers the lemon version to chocolate, which caused a minor family controversy last Thanksgiving. We ended up making both, and honestly, having options made everyone happy. The lemon cake disappeared just as fast as the chocolate.
The chocolate dobash cake 7 up variation I mentioned earlier works by replacing half the milk in the cake recipe with lemon-lime soda. Pour it in gently to preserve some carbonation. The resulting texture is incredibly light and airy with a subtle tang that complements the chocolate frosting beautifully.
For an adult twist, add a tablespoon of rum or Kahlua to your chocolate frosting. Not enough to make it boozy, just enough to add depth and sophistication. I made this version for my book club once and they practically licked the serving plate clean.
Mocha lovers can add 2 tablespoons of instant espresso powder to the frosting mixture. The coffee intensifies the chocolate flavor without tasting obviously like coffee. It just makes everything taste more chocolatey and complex.
If you’re feeling adventurous, try a strawberry version using strawberry puree in the frosting instead of chocolate. Reduce the milk slightly to account for the liquid from the fruit. This creates a pink frosting that tastes like summer and looks absolutely gorgeous at spring gatherings.
Pro Tips for Perfect Results
Quality ingredients make an enormous difference with this cake. Since there aren’t many components hiding behind spices or mix-ins, everything you use really shows through.
Invest in good cocoa powder. I use Dutch-process cocoa for deeper, smoother chocolate flavor without any bitterness. The cheap stuff from the dollar store will work, but it won’t taste nearly as good. Same goes for vanilla extract. Real vanilla makes this cake sing.
Butter quality matters too, especially since the frosting is basically butter and chocolate pudding. I use European-style butter with higher fat content when I can find it on sale. The extra richness shows up in both texture and flavor.
Fresh eggs produce better cakes than old ones. The whites whip better, the yolks are more flavorful, and everything just works more smoothly. If your eggs float in water, they’re too old. Use them for scrambled eggs instead and buy fresh ones for your cake.
Temperature control throughout the process prevents most disasters. Cold eggs don’t emulsify properly. Warm frosting slides off layers. Hot pans warp on cool racks. Let everything come to the right temperature naturally and your cake will cooperate beautifully.
When measuring flour, spoon it into your measuring cup and level it off with a knife. Scooping directly with the cup packs the flour down, giving you way too much. Too much flour equals dry, tough cake. Nobody wants that.
Don’t open the oven door during the first 15 minutes of baking. The temperature drop can make your cakes sink in the middle. I know it’s tempting to peek, but resist. Set a timer and trust the process.
If your frosting seems too thick to spread smoothly, add a tablespoon of milk and beat it in. Too thin? Refrigerate for 15 minutes to firm up. The consistency should be like smooth peanut butter, spreadable but not runny.
For cleaner slices, dip your knife in hot water and wipe it clean between each cut. This melts through the frosting smoothly instead of dragging it and creating a mess. Your slices will look bakery-perfect on the plate.
Speaking of presentation, refrigerating the finished cake for several hours or overnight dramatically improves both flavor and texture. The layers settle, the frosting sets perfectly, and everything melds together into something greater than the sum of its parts.
If you’re interested in exploring more layered cake techniques and creative flavor combinations, check out the inspiration waiting in this collection of cakes and cupcakes that can spark your next baking adventure.
Making dobash cake at home connects you to a tradition that spans continents and generations. Every time I pull one from the fridge and hear people gasp at how beautiful it looks, I feel proud. Not just of the cake itself, but of keeping this wonderful dessert alive and sharing it with people I care about. That’s what home baking should feel like, something that brings joy to both the baker and everyone lucky enough to get a slice.
FAQs
What was Queen Elizabeth’s favorite cake?
Queen Elizabeth II was known to love chocolate biscuit cake, which became famous as her go-to dessert. This rich, no-bake cake combined chocolate, butter, and McVitie’s Rich Tea biscuits into a decadent treat she reportedly requested for royal events. While completely different from dobash cake, both share a love for quality chocolate and simple elegance. The Queen would have slices sent to her various residences because she enjoyed it so much. It just goes to show that even royalty appreciates a good chocolate cake.
Where did Dobash cake originate?
Dobash cake originated in Hawaii during the mid-20th century, evolving from the Hungarian dobos torte created in 1885. Local Hawaiian bakers adapted the European layered cake concept to suit island tastes and climate conditions. They simplified the construction, made the layers thicker, and replaced the hard caramel topping with chocolate pudding frosting. King’s Bakery and other Honolulu establishments popularized the cake throughout the islands. It became so beloved that it’s now considered a staple of Hawaiian bakery culture and celebration desserts.
What is a Dobosh cake?
A dobosh cake, also spelled dobos torte, is a Hungarian layered sponge cake with chocolate buttercream and a hard caramel top. Created by chef József Dobos in 1885, it typically features seven or more very thin layers. The signature caramel topping is cut into wedges before it fully hardens, creating a distinctive presentation. While related to dobash cake through shared ancestry, dobosh cake remains more European in style and technique. Both are delicious multi-layered chocolate desserts but offer distinctly different eating experiences.
How is dobash cake different from other types of chocolate cakes?
Dobash cake stands apart because of its unique chocolate pudding-based frosting rather than traditional buttercream or ganache. The cake layers themselves are light sponge rather than dense chocolate cake, creating a textural contrast that’s incredibly satisfying. It’s assembled in multiple thin to medium layers, usually four or five, instead of the typical two or three layers of regular chocolate cake. The frosting texture falls somewhere between mousse and pudding, silky and rich but not heavy. This combination creates a more refined, less sweet chocolate experience than typical American chocolate cakes.
Can I make a non-chocolate version of Dobash cake?
Absolutely, and many bakers do exactly that with fantastic results. The lemon doberge version popular in New Orleans uses lemon custard instead of chocolate pudding for a bright, citrusy alternative. You could also try vanilla bean custard, strawberry, or even passion fruit for tropical flair. The key is maintaining that pudding-butter frosting technique that makes the texture so special. Just replace the cocoa with your chosen flavoring while keeping the same base method. I’ve even seen successful coconut and coffee versions that were absolutely delicious.
Are there any gluten-free options for Dobash cake?
Yes, you can make a gluten-free dobash cake by substituting a quality gluten-free flour blend for the cake flour. Look for blends that include xanthan gum, which helps replicate the structure gluten provides. The frosting is naturally gluten-free since it’s made from pudding and butter with no flour involved. I recommend blends specifically designed for cakes rather than all-purpose gluten-free flour for better texture. The cake might be slightly more delicate, so handle the layers gently during assembly. Many people can’t tell the difference when you use a good flour blend.
How long does a homemade Dobash cake last?
A properly stored dobash cake lasts 4 to 5 days in the refrigerator, covered loosely with plastic wrap or in a cake keeper. The pudding-based frosting actually helps keep the cake layers moist longer than regular frosting would. Some people say it tastes even better on day two or three after the flavors have had time to meld together. You can also freeze dobash cake for up to 3 months if wrapped tightly in plastic wrap and then foil. Thaw it overnight in the refrigerator before serving for best results.
Can I use a different pan size for dobash cake?
You can adapt the recipe to different pan sizes, but you’ll need to adjust baking times accordingly. Nine-inch pans will give you thinner layers that bake faster, around 15 to 18 minutes. Six-inch pans create a taller, more dramatic cake perfect for smaller gatherings. You could even make it as a sheet cake and cut it into layers horizontally if you only have one round pan. Just keep the total batter volume in mind and don’t fill pans more than halfway to allow for rise. Watch for doneness cues rather than relying solely on time.
What’s the best way to transport a dobash cake?
Transport dobash cake in a sturdy cake carrier placed on a flat surface in your vehicle, preferably the floor behind the front seat where it won’t slide. Refrigerate the cake until the last possible moment before leaving so the frosting is firm and stable. If you’re traveling more than 30 minutes, consider using a cooler with ice packs to keep it chilled. Avoid hot cars at all costs since the frosting will soften and potentially slide. I once transported one in my lap during a short drive and that worked fine, though I was incredibly nervous the whole time.
Do I need special equipment to make dobash cake?
You don’t need anything fancy, just basic baking equipment most home bakers already own. Four 8-inch round cake pans, mixing bowls, a whisk, measuring cups and spoons, and an electric mixer make the job easier. An offset spatula helps with frosting but isn’t absolutely necessary. A cake turntable is nice but you can manage without one by rotating your serving plate manually. The most important tools are patience and attention to detail rather than expensive gadgets. I made my first several dobash cakes with completely basic equipment and they turned out beautifully.
Once you’ve baked your first dobash cake and seen the joy it brings to your table, you’ll understand why this dessert has endured for generations. The process might seem involved at first, but each step builds your confidence and skills in ways that translate to countless other baking projects. So grab your mixing bowls, clear some counter space, and give yourself the gift of creating something truly special from scratch.
Equipment
- Mixing bowl
- Whisk
- Spatula
- Baking pans
- Parchment paper
Ingredients
- 2 cups cake flour
- 1.5 cups sugar
- 2 teaspoons baking powder
- 0.5 teaspoon salt
- 4 eggs
- 0.75 cups whole milk
- 0.5 cups melted butter
- 2 teaspoons vanilla extract
- 0.75 cup sugar (for frosting)
- 0.33 cup cocoa powder (for frosting)
- 0.33 cup cornstarch (for frosting)
- pinch salt (for frosting)
- 2 cups whole milk (for frosting)
- 3 egg yolks (for frosting)
- 2 teaspoons vanilla (for frosting)
- 1 tablespoon butter (for frosting)
Instructions
- Preheat your oven to 350°F and prepare four 8-inch round pans by greasing them and lining the bottoms with parchment paper.
- In a large bowl, sift together 2 cups of cake flour, 1.5 cups of sugar, 2 teaspoons of baking powder, and 0.5 teaspoon of salt.
- In another bowl, whisk together 4 eggs, 0.75 cup of milk, 0.5 cup of melted butter, and 2 teaspoons of vanilla extract.
- Pour the wet ingredients into the dry ingredients and fold gently until just combined.
- Divide the batter evenly among the prepared pans.
- Bake for 18 to 22 minutes or until a toothpick comes out clean.
- Allow the cakes to cool in their pans for 10 minutes, then transfer to wire racks to cool completely.
- For the frosting, whisk together 0.75 cup of sugar, 0.33 cup of cocoa powder, 0.33 cup of cornstarch, and a pinch of salt in a saucepan.
- Add 2 cups of whole milk and 3 egg yolks to the saucepan, whisk until smooth, and cook over medium heat, stirring constantly until thickened (about 8 to 10 minutes).
- Remove from heat and stir in 2 teaspoons of vanilla and 1 tablespoon of butter. Pour the pudding into a bowl and press plastic wrap directly onto the surface. Refrigerate until completely cool (about 2 hours).
- Once the pudding is cool, beat in 1 cup of softened butter until light and fluffy.
- To assemble, place the first cake layer on a serving plate and spread about 0.75 cup of frosting on top.
- Position the next layer on top and repeat until all layers are stacked.
- Cover the assembled cake with a thin crumb coat of frosting, refrigerate for 20 minutes, then apply a final generous coat of frosting.
Notes
Nutrition

Hello! I’m Sarah Mitchell, and I’m passionate about bringing creativity and innovation to baking. My love for baking started in high school when I first tried my hand at decorating cupcakes for a class project. What began as a fun hobby quickly became a full-time passion. I’ve spent the past decade working in bakeries and dessert shops, honing my skills in everything from simple cookies to intricate wedding cakes.
After working in some of the top bakeries across the country, I realized that baking was about more than just following recipes — it was about infusing your personality into each creation. At BakingSecret.com, I love creating recipes that push boundaries while staying true to the heart of classic baking. I specialize in creating delicious and visually stunning pastries that will wow your guests.
When I’m not baking, I enjoy teaching baking classes, trying out new cake decoration techniques, and traveling to find inspiration in global dessert traditions. I’m so excited to share my tips and tricks with you to help elevate your baking game!