
Have you ever had a dessert that feels like a hug from the sun? The kind that’s both cloud-light and dreamily creamy, with a zing that makes your taste buds sing? That’s exactly what happened in my kitchen last Sunday. I was dreaming of something sunny, something that could bridge the gap between a rich custard and a fluffy cake. After a few happy kitchen experiments (and one very patient family), this Lemon Custard Cake recipe was born. It’s a magical little dessert that separates into layers as it bakes—a tender sponge on top, a luscious lemon custard below. It’s my new go-to for bringing a little sunshine to the table, no matter the weather.
A Slice of Sunshine: The Story Behind Lemon Custard Cake
This delightful dessert feels like a well-kept secret from a grandmother’s recipe box. While its exact origins are a bit fuzzy, cakes that magically split into layers have been charming bakers across Europe for generations. Think of it as the lovechild of a French clafoutis and a Portuguese pudim. My version is a happy accident! I was tinkering with a simple sponge, adding extra egg yolks for richness, and realized the batter was thinner than usual. To my amazement, the oven worked its magic. The heavier part sank, creating a velvety custard base, while the airy foam rose to form a delicate cake top. It’s a brilliant bit of kitchen science that feels absolutely magical.
Why You’ll Absolutely Adore This Lemon Custard Delight
This recipe is a winner for so many reasons. First, the texture is pure magic—a two-in-one dessert that wows with every bite. Second, it’s deceptively simple. You don’t need any fancy ingredients or equipment, just a bowl, a whisk, and some elbow grease. The flavor is the real star, though. That fresh lemon zest doesn’t just add flavor; it adds a bright, cheerful aroma that fills your whole kitchen. It’s the perfect dessert when you want something impressive that doesn’t require a whole day of effort.
Perfect Occasions for Your Zesty Creation
This Lemon Custard Cake is wonderfully versatile. Its bright flavor makes it a star at spring brunches and summer picnics. It’s elegant enough for a dinner party yet simple enough for a cozy Tuesday night treat. I love bringing it to potlucks because it’s different from the usual heavy desserts. It’s also a fantastic finale to a rich meal, as its lightness cleanses the palate beautifully. Honestly, any day that needs a little sparkle is the right day for this cake.
Gathering Your Ingredients
Simplicity is key here! You likely have most of these in your pantry right now.
- 4 large eggs, separated
- 1 tablespoon fresh lemon zest
- 1 1/4 cups granulated sugar
- 1/4 cup unsalted butter, melted and cooled
- 1/3 cup all-purpose flour
- 1 1/2 cups milk, at room temperature
- 1/4 cup fresh lemon juice
- A pinch of salt
- Powdered sugar or fresh berries, for serving
Quick Swaps: Ingredient Substitution Options
No worries if you’re missing something! Here are some easy swaps:
- Lemon Zest/Juice: For a different twist, use lime or orange. Bottled juice works in a pinch, but fresh truly is best for flavor.
- Milk: Whole milk gives the richest custard, but 2% works well. For a dairy-free version, try unsweetened almond or oat milk.
- Flour: For a gluten-free lemon custard delight, use a 1:1 gluten-free baking blend.
- Sugar: You can reduce the sugar slightly, but it’s important for both sweetness and the custard’s structure.
Creating Your Lemon Custard Cake Magic
Let’s get baking! Follow these steps for a perfect, sunny result.
Step 1: Preheat and Prepare
Start by preheating your oven to 350°F (175°C). This ensures a consistent baking environment from the moment the batter goes in. Take an 8×8 inch baking dish and grease it lightly with butter. For extra security against sticking, you can line it with parchment paper, letting the edges overhang. This simple step makes removing your beautiful cake a total breeze later on. Pro tip: Get all your ingredients measured and ready to go before you start mixing. This “mise en place” makes the process smooth and stress-free.
Step 2: Zest and Separate with Care
Wash and dry one large, juicy lemon. Using a fine grater or microplane, gently zest the yellow skin, avoiding the bitter white pith underneath. The scent that bursts into the air is pure sunshine! Next, carefully separate your eggs. Place the whites in a very clean, grease-free mixing bowl. The yolks go into a separate, larger bowl. Keeping the whites fat-free is crucial for them to whip up properly later. Chef’s tip: Separate eggs when they’re cold—it’s easier. But let the whites come to room temperature before whipping for maximum volume.
Step 3: Build the Yolk Base
To the bowl with the egg yolks, add the granulated sugar. Whisk vigorously for a good 2-3 minutes. You’ll see the mixture transform from grainy yellow to a pale, thick, and creamy ribbon. This step incorporates air and is the first secret to a light texture. Now, stream in the melted (but not hot) butter while whisking constantly. The mixture will become silky and glossy. Gently whisk in the flour until just combined. The batter will be quite thick at this point.
Step 4: Incorporate the Liquids
Slowly drizzle in the room-temperature milk while whisking. Adding it gradually prevents the batter from becoming lumpy. Finally, whisk in the fresh lemon juice and that fragrant lemon zest. The batter will thin out significantly and smell absolutely incredible. This thin batter is exactly what we want—it’s what allows the magical separation to happen in the oven.
Step 5: Whip the Egg Whites to Stiff Peaks
Now, to the clean egg whites! Add a tiny pinch of salt. Using a hand mixer or stand mixer with a whisk attachment, beat the whites on medium-high speed. Start slowly to create small bubbles, then increase the speed. Beat until stiff, glossy peaks form. This means when you lift the whisk, the peak stands straight up and doesn’t droop. These fluffy white clouds are what will give our cake its airy top layer.
Step 6: The Gentle Fold
This is the most important step! Take about one-third of the whipped egg whites and stir it gently into the lemon batter. This first addition lightens the thick batter, making it easier to fold in the rest without deflating the air. Now, add the remaining whites. Using a large silicone spatula, cut down through the center, scoop along the bottom, and fold over the top. Turn the bowl a quarter-turn and repeat. Be patient and gentle until no large white streaks remain. A few small streaks are okay.
Step 7: Bake to Perfection
Pour the foamy batter into your prepared baking dish. It will be very liquid. Carefully place it in the center of your preheated oven. Bake for 40-50 minutes. The cake is done when the top is a beautiful golden brown, feels set to a light touch, and a toothpick inserted into the center comes out clean or with a few moist crumbs. The center might still have a slight jiggle—that’s the custard setting! Pro tip: Avoid opening the oven door during the first 30 minutes of baking to prevent the delicate cake from collapsing.
Step 8: Cool, Chill, and Serve
Once baked, let the cake cool in the pan on a wire rack for at least an hour. It will deflate slightly as it cools—that’s normal! For the cleanest slices and the best custard texture, cover it and refrigerate for at least 2-3 hours, or even overnight. When ready to serve, dust the top generously with powdered sugar for a snowy effect. Slice and enjoy the wonderful contrast of textures!
Your Lemon Custard Cake Timeline
Good things come to those who wait, but this recipe is surprisingly quick!
- Prep Time: 20 minutes
- Bake Time: 45 minutes
- Cooling Time: 1 hour
- Chilling Time (Recommended): 3 hours
- Total Time (to serve): About 5 hours
A Chef’s Secret for the Best Lemon Custard Delight
My biggest secret? Room temperature ingredients are non-negotiable. Cold milk or eggs can cause the melted butter to solidify into little lumps, which can break your beautiful emulsion. Taking the extra 30 minutes to let your eggs, milk, and even butter (after melting) come to room temp ensures a silky-smooth batter. This smooth batter bakes evenly and creates that perfect, distinct layer between the creamy custard and the fluffy cake.
A Fun Fact: The Magic of Separation
The “self-saucing” or layer-separating magic of this cake is a fantastic lesson in kitchen science. The starchy flour and heavy liquids in the batter (the egg yolks, milk) are denser. They naturally sink to the bottom during baking, forming the custard layer. The airy, whipped egg whites, full of tiny air bubbles, rise to the top and set into the delicate sponge. It’s one oven, one batter, but two incredible textures. Isn’t that clever?
Necessary Equipment
You don’t need fancy gear! Gather these basics:
- 8×8 inch square or 9-inch round baking dish
- Two mixing bowls (one must be very clean for egg whites)
- Whisk and silicone spatula
- Hand mixer or stand mixer (you can whisk egg whites by hand, but it’s a workout!)
- Fine grater or microplane for zesting
- Juicer or fork for lemon juice
- Measuring cups and spoons
Storing Your Lemon Custard Cake
Because of the custard layer, this cake loves the cold. Once completely cooled, cover the baking dish tightly with plastic wrap or transfer slices to an airtight container. It will keep beautifully in the refrigerator for 3-4 days. The flavors actually meld and the lemon becomes even more pronounced, making it arguably better on day two!
I do not recommend freezing this cake. The custard layer can become watery and grainy when thawed, losing its lovely smooth texture. It’s best enjoyed fresh from the fridge.
If you’re taking it to a gathering, you can transport it in its chilled baking dish. Keep it in a cooler with ice packs until you’re ready to serve. The powdered sugar dusting is best done right before serving to prevent it from dissolving into the cake.
Handy Tips and Advice
- Zest First, Juice Later: Always zest your lemon before you cut and juice it. It’s nearly impossible to zest a squeezed-out lemon half!
- No Lumps in the Custard: If you’re worried about flour lumps, you can sift the flour directly into the yolk mixture as you whisk.
- Test for Doneness: The golden top should spring back lightly when touched. A slight jiggle in the very center is perfect—it will set as it cools.
- For a Taller Cake: Use a slightly smaller 8-inch square pan for taller, more defined layers.
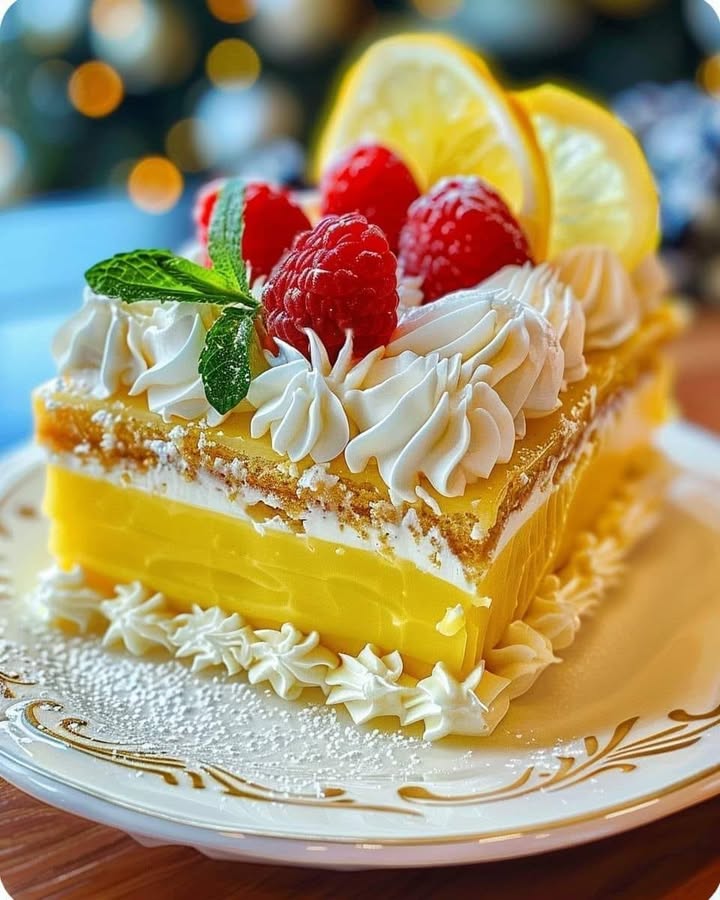
Presentation Ideas to Make it Shine
Make your dessert table pop with these simple ideas:
- Dust with powdered sugar through a small sieve for a professional, snowy effect.
- Serve each slice with a handful of fresh, colorful berries like raspberries, blueberries, or strawberries.
- A dollop of lightly sweetened whipped cream or a scoop of vanilla bean ice cream is heavenly.
- For a fancy touch, garnish with a twist of lemon zest or a thin, curled slice of lemon.
- Serve on individual plates with a drizzle of a simple berry coulis.
Craving More? Try These Healthier Twists!
Love the idea but want to mix it up? Here are six delicious variations:
- Lemon-Ricotta Custard Cake: Substitute 3/4 cup of the milk with whole-milk ricotta, blended until smooth. This adds a gorgeous, creamy protein boost and a subtle tang.
- Gluten-Free & Almond-Lemon Cake: Replace the all-purpose flour with finely ground almond flour. You’ll get a nuttier flavor and a wonderfully moist texture that’s naturally gluten-free.
- Reduced-Sugar Lemon Delight: Cut the granulated sugar down to 3/4 cup. The cake will be less sweet and more tart, perfect for those watching their sugar intake. The texture may be slightly denser.
- Coconut-Lemon Tropical Cake: Use coconut milk instead of regular milk and add 1/4 cup of unsweetened shredded coconut to the batter. It’s a tropical vacation in every bite!
- Individual Mini Custard Cakes: Bake the batter in greased ramekins or a muffin tin for about 20-25 minutes. This creates perfect single-serving desserts with great portion control.
- Berry Swirl Custard Cake: Before baking, drop small spoonfuls of your favorite berry jam or fresh crushed berries onto the batter. Use a knife to gently swirl for a marbled, fruity effect.
Common Mistakes to Avoid
Mistake 1: Using Cold Ingredients
This is the number one culprit for a failed emulsion! Adding cold milk or eggs to melted butter causes the butter to turn into solid bits. These fat droplets can weigh down the batter and prevent the clean layer separation. Always plan ahead. Take your eggs, milk, and butter out about 30-60 minutes before you start baking. Your batter will be smooth, homogeneous, and bake like a dream.
Mistake 2: Over-mixing or Rough Folding
After all the care of whipping the egg whites, being rough with them is a tragedy. Stirring or beating them aggressively into the batter deflates all the precious air bubbles. Without this air, you won’t get a fluffy cake top—it will be dense and flat. Be patient and gentle. Use a folding motion with a spatula, cutting down and folding over, just until the white streaks disappear.
Mistake 3: Overbaking the Cake
Because we’re looking for a custard layer, overbaking is a real risk. A completely solid, non-jiggly center means the custard has baked into a solid egg layer, losing its creamy, pudding-like texture. The cake top might also get too dark and dry. Pull the cake out when the top is golden and set, but the very center still has a slight, shimmering jiggle. Trust that it will continue to set perfectly as it cools on the counter.
Mistake 4: Not Letting it Chill
I know it’s tempting to dig in right away, but skipping the chill time is a mistake. The custard layer needs time to firm up in the refrigerator. Cutting into a warm cake will result in a soupy, messy slice. The flavors also need time to meld and intensify. For the cleanest slices and the most luxurious texture, let it chill for at least a few hours. It’s worth the wait!
Frequently Asked Questions
Why did my cake not separate into layers?
This usually happens if the egg whites weren’t whipped stiff enough, or if they were deflated during folding. The air in the whites is what creates the top cake layer. Also, over-mixing the batter after adding the flour can develop the gluten too much, creating a uniform, dense texture instead of a separating one. Ensure your whites are at stiff peak stage and fold with a light, careful hand.
Can I use bottled lemon juice instead of fresh?
You can in a pinch, but I strongly recommend fresh lemons. Fresh juice provides a brighter, cleaner, and more vibrant lemon flavor. Bottled juice often has a muted, sometimes slightly metallic taste. The fresh zest is also irreplaceable—it contains the aromatic oils that give the cake its incredible fragrance. For the best Lemon Custard Delight, fresh is always the way to go.
My custard layer is watery. What went wrong?
A watery custard typically points to under-baking. The starches in the flour need enough heat and time to fully swell and set the liquid. Make sure your oven is fully preheated and use an oven thermometer to check its accuracy. Also, ensure you’re using the correct size pan; a pan that’s too large will result in a thinner batter that over-bakes before the custard can properly set. Proper ingredient preparation, like bringing everything to room temperature, also ensures even baking and setting.
How do I get my egg whites to stiff peaks successfully?
Start with a perfectly clean, grease-free bowl and beaters. Any trace of fat (like yolk) will prevent the whites from foaming. Make sure your whites are at room temperature for more volume. Add a pinch of cream of tartar or a few drops of lemon juice at the soft peak stage—the acid stabilizes the foam. Beat on medium-high speed until the whites are glossy, and peaks stand straight up when you lift the whisk.
Can I make this cake gluten-free?
Absolutely! Simply replace the all-purpose flour with a high-quality 1-to-1 gluten-free baking flour blend. Brands like Bob’s Red Mill or King Arthur Measure for Measure work wonderfully. Do not use almond or coconut flour alone for this recipe, as they behave very differently and won’t provide the structure needed for the custard layer.
Is it normal for the cake to sink a lot after baking?
Yes, some sinking is completely normal and expected! The tall, airy foam of the egg whites will deflate as the cake cools, settling into a more compact but still tender sponge layer. Don’t worry if the height reduces by a half-inch or so. Significant collapsing (like a crater) usually means the egg whites were under-whipped or the cake was severely under-baked.
Can I double this recipe?
Yes, you can double all the ingredients. Bake it in a 9×13 inch baking dish. You will likely need to add 5-10 minutes to the baking time. Keep a close eye on it and use the visual and touch tests for doneness—golden top, set edges, slight jiggle in the center.
What’s the best way to store leftovers?
Cover the baking dish tightly with plastic wrap or transfer slices to an airtight container. Store in the refrigerator for up to 4 days. The cake actually gets more flavorful! I do not recommend freezing, as the custard texture will suffer upon thawing.
Can I add other flavors to this cake?
Of course! While lemon is classic, try orange zest and juice for a creamsicle vibe. A teaspoon of vanilla extract or a tablespoon of poppy seeds added with the zest are also delightful. For a fun twist, layer some fresh blueberries in the bottom of the pan before pouring in the batter.
This looks amazing! Where can I find more cakes like this?
I’m so glad you asked! If you love magical desserts that wow a crowd, you have to try our stunning Galaxy Ice Cream Cake for a show-stopping frozen treat. For another citrusy sensation, the Mango Passionfruit Cheesecake Cake is a tropical roll cake that’s bursting with flavor. And if you’re a fan of that delightful custard texture, you’ll adore our adorable individual Pineapple Upside-Down Mini Cakes. For the ultimate indulgence, our Hot Fudge Sundae Brownie Cheesecake is pure decadence. You can explore all of these and many more wonderful creations in our full collection of favorite cake and cupcake recipes.
And there you have it—your guide to creating this spellbinding Lemon Custard Cake. It’s more than just a recipe; it’s a little bit of kitchen magic that never fails to impress. The joy is in the process: zesting the lemon, watching the egg whites transform into clouds, and the anticipation as the oven performs its separating trick. So, tie on your apron, grab some sunny lemons, and whip up this zesty, creamy delight. I promise, the happy sighs from your family and friends will be all the thanks you need. Now, go bake some sunshine!
Equipment
- Grand bol
- Fouet
- Spatule
- Plat de cuisson
- Papier sulfurisé
Ingredients
- 4 oeufs
- 150 g sucre
- 30 g farine tout usage
- 5 g beurre non salé fondu et refroidi
- 450 ml lait à température ambiante
- 60 ml jus de citron frais
- 1 pincée sel
- 1 c. à soupe zeste de citron frais
- q.s. sucre glace pour saupoudrer
- q.s. baies fraîches pour servir
Instructions
- Préchauffez votre four à 175°C et beurrez un plat de cuisson de 20x20 cm.
- Zestez un citron et séparez les blancs d'œufs dans un bol propre et les jaunes dans un autre bol.
- Battez les jaunes d'œufs avec le sucre pendant 2-3 minutes jusqu'à ce que le mélange soit crémeux et pâle.
- Incorporez le beurre fondu tout en fouettant, puis ajoutez délicatement la farine jusqu'à ce qu'elle soit juste incorporée.
- Versez progressivement le lait tout en fouettant, suivi du jus de citron et du zeste jusqu'à ce que le tout soit bien combiné.
- Dans le bol des blancs d'œufs, ajoutez une pincée de sel et battez jusqu'à obtenir des pics fermes.
- Incorporez délicatement un tiers des blancs en neige dans la pâte, puis incorporez les blancs restants jusqu'à ce qu'il n'y ait plus de grosses traces.
- Versez la pâte dans le plat préparé et faites cuire pendant 40-50 minutes jusqu'à ce qu'elle soit dorée et bien prise avec une légère tremblote au centre.
- Laissez le gâteau refroidir dans le plat pendant une heure, puis réfrigérez pendant 2-3 heures avant de servir. Saupoudrez de sucre glace avant de trancher.
Notes
Nutrition

Hi, I’m Olivia Parker, the founder of BakingSecret.com and a lifelong lover of all things sweet and homemade. I grew up in a small town in Oregon, where the smell of fresh cookies in my family’s kitchen sparked my passion for baking. Over the years, I turned that passion into a mission: to help home bakers feel confident, inspired, and creative.
After studying food science and working in several artisan bakeries across the U.S., I decided to create a space where everyone from beginners to seasoned bakers can find reliable recipes, expert tips, and a warm, welcoming community. BakingSecret.com is my way of sharing the magic of baking with the world. When I’m not testing new recipes, you’ll find me exploring farmers’ markets, collecting vintage cookbooks, or perfecting my sourdough technique.