
Why Pumpkin and Cheesecake Bars Are My Fall Obsession
Last October, I brought a pan of homemade dessert bars to my neighbor’s potluck. Within twenty minutes, the entire batch had disappeared. Three people asked for the recipe before I even grabbed my own piece. That’s the power of combining pumpkin and cheesecake into one irresistible treat.
These bars create magic in your mouth. The rich, tangy cheesecake layer meets warm pumpkin spice in every bite. I’ve been making them for five years now, and they never fail to impress. Whether you’re planning a Thanksgiving dinner or just want a cozy weekend baking project, these bars deliver.
I love how easy they are to serve too. No fancy plating required. Just cut them into squares and watch people’s faces light up. They look beautiful on any dessert table, and they taste even better than they look.
The best part? You don’t need professional baking skills to pull these off. I’ll walk you through everything you need to know. By the end of this guide, you’ll feel confident making these bars for any occasion.
What Are Pumpkin and Cheesecake Bars?
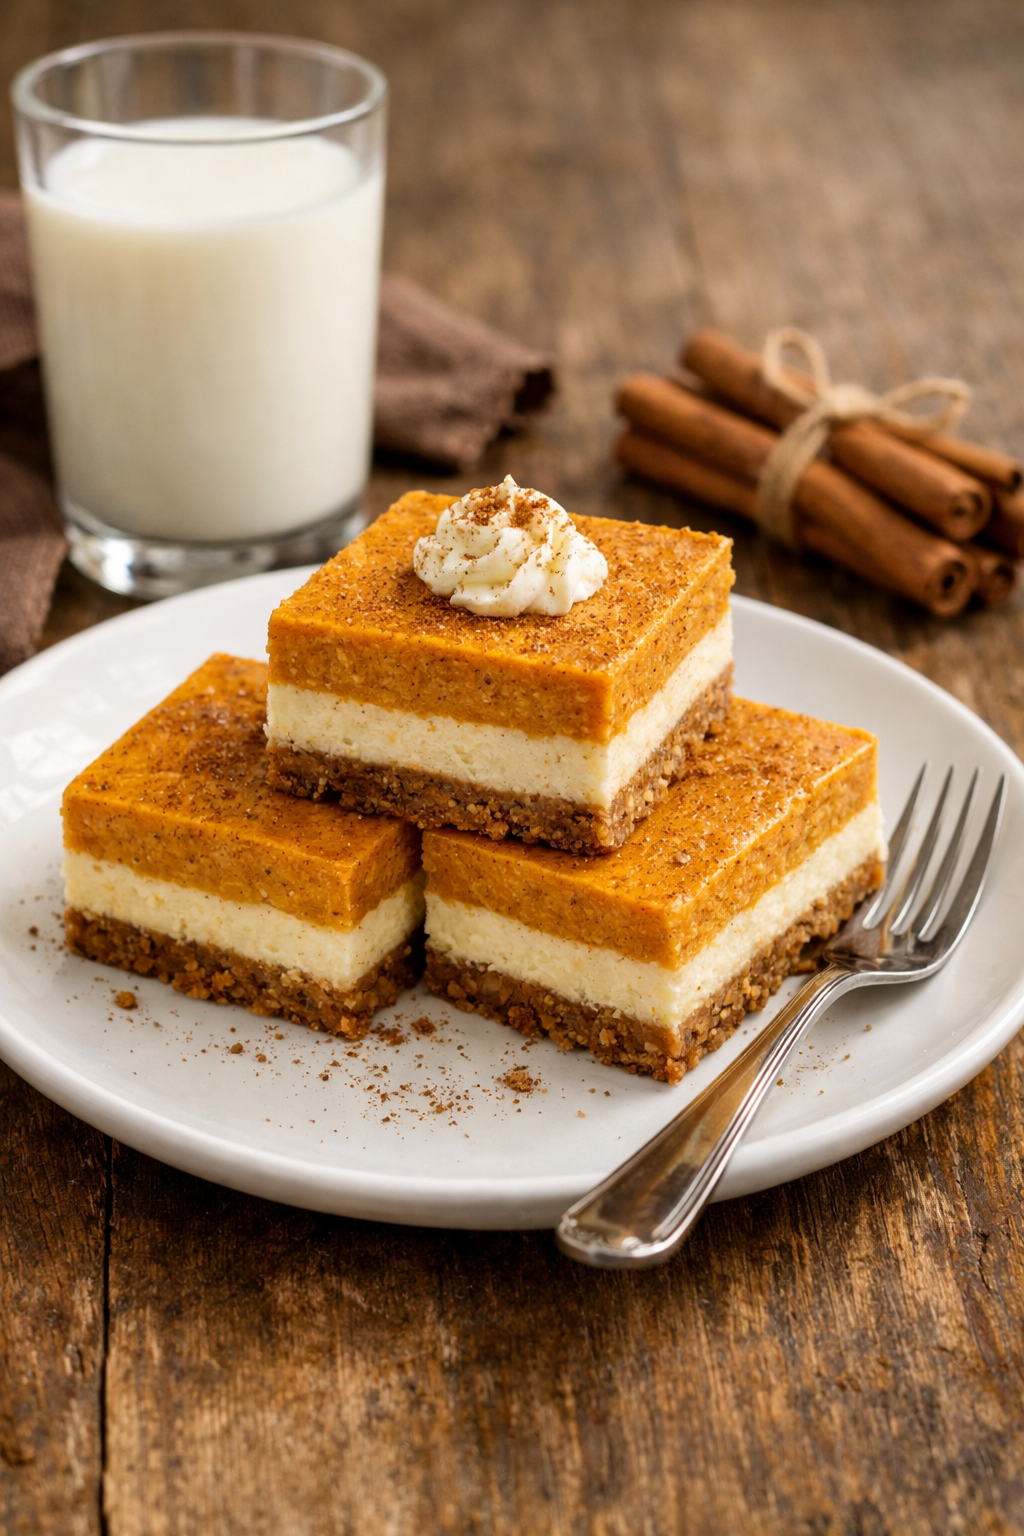
Think of pumpkin and cheesecake bars as the ultimate fall dessert hybrid. They combine two beloved flavors into one handheld treat. The bottom layer features spiced pumpkin filling packed with cinnamon, nutmeg, and ginger. The top layer brings smooth, creamy cheesecake to balance everything out.
These bars sit somewhere between a pie and a traditional cheesecake. They’re denser than cake but lighter than a full cheesecake slice. The texture is what makes them special. You get that velvety cheesecake feel mixed with the softer pumpkin base.
Most recipes start with a graham cracker or gingersnap crust. This creates a sturdy foundation that holds both layers together. The crust adds a sweet crunch that contrasts beautifully with the creamy filling above it.
When I first tried making these, I was worried about getting the layers to work together. Turns out, the technique is simpler than I thought. You spread the pumpkin mixture first, dollop the cheesecake on top, and then swirl them together. The marbled effect looks impressive but takes just a few seconds to create.
The Perfect Balance of Flavors
What makes these bars stand out is how well the flavors complement each other. Pumpkin can sometimes taste one-dimensional on its own. Add cheesecake to the mix, and suddenly you have depth and complexity.
The cheesecake layer brings tanginess from the cream cheese. This cuts through the sweetness of the pumpkin. It’s like having two desserts in one bite, but they work together instead of competing.
The spices in the pumpkin layer do important work here. Cinnamon adds warmth. Nutmeg brings a subtle earthiness. Ginger gives a tiny kick that wakes up your taste buds. These spices make the bars taste like fall in dessert form.
I always use real pumpkin puree, not pumpkin pie filling. The plain puree lets me control the sugar and spice levels. Plus, it has a cleaner pumpkin flavor that shines through better.
The cream cheese needs to be full-fat for the best results. I learned this the hard way after trying low-fat versions. They turned out grainy and didn’t have that signature cheesecake richness. Don’t cut corners on the cream cheese.
Texture That Keeps People Coming Back
The texture of these bars is what turns first-time tasters into repeat customers. The bottom pumpkin layer is soft and almost custardy. It melts on your tongue without being mushy or wet.
The cheesecake portion adds a silky smoothness. It’s firm enough to hold its shape when you cut the bars, but still feels luxurious when you eat it. This combination creates an interesting mouthfeel that keeps you reaching for another piece.
The crust provides necessary structure. Without it, the bars would fall apart. A good crust should be firm but not hard. It should crumble slightly when you bite into it, adding texture without overpowering the main event.
Temperature affects the texture too. These bars taste great cold, at room temperature, or slightly warmed. I prefer them chilled because the layers hold together better. My husband likes them at room temperature when the flavors open up more. There’s no wrong answer here.
Perfect for Any Occasion
I make pumpkin cheesecake bars for all kinds of events. They’re obvious stars at Thanksgiving and Halloween parties. But I’ve also brought them to summer picnics and winter holiday gatherings. They work year-round if you love pumpkin like I do.
These bars travel well, which makes them ideal for potlucks. They don’t need special serving dishes or utensils. Just pack them in a container and go. They won’t get soggy or fall apart during transport.
For casual get-togethers, I cut them into larger squares. For fancier events, I make them smaller and more bite-sized. You can adjust the portion size based on your needs. One 9×13 pan usually gives me 12 to 24 servings depending on how I cut them.
They’re also great for gift-giving. I pack them in decorative boxes during the holidays. My friends always appreciate homemade treats more than store-bought items. These bars show effort without requiring all-day kitchen time.
Kids love them too, which surprised me at first. I thought the cheesecake might be too sophisticated for young palates. But the sweetness of the pumpkin and the familiar cinnamon flavor win them over. I’ve served these at children’s birthday parties with great success.
Coffee shops and bakeries charge premium prices for similar desserts. Making them at home costs a fraction of that. The ingredients are basic and affordable. You probably have half of them in your pantry already.
The versatility extends to dietary modifications too. I’ve successfully made gluten-free versions using almond flour crusts. Dairy-free adaptations work with cashew cream instead of cream cheese. The basic concept is flexible enough to accommodate different needs.

Gathering Your Ingredients for the Best Pumpkin Cheesecake Bars
Now that you’re sold on making these bars, let’s talk about what you actually need to grab from the store. I keep my pantry stocked with most of these items during fall, which makes whipping up a batch super convenient on short notice.
For the crust layer, you’ll need about two cups of graham cracker crumbs (that’s roughly 15 full crackers if you’re crushing them yourself), six tablespoons of melted butter, and three tablespoons of sugar. I prefer crushing my own crackers in a food processor because the texture comes out more even. Plus, there’s something satisfying about the whole process. If graham crackers aren’t your thing, gingersnaps make an incredible substitute that adds extra spice notes.
The pumpkin layer requires one 15-ounce can of pure pumpkin puree (not the pre-spiced pie filling), three large eggs, one cup of granulated sugar, and half a cup of heavy cream. For spices, you’ll need one and a half teaspoons of cinnamon, half a teaspoon of ground ginger, half a teaspoon of nutmeg, and a quarter teaspoon of ground cloves. I also add a pinch of salt because it makes all the other flavors pop.
Here’s the thing about pumpkin puree. Not all cans are created equal. I once bought a store brand that was weirdly watery and had to strain it through cheesecloth for twenty minutes. Now I stick with Libby’s or organic brands from Whole Foods. The consistency should be thick and smooth, not runny or stringy. If you tap the can and it sounds sloshy, pick a different one.
For the cheesecake layer, grab two 8-ounce packages of cream cheese (they must be full-fat), half a cup of sugar, two large eggs, and one teaspoon of vanilla extract. The cream cheese needs to sit at room temperature for at least an hour before you start. I learned this lesson the hard way when I tried microwaving cold cream cheese to soften it quickly. Ended up with weird lumpy spots that never fully mixed in.
Speaking of cream cheese, quality matters tremendously here. Philadelphia is my go-to brand because it’s consistently smooth and tangy. Store brands sometimes have stabilizers that affect the texture. I’ve noticed some generic versions don’t whip as well or have a slightly plasticky mouthfeel. If you’re already investing time in baking, spend the extra dollar on good cream cheese.
Fresh spices make such a difference that I’m almost annoying about it. That jar of cinnamon you bought three years ago? It’s probably lost most of its flavor. I replace my ground spices every six months, especially the ones I use frequently. Sometimes I buy whole nutmeg and grate it fresh, which gives an incredibly fragrant result. The aroma alone is worth the extra thirty seconds of effort.
By the way, if you’re shopping at a place like Penzeys Spices or a good spice shop, the quality difference is night and day compared to supermarket options. The spices smell stronger and taste more vibrant. I’m not saying you can’t make good bars with regular grocery store spices, but if you want to elevate things, better spices are the easiest upgrade.
Ingredient Swaps for Special Dietary Needs
I get asked about modifications constantly, so let me address the most common ones. For gluten-free bars, swap the graham crackers with gluten-free graham crackers or crushed gluten-free cookies. I’ve had success with Pamela’s brand and Simple Mills. You can also use almond flour mixed with melted butter and a bit of sugar for a naturally gluten-free crust. My gluten free cheesecake recipe uses a similar crust technique that works beautifully.
Dairy-free versions require more creativity but they’re totally doable. Replace the cream cheese with cashew cream cheese or a brand like Kite Hill. Coconut cream works instead of heavy cream. Use dairy-free butter for the crust. The texture won’t be identical to traditional cheesecake, but it’s still delicious. I’ve made a dairy free cheesecake that uses similar substitutions if you want more detailed guidance on that front.
For lower sugar options, I’ve experimented with monk fruit sweetener and coconut sugar. The bars turn out slightly less sweet but still tasty. Coconut sugar gives a deeper, almost caramel-like flavor that some people actually prefer. Just know that alternative sweeteners can affect texture slightly, making things a bit denser.
Step-by-Step Instructions for Perfect Pumpkin Cheesecake Bars
Okay, ingredients assembled. Let’s actually make these things. Preheat your oven to 325 degrees Fahrenheit. This lower temperature helps prevent cracks and ensures even baking throughout.
Start with the crust. Mix your graham cracker crumbs with melted butter and sugar until the mixture looks like wet sand. Press it firmly into a 9×13 inch baking pan that you’ve lined with parchment paper. I always leave some parchment hanging over the edges because it makes lifting the bars out so much easier later. Use the bottom of a measuring cup to really pack that crust down. You want it compact and even.
Funny enough, I used to skip baking the crust first, and it always turned out soggy. Now I bake it for 10 minutes before adding the filling. This creates a barrier that keeps moisture from seeping in. Let it cool for a few minutes while you prep the fillings.
For the pumpkin mixture, whisk together the pumpkin puree, eggs, sugar, cream, and all your spices until completely smooth. No lumps allowed here. I use a hand mixer on medium speed for about two minutes. The mixture should be silky and pourable.
The cheesecake layer requires beating the room-temperature cream cheese until fluffy first. This takes about three minutes with an electric mixer. Then add sugar and beat another minute. Add eggs one at a time, mixing well after each. Finally, mix in the vanilla. The mixture should be thick but smooth, lighter in color than when you started.
Here’s where it gets fun. Pour the pumpkin mixture over your pre-baked crust and spread it evenly. Then dollop spoonfuls of the cheesecake mixture on top. I usually do about 8 to 10 dollops randomly across the surface. Take a butter knife or a skewer and swirl through both layers in a figure-eight pattern. Don’t overthink it. Random swirls look more natural and pretty than perfectly planned ones.
Some people prefer a more distinct layered look, kind of like what you’d see in a lemon blueberry cheesecake cake with clear separation. If that’s your style, spread the entire cheesecake layer on top of the pumpkin instead of swirling. Both presentations taste amazing.
Baking and Cooling Tips for Success
Slide your pan into that preheated 325-degree oven and bake for 45 to 55 minutes. The exact time depends on your oven and how thick your layers are. You’re looking for edges that are set and slightly puffed, with a center that still jiggles a tiny bit when you shake the pan gently.
The jiggle test is crucial. If the center looks liquidy, keep baking. If it’s completely firm, you’ve probably overbaked them slightly. They’ll still taste good but might be a bit dry. That slight jiggle in the center means the residual heat will finish cooking everything as it cools without overdoing it.
I always turn off the oven, crack the door open, and let the bars sit inside for another 15 minutes. This gradual temperature change prevents cracks from forming on the surface. Cheesecake hates sudden temperature shifts. Trust me on this one.
After that, pull them out and let them cool at room temperature for about an hour. Then cover the pan with plastic wrap and refrigerate for at least four hours. Overnight is even better. These bars need that chill time for the flavors to meld and the texture to set properly. I know waiting is torture, but cutting into warm bars results in a messy disaster.
When you’re ready to cut them, use a sharp knife that you’ve run under hot water and dried off. Make one cut, wipe the knife clean, run it under hot water again, and make the next cut. This hot knife technique gives you clean edges instead of smushed, raggedy ones. It takes extra time but makes your bars look bakery-worthy.
If you want to get fancy with presentation, wipe the knife between every single cut. For casual family desserts, I usually just rinse it every few cuts. Nobody complains either way. The bars store in an airtight container in the fridge for up to five days, though they never last that long in my house. They also freeze beautifully for up to three months, which makes them perfect for advance party prep.
This same careful cutting approach works great for other delicate desserts too. When I make my no bake peanut butter cheesecake, the hot knife method is absolutely essential for clean slices.
How to Serve Your Pumpkin Cheesecake Bars Like a Pro
After you’ve nailed the recipe and cut those perfect squares, the fun part begins—figuring out how to serve them. I’ve tried just about every topping and pairing you can imagine over the years, and some combinations are absolute game-changers.
My go-to garnish is a simple dollop of freshly whipped cream. Not the canned stuff, but real heavy cream whipped with a touch of vanilla and powdered sugar. It takes maybe three minutes to make and adds a cloud-like lightness that balances the dense richness of the bars. Sometimes I’ll add a tiny pinch of cinnamon to the whipped cream itself, which creates this gorgeous layered spice effect.
Caramel sauce is another winner. I drizzle it right before serving so it stays glossy and doesn’t soak into the bars. The buttery sweetness of caramel plays beautifully with both the pumpkin spice and the tangy cheesecake. If you’re feeling fancy, salted caramel takes things up another notch. That sweet-salty contrast is chef’s kiss.
Here’s something I discovered by accident last year. A light dusting of cinnamon sugar on top right before serving makes them look professionally finished. I mix equal parts cinnamon and granulated sugar in a small shaker and give each bar a quick sprinkle. It catches the light and adds a subtle crunch that people notice.
For holidays, I’ll add candied pecans or toasted pumpkin seeds on top. The nuts bring texture and a sophisticated touch that makes the bars feel more special. I once served them with maple syrup drizzled over everything at a brunch, and people couldn’t stop talking about it. The maple amplified the fall flavors without overpowering anything.
Pairing drinks matters too. These bars are incredible with coffee, especially a medium roast that isn’t too bitter. The coffee cuts through the sweetness perfectly. For non-coffee drinkers, spiced chai tea or even a glass of cold milk works wonderfully. I’ve served them at evening gatherings with dessert wine, and that’s a whole different experience—very grown-up and elegant.
Temperature changes the serving experience significantly. Cold from the fridge, they’re firm and refreshing, almost like eating a frozen treat on a warm day. At room temperature, the flavors bloom more and the texture gets softer. I’ve even warmed individual squares in the microwave for about 15 seconds and served them with vanilla ice cream melting on top. That warm-cold contrast is absolutely addictive.
For parties, I like cutting them into smaller bite-sized pieces and arranging them on a tiered serving platter. It makes them look abundant and inviting. Add some fall leaves or small pumpkins around the base for decoration, and you’ve got an Instagram-worthy display that required zero extra effort.
Storing Your Bars to Maintain Peak Freshness
Let’s talk storage, because improper storage ruins even the best-made desserts. These bars need to live in the refrigerator pretty much always. The cream cheese and eggs in them mean they can’t sit out for hours like cookies can.
I store mine in an airtight container with parchment paper between layers if I’m stacking them. This prevents them from sticking together or getting smooshed. Glass containers with snap-on lids work best because plastic can sometimes absorb flavors. The bars will stay fresh and delicious for up to five days in the fridge, though honestly, they rarely make it past day three at my house.
After about day four, I notice the crust starts losing some of its crispness. It’s still good, just softer. If that bothers you, eat them within the first three days when everything is at peak texture. The flavor actually improves slightly after a day or two as everything melds together.
Freezing is where these bars really shine for meal prep and advance planning. I cut them into individual portions, wrap each one tightly in plastic wrap, then put all the wrapped bars in a freezer-safe zip-top bag. They’ll keep for up to three months this way. Label the bag with the date because frozen desserts all start looking the same after a while.
When you’re ready to eat a frozen bar, just transfer it to the fridge and let it thaw overnight. Thawing at room temperature works too if you’re in a hurry—it takes about two to three hours. I don’t recommend microwaving them from frozen because the texture gets weird and watery.
One trick I learned from a baker friend: freeze the bars on a parchment-lined baking sheet first, uncovered, for about two hours. Once they’re solid, then wrap them individually. This prevents them from sticking together and makes the wrapping process so much easier. You’re basically flash-freezing them, which is a technique you’ll see in basic cooking techniques for preserving food quality.
If you’re making these for a party but need to bake them days in advance, freezing is your best friend. They come out tasting just as fresh as the day you made them. Nobody will ever know they weren’t baked that morning.
By the way, don’t freeze them with toppings already on. Add whipped cream, caramel, or any garnishes after thawing. Frozen whipped cream gets watery and sad when it defrosts. Trust me on this.
Reheating Your Pumpkin and Cheesecake Bars
Most of the time, these bars are best served cold or at room temperature. But sometimes you want that warm, just-baked feeling, especially on a chilly evening when comfort food calls.
For reheating individual portions, the microwave works in a pinch. Put a bar on a microwave-safe plate and heat it on 50% power for 15 to 20 seconds. Check it and add more time in 10-second increments if needed. You’re not trying to make it hot, just barely warm. Too much heat and the cheesecake layer starts to separate and get oily.
The oven method is gentler and gives better results. Preheat your oven to 300 degrees, place the bars on a baking sheet, and warm them for about 8 to 10 minutes. Cover them loosely with foil so the tops don’t brown or dry out. This method works great if you’re reheating several pieces at once for a gathering.
I usually don’t reheat the whole pan because it’s hard to control the temperature evenly. The edges tend to get too warm while the center is still cold. Individual portions or small batches work much better.
Here’s something worth mentioning: cold bars straight from the fridge are genuinely delicious and don’t need reheating at all. Sometimes I think we get caught up in serving everything warm when room temperature or chilled is actually ideal. These bars were designed to be enjoyed cold, so don’t feel like you have to heat them just because they’re a “baked good.”
Common Questions About Making Pumpkin Cheesecake Bars
Can I use canned pumpkin puree instead of fresh pumpkin?
Absolutely, and I actually prefer canned pumpkin for this recipe. Fresh pumpkin has too much moisture and requires roasting, straining, and pureeing—way more work than necessary. Canned pure pumpkin puree (not pie filling) has the perfect consistency and concentrated flavor. Just make sure you’re buying plain pumpkin, not the pre-spiced version. The label should list only one ingredient: pumpkin.
How do I prevent the cheesecake from cracking?
Cracks happen when the temperature changes too quickly or when you overbake. Use the lower oven temperature I mentioned (325°F), and don’t skip the gradual cooling step where you turn off the oven and crack the door. Make sure all your ingredients, especially cream cheese and eggs, are at room temperature before mixing because cold ingredients don’t blend smoothly and can cause texture issues. The slight jiggle in the center when you pull them out is your insurance against overbaking.
Can I make these bars ahead of time?
Yes, they’re actually better when made ahead! The flavors develop more fully after sitting in the fridge overnight. I regularly make them two days before I need them. For longer advance prep, freeze them as I described above. They’re one of those rare desserts that handle make-ahead planning beautifully, which is why they’re perfect for holiday stress.
What can I substitute for cream cheese if I’m lactose intolerant?
Lactose-free cream cheese works perfectly and you won’t notice any difference in taste or texture. Brands like Green Valley make excellent lactose-free versions. If you need fully dairy-free options, cashew-based cream cheese alternatives like Kite Hill or Miyoko’s work well, though the tang is slightly different. Coconut cream cheese is another option but brings a subtle coconut flavor that not everyone loves in pumpkin desserts.
How do I get the layers to stay separate and not mix?
If you want distinct layers instead of the marbled swirl, spread the pumpkin layer first and let it set for about 10 minutes at room temperature. Then very carefully spread the cheesecake mixture on top using a offset spatula. Start from the center and work outward gently. The slight setting of the pumpkin layer creates a barrier that keeps them more separate. That said, a little mixing at the border where they meet is natural and actually looks pretty.
Can I add other flavors to the pumpkin layer?
Definitely! I’ve stirred in a tablespoon of maple syrup for deeper fall flavor. A teaspoon of espresso powder enhances all the other flavors without making it taste like coffee. Some people add a splash of bourbon or rum for a grown-up twist. Orange zest is another beautiful addition that brightens everything up. Just don’t go overboard—a little goes a long way.
How do I make the crust extra crispy?
The key is pre-baking the crust as I mentioned, but you can take it further. Bake it for 12 to 15 minutes instead of just 10 until it’s golden brown. Use less butter in the crust mixture for a drier, crunchier result—try five tablespoons instead of six. Adding a tablespoon of melted coconut oil to the crust mixture also creates a crisper texture. Some people brush the baked crust with a thin layer of melted white chocolate before adding the filling, which creates a moisture barrier.
What’s the best way to cut the bars without making a mess?
The hot knife technique I described earlier is non-negotiable for clean cuts. Beyond that, make sure the bars are completely chilled and firm before cutting. Use a long, thin knife rather than a short one so you can make smooth strokes. Wipe the blade clean between cuts with a damp paper towel. If you’re still getting messy cuts, try chilling the knife in the freezer for a few minutes before each cut.
Can I make mini versions of these bars?
Absolutely! Use a muffin tin lined with paper liners. Press a small amount of crust into each cup, then layer in the pumpkin and cheesecake mixtures. Baking time will be shorter—check them at 20 to 25 minutes. Mini versions are perfect for parties because they’re already portioned and easy for guests to grab. They also freeze individually really well.
Do these bars need to be refrigerated if I’m serving them within a few hours?
For food safety, yes, they should stay refrigerated. The cream cheese and eggs mean they can’t sit at room temperature for more than two hours according to food safety guidelines. If you’re serving them at a party, keep them chilled until right before serving, or put the serving platter over a larger tray of ice to keep them cool. They taste great cold anyway, so this isn’t a hardship.
If you’re looking for more inspiration with cheesecake-based desserts, my collection of cheesecake recipes has plenty of ideas that use similar techniques and flavor combinations you might enjoy exploring.
Making pumpkin and cheesecake bars doesn’t require fancy skills or hard-to-find ingredients. Just follow the steps, trust the process, and don’t be afraid to make them your own with different toppings or slight flavor tweaks. These bars have brought so much joy to my gatherings over the years, and I’m confident they’ll do the same for yours. Give them a try this weekend—your kitchen will smell amazing, and everyone who tastes them will be asking when you’re making them again.
Equipment
- Baking Pan
- Whisk
- Mixing Bowls
- Knife
- Parchment Paper
Ingredients
- 2 cups Graham Cracker Crumbs
- 6 tablespoons Melted Butter
- 3 tablespoons Sugar
- 1 15 oz can Pure Pumpkin Puree
- 3 Large Eggs
- 1 cup Granulated Sugar
- 1/2 cup Heavy Cream
- 1 1/2 teaspoons Cinnamon
- 1/2 teaspoon Ground Ginger
- 1/2 teaspoon Nutmeg
- 1/4 teaspoon Ground Cloves
- Pinch Salt
- 2 8 oz packages Full-Fat Cream Cheese
- 1/2 cup Sugar for Cheesecake Layer
- 2 large Eggs for Cheesecake Layer
- 1 teaspoon Vanilla Extract
Instructions
- Preheat your oven to 325°F (163°C).
- Mix the graham cracker crumbs, melted butter, and sugar until the mixture resembles wet sand.
- Press the mixture into a lined 9x13 inch baking pan and bake for 10 minutes.
- Let the crust cool while you prepare the fillings.
- In a bowl, whisk together the pumpkin puree, eggs, sugar, cream, and spices until smooth.
- In a separate bowl, beat the cream cheese until fluffy, then add sugar and beat until combined.
- Add eggs to the cream cheese mixture one at a time, mixing well after each addition, then add vanilla.
- Pour the pumpkin mixture over the crust and spread it evenly.
- Dollop spoonfuls of the cheesecake mixture on top of the pumpkin layer.
- Swirl the two layers together with a knife in a figure-eight pattern.
- Bake for 45 to 55 minutes until the edges are set but the center jiggles slightly.
- Turn off the oven, crack the door, and let the bars sit in the oven for 15 minutes.
- Let them cool at room temperature for an hour.
- Cover and refrigerate for at least 4 hours or overnight before cutting.
Notes
Nutrition

Hello! I’m Sarah Mitchell, and I’m passionate about bringing creativity and innovation to baking. My love for baking started in high school when I first tried my hand at decorating cupcakes for a class project. What began as a fun hobby quickly became a full-time passion. I’ve spent the past decade working in bakeries and dessert shops, honing my skills in everything from simple cookies to intricate wedding cakes.
After working in some of the top bakeries across the country, I realized that baking was about more than just following recipes — it was about infusing your personality into each creation. At BakingSecret.com, I love creating recipes that push boundaries while staying true to the heart of classic baking. I specialize in creating delicious and visually stunning pastries that will wow your guests.
When I’m not baking, I enjoy teaching baking classes, trying out new cake decoration techniques, and traveling to find inspiration in global dessert traditions. I’m so excited to share my tips and tricks with you to help elevate your baking game!