
The Matilda Cake That Will Make Your Heart Sing
Do you remember that magical, dreamy scene in *Matilda* where Bruce Bogtrotter conquers the towering chocolate cake? Just thinking about it makes my mouth water! For years, I tried to bake a cake that captured that pure, unadulterated joy—something moist, utterly indulgent, and worthy of a triumphant smile. After countless trials (and some very happy taste-testers), I found the one. This is the ultimate Indulgent Matilda Chocolate Cake, and it’s going to become your new family legend.
A Slice of Chocolate History
Chocolate cake has a history as rich as its flavor. From dense European tortes to the fluffy American classics we know today, it’s always been a symbol of celebration. My version is a nod to that iconic movie moment, but made simple for the home baker. It takes the classic “devil’s food” method—adding boiling water to the batter—and turns it into something spectacular. The water might seem strange, but it’s the secret to unlocking an incredibly tender, moist chocolate cake. It’s a modern twist on a timeless favorite, perfect for any gathering where you want to spoil your loved ones.
Why You’ll Fall in Love With This Cake
This isn’t just any chocolate cake. First, it comes together in one bowl—cleanup is a breeze! Second, the texture is absolute perfection. We’re talking about a cake so tender it practically melts, paired with a frosting so creamy and rich you’ll want to eat it with a spoon. It’s deeply chocolatey without being bitter, sweet without being cloying, and sturdy enough to hold those beautiful layers. It’s the kind of recipe you’ll reach for again and again, whether it’s a birthday, a bad day, or just a Tuesday.
Perfect Occasions for This Indulgent Treat
- Birthday Celebrations: Swap out the store-bought for this homemade showstopper.
- Potlucks & Gatherings: It travels well and disappears quickly!
- Just Because: Sometimes, the best reason is no reason at all. A midweek slice with coffee is pure bliss.
- Movie Nights: Serve it while watching *Matilda*, of course!
What You’ll Need: The Ingredients
For the Cake:
- 1 ¾ cups (220g) all-purpose flour
- 1 ¾ cups (300g) granulated sugar
- ¾ cup (75g) unsweetened cocoa powder
- 1 ½ tsp baking powder
- 1 ½ tsp baking soda
- 1 tsp salt
- 2 large eggs
- 1 cup (240ml) whole milk
- ½ cup (120ml) vegetable oil
- 2 tsp vanilla extract
- 1 cup (240ml) boiling water
For the Frosting:
- 1 cup (230g) unsalted butter, softened
- 3 ½ cups (450g) powdered sugar
- ½ cup (50g) unsweetened cocoa powder
- ⅓ cup (80ml) heavy cream
- 2 tsp vanilla extract
No Problem! Handy Substitutions
- Milk: Any milk you have works—2%, almond, or oat milk are fine.
- Oil: Canola or melted coconut oil are great swaps for vegetable oil.
- Cocoa Powder: Use natural or Dutch-processed cocoa; both work wonderfully here.
- Heavy Cream: For the frosting, whole milk or half-and-half can be used in a pinch, though the frosting will be less fluffy.
Crafting Your Indulgent Matilda Masterpiece
Step 1: Prep and Preheat
Start by preheating your oven to 350°F (175°C). This gives it time to reach the perfect, even temperature. Grab two 9-inch round cake pans. Grease them generously with butter or non-stick spray, then dust with a little flour or line the bottoms with parchment paper circles. This is your insurance policy for perfect, un-sticky cake release later. Trust me, you don’t want to leave this part out!
Step 2: Whisk the Dry Goods
In a large mixing bowl, whisk together your flour, sugar, cocoa powder, baking powder, baking soda, and salt. Watch as the dark cocoa swirls into the pale flour, creating a beautiful, sandy mixture. Whisking here is key—it evenly distributes the leaveners so your cake rises uniformly without any bitter soda pockets. Take a deep breath and smell that pure chocolate promise!
Step 3: Bring in the Wet Team
Now, make a well in the center of your dry ingredients. Crack in the eggs, then pour in the milk, vegetable oil, and vanilla extract. Using a hand mixer or a sturdy whisk, blend everything together just until smooth. The batter will be thick, shiny, and irresistibly chocolatey at this stage. Don’t overmix; we just want everything combined.
Step 4: The Magic of Boiling Water
Here comes the secret! With the mixer on low speed, slowly and carefully pour in the boiling water. The batter will transform from thick to very thin and liquid. This is totally normal and exactly what you want! The hot water “blooms” the cocoa powder, intensifying its flavor, and creates a batter that bakes up incredibly moist. Pro tip: Pour steadily to avoid splashes of the hot liquid.
Step 5: Bake to Perfection
Carefully divide the thin batter between your prepared pans. Slide them into the preheated oven. Bake for 30-35 minutes. You’ll know it’s done when the cakes have pulled away slightly from the edges and a toothpick poked into the center comes out with just a few moist crumbs, not wet batter. Your kitchen will smell absolutely heavenly.
Step 6: The All-Important Cool Down
Let the cakes cool in their pans on a wire rack for exactly 10 minutes. This allows them to firm up a bit so they don’t break. Then, run a knife around the edges, invert the pans, and gently lift them off. Peel away the parchment if you used it. Let the cakes cool completely on the rack before you even think about frosting. A warm cake will melt your frosting into a sad puddle!
Step 7: Make the Dreamy Frosting
While the cakes cool, make the frosting. Beat the softened butter in a bowl until it’s pale, fluffy, and creamy—about 3 minutes. Gradually add the powdered sugar and cocoa powder, beating on low at first to avoid a sugar cloud! Once incorporated, pour in the heavy cream and vanilla. Turn the mixer to medium-high and beat for another 2-3 minutes until the frosting is light, spreadable, and dreamily smooth.
Step 8: Assemble Your Masterpiece
Place one completely cool cake layer on your serving plate. Spoon a generous dollop of frosting in the center and spread it evenly to the edges with an offset spatula. Gently place the second layer on top, flat-side up for a level cake. Now, frost the top and sides with the remaining frosting, using swirling motions for a rustic, homemade look. Chef’s tip: For super clean slices, dip your knife in hot water and wipe it dry between cuts.
Your Baking Timeline
| Prep Time | 20 minutes |
| Cook Time | 35 minutes |
| Cooling Time | 1 hour |
| Total Time | About 1 hour 55 minutes |
My Secret for the Ultimate Moist Cake
Do not skip the boiling water! I know it seems odd to add a cup of hot liquid to a perfectly good batter. But this simple step is what makes all the difference. It hydrates the flour and cocoa deeply, ensuring every single crumb stays tender and moist for days. It’s the non-negotiable secret to that legendary texture.
A Chocolatey Bit of Extra Info
Did you know that using cocoa powder in baking, like we do here, is a wonderful way to get rich flavor without all the fat of bar chocolate? Cocoa is packed with flavonoids. Enjoying it as part of a balanced diet can be a delightful way to treat yourself. For instance, research highlighted by the NIH notes that protein-rich foods, including those with cocoa, can support muscle maintenance, which is a great reminder that balance is key—even with dessert!
Gather Your Tools
- Two 9-inch round cake pans
- Large mixing bowl
- Hand mixer or stand mixer
- Whisk
- Wire cooling rack
- Offset spatula (for easy frosting)
How to Keep Your Cake Fresh
Once frosted, your cake is happiest stored in a cake carrier or under a large inverted bowl at room temperature for up to 2 days. The frosting helps seal in moisture. If your kitchen is very warm, you can refrigerate it. Just let it sit out for an hour before serving to take the chill off.
For longer storage, you can freeze the unfrosted cake layers. Wrap each cooled layer tightly in plastic wrap, then a layer of aluminum foil. They’ll keep beautifully for up to 3 months. Thaw overnight in the refrigerator before frosting.
Leftover slices can be stored in an airtight container in the fridge for up to 5 days. To revive them, let them sit out for 30 minutes or microwave a single slice for a brief 10 seconds.
Pro Tips for Guaranteed Success
- Room Temperature Matters: Use eggs and milk that aren’t stone-cold from the fridge. They mix into the batter more evenly, giving you a better texture.
- Measure Flour Correctly: Spoon flour into your measuring cup and level it off. Don’t scoop directly from the bag—you’ll pack in too much and get a dry cake.
- Test for Doneness Early: Start checking your cake at the 30-minute mark. Ovens vary, and overbaking is the enemy of moisture.
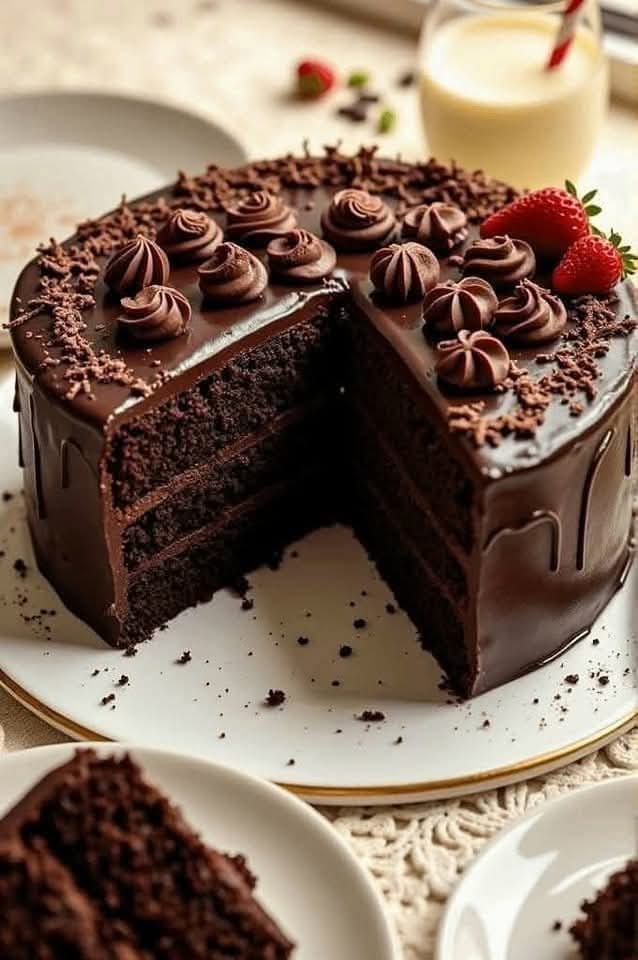
Make It Look Stunning
- Press chocolate shavings or curls onto the sides of the frosted cake.
- Top with fresh berries, like raspberries or strawberries, for a pop of color.
- A simple dusting of powdered sugar or cocoa powder looks elegantly rustic.
- Pipe swirls of extra frosting around the top edge and place whole chocolate chips in each swirl.
Healthful & Fun Recipe Variations
Love this base recipe? It’s wonderfully adaptable! Try one of these twists:
- Gluten-Free Matilda Cake: Swap the all-purpose flour for a 1:1 gluten-free baking blend. Everything else stays the same!
- Vegan Chocolate Cake: Use flax eggs, plant-based milk, and vegan butter. The boiling water trick works perfectly here too.
- Chocolate Orange Cake: Add the zest of one orange to the batter and use fresh orange juice in place of the milk for a citrus kick.
- Mexican Chocolate Cake: Stir 1 tsp of cinnamon and a tiny pinch of cayenne pepper into the dry ingredients for a warm, spicy depth.
- Peanut Butter Chocolate Cake: Swirl ½ cup of creamy peanut butter into the frosting, or spread a layer between the cake layers.
- Dairy-Free Delight: Use your favorite non-dairy milk and a plant-based butter stick in the frosting.
Common Mistakes to Avoid
Mistake 1: Overmixing the Batter
Once you add the flour, too much mixing is a recipe for trouble. Vigorous beating develops the gluten in the flour, which can make your cake tough and dense instead of tender. Mix just until you no longer see streaks of dry ingredients. A few small lumps are perfectly fine. They will bake out. A gentle hand is your best tool for a soft crumb.
Mistake 2: Frosting a Warm Cake
I know the temptation is huge, but you must wait! Frosting a cake that’s even slightly warm is a disaster waiting to happen. The heat will melt the butter in the frosting, causing it to slide right off the cake and become a greasy, thin mess. Patience is key. Let your layers cool completely on a wire rack, which usually takes about an hour. Pro tip: You can speed this up by popping the cooled cakes in the fridge for 20 minutes.
Mistake 3: Using Cold Ingredients
Baking is a chemical dance, and temperature matters. Using eggs and milk straight from the fridge can cause the batter to curdle or not emulsify properly with the oil. This can lead to uneven baking and a less-than-perfect texture. Simply take your eggs and milk out about 30 minutes before you start baking. They’ll blend into the batter smoothly, creating a uniform and beautiful cake structure.
Mistake 4: Not Preparing the Pans Properly
That sad moment when half your cake sticks to the pan is completely avoidable. A quick spray of cooking oil isn’t always enough for this moist batter. Always grease the pan, then dust it with cocoa powder (instead of flour) for a chocolate cake—this avoids white streaks. For absolute certainty, add a parchment paper circle to the bottom. Your cakes will release like a dream every single time.
Frequently Asked Questions
Can I make this cake in a different pan?
Absolutely! This versatile batter works in a 9×13-inch rectangle pan. Bake it for about 35-40 minutes. You can also make cupcakes—fill liners ⅔ full and bake for 18-22 minutes. This recipe yields about 24 perfect cupcakes. Just remember, the baking time will change with the pan size, so always use the toothpick test to check for doneness in the center.
Why is my cake dry?
A dry cake usually means it was baked a little too long or the flour was over-measured. Ovens can run hot, so an oven thermometer helps ensure accurate temperature. Also, be sure to spoon your flour into the measuring cup and level it off. Don’t scoop the cup directly into the flour bag, as this packs in too much. Finally, set a timer for the minimum bake time and check it then to avoid overbaking.
Can I make this ahead of time?
Yes, and it’s a great time-saver! You can bake the cake layers up to two days in advance. Let them cool completely, then wrap each layer tightly in plastic wrap and store at room temperature. You can also freeze them for up to 3 months. The frosting can be made 1-2 days ahead and kept in an airtight container in the fridge. Just let it come to room temperature and re-whip it for a few seconds before using.
My frosting is too runny/thick. How can I fix it?
Frosting consistency is easy to adjust. If it’s too runny, it’s likely the butter was too soft or the kitchen was very warm. Chill the frosting in the fridge for 20-30 minutes, then beat it again. If it’s too thick to spread, add more heavy cream, one teaspoon at a time, beating after each addition until you reach the perfect, spreadable consistency.
What’s the best cocoa powder to use?
For a deep, classic chocolate flavor, I recommend using a natural unsweetened cocoa powder. Dutch-processed cocoa will also work and gives a slightly milder, less acidic taste. Don’t use sweetened hot chocolate mix—it’s not the same thing! Stick with a good-quality baking cocoa for the best results in your Indulgent Matilda Chocolate Cake.
Can I reduce the sugar in this recipe?
You can, but I wouldn’t recommend reducing it by more than ¼ cup. Sugar doesn’t just add sweetness; it helps tenderize the cake, keeps it moist, and aids in browning. Reducing it too much can affect the texture and structure. If you want a less sweet option, focus on using a darker cocoa powder and perhaps use a slightly less sweet frosting.
How do I get my cake layers perfectly flat?
To avoid a domed top that you have to slice off, try using cake strips! You soak fabric strips in water, wrap them around the outside of the cake pans, and they insulate the edges so the cake bakes evenly from edge to center. If you don’t have strips, you can gently press down on the dome with a clean towel once the cake is out of the oven and still warm.
Is there a substitute for eggs?
For an egg-free version, you can try a “flax egg.” Mix 1 tablespoon of ground flaxseed with 2.5 tablespoons of warm water for each egg, let it sit for 5 minutes to gel, then use it in the recipe. This works well, though the texture may be slightly more dense. Another option is ¼ cup of unsweetened applesauce per egg.
What can I use instead of buttermilk?
This recipe uses regular milk, but if you want to try buttermilk for extra tang and tenderness, you can! Simply replace the 1 cup of whole milk with 1 cup of buttermilk. If you don’t have buttermilk, make a quick version: add 1 tablespoon of white vinegar or lemon juice to a measuring cup, then fill it to the 1-cup line with milk. Stir and let it sit for 5 minutes before using.
My cake sunk in the middle. What went wrong?
A sunken center usually means the cake wasn’t fully baked, the oven door was opened too early (before the structure had set), or there was too much leavener (baking soda/powder). Ensure your oven is fully preheated, avoid opening the door in the first 25 minutes of baking, and double-check your measurements for baking soda and powder. Using fresh ingredients also helps.
If this Indulgent Matilda Chocolate Cake has inspired you to try more layered wonders, explore our entire collection of favorite cake and cupcake recipes for your next baking adventure. From a zesty Chocolate Lemon Mousse Dome to a festive No-Bake Funfetti Oreo Icebox Cake, there’s always a new creation to try. For fruit lovers, the stunning Cherry-Blackberry Symphony or the bright Lemon Cake with Cranberry Filling are absolute must-bakes.
Your Turn to Bake a Memory
There you have it—the chocolate cake of your dreams, with all the moisture, richness, and magic of a storybook treat. It’s more than just a dessert; it’s a experience. It’s the cake you bake for victories, for comfort, and for pure, shared joy. So preheat that oven, gather your ingredients, and get ready for the compliments. This indulgent chocolate cake is waiting to become your family’s new favorite tradition. Now, go bake like Bruce ate!
Equipment
- Grand bol
- Fouet
- Spatule
- Plaque à pâtisserie
- Papier sulfurisé
Ingredients
- 220 g farine tout usage
- 300 g sucre granulé
- 75 g cacao en poudre non sucré
- 1.5 cuil. à café poudre à lever
- 1.5 cuil. à café bicarbonate de soude
- 1 cuil. à café sel
- 2 nombre oeufs
- 240 ml lait entier
- 120 ml huile végétale
- 2 cuil. à café extrait de vanille
- 240 ml eau bouillante
- 230 g beurre non salé, ramolli pour la garniture
- 450 g sucre glace pour la garniture
- 50 g cacao en poudre pour la garniture
- 80 ml crème épaisse pour la garniture
- 2 cuil. à café extrait de vanille pour la garniture
Instructions
- Préchauffez le four à 175°C et préparez deux moules à gâteau ronds de 9 pouces en les graissant et en les farinant ou en les tapissant de papier sulfurisé.
- Dans un grand bol, fouettez ensemble la farine, le sucre, le cacao en poudre, la poudre à lever, le bicarbonate de soude et le sel.
- Faites un puits dans les ingrédients secs et ajoutez les œufs, le lait, l'huile végétale et l'extrait de vanille. Mélangez jusqu'à obtenir une pâte lisse.
- Versez lentement l'eau bouillante tout en mélangeant à vitesse lente jusqu'à ce que le mélange soit homogène.
- Divisez la pâte entre les moules préparés et faites cuire pendant 30-35 minutes jusqu'à ce qu'un cure-dent en ressorte avec des miettes humides.
- Laissez les gâteaux refroidir dans les moules pendant 10 minutes, puis retournez-les sur une grille pour les laisser refroidir complètement.
- Pour la garniture, battez le beurre ramolli jusqu'à ce qu'il soit mousseux. Ajoutez progressivement le sucre glace et le cacao en poudre, puis mélangez la crème épaisse et la vanille jusqu'à obtenir un mélange lisse.
- Assemblez le gâteau en superposant un gâteau sur un plat de service, en étalant le glaçage sur le dessus, puis empilez la seconde couche et glacez le dessus et les côtés.