
Strawberry Cheesecake Cookies: Your New Go-To Dessert
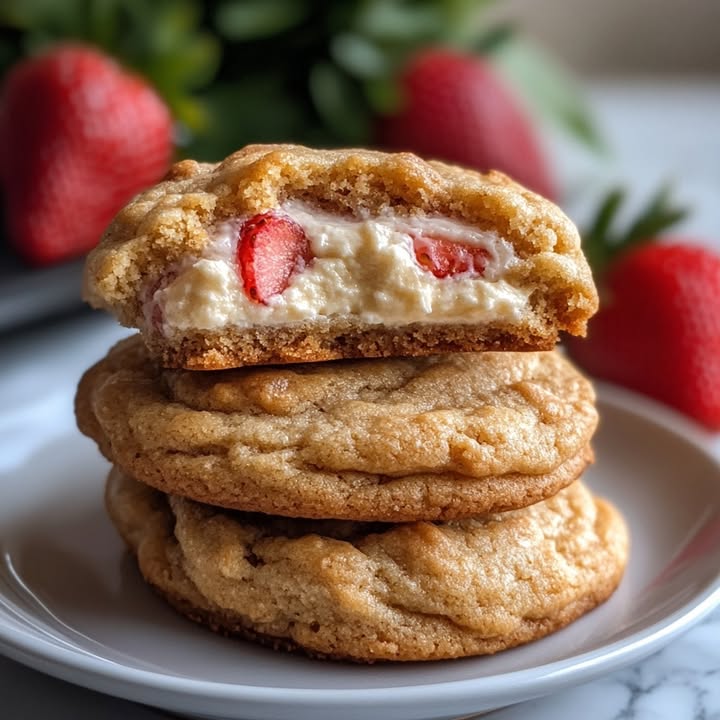
Have you ever looked at a cookie and thought, “This is good, but it could use a cheesecake surprise inside?” Just me? I promise, after one bite of these Strawberry Cheesecake Stuffed Cookies, you’ll be thinking it too! It all started last summer when my family couldn’t decide between cheesecake and cookies for dessert. So I did what any slightly-crazy baking enthusiast would do: I combined them. The result was pure, berry-studded, creamy-centered magic. These cookies are a fun, handheld twist on a classic dessert that never fails to impress.
The Story of a Stuffed Cookie Sensation
The idea of stuffing cookies isn’t brand new, but it feels like a modern baking party trick. Traditional thumbprint cookies give us a little well for jam. But the concept of hiding a whole dollop of creamy filling inside a soft cookie dough? That’s next-level. I like to think of these Strawberry Cheesecake Cookies as the love child of a New York cheesecake and a gooey, fruit-filled cookie. They take a familiar comfort food and turn it into a delightful surprise with every single bite. It’s a recipe that celebrates playfulness in baking.
Why You’ll Fall in Love with This Recipe
You will love these cookies because they are the ultimate two-in-one treat. They satisfy that craving for something soft and baked, plus something cool and creamy. The chew of the cookie with the tangy, frozen cream cheese center is a textural dream. Plus, they look incredibly fancy but are honestly simple to make. The freeze-dried strawberries pack a huge punch of real fruit flavor without making the dough soggy. They’re a guaranteed conversation starter at any gathering!
Perfect Occasions for Strawberry Cheesecake Cookies
These are the cookies you make when you want to show off a little (in the best way!). They’re perfect for:
- Potlucks & Parties: They transport easily and everyone will grab one.
- Valentine’s Day or Mother’s Day: The pink strawberries and sweet filling feel extra special.
- Summer Picnics: They’re a refreshing, fruity alternative to heavy brownies.
- Just Because: Honestly, a Tuesday afternoon is reason enough. You deserve a sweet surprise!
Ingredients for Strawberry Cheesecake Stuffed Cookies
Let’s gather our goodies! You’ll need two simple sets of ingredients.
For the Cheesecake Filling:
- 6 ounces cream cheese, softened: Full-fat works best for a firm, creamy center.
- 2 tablespoons powdered sugar: Sweetens the filling without adding graininess.
- 1/2 teaspoon vanilla extract: Adds that classic, warm bakery aroma.
For the Cookie Dough:
- 1/2 cup unsalted butter, softened: The base of our soft, chewy dough.
- 1/2 cup brown sugar & 1/4 cup granulated sugar: Brown sugar adds moisture and molasses depth.
- 1 large egg: Binds everything together.
- 1 teaspoon vanilla extract: Doubles down on that wonderful fragrance.
- 1 1/2 cups all-purpose flour: Provides the structure.
- 1/2 teaspoon baking soda & 1/4 teaspoon salt: For the perfect rise and flavor balance.
- 3/4 cup freeze-dried strawberries, crushed: The star! They give intense berry flavor and a pretty pink speckle.
- 1/2 cup white chocolate chips (optional): Adds a sweet, creamy contrast to the tangy berries.
Easy Ingredient Substitutions
Don’t stress if you’re missing something! Here are some easy swaps:
- Freeze-Dried Strawberries: You can use 1/3 cup of high-quality strawberry jam swirled into the dough, but the texture will be different and wetter. Freeze-dried is best.
- White Chocolate Chips: Semi-sweet or dark chocolate chips work great. Or, skip them entirely!
- Gluten-Free: Use a 1:1 gluten-free flour blend for the all-purpose flour.
- Dairy-Free: Use vegan cream cheese and a plant-based butter substitute.
How to Make Strawberry Cheesecake Cookies: Step-by-Step
Step 1: Make and Freeze the Filling
Start by making your surprise pocket. In a small bowl, beat the softened cream cheese, powdered sugar, and vanilla together until it’s completely smooth and lump-free. This creamy mixture is what will become your frozen heart. Use a teaspoon to scoop small mounds onto a plate or baking sheet lined with parchment. You should get about 14 dollops. Pop the whole plate into the freezer for at least 30 minutes. This step is non-negotiable! A firm filling won’t melt into the dough while you bake.
Step 2: Prep the Dough
While the filling chills, preheat your oven to 350°F (175°C) and line your baking sheets with parchment paper. Now, let’s make the cookie dough. In a large bowl, cream together the softened butter, brown sugar, and granulated sugar. Beat it for a good 2-3 minutes until it becomes pale, fluffy, and wonderfully creamy. This incorporates air for a lighter cookie. Crack in the egg and pour in the vanilla, mixing until just combined. The mixture will look glossy and rich.
Step 3: Combine Dry and Wet Ingredients
In a separate bowl, whisk together the flour, baking soda, and salt. This ensures the leavening is evenly distributed so you don’t get a bitter bite. Gradually add these dry ingredients to your wet butter mixture. Mix on low speed just until no flour streaks remain. Overmixing will make tough cookies, so stop as soon as it comes together. The dough will be soft and slightly sticky.
Step 4: Fold in the Goodies
Time for the fun part! Take your freeze-dried strawberries and crush them with your hands or in a bag. You want a mix of fine powder and small bits for great flavor and color. Gently fold these gorgeous pink crumbs into the dough along with the white chocolate chips, if using. The dough will turn a beautiful light pink and smell like a strawberry field.
Chef’s Tip: For an extra berry punch, save a tablespoon of the crushed strawberries to roll the stuffed cookie dough balls in before baking. It gives a gorgeous, rustic look and concentrated flavor.
Step 5: Assemble the Stuffed Cookies
Check on your filling. It should be solid to the touch. Use a tablespoon or cookie scoop to portion about 2 tablespoons of dough. Flatten it slightly in your palm. Place one frozen cheesecake dollop right in the center. Carefully pull the dough up and around the filling, pinching it closed to seal it completely. Roll it gently into a ball between your palms to smooth it out. Make sure it’s sealed well so the cheesecake doesn’t leak! Place each stuffed ball on your prepared baking sheet, leaving about 2 inches between them.
Step 6: Bake to Perfection
Bake your Strawberry Cheesecake Cookies for 12-14 minutes. Watch for the edges to become lightly golden. The centers will still look soft and puffy, and that’s perfect. They will firm up as they cool. This is the key to a soft, chewy cookie. Overbaking will give you a crunchy cookie, which isn’t what we want here. Let them cool on the baking sheet for 5 full minutes before moving them to a wire rack. This lets them set so they don’t fall apart.
Important Timing Breakdown
Managing your time makes baking stress-free. Here’s the full schedule:
- Prep Time: 20 minutes (includes making filling and dough)
- Freezing Time: 30 minutes (for the filling – crucial!)
- Cook Time: 14 minutes per batch
- Cool Time: 5 minutes on sheet, then 15 on rack
- Total Active Time: About 34 minutes
- Total Project Time: About 1 hour 15 minutes
Chef’s Secret for the Best Cookies
My biggest secret? Freeze the assembled cookie dough balls for 10 minutes before baking. After you’ve stuffed and sealed all the cookies, pop the whole baking sheet into the freezer. This quick chill prevents the cookies from spreading too fast in the oven. It gives the butter a chance to firm up, leading to a thicker, softer, more bakery-style cookie. It’s a tiny extra step with a huge payoff.
A Fun Fact About Freeze-Dried Fruit
Freeze-dried strawberries are a baker’s secret weapon. The freeze-drying process removes nearly all the moisture, leaving behind intense, concentrated strawberry flavor. This means you get a huge fruity punch without adding liquid, which would ruin the cookie dough’s texture. One bag goes a long way, and the crunch is so satisfying before they bake!
Necessary Kitchen Equipment
You don’t need fancy tools! Here’s what I use:
- 2 Mixing bowls (one large, one medium)
- Electric hand mixer or stand mixer
- Whisk
- Spatula
- Measuring cups and spoons
- Baking sheets
- Parchment paper or silicone baking mats
- Wire cooling rack
- Teaspoon and tablespoon cookie scoops (helpful, not essential)
How to Store Your Strawberry Cheesecake Cookies
These cookies are best enjoyed fresh, but they store beautifully. Once completely cooled, place them in an airtight container at room temperature for up to 2 days. The cookie stays soft, and the filling will be creamy.
For longer storage, the refrigerator is your friend. Store them in an airtight container in the fridge for up to 5 days. The chilled filling becomes firm and almost ice-cream-like, which is a delicious different experience! Let them sit out for 10 minutes before serving to take the chill off.
You can also freeze the baked and cooled cookies for up to 3 months. Layer them between parchment paper in a freezer-safe container. Thaw in the fridge overnight or at room temperature for an hour.
Top Tips and Advice for Success
- Softened, not melted, butter is key. It should be cool to the touch but leave a slight indent when you press it.
- Don’t skip creaming the butter and sugars! This 2-3 minute step adds air for lift.
- Seal the dough tightly around the frozen filling. Any cracks can cause leaks.
- Use a reliable oven thermometer to make sure your temperature is accurate.
- If you love the combo of fruit and cream cheese, you might also adore the swirls in our Peanut Butter Chocolate Swirl Cookies for a different flavor adventure.
Presentation Ideas to Wow Your Guests
- Dust with a little extra powdered sugar mixed with crushed freeze-dried strawberry powder.
- Serve on a pretty cake stand for a dessert table centerpiece.
- Drizzle with a simple pink glaze made from powdered sugar, milk, and a bit of strawberry powder.
- Place each cookie in a mini cupcake liner for a cute, portable treat.
Healthier & Dietary Alternative Recipes
Want to mix it up? Here are six delicious variations on this stuffed cookie idea:
- Vegan Delight: Use vegan cream cheese, plant-based butter, and a flax egg. Ensure your sugar is vegan-friendly.
- Lower-Sugar Version: Use a sugar substitute blend made for baking in the dough. For the filling, use a low-fat cream cheese and reduce powdered sugar by half.
- Blueberry Lemon: Swap freeze-dried strawberries for freeze-dried blueberries. Add 1 tsp lemon zest to the cookie dough and the filling.
- Chocolate Lover’s: Use a standard chocolate chip cookie dough. Keep the plain cheesecake filling or add 1 tbsp cocoa powder to it.
- Key Lime Pie: Add 2 tbsp lime juice and 1 tsp lime zest to the cream cheese filling. Use a plain sugar cookie dough, or add a bit of lime zest there too.
- Cookies & Cream: Crush 5 cream-filled chocolate sandwich cookies into the dough. Use a plain cheesecake filling or mix in some of the cookie crumbs.
Common Mistakes to Avoid
Mistake 1: Using Warm Cream Cheese Filling
If your cheesecake dollops aren’t frozen solid, they will melt instantly into the dough when baked. You’ll lose the delightful creamy pocket. Always ensure the filling has been in the freezer for at least 30 minutes and is firm to the touch. If your kitchen is very warm, consider freezing for 45 minutes. A pro tip is to make the filling first, freeze it, and then start your dough. That way, it’s definitely ready.
Mistake 2: Overmixing the Cookie Dough
Once you add the flour, mix only until the ingredients are just combined. Overmixing develops the gluten in the flour, leading to tough, dense cookies instead of soft and tender ones. Stir by hand when folding in the strawberries and chocolate chips to prevent this. It’s okay if there are a few faint streaks of flour; they will incorporate.
Mistake 3: Not Sealing the Dough Properly
If you leave a crack or a thin spot when wrapping the dough around the filling, it will burst open in the oven. Take your time to completely encase the frozen dollop. Smooth the seam with your fingers and roll the ball gently to seal it shut. Double-check each one. This little act of care ensures every cookie has a perfect, hidden treasure inside.
Mistake 4: Overbaking the Cookies
These cookies continue to cook on the hot baking sheet after you take them out of the oven. Pull them out when the edges are just set and lightly golden, but the centers still look puffy and soft (even if they look a tiny bit underdone). They will finish setting up as they cool. Overbaked cookies lose that wonderful soft, chewy texture.
Mistake 5: Substituting Fresh Strawberries
It’s tempting to use fresh or frozen strawberries for a natural twist. Don’t do it! The extra water content will make your dough wet, sticky, and impossible to handle. It will also turn the cookies soggy and may prevent proper baking. Freeze-dried fruit is essential because it provides pure flavor without moisture, a lesson I learned with juicy disappointments like our Lemon Poundcake Cookies which use zest and juice carefully.
Frequently Asked Questions
Can I make the dough ahead of time?
Absolutely! You can prepare the cookie dough (without stuffing it) up to 2 days in advance. Wrap it tightly in plastic wrap and store it in the refrigerator. Let it sit at room temperature for about 30 minutes to soften slightly before portioning and stuffing with the frozen filling. You can also freeze the unstuffed dough ball for up to 3 months. Thaw overnight in the fridge before using.
My filling leaked out. What did I do wrong?
A leak usually means one of two things. First, the filling wasn’t frozen solid enough. Make sure it’s rock hard. Second, the dough wasn’t sealed completely around it. Ensure you have no holes when you pinch it closed. Using a slightly bigger scoop of dough can give you more material to work with for a secure wrap. Also, avoid over-handling the dough, as warm hands can soften the frozen center.
Can I use fresh or frozen fruit instead of freeze-dried?
I strongly advise against it for this recipe. Fresh or frozen berries contain too much water. They will release this moisture while baking, making your cookie dough soggy and causing the cookies to spread too much or bake unevenly. Freeze-dried strawberries give that intense, true strawberry flavor without the wetness. It’s the key to the perfect texture.
Flat cookies often point to butter that was too warm. Your butter should be softened but still cool. If it’s melted or greasy, your cookies will spread. Another culprit is not chilling the filled dough balls before baking. That quick 10-minute freezer chill gives the butter a chance to firm up again, controlling the spread. Also, double-check your baking soda is fresh.
Don’t wait for them to look fully “done” in the middle. Bake until the edges are lightly golden brown and set, and the tops have lost their shiny, wet look. The centers will still look soft and puffy. They will finish setting as they cool on the baking sheet. This is the secret to a soft, chewy texture instead of a crispy one.
Yes, they freeze wonderfully! Let the baked cookies cool completely. Then, place them in a single layer on a baking sheet to flash freeze for about an hour. Once solid, transfer them to a freezer-safe bag or container, separating layers with parchment paper. They’ll keep for up to 3 months. Thaw at room temperature or enjoy them cold for a firmer, cool filling.
What’s the best way to crush the freeze-dried strawberries?
You have a few easy options. Place them in a zip-top bag, press out the air, and crush them with a rolling pin or the bottom of a heavy glass. You’ll get a nice mix of powder and small bits. You can also pulse them a few times in a food processor or blender. Be careful not to turn them into a super-fine powder unless you want just color; the little bits add nice texture.
For sure! Simply replace the all-purpose flour with a good-quality 1:1 gluten-free baking flour blend. Brands like Bob’s Red Mill or King Arthur Measure for Measure work well. Make sure your baking soda and other ingredients are gluten-free certified if needed. The method and all other steps remain exactly the same.
Can I use low-fat or Neufchâtel cream cheese?
You can, but the texture of the filling will be slightly softer and may not hold its shape as well when frozen. Full-fat cream cheese freezes firmer, giving you that distinct, cool cream cheese center. If you use a lower-fat variety, consider freezing the dollops for a longer time, maybe 45-60 minutes, to ensure they are very hard.
What other fillings could I try?
Get creative with the filling! A dollop of thick fruit jam or preserves (like raspberry or cherry) works if you freeze it first. You could also mix a tablespoon of cocoa powder into the cream cheese for a chocolate cheesecake center. A spoonful of no-bake peanut butter bar mixture could be fun, too. Just remember the filling must be scoopable and freezable!
Remember, baking is about joy and sharing. Always start with clean hands and surfaces, and follow basic safe food handling practices, especially when working with dairy and eggs. It keeps your delicious creations safe for everyone.
I hope this recipe brings as much fun and delight to your kitchen as it does to mine. These Strawberry Cheesecake Cookies are a special treat that feels like a hidden gift. For more cookie inspiration and stuffed dessert ideas, be sure to explore our full collection of cookie and biscuit recipes on the site. Happy baking, and don’t forget to let me know how yours turn out!
Equipment
- Grand bol
- Fouet
- Spatule
- Plaque à pâtisserie
- Papier sulfurisé
Ingredients
- 170 g fromage à tartiner ramolli
- 30 g sucre glace
- 2 cuil. à café extrait de vanille
- 125 g beurre mou
- 75 g sucre brun
- 50 g sucre blanc
- 1 œuf
- 200 g farine tout usage
- 1 cuil. à café bicarbonate de soude
- 1 pincée sel
- 100 g fraises lyophilisées écrasées
- 75 g pépites de chocolat blanc facultatif
Instructions
- Préparez la garniture au cheesecake en battant le fromage à tartiner, le sucre glace et la vanille dans un bol jusqu'à obtenir une consistance lisse, puis congelez de petites boules pendant au moins 30 minutes.
- Préchauffez le four à 175°C et tapissez des plaques à pâtisserie de papier sulfurisé.
- Crème le beurre mou, le sucre brun et le sucre blanc pendant 2-3 minutes jusqu'à obtenir une consistance claire et mousseuse. Ajoutez l'œuf et la vanille et mélangez jusqu'à ce que le tout soit juste combiné.
- Dans un bol séparé, tamisez ensemble la farine, le bicarbonate de soude et le sel; incorporez progressivement le mélange de beurre jusqu'à ce qu'il n'y ait plus de traînées de farine.
- Incorporez les fraises lyophilisées et les pépites de chocolat blanc si vous les utilisez.
- Utilisez 2 cuillères à soupe de pâte pour créer un cercle plat, placez une boule de garniture au cheesecake au centre, et refermez la garniture en pinçant la pâte. Roulez en boule et placez sur la plaque à pâtisserie.
- Faites cuire pendant 12-14 minutes jusqu'à ce que les bords soient légèrement dorés et que les centres soient gonflés; laissez refroidir pendant 5 minutes sur la plaque avant de les transférer à une grille.
Notes
Nutrition

Hi, I’m Olivia Parker, the founder of BakingSecret.com and a lifelong lover of all things sweet and homemade. I grew up in a small town in Oregon, where the smell of fresh cookies in my family’s kitchen sparked my passion for baking. Over the years, I turned that passion into a mission: to help home bakers feel confident, inspired, and creative.
After studying food science and working in several artisan bakeries across the U.S., I decided to create a space where everyone from beginners to seasoned bakers can find reliable recipes, expert tips, and a warm, welcoming community. BakingSecret.com is my way of sharing the magic of baking with the world. When I’m not testing new recipes, you’ll find me exploring farmers’ markets, collecting vintage cookbooks, or perfecting my sourdough technique.