
The Search for the Perfect Spring Cookie Ends Here
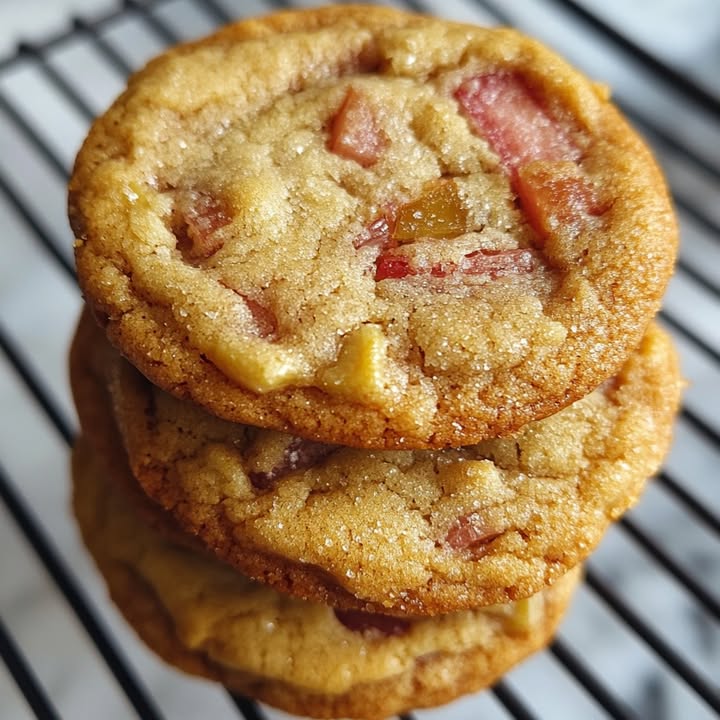
You know that feeling when you crave something sweet, but you also want to feel a little bit virtuous? Like you’re celebrating the season? That was me last week, staring at a glorious, pink-green bundle of rhubarb at the farmer’s market. My grandma always made pies, but I was craving something handheld and chewy. The answer? These magical Brown Sugar Rhubarb Cookies. They’re a sweet, chewy hug with a delightful tart surprise in every bite.
A Little History on Rhubarb in the Kitchen
Rhubarb has been a garden treasure for centuries, often dubbed the “pie plant.” Early American cooks, especially those in the Midwest, became masters at using this tart stalk to make delicious, sweetened treats. It was a sign of spring. My own memories are full of steaming rhubarb crisps cooling on the counter. These cookies are my modern, portable take on that tradition. They take the classic sweet-tart flavor duo and deliver it in a soft, chewy cookie that’s perfect for today’s bake-and-go lifestyle.
Why You’ll Love This Rhubarb Cookie Recipe
Honestly, these might become your new favorite for three simple reasons. First, the flavor is unbeatable: rich brown sugar caramel notes dancing with that bright rhubarb zing. Second, they are incredibly easy. No fancy equipment or techniques needed. Third, they are a fantastic way to use up that spring rhubarb bounty. Plus, your kitchen will smell absolutely heavenly. They’re a crowd-pleaser that looks and tastes like you fussed, when really, it’s one simple bowl after another.
Perfect Occasions for These Sweet-Tart Treats
- Spring Picnics & Potlucks: They transport easily and are always a conversation starter.
- Teacher Appreciation or Neighborly Gifts: Pack them in a cute box for a homemade touch everyone loves.
- After-School Snack with a Twist: A fun way to introduce kids to rhubarb’s unique flavor.
- Your Morning Coffee Break: Pair one with your cup of coffee for a perfect sweet moment.
Gathering Your Rhubarb Cookie Ingredients
Here’s your simple shopping list for these chewy delights. Make sure your butter is softened and your rhubarb is nice and fresh!
- 1 ½ cups all-purpose flour
- ½ teaspoon baking soda
- ¼ teaspoon salt
- ½ teaspoon cinnamon
- ¾ cup unsalted butter, softened
- 1 cup brown sugar, packed
- 1 large egg
- 1 teaspoon vanilla extract
- 1 cup finely chopped fresh rhubarb
- ½ cup chopped walnuts or pecans (optional)
Easy Ingredient Swaps & Substitutions
Don’t have something? No panic! Here are some easy fixes:
- No Fresh Rhubarb? Use an equal amount of frozen, chopped rhubarb. Do not thaw it before folding it in, or it will make the dough too wet.
- Out of Brown Sugar? Make your own by mixing 1 cup white sugar with 1 tablespoon of molasses. Stir it really well.
- Nut-Free? Simply leave them out! The cookies are still fantastic. You could add rolled oats for a different texture.
- Dairy-Free? Use a plant-based butter stick that bakes well. The results are nearly identical.
How to Make Brown Sugar Rhubarb Cookies: A Step-by-Step Guide
Step 1: Preheat and Prep
Start by firing up your oven to 350°F (175°C). This gives it plenty of time to reach the perfect, even temperature. Then, line your baking sheets with parchment paper. Trust me, this little step is a lifesaver. It prevents sticking and makes cleanup a breeze. No more scraping cookie bits off the pan! Pro tip: If you don’t have parchment, a light coating of baking spray works in a pinch.
Step 2: Whisk the Dry Team
Grab a medium bowl and your whisk. Add the all-purpose flour, baking soda, salt, and that warm, cozy cinnamon. Whisk it all together until it looks like one uniform, pale mixture. You’re not just mixing here; you’re making sure the leavening is evenly distributed. This is the secret to cookies that rise perfectly every time. Set this bowl aside for its grand entrance later.
Step 3: Cream the Butter and Sugar
Now, for the fun part! In a large bowl, beat together the softened butter and packed brown sugar. Use an electric mixer or some serious elbow grease. Beat it for a good 2-3 minutes until it becomes light, fluffy, and a beautiful caramel color. You’ll see the change. This step incorporates air, which is key for texture. Then, crack in the egg and add the vanilla. Mix just until smooth and creamy.
Step 4: Bring It All Together
Time to unite the teams! Gradually add your bowl of dry ingredients to the creamed butter mixture. Stir on low speed or by hand until the flour just disappears. A few streaks are okay. Overmixing is the enemy of tender cookies. Now, gently fold in the star of the show: the finely chopped, vibrant pink rhubarb. If you’re using nuts, fold them in now too. The dough will be thick and speckled with delicious bits.
Step 5: Scoop and Bake to Golden Perfection
Using a tablespoon or a small cookie scoop, drop rounded portions of dough onto your prepared baking sheets. Leave about 2 inches between them—they will spread a little as they bake. Slide them into your preheated oven. Bake for 10 to 12 minutes. You’re looking for lightly golden edges while the centers still look soft. Chef’s tip: They will finish setting as they cool. This is the secret to a perfectly chewy center!
Step 6: The All-Important Cool Down
When the timer dings, pull out your gorgeous, aromatic cookies. Let them sit right on the hot baking sheet for exactly 5 minutes. This allows them to firm up enough to move without falling apart. Then, use a spatula to transfer them to a wire rack. Let them cool completely there. I know it’s hard to wait, but this sets their texture and makes that chewy-crispy edge just right.
Your Brown Sugar Rhubarb Cookie Timeline
From craving to cookie in less than 30 minutes? Yes, please!
- Prep Time: 10 minutes
- Cooking Time: 12 minutes
- Cooling Time: 15 minutes
- Total Time: ~37 minutes
- Kcal: About 180 per cookie
- Servings: 18 delicious cookies
The One Secret for the Chewiest Rhubarb Cookies
Here’s my not-so-secret weapon: pack that brown sugar tightly into your measuring cup. Don’t just scoop it in loosely. Really press it down. More brown sugar means more moisture, and more moisture means a chewier, more flavorful cookie. It’s the difference between a good cookie and a “wow, can I have the recipe?” cookie.
Rhubarb: The Vegetable Pretending to Be a Fruit
Here’s a fun fact to share while you bake: Rhubarb is actually a vegetable! It’s classified as such because we eat the stalk. But in 1947, a U.S. court ruled it was a fruit for the purposes of regulations and tariffs, since it’s almost always used like one. So, you’re basically eating a sneaky veggie for dessert. How great is that?
What You’ll Need to Bake Them
- 2-3 Baking Sheets
- Parchment Paper
- Mixing Bowls (1 large, 1 medium)
- Electric Hand Mixer or Whisk & Spatula
- Measuring Cups & Spoons
- Cookie Scoop or Tablespoon
- Wire Cooling Rack
How to Store Your Brown Sugar Rhubarb Cookies
Once your cookies are completely cool, store them in an airtight container at room temperature. A cookie jar or a container with a tight lid works perfectly. They will stay fresh and chewy for about 3-4 days this way. Just make sure they are completely cool first. Trapped warmth creates steam, which can make them soggy.
For longer storage, you can freeze the baked cookies. Place them in a single layer in a freezer bag or airtight container, with parchment paper between layers. They will keep for up to 2 months. When you’re ready for one, just let it thaw at room temperature for a bit. It will taste almost as fresh as the day it was baked.
You can also freeze the cookie dough! Scoop the dough balls onto a baking sheet and freeze them solid. Then, transfer the frozen dough balls to a bag. You can bake them straight from the freezer; just add 1-2 minutes to the bake time. This is perfect for having fresh, warm cookies anytime the mood strikes.
Tips for Cookie Perfection
- Chop Rhubarb Evenly: Aim for small, ¼-inch pieces. This ensures every bite has a bit of tang and they cook evenly.
- Don’t Over-Bake: Take them out when the edges are lightly golden but the centers look soft. They continue to cook on the hot tray.
- Soften Butter Correctly: Leave it on the counter for 30-60 minutes. It should be cool to the touch but leave a slight indent when pressed. Microwaving can melt it unevenly.
- Mix With Care: Once you add the flour, mix just until combined. Overworked dough makes tough cookies.
Making Your Cookies Look as Good as They Taste
- Dust cooled cookies with a light shower of powdered sugar for a pretty, snowy effect.
- Serve them on a rustic wooden board or a pretty vintage plate for a homey feel.
- Pair them with a small bowl of vanilla ice cream for an instant, decadent dessert.
- For a gift, stack them in a clear cellophane bag tied with a pink or green ribbon.
6 Fun Variations to Try Next Time
Love this recipe? Shake it up! Here are six delicious twists:
- Rhubarb Ginger Cookies: Add 1 tablespoon of finely grated fresh ginger to the dough for a spicy kick.
- White Chocolate Rhubarb Cookies: Fold in ½ cup of white chocolate chips with the rhubarb. The sweetness pairs beautifully with the tartness.
- Oatmeal Rhubarb Cookies: Replace ½ cup of the flour with old-fashioned rolled oats for a heartier, breakfast-friendly cookie.
- Strawberry-Rhubarb Cookies: Use ½ cup rhubarb and ½ cup finely chopped fresh strawberries for the classic pie flavor.
- Gluten-Free Rhubarb Cookies: Swap the all-purpose flour for a 1-to-1 gluten-free baking blend. The results are fantastic.
- Citrus Zested Cookies: Add the zest of one orange to the butter-sugar mixture for a bright, sunny flavor layer.
More Easy Baking Ideas You’ll Adore
If you love easy, crowd-pleasing treats, you have to try my favorite No-Bake Peanut Butter Chocolate Bars. They’re a lifesaver when you need something rich and delicious without turning on the oven. For another burst of spring flavor, these sunny Lemon Poundcake Cookies are a must-bake. Feeling fancy? The Strawberry Cheesecake Stuffed Cookies are a show-stopping surprise. And if you have a crowd to feed, a Strawberry Earthquake Cake is the easiest, most deliciously messy dessert you’ll ever make.
Common Mistakes to Avoid
Mistake 1: Using Soggy or Thawed Frozen Rhubarb
This is the biggest culprit for cakey, spread-out cookies. Rhubarb contains a lot of water. If you thaw frozen rhubarb, it releases that moisture right into your dough, making it wet and weak. How to avoid it: Always chop your rhubarb fresh, or if using frozen, keep it frozen solid until the very moment you fold it in. The pieces will hold their shape and moisture during baking.
Mistake 2: Not Packing the Brown Sugar
Measuring brown sugar loosely is like leaving flavor on the table. Loose sugar means less molasses content and less moisture in your dough. This can lead to cookies that are drier, flatter, and less chewy. How to avoid it: Firmly press the brown sugar into your measuring cup. Turn it out; it should hold the shape of the cup for a second. That’s perfect! This simple trick guarantees a rich, moist cookie.
Mistake 3: Overmixing the Dough After Adding Flour
Once the flour hits the wet ingredients, the clock starts ticking. Overmixing develops the gluten in the flour, which is great for bread but terrible for tender cookies. It makes them tough and dense. How to avoid it: Stir the dry ingredients in by hand or on the lowest mixer setting. Stop as soon as you no longer see dry flour streaks. It’s okay if there are a few small lumps of unmixed butter.
Mistake 4: Baking on a Hot Pan
Putting cookie dough on a warm baking sheet is a recipe for flat, greasy cookies. The butter in the dough starts melting the second it hits the heat, causing the cookies to spread uncontrollably before they even start to bake. How to avoid it: Always use cool baking sheets. If you’re baking multiple batches, rinse your used sheet under cold water to cool it down quickly, dry it, and re-line it with parchment.
Your Rhubarb Cookie Questions, Answered
Can I use dried rhubarb instead of fresh?
I don’t recommend dried rhubarb for this specific recipe. The magic of these cookies comes from the juicy, tart burst of fresh (or frozen) rhubarb as it bakes. Dried rhubarb won’t provide that same texture or moisture release. It would likely just become tough and chewy in the cookie. If you only have dried, try rehydrating it slightly in hot water first, then pat it very dry before using. But fresh is definitely the best choice for the perfect result.
Flat cookies usually point to one of three issues. First, your butter might have been too warm or even melted. Butter should be softened but still cool to the touch. Second, your baking soda could be old and lost its potency. Test it by mixing a bit with vinegar; it should bubble vigorously. Third, as mentioned, a warm baking sheet or over-creaming the butter and sugar can cause excess spread. Check your ingredients and make sure your dough is cool before baking.
For soft, chewy cookies, visual cues are key. They are done when the edges are set and have turned a light golden brown, but the centers still look puffy, soft, and slightly underdone. They will NOT look fully set in the middle. Remember, they continue to cook on the hot baking sheet after you take them out. This “carryover cooking” is what gives you that ideal soft center. If you wait for the centers to look fully cooked in the oven, they’ll be overdone and crisp when cooled.
Can I make the dough ahead of time?
Absolutely! You can prepare the cookie dough, cover the bowl tightly with plastic wrap, and refrigerate it for up to 48 hours. Chilling the dough actually improves the flavor as the ingredients have time to meld. It also firms up the butter, which can help prevent spreading. Let the chilled dough sit at room temperature for about 10-15 minutes before scooping, as it will be quite firm. You can also scoop the dough balls first and chill them on a tray, then bake from chilled (adding a minute or two to the bake time).
Are the nuts necessary? What’s a good substitute?
The nuts are completely optional! They add a nice crunch and earthy flavor, but the cookies are wonderful without them. If you’re allergic or just not a fan, simply leave them out. You don’t need to replace them with anything. However, if you want a different texture, you could try substituting with an equal amount of old-fashioned rolled oats, shredded coconut, or even a handful of white or dark chocolate chips for a sweeter twist.
Why is my rhubarb sometimes green and not pink?
The color of rhubarb stalks varies by variety and growing conditions. Field-grown, early spring rhubarb tends to have brighter red or pink stalks. Later in the season, or with some green varieties, the stalks can be mostly green with just a hint of pink. Don’t worry! Green rhubarb is just as flavorful and perfectly fine to use. Your cookies might just have less of a pink speckle, but they will taste just as delicious.
Can I use a sugar substitute like Splenda?
This can be tricky. Brown sugar contributes not just sweetness but also moisture, acidity (from the molasses), and affects the texture and spread of the cookie. A granulated sugar substitute like Splenda won’t provide the same moisture or caramelized flavor. For best results, I recommend using real brown sugar. If you must substitute, look for a “brown sugar blend” substitute specifically designed for baking, and follow the package’s conversion guidelines closely.
Is it safe to eat raw rhubarb?
This is an important one! While the stalks are safe to eat raw in small quantities (like finely chopped in this cookie dough), you should never eat rhubarb leaves. Rhubarb leaves contain high levels of oxalic acid, which is toxic. Always trim off and discard the leaves completely before using the stalks. When preparing rhubarb, only use the firm stalks. For more information on food safety and handling, resources like the USDA provide great guidelines on safe cooking temperatures and practices.
A cakey texture often means too much flour or overmixing. First, make sure you’re measuring your flour correctly. Spoon the flour into your measuring cup and level it off with a knife—don’t scoop directly from the bag, which packs it down. Second, ensure you’re not over-beating the dough once the flour is added. Finally, try using an extra egg yolk along with the whole egg. The added fat from the yolk promotes a richer, chewier texture.
Can I double this recipe?
Yes, you can absolutely double it! This recipe doubles beautifully. Just make sure you have a large enough mixing bowl to accommodate all the ingredients. You’ll also need to bake in batches, as doubling will make about 36 cookies. Always use a cool baking sheet for each new batch, as discussed. It’s a fantastic recipe for making ahead for a big event or freezing for future cookie emergencies.
I hope you’re inspired to give these delightful cookies and biscuits a try. They truly are one of my favorite ways to welcome spring into my kitchen.
Ready, Set, Bake!
So there you have it. The recipe for the perfect spring cookie that’s equal parts comforting and exciting. These Brown Sugar Rhubarb Cookies are a testament to how simple ingredients can create something truly special. They’ve earned a permanent spot in my recipe box, and I have a feeling they’ll in yours too. Now, go grab that rhubarb, preheat your oven, and get ready for your house to smell amazing. Happy baking!
Equipment
- Plaque à pâtisserie
- Fouet
- Grand bol
- Spatule
- Papier sulfurisé
Ingredients
- 1.5 tasse farine tout usage
- 0.5 cuillère à café bicarbonate de soude
- 0.25 cuillère à café sel
- 0.5 cuillère à café cannelle
- 0.75 tasse beurre non salé, ramolli
- 1 tasse sucre brun, tassé
- 1 grand œuf
- 1 cuillère à café extrait de vanille
- 1 tasse rhubarbe fraîche finement hachée
- 0.5 tasse noix ou pacanes hachées (facultatif)
Instructions
- Préchauffez le four à 175°C (350°F) et tapissez les plaques à pâtisserie de papier sulfurisé.
- Dans un bol moyen, fouettez ensemble la farine, le bicarbonate de soude, le sel et la cannelle ; mettez de côté.
- Dans un grand bol, crémez le beurre ramolli et le sucre brun jusqu'à obtenir un mélange léger et aéré ; ajoutez l'œuf et la vanille et mélangez jusqu'à consistance homogène.
- Ajoutez progressivement les ingrédients secs au mélange humide, en mélangeant juste jusqu'à ce que le tout soit combiné ; incorporez doucement la rhubarbe et les noix si vous en utilisez.
- Déposez des portions arrondies de pâte sur les plaques à pâtisserie préparées, en laissant de l'espace pour l'étalement.
- Faites cuire pendant 10 à 12 minutes jusqu'à ce que les bords soient légèrement dorés et que le centre ait l'air moelleux ; laissez refroidir sur la plaque pendant 5 minutes, puis transférez sur une grille pour refroidir complètement.
Notes
Nutrition

Hi, I’m Olivia Parker, the founder of BakingSecret.com and a lifelong lover of all things sweet and homemade. I grew up in a small town in Oregon, where the smell of fresh cookies in my family’s kitchen sparked my passion for baking. Over the years, I turned that passion into a mission: to help home bakers feel confident, inspired, and creative.
After studying food science and working in several artisan bakeries across the U.S., I decided to create a space where everyone from beginners to seasoned bakers can find reliable recipes, expert tips, and a warm, welcoming community. BakingSecret.com is my way of sharing the magic of baking with the world. When I’m not testing new recipes, you’ll find me exploring farmers’ markets, collecting vintage cookbooks, or perfecting my sourdough technique.