
The Simple Dessert That Steals Every Party
You know that feeling when you’re asked to bring a dessert for a crowd and panic sets in? You want something easy, something sure to please, and something that won’t have you slaving in the kitchen for hours. Well, my friend, meet your new secret weapon: Crowd-Pleasing Cherry Bars. I discovered this recipe years ago when I needed to feed my son’s entire soccer team. These bars were devoured in minutes, and I’ve been the designated “dessert lady” ever since!
A Slice of Sweet History
While the exact origin is a bit fuzzy, bar cookies like these are a true American classic. They likely evolved from the frugal “cake and topping” concept, a way to stretch simple pantry ingredients into a generous treat. My grandma made a version with blackberries from her garden. My modern twist uses convenient cherry pie filling, making it perfect for our busy lives. It’s a beautiful blend of old-fashioned comfort and new-fashioned ease.
Why You’ll Love These Crowd-Pleasing Cherry Bars
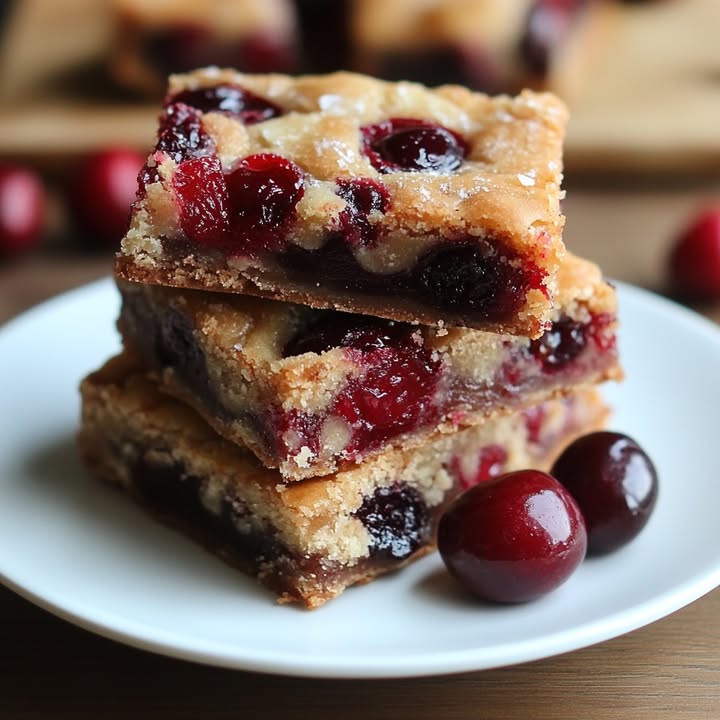
This recipe is a keeper for so many reasons. First, the flavor is unbeatable. The sweet, slightly tart cherries pair perfectly with the soft, buttery cake. Then, there’s the simplicity. It’s a simple dump-and-spread method—no fancy skills needed! Finally, it’s incredibly forgiving. Even if your batter isn’t perfectly even, it bakes up into a beautiful, rustic dessert that always gets rave reviews.
Perfect Occasions for These Cherry Bars
These bars are your go-to for any gathering. They are the ultimate potluck dessert, easily transportable and always a hit. Bring them to school bake sales, family reunions, or holiday cookie swaps. They’re perfect for a summer picnic or a cozy winter get-together. Anytime you need a reliable, delicious sweet treat for a group, this is your recipe.
Gathering Your Ingredients
Let’s gather everything you need. The beauty is in its simplicity! Here’s your shopping list:
For the bars:
- 1 cup unsalted butter, softened
- 2 cups granulated sugar
- 4 large eggs
- 1 teaspoon vanilla extract
- 3 cups all-purpose flour
- 1 teaspoon baking powder
- 1 teaspoon salt
- 1 (21-ounce) can cherry pie filling
For the glaze:
- 1 cup powdered sugar
- 2 tablespoons milk
- 1/2 teaspoon vanilla extract
Handy Substitution Options
No worries if you’re missing something! Here are some easy swaps:
- Butter: You can use salted butter. Just omit the extra salt in the recipe.
- Cherry Pie Filling: Any fruit pie filling works! Try blueberry, apple, or peach for a fun twist.
- Milk in Glaze: Any liquid works here. Lemon juice, almond milk, or even a little cherry juice from the can add unique flavor.
How to Make Cherry Bars for a Crowd: Step-by-Step
Ready to bake? Follow these simple steps for perfect bars every time.
Step 1: Prep Your Pan and Oven
First, turn your oven on to 350°F (175°C). This gives it time to heat evenly. Grab your large 10×15-inch baking pan. Generously grease the bottom and sides with butter or non-stick spray. The last thing you want is for your beautiful bars to stick! A well-greased pan is the secret to easy, clean slices later.
Step 2: Cream the Butter and Sugar
In a large mixing bowl, add your softened butter and granulated sugar. Use a hand mixer or stand mixer to beat them together. Keep going for about 2-3 minutes until the mix is pale, fluffy, and light. You’ll hear the texture change from gritty to smooth. This step is crucial for creating that tender, cake-like crumb in your bars.
Step 3: Add Eggs and Vanilla
With your mixer on a medium speed, add the eggs one at a time. Let each egg fully blend into the buttery mixture before adding the next. This helps the batter emulsify and stay smooth. Finally, pour in that teaspoon of vanilla extract. The warm, sweet aroma will start to fill your kitchen already!
Step 4: Combine Dry Ingredients
In a separate, medium-sized bowl, whisk together your flour, baking powder, and salt. Use a fork or whisk to really aerate the flour. This little trick helps ensure your bars bake up nice and light. Now, gradually add these dry ingredients to your wet batter. Mix on low speed until just combined. A few streaks of flour are okay—don’t overmix!
Pro tip: Overmixing develops gluten, which can make bars tough. Stop as soon as you no longer see dry flour.
Step 5: Layer the Batter and Cherries
Here’s the fun part! Spoon about two-thirds of your thick, velvety batter into your greased pan. Use a spatula to spread it into a somewhat even layer. It’s sticky, so a little patience helps. Now, open your can of cherry pie filling. Spoon glossy, red cherries and their thick syrup evenly over the batter layer. Try to cover most of the surface.
Step 6: Top with Remaining Batter
You’ll have about one-third of the batter left. Drop it in small spoonfuls all over the cherry layer. Don’t worry about covering every single cherry spot! The batter will spread and puff as it bakes, creating a beautiful, cobblestone-like top. The vibrant red cherries will peek through in the most inviting way.
Step 7: Bake to Golden Perfection
Carefully place your pan in the center of your preheated oven. Bake for 35 to 40 minutes. You’re looking for the top to be a lovely golden brown, and a toothpick inserted in the cakey part should come out clean. The smell of baking cherries and butter will be absolutely heavenly. Once done, take the pan out and place it on a wire rack.
Step 8: Cool and Add the Glaze
This is the hardest step—waiting! You must let the pan cool completely. If you try to cut warm bars, they will fall apart. I let mine cool for at least 2 hours. While you wait, make the simple glaze. Whisk the powdered sugar, milk, and vanilla in a small bowl until smooth. Once the bars are totally cool, drizzle the glaze back and forth over the top with a spoon.
Chef’s tip: For perfect, clean cuts, chill the glazed bars in the refrigerator for 30 minutes before slicing. The glaze will set, and your knife will glide through beautifully.
Step 9: Slice and Serve!
Finally, use a sharp knife to cut your masterpiece into squares or rectangles. Wipe the knife clean between cuts for neat edges. Arrange your beautiful Crowd-Pleasing Cherry Bars on a platter and watch them disappear. The contrast of the white glaze, golden cake, and ruby-red cherries is simply stunning.
Timing Your Baking Success
Good planning makes baking stress-free! Here’s your timeline:
- Prep Time: 20 minutes
- Cook Time: 40 minutes
- Cooling Time: 2 hours (this is essential!)
- Total Time: 3 hours (including cooling)
Chef’s Secret for the Best Cherry Bars
My secret is in the butter. Make sure it’s truly softened to room temperature. It should give slightly when you press it, but not be melted or oily. This allows it to trap more air when creamed with the sugar. More air equals a lighter, more tender bar that melts in your mouth. If you forget to soften it, cut it into small cubes and let it sit for 15-20 minutes.
A Sweet Little Fact
Did you know the cherry pie filling we use today was a World War II innovation? Canned fruits and fillings became popular for their convenience and long shelf life, allowing families to enjoy fruit desserts year-round. So when you use that can, you’re part of a long tradition of practical, joyful baking!
Necessary Equipment
You don’t need fancy tools. Just gather these kitchen basics:
- 10×15-inch baking pan (a jelly roll pan)
- Large mixing bowl
- Medium mixing bowl
- Hand mixer or stand mixer
- Whisk or fork
- Rubber spatula
- Measuring cups and spoons
- Wire cooling rack
Storing Your Delicious Cherry Bars
Leftovers are a rare event, but it’s good to know how to store them! At room temperature, the bars will stay fresh in an airtight container for about 2 days. Place parchment paper between layers if you stack them to keep the glaze from sticking.
For longer storage, you can refrigerate them. Keep them in a sealed container, and they’ll be delicious for up to 5 days. The cool temperature helps the glaze and filling set nicely.
You can also freeze these bars for up to 3 months. Freeze them on a baking sheet first until solid, then transfer to a freezer bag. Thaw overnight in the fridge for the best texture.
My Best Tips and Advice
- For easier spreading, lightly dampen your spatula with water when pressing the first layer of batter.
- If your cherry filling is very lumpy, give it a gentle stir in the can before spooning it out.
- Always use a toothpick to test for doneness. The cherries might make it look wet, so test the cakey part.
- Get creative with glaze flavors! Add a drop of almond extract for an amazing cherry-almond combo.
Presentation Tips to Impress
Make those bars shine on the table!
- Dust with a little extra powdered sugar right before serving.
- Serve each bar on a small doily or colorful napkin.
- Garnish the platter with fresh mint leaves or a few whole cherries.
- For a party, cut them into smaller, bite-sized pieces for easy grazing.
6 Healthier & Fun Recipe Variations
Love the base recipe? Try these tasty twists!
- Whole Wheat Cherry Bars: Swap half the all-purpose flour for whole wheat flour. It adds a nutty flavor and extra fiber. The texture remains soft and wonderful.
- Reduced-Sugar Cherry Bars: Cut the granulated sugar in the batter to 1.5 cups. The cherries and glaze provide plenty of sweetness already.
- Gluten-Free Cherry Bars: Use a 1-to-1 gluten-free all-purpose flour blend. Ensure your baking powder is gluten-free. The result is a celiac-friendly treat everyone can enjoy.
- Lemon-Zested Cherry Bars: Add the zest of one lemon to the batter. The bright citrus cuts the sweetness and pairs beautifully with the cherries.
- Cream Cheese Frosting Bars: Skip the glaze and top cooled bars with a layer of simple cream cheese frosting for an ultra-decadent dessert.
- Mixed Berry Bliss Bars: Use a can of mixed berry pie filling instead of cherry. You get a beautiful medley of blueberry, raspberry, and blackberry flavors.
Links to More Crowd-Pleasing Recipes
If you loved making these easy bars, you might also enjoy my recipe for a classic lemon bar that’s always a hit at picnics. For another fantastic potluck option, try my famous seven-layer magic cookie bars. When apples are in season, my caramel apple slab pie feeds a crowd with minimal effort. And if you’re a chocolate lover, you can’t miss my triple chocolate brownie recipe that’s perfect for any celebration.
Common Mistakes to Avoid
Steer clear of these simple errors for bar-baking success.
Mistake 1: Using Cold or Melted Butter
This is the biggest culprit for texture problems. Cold butter won’t cream properly with the sugar, leading to dense bars. Melted butter will make the batter greasy and thin. Your bars might be heavy or oily. The fix is simple. Take your butter out of the fridge about an hour before you start. It should be cool to the touch but soft enough to leave an indent when you press it.
Mistake 2: Skipping the Cooling Step
We’ve all been tempted to cut into warm bars! I get it. But if you slice them too soon, they will crumble and fall apart. The structure hasn’t set yet. The glaze will also melt right off. Patience is your best tool here. Let the pan cool on a wire rack for at least two hours. For the cleanest cuts, pop the whole pan in the fridge for 30 minutes after it cools.
Mistake 3: Overmixing the Batter
Once you add the flour, your mixing should be gentle. Overmixing activates the gluten in the flour. This can make your cherry bars tough and chewy instead of soft and tender. Mix the dry ingredients in on low speed, and stop as soon as you no longer see white streaks of flour. A few small lumps in the batter are perfectly fine.
Mistake 4: Using the Wrong Size Pan
The 10×15-inch pan is specified for a reason. A smaller pan (like a 9×13) will be too deep. Your bars will be undercooked in the middle or take much longer to bake. A larger, thinner pan will make the bars too crisp. If you don’t have the right size, you can use a 9×13 pan, but only spread about 3/4 of the batter for the bottom layer and expect a longer bake time. Check for doneness carefully.
Mistake 5: Spreading the Top Batter Evenly
It might seem neat to try and spread the last bit of batter over the cherries. Don’t do it! You’ll just drag the cherries into the batter and make a messy, mixed layer. The charm of this dessert is the distinct layers. Dropping spoonfuls lets the batter spread naturally in the oven. The cherries will peek through, creating a beautiful, rustic look that’s part of the appeal.
More Delicious Dessert Bar Ideas
This recipe has secured its place as one of my all-time favorite easy dessert bar recipes for good reason. It’s the kind of treat that gets requested again and again, proving that simple ingredients can create pure magic.
Frequently Asked Questions
Can I use fresh cherries instead of pie filling?
You can, but it requires more work. Fresh cherries need to be pitted and cooked down with sugar and a thickener like cornstarch to create a filling-like consistency. For a 21-ounce can, you’d need about 4 cups of pitted cherries. Simmer them with about 1/2 cup sugar and 2 tablespoons of cornstarch dissolved in juice until thick. Let it cool before using. The canned filling is just so convenient, but homemade is delicious if you have the time!
How far in advance can I make these bars?
These bars are great for making ahead. You can bake them 1-2 days before you need them. Store them covered at room temperature. I recommend waiting to add the glaze until the day you plan to serve them. This keeps the glaze looking fresh and prevents it from soaking in. If you glaze them ahead, they will still taste great, but the glaze may become less visible and more absorbed into the top.
Can I freeze cherry bars?
Absolutely! They freeze very well. Make sure they are completely cooled. It’s best to freeze them without the glaze. Place the unglazed bars in a single layer on a baking sheet and freeze until solid (about 2 hours). Then, transfer them to a freezer-safe bag or container. They’ll keep for up to 3 months. Thaw overnight in the refrigerator, then drizzle with fresh glaze before serving.
My bars are too sweet. How can I adjust this?
The recipe is definitely a sweet treat. You can reduce the sugar in the batter by 1/4 to 1/2 cup without major issues. The bars will be slightly less tender but still good. You can also use a “less sugar” variety of cherry pie filling if you can find it. Another option is to skip the powdered sugar glaze altogether. A light dusting of powdered sugar just before serving provides sweetness without being overwhelming.
Why did my bars turn out dry?
Dry bars usually mean they were baked a bit too long. Oven temperatures can vary. Start checking for doneness at the 30-minute mark. The edges should be golden, and a toothpick inserted into the cakey part (not the cherry goo) should come out with a few moist crumbs, not bone dry. Also, be sure to measure your flour correctly. Spoon it into the measuring cup and level it off. Scooping directly packs in too much flour, which leads to dryness.
Can I use a different type of fruit?
Yes, this recipe is very versatile! Any canned fruit pie filling works beautifully. Blueberry, apple, peach, and raspberry are all fantastic choices. You can even mix and match. Just be sure to keep the total amount to about 21 ounces (one standard can). The baking time should remain about the same. It’s a wonderful way to use what you have or match the dessert to a holiday color scheme.
What’s the best way to cut them cleanly?
For super clean, professional-looking squares, chill them first. After the bars have cooled to room temperature, place the whole pan in the refrigerator for 30-60 minutes. This firms up the glaze and filling. Use a long, sharp knife. Wipe the blade clean with a damp paper towel after each cut. Some bakers even dip the knife in hot water and dry it before each slice for an ultra-smooth edge.
Is there a dairy-free version?
You can easily make dairy-free cherry bars. Use a plant-based butter stick (not spread) in the batter. For the glaze, use any non-dairy milk like almond, soy, or oat milk. The results are nearly identical. Just check that your chosen butter substitute is meant for baking and has a similar fat content to real butter for the best texture.
How many people does this recipe serve?
It depends on how you cut them! From a 10×15 pan, you can get about 24 generous squares or 48 smaller, two-bite pieces. It’s perfect for a large gathering. When thinking about portion control for a potluck, remember that smaller pieces allow people to try multiple desserts. I usually cut them medium-sized for a family event and smaller for a big party with lots of food options.
Can I make these bars in a 9×13 pan?
You can, but the bars will be thicker. I would use only about 3/4 of the batter for the bottom layer to avoid it being too deep. The baking time will likely increase by 5-10 minutes because the center will be thicker. Keep a close eye on them and test with a toothpick for doneness. The edges should be golden brown, and the center should spring back lightly when touched.
The Final Slice
There you have it! My tried-and-true recipe for the easiest, most delicious Crowd-Pleasing Cherry Bars. They are the dessert that never lets me down. Simple ingredients, straightforward steps, and a result that always brings smiles. Whether it’s for a busy weeknight treat or a huge family reunion, this recipe has your back. So preheat that oven, grab a can of cherries, and get ready to become the most popular baker in the room. Happy baking
Equipment
- Grand bol
- Fouet
- Spatule
- Plaque à pâtisserie
- Papier sulfurisé
Ingredients
- 1 tasse beurre non salé, ramolli
- 2 tasses sucre granulé
- 4 œufs
- 1 cuil. à café extrait de vanille
- 3 tasses farine tout usage
- 1 cuil. à café poudre à lever
- 1 cuil. à café sel
- 1 boîte (21 onces) garniture de tarte aux cerises
- 1 tasse sucre glace (pour le glaçage)
- 2 cuil. à soupe lait (pour le glaçage)
- 1/2 cuil. à café extrait de vanille (pour le glaçage)
Instructions
- Préchauffez le four à 175°C et graissez un moule à pâtisserie de 10x15 pouces.
- Dans un grand bol, crémez le beurre ramolli et le sucre granulé jusqu'à ce que le mélange soit pâle et léger (environ 2-3 minutes).
- Ajoutez les œufs un par un, en mélangeant bien après chaque ajout, puis ajoutez l'extrait de vanille.
- Dans un autre bol, mélangez la farine, la poudre à lever et le sel.
- Incorporez progressivement les ingrédients secs dans le mélange humide à basse vitesse jusqu'à ce que le tout soit juste combiné.
- Versez deux tiers de la pâte dans le moule préparé et étalez-la uniformément.
- Répartissez uniformément la garniture de tarte aux cerises sur la couche de pâte.
- Déposez des cuillerées de la pâte restante sur la garniture de cerises.
- Faites cuire dans le four préchauffé pendant 35 à 40 minutes jusqu'à ce que le tout soit doré et qu'un cure-dent en ressorte propre.
- Laissez les barres refroidir complètement sur une grille pendant au moins 2 heures avant de les glacer.
- Pour le glaçage, fouettez ensemble le sucre glace, le lait et l'extrait de vanille jusqu'à obtenir un mélange lisse. Nappez les barres refroidies.
- Réfrigérez pendant 30 minutes avant de couper en carrés ou rectangles et de servir.
Notes
Nutrition

Hi, I’m Olivia Parker, the founder of BakingSecret.com and a lifelong lover of all things sweet and homemade. I grew up in a small town in Oregon, where the smell of fresh cookies in my family’s kitchen sparked my passion for baking. Over the years, I turned that passion into a mission: to help home bakers feel confident, inspired, and creative.
After studying food science and working in several artisan bakeries across the U.S., I decided to create a space where everyone from beginners to seasoned bakers can find reliable recipes, expert tips, and a warm, welcoming community. BakingSecret.com is my way of sharing the magic of baking with the world. When I’m not testing new recipes, you’ll find me exploring farmers’ markets, collecting vintage cookbooks, or perfecting my sourdough technique.