
Have you ever had a kitchen panic moment? You know, the one where you need to bring a dish to a potluck and your original plan goes out the window? That’s exactly how this Best Ever Strawberry Cake was born for me. I swapped it in at the last minute, crossed my fingers, and watched it become the star of the party. The whole thing was gone before the main course! It’s the kind of happy accident that makes you look like a baking genius. So, what’s your secret twist to make this strawberry cake even more special?
A Little Story Behind This Berry-Licious Cake
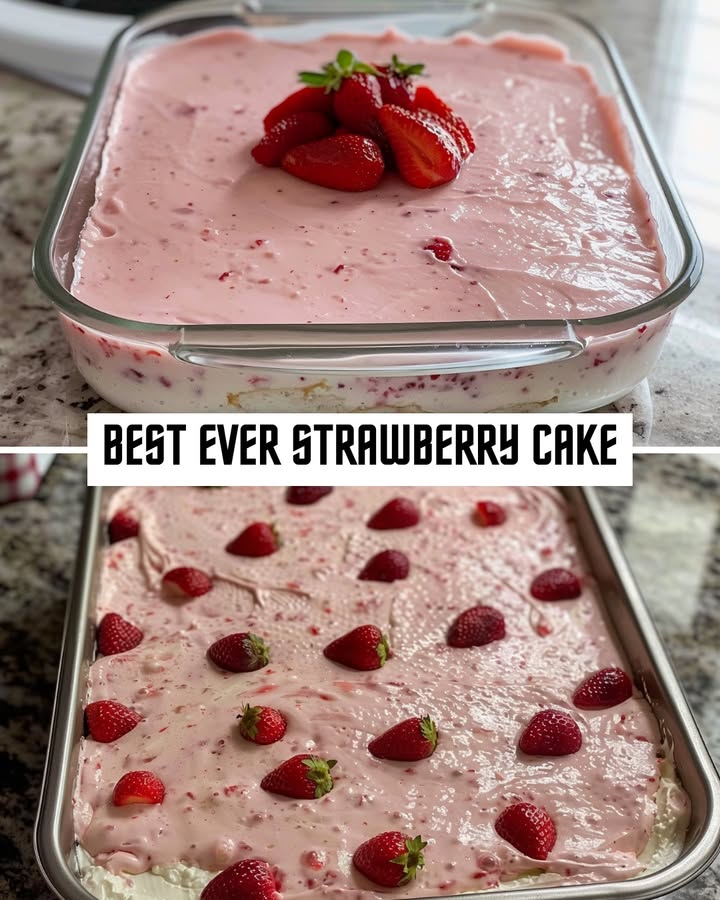
This cake is a beautiful blend of old-school charm and modern convenience. It’s inspired by those classic “poke cakes” our grandmas used to make, where you pour jello into a warm cake for an extra burst of flavor and moisture. My version takes that idea and runs with it, using real strawberry puree alongside the jello for a fresher, more vibrant taste. It’s a tradition updated for today’s busy cook who still wants to make something spectacular. Whether you’re keeping it simple or dressing it up, this cake always feels like a celebration.
Why You’ll Absolutely Love This Strawberry Cake Recipe
This isn’t just any cake. First, the flavor is incredible – it’s intensely strawberry, not artificial at all. Second, it’s shockingly easy. Starting with a cake mix means you’re halfway done before you even preheat the oven. The creamy, tangy frosting made with cream cheese and butter is the perfect rich counterpoint to the sweet, fruity cake. It’s moist, pretty, and guaranteed to get you compliments. Trust me, this will become your go-to recipe for every spring and summer gathering.
Perfect Occasions for Your Show-Stopping Cake
This cake is a crowd-pleaser for any event! It’s perfect for potlucks (just ask my friends), birthday parties, baby showers (especially for a little girl!), or Mother’s Day brunch. I love making it for a simple weekend treat to brighten up the dinner table. It screams sunshine and happy times. Anytime you need a dessert that looks like you fussed for hours but secretly didn’t, this is your recipe.
Gathering Your Ingredients for the Best Strawberry Cake
Here’s what you’ll need to create this magic. The beauty is in the mix of simple pantry items and fresh berry goodness.
- 1 box (15.25 oz) white cake mix
- 1 box (3 oz) strawberry-flavored gelatin (like Jell-O)
- 1 cup canola oil
- 4 large eggs
- 1/2 cup strawberries, pureed (fresh or thawed frozen work great)
- 1 package (8 oz) cream cheese, softened
- 1/2 cup (1 stick) unsalted butter, softened
- 4 cups powdered sugar
- 1 teaspoon vanilla extract
- Extra strawberries for garnish (optional)
Easy Swaps: Your Strawberry Cake, Your Way
Don’t have something? No problem! Cooking is about making it work for you.
- Oil: You can use vegetable oil instead of canola oil. For a different flavor, melted coconut oil works too.
- Cake Mix: A yellow cake mix can be used if you can’t find white. The color will just be a bit more golden.
- Fresh Strawberries: If fresh aren’t in season, use frozen strawberries that have been thawed and drained well. The flavor is still fantastic.
- Frosting: For a lighter option, you could frost the cake with homemade whipped cream. Just know it won’t hold up as long at room temperature.
How to Make This Irresistible Strawberry Cake
Let’s get baking! Follow these simple steps for a perfect, moist cake every time.
Step 1: Preheat and Prep
Start by heating your oven to 350°F (175°C). Grab a 9×13 inch baking pan and generously grease and flour it, or line it with parchment paper. This little step is your insurance policy for a cake that pops right out cleanly. While the oven heats up, measure out all your ingredients. Having everything ready makes the process so smooth and enjoyable. You’ll feel like a chef on your own cooking show!
Step 2: Mix the Cake Batter
In a large mixing bowl, combine the dry white cake mix and the strawberry gelatin powder. Give them a quick whisk to blend. Then, add in the canola oil, eggs, and your beautiful red strawberry puree. Use an electric mixer on medium speed to beat everything together for about 2 minutes. The batter will turn a lovely pale pink color and become beautifully smooth and thick. Pro tip: Scrape down the sides of the bowl halfway through to make sure everything is perfectly incorporated.
Step 3: Bake to Perfection
Pour that gorgeous pink batter into your prepared pan. Spread it out evenly with a spatula. Place it in the center of your preheated oven. Bake for 30-35 minutes. You’ll know it’s done when the top is golden and springs back lightly when touched, or a toothpick inserted in the center comes out clean. The smell of baking strawberries will fill your kitchen – it’s pure happiness!
Chef’s tip: Don’t open the oven door before the 30-minute mark. A sudden temperature drop can cause the cake to fall. Patience is key for a perfect rise.
Step 4: Cool the Cake Completely
Once baked, take the cake out and place the pan on a wire cooling rack. This is the most important step for frosting success! You must let the cake cool completely to room temperature. If you frost a warm cake, the creamy frosting will melt right off into a sad, runny puddle. I know it’s hard to wait, but grab a cup of tea and let it cool for at least an hour.
Step 5: Whip Up the Creamy Frosting
While the cake cools, make your frosting. In a clean bowl, beat the softened cream cheese and softened butter together until they’re completely smooth and fluffy. This takes about 2-3 minutes. Gradually add the powdered sugar, about one cup at a time, beating well after each addition. Finally, mix in the vanilla extract. The frosting should be thick, spreadable, and dreamily creamy.
Step 6: Frost and Garnish
Now for the fun part! Use an offset spatula or a butter knife to spread all that creamy frosting over the top of the completely cooled cake. Swirl it beautifully. For a final touch, you can garnish with sliced fresh strawberries or even a sprinkle of leftover gelatin powder for a pop of color. Slice, serve, and get ready for the applause!
| Prep Time | Cook Time | Cooling Time | Total Time |
|---|---|---|---|
| 20 minutes | 35 minutes | 1 hour | About 1 hour 55 minutes |
The Chef’s Secret for Ultimate Flavor
My secret? Let the cake sit overnight. I know, it’s torture. But if you can cover and refrigerate the frosted cake for a few hours or even overnight, the flavors deepen and marry together. The strawberry flavor from the jello and puree soaks into every crumb, making it unbelievably moist and flavorful. It’s worth the wait!
A Fun Fact About Strawberries
Did you know strawberries are the only fruit with seeds on the outside? Each berry has about 200 tiny seeds! They’re also a fantastic source of vitamin C. Using pureed strawberries in this cake isn’t just for flavor; it adds a little natural fruit goodness, too.
Tools You’ll Need in Your Kitchen
- 9×13 inch baking pan
- Electric mixer (handheld or stand)
- Large mixing bowls
- Measuring cups and spoons
- Wire cooling rack
- Spatula (for mixing and frosting)
- Blender or food processor (for pureeing strawberries)
Storing Your Strawberry Masterpiece
Because of the cream cheese frosting, this cake needs to be stored in the refrigerator. Cover the pan tightly with plastic wrap or aluminum foil, or transfer slices to an airtight container.
It will keep beautifully in the fridge for up to 4-5 days. The cold actually makes the cake even more dense and moist, which many people love.
You can also freeze this cake for up to 2 months. Freeze it uncovered on a baking sheet first until the frosting is solid, then wrap the whole cake or individual slices tightly in plastic wrap and foil. Thaw overnight in the fridge before serving.
Tips & Tricks for Baking Success
- Make sure your cream cheese and butter are truly softened at room temperature for a lump-free, silky frosting.
- If your strawberry puree is very watery, strain it a bit so you don’t add too much extra liquid to the batter.
- For a neater presentation, run a knife under hot water, dry it, and then use it to slice the cake cleanly.
- If you want a more natural pink color, add a tiny drop of red food coloring to the batter. The puree gives a soft hue, but a drop can make it really pop.
Presentation Ideas to Wow Your Guests
- Serve each slice on a plate with a dollop of fresh whipped cream and a perfect whole strawberry on the side.
- Use a cookie cutter to cut the cake into fun shapes like hearts or stars for a party.
- Before serving, dust the top lightly with powdered sugar through a fine-mesh sieve for an elegant, snowy effect.
- Create a “strawberry patch” on top by arranging sliced strawberries in a pretty pattern before the frosting fully sets.
Healthier & Creative Twists on This Cake
Want to mix it up? Here are six delicious ways to personalize this classic recipe.
- Strawberry Lemonade Cake: Add the zest of one lemon to the cake batter and use lemon juice instead of vanilla in the frosting for a bright, tangy twist.
- Chocolate-Dipped Strawberry Cake: Add 1/2 cup of cocoa powder to the dry mix for a chocolate base. Frost as usual, then drizzle slices with melted dark chocolate.
- Angel Food Strawberry Cake: For a lighter version, use a fat-free angel food cake mix and fold the puree into the batter gently. Top with a light, sweetened Greek yogurt frosting.
- Strawberry Shortcake Cake: Bake the cake in two 9-inch round pans. Use sweetened whipped cream instead of cream cheese frosting between the layers and on top, then pile high with fresh berries.
- Gluten-Free Strawberry Cake: Simply swap the regular cake mix for your favorite gluten-free white or yellow cake mix. Ensure all other ingredients are certified gluten-free.
- Mini Strawberry Cupcakes: Pour the batter into lined muffin tins and bake for 18-22 minutes. Frost each one for perfect individual portions, great for kids’ parties.
If you love this simple, delicious cake, you might also enjoy my other easy bake-sale hits like this classic Moist Banana Bread, these decadent Chewy Chocolate Chip Cookies, a stunning Lemon Berry Trifle, or this always-popular Texas Sheet Cake.
Common Mistakes to Avoid With This Cake
Mistake 1: Using Cold Dairy for the Frosting
This is the number one reason for lumpy, runny frosting. If your cream cheese and butter come straight from the fridge, they won’t blend smoothly with the sugar. You’ll end up with tiny butter lumps and a frosting that’s too soft to hold its shape. To avoid this, take the cream cheese and butter out at least an hour before you start. They should be soft to the touch but not melted. Smooth, room-temperature ingredients make a smooth, dreamy frosting.
Mistake 2: Frosting a Warm Cake
I get it, you’re excited to finish your creation! But spreading that rich cream cheese frosting on a cake that’s even slightly warm is a disaster. The heat will cause the fat in the frosting to melt immediately. Your beautiful frosting will slide right off the cake and become a soupy mess. Be patient. Let the cake cool in the pan on a wire rack until no warmth remains. Touch the bottom of the pan—if it’s cool, you’re good to go.
Mistake 3: Overmixing the Cake Batter
Once you add the wet ingredients to the dry mix, you only need to mix until everything is just combined and smooth. Overmixing for several minutes on high speed works too much gluten in the flour. This can make your cake tough, dense, and chewy instead of light and tender. Use your mixer on medium speed for the time stated (about 2 minutes) and stop as soon as the batter looks uniform. A few small lumps are just fine!
Mistake 4: Ignoring the Pan Prep
Just spraying the pan might not be enough for this moist cake. If you don’t properly grease and flour the pan, or use parchment paper, you risk half your cake sticking to the bottom. There’s nothing sadder than a beautiful cake that tears when you try to take it out. Take an extra 60 seconds to grease the pan well with butter or oil, then sprinkle in a little flour, tapping it around to coat all sides. For absolute certainty, a sheet of parchment paper in the bottom is a baker’s best friend.
Remember, using fresh, quality ingredients doesn’t just taste better; it’s a simple way to improve your overall food quality and nutrition. For a great guide on balancing treats like this cake within a healthy diet, check out the helpful resources on managing your daily calorie needs.
This Best Ever Strawberry Cake is just one of many beloved treats in my collection. If you’re looking for more inspiration for sweet celebrations, explore all my favorite cake and cupcake recipes for your next baking adventure.
Your Strawberry Cake Questions, Answered
Can I use fresh strawberries instead of puree in the cake batter?
You should absolutely use fresh strawberries, but they need to be turned into a puree for this recipe. Chopping them isn’t enough. The puree distributes the strawberry flavor and moisture evenly throughout the whole cake batter. If you just fold in chopped berries, they might sink to the bottom and make the batter wet in spots. To make the puree, simply wash and hull about 1/2 cup of fresh strawberries, blend them in a food processor or blender until smooth, and measure out what you need. It’s easy and makes all the difference!
Can I make this strawberry cake recipe without jello?
You can, but the jello is a key player. The strawberry gelatin does three important things: it gives the cake its vibrant pink color, it adds a strong, true strawberry flavor, and it helps keep the cake incredibly moist. If you leave it out, you’ll have a plainer white cake with just a hint of strawberry from the puree. To try a version without it, you could add a bit more puree and perhaps a drop of natural food coloring, but the texture and intense flavor will be different.
My frosting is too runny. How can I fix it?
A runny frosting usually means your dairy was too soft (almost melted) or the cake wasn’t cool. First, pop the whole bowl of frosting into the refrigerator for 20-30 minutes to firm up the fats. Then, beat it again. If it’s still too soft, you can gradually add a little more powdered sugar, about 1/4 cup at a time, until it reaches a spreadable consistency. Next time, ensure your butter and cream cheese are soft but still cool to the touch, not warm and oily.
Can I bake this cake in round pans for a layer cake?
Yes, you can! This recipe will work perfectly in two 9-inch round cake pans. Just be sure to grease and flour the pans well. The baking time will be slightly less—start checking at 25 minutes. Let the layers cool in the pans for 10 minutes, then turn them out onto a rack to cool completely before frosting. You’ll have a stunning layered strawberry cake perfect for a birthday!
How far in advance can I make this cake?
You can make this cake 1-2 days in advance, and many would argue it’s even better! Because it’s so moist and the flavors continue to develop, it’s an excellent make-ahead dessert. Just bake and frost it, cover it tightly, and store it in the refrigerator. Take it out about 30 minutes before you plan to serve it to take the chill off the frosting. This makes it ideal for parties where you don’t want to be baking at the last minute.
Can I use frozen strawberries for the puree?
Frozen strawberries are a great year-round option. Just thaw them completely in a bowl first. Once thawed, there will be a lot of liquid. It’s best to strain the berries, reserve the juice, and then puree just the berries. You can add a tablespoon or two of the reserved juice back into the puree if it seems too thick. Using frozen berries without draining will add too much water to your batter and can affect how the cake sets up.
Why did my cake sink in the middle?
A sunken cake usually points to three issues: the cake was underbaked, the oven door was opened too early, or there was too much leavening. First, ensure you’re testing for doneness with a toothpick—it should come out clean. Second, resist the urge to open the oven door before at least 30 minutes of baking. The cold air makes the cake collapse. Finally, follow the recipe exactly; adding extra puree or liquid can throw off the balance and cause sinking.
Is there a way to make this cake less sweet?
The cake and frosting are definitely sweet. To cut the sweetness a bit, you can reduce the powdered sugar in the frosting by 1/2 to 1 cup. The frosting will be softer and more tangy from the cream cheese, which is lovely. You could also use a less sweet whipped cream frosting instead. In the cake itself, there’s not much you can adjust without changing the texture, but the tangy frosting balance really helps.
Can I add real strawberry pieces to the batter?
I wouldn’t recommend adding large pieces of strawberry to the actual batter. The extra moisture from the fruit pieces can create soggy pockets and make the cake bake unevenly. If you want bits of berry, the best way is to fold in a small handful of very finely chopped strawberries at the very end. Even better, use them as a garnish on top of the frosting where their texture and fresh flavor can really shine.
What’s the best way to get clean slices of cake?
For picture-perfect slices, use a long, thin knife. Run the blade under very hot water for a few seconds, wipe it completely dry with a towel, and then make your cut. The hot knife will glide smoothly through the frosting and cake without dragging or crumbling. Clean and re-heat the knife between each slice. This trick works for any frosted cake and makes serving look so professional.
Ready to Bake Your New Favorite Cake?
So there you have it! My famous, potluck-winning, accidentally-amazing strawberry cake. It’s the recipe I turn to when I need something guaranteed to bring smiles. It’s simple enough for a Tuesday and special enough for a celebration. I can’t wait for you to try it and make it your own. Don’t forget to share your photos and your secret twists with me. Happy baking, and may your kitchen be filled with the sweet smell of strawberries!
Equipment
- Grand bol
- Fouet
- Spatule
- Plaque à pâtisserie
- Papier sulfurisé
Ingredients
- 1 boîte mélange de gâteau blanc (15,25 oz)
- 1 boîte gelée de fraise (3 oz)
- 1 tasse huile de canola
- 4 grands œufs
- 1/2 tasse fraises, réduites en purée
- 1 paquet fromage à la crème (8 oz), ramolli
- 1/2 tasse beurre non salé (1 bâton), ramolli
- 4 tasses sucre en poudre
- 1 cuillère à café extrait de vanille
- q.s. fraises supplémentaires pour la garniture (facultatif)
Instructions
- Préchauffez le four à 175°C (350°F). Graissez et farinez un moule à pâtisserie de 9x13 pouces ou tapissez-le de papier sulfurisé.
- Dans un grand bol, fouettez ensemble le mélange de gâteau blanc et la gélatine de fraise.
- Ajoutez l'huile de canola, les œufs et la purée de fraises au mélange sec. Battez avec un batteur électrique à vitesse moyenne pendant environ 2 minutes jusqu'à obtenir une consistance lisse.
- Versez la pâte dans le moule préparé et étalez-la uniformément. Faites cuire pendant 30-35 minutes jusqu'à ce qu'elle soit dorée et qu'un cure-dent en ressorte propre.
- Laissez le gâteau refroidir complètement sur une grille.
- Pour le glaçage, battez le fromage à la crème ramolli et le beurre jusqu'à obtenir une consistance lisse, puis ajoutez progressivement le sucre en poudre et l'extrait de vanille jusqu'à ce que le mélange soit crémeux.
- Une fois le gâteau refroidi, étalez le glaçage sur le dessus et décorez avec des fraises tranchées si désiré.
Notes
Nutrition

Hi, I’m Olivia Parker, the founder of BakingSecret.com and a lifelong lover of all things sweet and homemade. I grew up in a small town in Oregon, where the smell of fresh cookies in my family’s kitchen sparked my passion for baking. Over the years, I turned that passion into a mission: to help home bakers feel confident, inspired, and creative.
After studying food science and working in several artisan bakeries across the U.S., I decided to create a space where everyone from beginners to seasoned bakers can find reliable recipes, expert tips, and a warm, welcoming community. BakingSecret.com is my way of sharing the magic of baking with the world. When I’m not testing new recipes, you’ll find me exploring farmers’ markets, collecting vintage cookbooks, or perfecting my sourdough technique.