
You know that beautiful feeling? It’s when you see the look on your friend’s face as they take the first bite of your dessert. Their eyes close for a second, and a little smile appears. That’s the whole reason I cook. My latest victory in the “friend amazement” category is this incredible millefeuille. It looks like it came from a fancy Parisian patisserie, but I promise, it’s so much easier than it seems. I tested it for my book club last week, and let’s just say the discussion was more about the layers of pastry than the plot! This is my go-to recipe for a Delightful Millefeuille that is sure to impress.
The Story of a Thousand Leaves
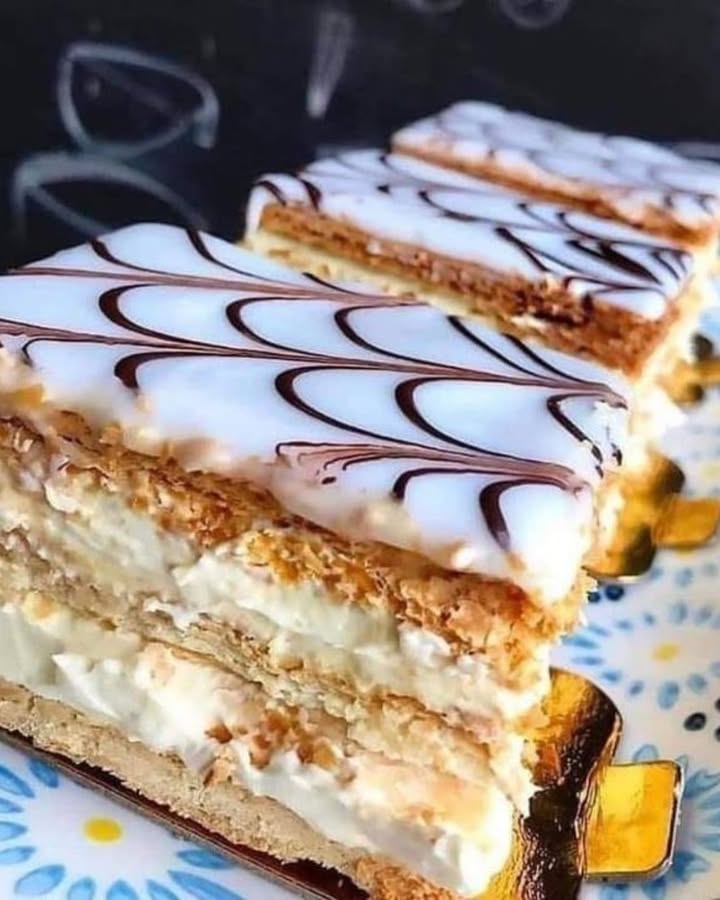
Millefeuille means “a thousand leaves” in French, and it’s a perfect name. It describes those wonderfully flaky, paper-thin layers of puff pastry. The classic version is thought to have been created in the 1600s by a French chef. Traditionally, it’s layered with pastry cream and topped with white icing and chocolate lines. My version keeps that dreamy spirit but adds a modern, delicious twist with dulce de leche. It’s like a hug from a classic French bakery and a cozy South American kitchen all in one bite. Whether you stick to the classic custard or play with flavors, the magic is all in those crisp, buttery layers.
Why You’ll Fall in Love With This Millefeuille Recipe
First, it’s secretly simple. Using store-bought puff pastry is a total game-saver. Second, the flavor contrast is heavenly. Imagine crisp, golden pastry against a smooth, vanilla-speckled cream, all ribboned with rich, caramel-like dulce de leche. It’s a textural dream! Finally, it’s a showstopper. Putting the layers together feels like a fun, edible craft project. The final product looks incredibly professional, but only you’ll know how straightforward it really was. It’s the perfect dessert to make you feel like a master baker.
When to Whip Up Your Millefeuille
This dessert shines at so many gatherings! It’s elegant enough for a dinner party or a birthday celebration. It’s a fantastic make-ahead option for holidays, as you can bake the pastry and make the filling a day early. I also love making mini versions for a fancy afternoon tea or a bridal shower. Honestly, any day that needs a little extra sweetness is a good day for millefeuille. It turns an ordinary coffee break into a special occasion.
What You’ll Need: Ingredients
Gather these simple ingredients for your delightful millefeuille:
- 1 thawed frozen puff pastry sheet
- 1 1/2 cups milk
- 1/2 cup sugar
- Pinch of salt
- 1 teaspoon vanilla extract
- 3 tablespoons cornstarch
- 3 egg yolks, beaten
- 1 tablespoon butter
- 1 cup arequipe or dulce de leche
No Problem: Handy Substitutions
Don’t worry if you’re missing an item! Here are some easy swaps:
- Dulce de Leche: If you can’t find it, you can slowly simmer a can of sweetened condensed milk (completely submerged in water) for 3 hours to make your own. Let it cool completely before opening! Or, use a good quality salted caramel sauce.
- Cornstarch: An equal amount of all-purpose flour can work in the custard, though the texture will be slightly less silky.
- Vanilla Extract: Try using the seeds from half a vanilla bean for an incredible aromatic boost. Just scrape the seeds into the warming milk.
Creating Your Masterpiece: Step-by-Step Instructions
Step 1: Preheat & Prep
First, get your oven nice and hot at 400°F (200°C). This high heat is key for that explosive puff in the pastry. While it heats, line a baking sheet with parchment paper. This little step is a lifesaver. It ensures your beautiful golden pastry won’t stick and makes cleanup a breeze. I never skip it! Having everything ready before you start makes the whole process feel smooth and relaxing.
Step 2: Bake the Base
Unfold your thawed puff pastry sheet on a lightly floured surface. Using a sharp knife, cut it evenly into three long rectangles. Now, take a fork and gently prick the surface of each strip all over. This is called “docking.” It lets steam escape so the pastry bakes flat and crisp instead of ballooning up. Place them on your prepared baking sheet and slide it into the oven. You’ll know they’re done when they are a deep, golden brown and feel light and crisp, about 15 minutes. Let them cool completely on a rack—patience here is crucial for clean layers.
Pro tip: If the pastry puffs up too much in the middle while baking, you can gently press it down with a spatula when it’s fresh out of the oven.
Step 3: Creamy Filling
This is where the magic gets creamy. Warm the milk in a saucepan over medium heat until you see little bubbles at the edge. In a separate bowl, whisk together the sugar, cornstarch, and that tiny pinch of salt. This ensures no lumps. Slowly whisk this dry mix into the warm milk. It will look cloudy at first. Keep stirring! Add the beaten egg yolks and continue to stir lovingly as the mixture transforms. It will thicken into a beautiful, glossy pudding. Pull it off the heat and stir in the vanilla and butter until it’s all melted and fragrant. Pour this custard into a bowl, press plastic wrap directly onto its surface (to prevent a skin), and let it cool.
Step 4: Layer of Love
This is my favorite part—the assembly! Carefully split each cooled pastry rectangle horizontally into two layers. You now have six delicate, crispy sheets. Place the first one on your serving plate. Spread a generous, even layer of the cool vanilla custard. Gently place the next pastry sheet on top. Now, spread a layer of that luscious dulce de leche. Keep going, alternating the fillings—custard, then dulce de leche—until you’ve used all your layers. The stack will look wobbly and wonderful!
Chef’s tip: Use a serrated bread knife and a gentle sawing motion to split the pastry layers. It gives you much cleaner cuts than a chef’s knife.
Step 5: Final Touch
You’ve built your tower of deliciousness! For the grand finale, dust the very top with a snowy shower of powdered sugar. You can use a fine-mesh sieve for a really even dusting. For an extra touch of caramel goodness, take a spoon and artistically drizzle a little more dulce de leche over the top. Some finely chopped nuts or fresh berries on the side make it look absolutely restaurant-worthy. Now, take a picture quickly before it disappears!
Timing is Everything
This delightful millefeuille is a surprisingly quick project. Here’s the breakdown:
- Prep Time: 20 minutes (most of this is for the custard)
- Cook Time: 15-20 minutes for the pastry
- Cooling Time: About 1 hour (for pastry and custard)
- Assembly Time: 10 minutes
- Total Time: About 1 hour 40 minutes (mostly hands-off cooling)
- Servings: Makes about 6 generous servings.
My Secret Weapon: The Chill
My absolute best tip is to chill the assembled millefeuille for at least 30 minutes before serving. This brief rest in the fridge lets the fillings firm up just a touch and allows the flavors to marry. It makes slicing so much cleaner, giving you perfect, beautiful layers on each plate. It also gives the crisp pastry a minute to soften slightly from the fillings, creating that perfect contrast of crisp and creamy.
A Quick Fact: Puff Pastry Magic
That humble frozen sheet of puff pastry is a marvel of baking. It contains hundreds of layers of dough and butter. In the hot oven, the water in the butter turns to steam, pushing the layers apart. This is what creates those feathery, delicate “leaves.” So when you take that first bite, you’re enjoying a little bit of science and a whole lot of culinary art.
Gathering Your Tools
You don’t need any special equipment. Just gather:
- Baking sheet
- Parchment paper
- Saucepan
- Mixing bowls and whisk
- Sharp knife (serrated is best for splitting)
- Spatula or offset knife for spreading
- Cooling rack
Keeping Your Delightful Millefeuille Fresh
This dessert is best enjoyed the day it’s made, when the pastry is at its peak crispness. If you have leftovers, store them carefully in the refrigerator, covered loosely with plastic wrap or in an airtight container. The pastry will soften from the moisture of the fillings, but it will still taste wonderful for up to 2 days.
Avoid freezing the fully assembled dessert. The custard can become watery when thawed. However, you can freeze the baked and cooled pastry strips separately in an airtight bag for up to a month. Thaw at room temperature before assembling. This is a great way to get a head start on a special dessert!
For the best presentation, I recommend assembling the millefeuille a few hours before you plan to serve it. Let it chill in the fridge, and add the final powdered sugar dusting and drizzle just before bringing it to the table.
My Best Advice for Success
- Thaw pastry properly: Let it thaw in the fridge overnight, or on the counter for about 40 minutes. It should be pliable but still cold.
- Don’t rush the cooling: Warm custard will melt the dulce de leche and make the pastry soggy. Cool everything completely.
- Spread fillings evenly: Use an offset spatula or the back of a spoon. Even layers mean every bite is perfect.
- Slice with care: Use a very sharp, serrated knife. Press down gently in a sawing motion for clean cuts without squishing.
Making It Look Gorgeous
Presentation is half the fun! Here are some ideas:
- Make individual servings by cutting the large pastry strips into smaller squares before layering.
- Add fresh berries like raspberries or strawberries between the layers or on the side.
- Top with a dollop of whipped cream and a mint sprig.
- Dust with cocoa powder along with the powdered sugar for a two-tone effect.
- Serve on a beautiful cake stand or a simple white plate to let the layers shine.
Want to Mix It Up? Try These Variations!
Once you master the classic, the world of millefeuille is your oyster! Here are six fun twists:
- Chocolate Millefeuille: Add 2 tablespoons of cocoa powder to the dry mix for the custard to make a rich chocolate pastry cream.
- Berry Bliss: Lightly sweeten fresh whipped cream with a little powdered sugar and layer it with fresh sliced strawberries or raspberries.
- Coffee Infused: Dissolve 1-2 teaspoons of instant espresso powder into the warm milk for a mocha-flavored custard.
- Lemon Curd Layer: Swap the dulce de leche for tangy, bright homemade or store-bought lemon curd. It’s incredibly refreshing.
- Nutty Crunch: Sprinkle finely chopped toasted hazelnuts or almonds between the layers for a wonderful texture.
- Seasonal Pumpkin: In the fall, mix a few tablespoons of pumpkin puree and pumpkin pie spice into the custard for a festive treat.
If you loved playing with puff pastry here, you’ll adore mastering our classic Apple Turnovers. For another stunning layered dessert, our No-Bake Tiramisu is always a crowd-pleaser. And if you find yourself with extra custard, it’s the perfect filling for our simple Profiteroles (Cream Puffs). Exploring different international pastries is a delicious way to travel from your kitchen!
Common Mistakes to Avoid for a Perfect Millefeuille
Mistake 1: Not Pricking the Pastry (Docking)
It seems like a small step, but skipping the fork pricks is a big error. Without them, steam gets trapped between the layers. This causes the pastry to puff up unevenly into a giant balloon. You’ll end up with a hollow, domed shape that’s impossible to split into even layers. Always take 30 seconds to dock the pastry thoroughly before baking. This gives you those beautifully flat, crisp sheets you need for stacking.
Mistake 2: Assembling with Warm Ingredients
Impatience is the enemy here. If your pastry or custard is even slightly warm when you assemble, you’ll have a soggy mess. The warmth melts the dulce de leche and immediately starts to soften the crisp pastry layers. The whole structure can become unstable and lose its wonderful texture contrast. Let the pastry cool completely on a rack. Chill your custard until it’s firm and cold. This patience pays off in every crisp, clean bite.
Mistake 3: Spreading Fillings Too Thick or Unevenly
It’s tempting to pile on the delicious fillings. But too much weight can cause your delicate tower to slide or collapse. An uneven spread creates lopsided layers and messy slices. The key is moderation and evenness. Use just enough filling to cover the pastry in a smooth, thin layer. An offset spatula is the perfect tool for this job. It gives you control for a neat, professional look and a balanced flavor in each bite.
Mistake 4: Using a Dull Knife to Slice
Trying to slice your millefeuille with a dull knife or pressing straight down is a recipe for disaster. You’ll crush all those beautiful, flaky layers into crumbs. The fillings will squish out the sides. For perfect, clean portions, use a long, sharp serrated knife. Gently use a light sawing motion, letting the teeth of the knife do the work. Don’t apply heavy downward pressure. Wipe the knife clean between cuts for the neatest presentation.
Remember, cooking at home is a wonderful way to explore creativity, and balancing treats like this with general healthy eating habits makes every indulgence even more special.
Your Millefeuille Questions, Answered
Can I make the components ahead of time?
Absolutely! This is a great make-ahead dessert. You can bake the puff pastry strips up to two days in advance. Store them in an airtight container at room temperature. The vanilla custard filling can be made 1-2 days ahead and kept tightly covered in the refrigerator. Assemble the whole dessert a few hours before you plan to serve it. This allows the flavors to meld and makes slicing easier. Just add the final dusting of sugar right before serving.
My custard is lumpy. What did I do wrong and can I fix it?
Lumps usually happen if the dry ingredients (cornstarch/sugar) are added too quickly to the hot milk, or if you stop stirring. To prevent it, always whisk the dry mix together first. Then, slowly add a little warm milk to the bowl to create a smooth paste (this is called a “slurry”) before pouring it all back into the saucepan. If you do get lumps, don’t panic! Immediately pour the hot custard through a fine-mesh sieve into a clean bowl. Press it through with a spatula. This will catch any cooked egg bits or starch lumps, leaving you with a silky smooth filling.
What’s the difference between arequipe, dulce de leche, and caramel?
This is a common question! Dulce de leche is Spanish for “sweetness of milk.” It’s made by slowly cooking sweetened milk until it caramelizes, resulting in a thick, spreadable, milky caramel. Arequipe is simply the name used for dulce de leche in countries like Colombia and Venezuela. Traditional caramel sauce is made by cooking sugar and water until it browns, then adding cream and butter. It has a sharper, less milky flavor. For this recipe, you can use any labeled “dulce de leche” or “arequipe” found in the Latin foods aisle.
Can I use homemade puff pastry?
You certainly can, and it will be amazing! Homemade puff pastry is a labor of love and yields an incredibly flaky, buttery result. However, it is time-consuming and requires skill to keep the butter cold. For this recipe, which is about accessible elegance, a high-quality store-bought all-butter puff pastry is a fantastic and completely respectable choice. It saves hours of work and delivers excellent results. No one will know your secret!
How do I prevent the top from getting soggy after dusting with sugar?
Powdered sugar contains a little cornstarch, but it will still dissolve when it touches moisture. To keep that pretty white dusting looking perfect, add it at the very last possible moment, right before you bring the dessert to the table. If you’re drizzling with extra dulce de leche, do that first, then dust with sugar. The pastry stays crisper, and the presentation is stunning. You can also serve extra powdered sugar on the side for people to add themselves.
Is there a way to make this recipe less sweet?
Yes, you can adjust the sweetness to your taste. The main sources are the sugar in the custard and the dulce de leche. You can reduce the sugar in the custard by a tablespoon or two. For the dulce de leche layer, you can use a lighter hand when spreading. Another option is to replace the dulce de leche layer with lightly sweetened whipped cream or a tangy fruit compote, which will balance the sweetness beautifully.
Can I make this without eggs in the custard?
For an egg-free custard, you can make a simpler version called “crème pâtissière” that relies more on cornstarch. Increase the cornstarch to 1/4 cup and omit the egg yolks. Follow the same steps of mixing it with the sugar and salt, whisking into warm milk, and cooking until very thick. The texture will be slightly different—more gel-like and less rich—but it will still be delicious and hold up well in the layers.
My pastry didn’t rise much. Why?
If your pastry stayed flat, the most likely cause is that it wasn’t cold enough when it went into the oven. The butter layers must be firm so they create steam pockets as they melt. Make sure your pastry is thawed but still chilled. Also, check your oven temperature with an thermometer. An oven that’s not hot enough won’t create the immediate steam burst needed for a good rise. Finally, avoid over-handling the dough, which can melt the butter with your hands.
How do I transport a millefeuille?
Transporting this delicate dessert requires care. Assemble it on a flat serving plate or a sturdy cardboard cake round. Do not add the powdered sugar topping. Place the whole plate in a large, shallow box that gives it a little headroom. You can use non-slip shelf liner or a damp paper towel under the plate to keep it from sliding. Drive carefully! Once at your destination, add the final dusting of sugar and any drizzles. It’s often easier to transport the components separately and assemble on-site if possible.
Can I freeze a baked millefeuille?
I don’t recommend freezing the fully assembled dessert. The custard can separate and become grainy when thawed, and the pastry will lose its crispness and become soggy. The best strategy for freezer prep is to freeze the baked and completely cooled pastry strips. Wrap them tightly in plastic wrap and then in foil, and store for up to a month. Thaw at room temperature while you make the fresh fillings, then assemble. This gives you the best of both worlds: make-ahead ease and fresh flavor.
I hope you feel inspired and confident to try this delightful millefeuille recipe. It truly is a magical dessert that brings so much joy. There’s nothing quite like the pride of presenting something so beautiful that you made with your own hands. The layers of crisp pastry, silky cream, and rich caramel are a celebration in every bite. So gather your ingredients, put on some fun music, and get ready to create a little piece of pastry heaven right in your own kitchen. Don’t forget to share your creation—and the smiles it brings! Happy baking!
Equipment
- Plaque à pâtisserie
- Fouet
- Spatule
- Casserole
- Papier sulfurisé
Ingredients
- 1 feuille de pâte feuilletée décongelée
- 350 ml lait
- 100 g sucre
- 1 pincée sel
- 1 cuil. à café extrait de vanille
- 45 g fécule de maïs
- 3 jaunes d'œufs battus
- 15 g beurre
- 250 g arequipe ou dulce de leche
Instructions
- Préchauffez le four à 200°C et tapissez une plaque à pâtisserie de papier sulfurisé.
- Dépliez la pâte feuilletée décongelée sur une surface farinée et découpez-la en trois rectangles longs.
- Perforez la surface de chaque bande avec une fourchette, puis placez-la sur la plaque à pâtisserie préparée.
- Faites cuire pendant 15 minutes ou jusqu'à ce qu'elles soient dorées et croustillantes, puis laissez complètement refroidir sur une grille.
- Chauffez le lait dans une casserole à feu moyen jusqu'à ce que des petites bulles se forment.
- Dans un bol, fouettez le sucre, la fécule de maïs et le sel, puis incorporez graduellement dans le lait chaud.
- Ajoutez les jaunes d'œufs battus et continuez à remuer jusqu'à ce que le mélange épaississe en crème, puis retirez du feu.
- Incorporez la vanille et le beurre jusqu'à ce qu'ils soient fondus et lisses, puis laissez refroidir avec un film plastique sur la surface.
- Coupez chaque rectangle de pâte refroidi horizontalement pour créer six couches.
- Assemblez le millefeuille en alternant les couches de crème et de dulce de leche entre les couches de pâte.
- Poudrez le dessus de sucre glace et arrosez de dulce de leche avant de servir.
Notes
Nutrition

Hi, I’m Olivia Parker, the founder of BakingSecret.com and a lifelong lover of all things sweet and homemade. I grew up in a small town in Oregon, where the smell of fresh cookies in my family’s kitchen sparked my passion for baking. Over the years, I turned that passion into a mission: to help home bakers feel confident, inspired, and creative.
After studying food science and working in several artisan bakeries across the U.S., I decided to create a space where everyone from beginners to seasoned bakers can find reliable recipes, expert tips, and a warm, welcoming community. BakingSecret.com is my way of sharing the magic of baking with the world. When I’m not testing new recipes, you’ll find me exploring farmers’ markets, collecting vintage cookbooks, or perfecting my sourdough technique.