
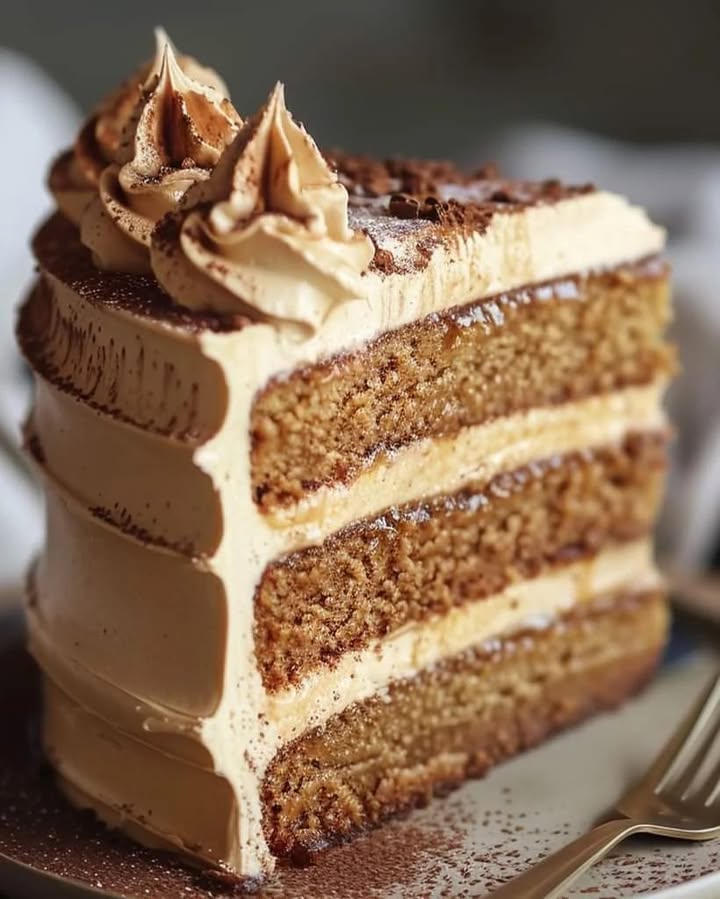
My Irresistible Caramel Coffee Buttercream Cake: A Love Story in Layers
You know that feeling when you have your first sip of a perfectly made caramel macchiato? That rich, bittersweet, utterly comforting moment? I wanted to bake a cake that captured that exact feeling. After a lot of happy kitchen experiments (and a few very eager taste-testers), I created this Irresistible Caramel Coffee Buttercream Cake. It’s the cake I make when I want to impress my book club, celebrate a birthday, or just treat my family to something spectacular. It’s not just a dessert; it’s a hug in cake form.
The Sweet Tale of a Modern Classic
While I can’t trace this exact cake to a historic European kitchen, its spirit is pure comfort-food tradition. Think of it as the sophisticated cousin of your classic morning coffee cake. It marries the deep, roasty flavor of coffee—a baker’s secret for enhancing chocolate—with the buttery sweetness of caramel. My version came about one rainy Sunday. I was sipping coffee, staring at a jar of caramel sauce, and thought, “Why not put my favorite drink *into* the cake and *on* the cake?” The result was this beautiful three-layer masterpiece. It’s a nod to timeless baking with a deliciously modern twist that everyone adores.
Why You’ll Fall Head Over Heels for This Cake
You’ll love this recipe because it works every single time! The flavor is complex but the method is wonderfully simple. It’s a one-bowl wonder for the cake layers, and the buttercream comes together in minutes. The magic is in the harmony of flavors: the moist, tender cake has a subtle coffee note that perfectly balances the sweet, creamy, and slightly salty caramel buttercream. It’s show-stopping enough for a party but cozy enough for a weeknight slice. Plus, it makes your whole house smell like the world’s best cafe.
Perfect Occasions for Your Caramel Coffee Masterpiece
This cake isn’t picky about where it goes! It’s perfect for:
- Birthdays & Celebrations: Swap out the usual chocolate for this elegant flavor.
- Holiday Gatherings: It’s a welcome change from peppermint and gingerbread.
- Book Club or Girls’ Night: It pairs perfectly with gossip and more coffee.
- Just Because: Sometimes, a Tuesday deserves a spectacular cake.
Gathering Your Ingredients for Success
Here’s everything you need to create this dreamy Caramel Coffee Cake. I promise, it’s all worth it!
For the Cake:
- 2 cups all-purpose flour
- 1 1/2 cups granulated sugar
- 1/2 cup brown sugar
- 1 cup unsalted butter, softened
- 1 cup brewed coffee, cooled
- 1/2 cup whole milk
- 4 large eggs
- 2 tsp baking powder
- 1 tsp baking soda
- 1/2 tsp salt
- 2 tsp vanilla extract
For the Caramel Coffee Buttercream:
- 1 cup unsalted butter, softened
- 4 cups powdered sugar
- 1/4 cup heavy cream
- 1/4 cup caramel sauce (store-bought or homemade)
- 2 tbsp brewed coffee, cooled
- 1 tsp vanilla extract
For Garnish:
- Cocoa powder for dusting
No Stress Substitution Options
Don’t panic if you’re missing an item! Baking is flexible.
- Dairy-Free? Use plant-based butter and a milk/cream alternative like oat or coconut milk.
- Out of Coffee? Strong instant coffee dissolved in hot water works great.
- No Caramel Sauce? You can gently melt store-bought soft caramels with a splash of cream.
- Different Pans? This batter can also make about 24 cupcakes. Just reduce the baking time to 18-22 minutes.
Let’s Bake: Creating Your Irresistible Caramel Coffee Buttercream Cake
Ready? Put on your apron, and let’s bake some happiness! Follow these steps for a perfect result.
Step 1: Preheat and Prep
First, get your oven heating to 350°F (175°C). This ensures it’s perfectly hot when your batter is ready. Grab your three 8-inch round cake pans. Grease them well with butter or baking spray, then dust with a little flour, tapping out the excess. This little dance guarantees your beautiful cake layers will slide out without a fuss later. I always do this first—it’s my “mise en place” moment that makes everything else smoother.
Step 2: Cream the Butter and Sugars
In a large mixing bowl, combine the softened butter, granulated sugar, and brown sugar. Beat them together on medium speed for 3-4 minutes. You’ll see the magic happen: the mix will turn pale, fluffy, and almost like a creamy cloud. This step isn’t just mixing; it’s incorporating air, which is the secret to a light and tender cake crumb. Pro tip: Your butter should be soft enough to leave a gentle dent when pressed, but not melted or oily.
Step 3: Add Eggs and Vanilla
Now, add your eggs one at a time, beating well after each addition. Scrape down the sides of the bowl with a spatula to make sure everything is evenly mixed. Then, pour in that lovely vanilla extract. The aroma at this stage is already divine—sweet, buttery, and rich. Each egg binds the batter and adds structure, so don’t rush this part. A smooth, emulsified batter now means a perfectly textured cake later.
Step 4: Combine Dry and Wet Ingredients
In a separate bowl, whisk together your flour, baking powder, baking soda, and salt. This sifting (or just good whisking) ensures your leaveners are evenly distributed for a consistent rise. Now, with your mixer on low, add about one-third of the dry ingredients to the butter mixture. Follow that with half of the cooled coffee and milk. Repeat, ending with the final third of the dry ingredients. Mix until *just* combined—a few streaks of flour are okay. Overmixing is the enemy of a tender cake!
Step 5: Bake to Perfection
Divide the beautiful, fragrant batter evenly among your three prepared pans. I like to use a kitchen scale for absolute precision, but the eye-ball method works too! Smooth the tops with your spatula. Slide them into your preheated oven. Bake for 25-30 minutes. You’ll know they’re done when the tops spring back lightly to the touch and a toothpick inserted in the center comes out with just a crumb or two. The smell will be absolutely intoxicating.
Step 6: Cool the Layers
This step requires patience, my friends! Let the cakes cool in their pans on a wire rack for exactly 10 minutes. This lets them firm up just enough. Then, run a knife around the edges, gently invert them onto the racks, and peel off the parchment if you used it. Let them cool completely. I can’t stress this enough: warm cake + buttercream = a melty, sliding mess. Wait for it!
Step 7: Make the Dreamy Buttercream
While the cakes cool, make your Caramel Coffee Buttercream. Beat the softened butter in a clean bowl until it’s super creamy and pale. Gradually add the powdered sugar with the mixer on low (to avoid a sugar cloud!), then increase the speed. Once smooth, pour in the caramel sauce, cooled coffee, heavy cream, and vanilla. Beat on medium-high for 2-3 minutes until it’s incredibly light, fluffy, and spreadable. Taste it—you deserve it!
Step 8: Assemble and Frost Your Masterpiece
Place your first cake layer on a plate or stand. Dollop a generous amount of buttercream on top and spread it evenly to the edges. Repeat with the second layer. Top with the third layer. Now, apply a thin “crumb coat” of buttercream over the entire cake and pop it in the fridge for 15 minutes. This seals in crumbs. Finally, use the remaining buttercream to create a beautiful, smooth (or swirly!) finish on the top and sides. Chef’s tip: A bench scraper or offset spatula dipped in hot water makes smoothing the frosting a dream.
Step 9: The Final Touch
For a simple, elegant finish, place a stencil or doily on top of your cake and dust it lightly with cocoa powder. Carefully lift it off to reveal a beautiful pattern. Or, just a light dusting over the whole top looks gorgeous and hints at the delicious flavors inside. Your Irresistible Caramel Coffee Buttercream Cake is ready to shine!
Timing is Everything
Let’s break down the clock so you can plan your baking adventure:
- Prep Time: 20 minutes (measuring, mixing, pan prep)
- Cooking Time: 30 minutes (for the cake layers)
- Cooling Time: 1 hour (crucial for easy frosting!)
- Frosting & Assembly Time: 20 minutes
- Total Time: About 2 hours, 10 minutes (including cooling)
- Kcal: Approximately 550 kcal per slice
- Servings: 12 generous slices
My Secret Weapon for the Best Caramel Coffee Cake
Here’s my little secret: use strong, cold brew coffee if you have it. Its smoother, less acidic flavor infuses the cake and buttercream with a deeper, richer coffee note without any bitterness. It’s the difference between a good coffee cake and an unforgettable one.
A Fun Fact About Your Ingredients
Did you know that adding coffee to chocolate cake is a beloved baker’s trick? The caffeine doesn’t make it taste like coffee; instead, it enhances and deepens the chocolate flavor. In this cake, we let the coffee shine on its own, but the principle is the same—it brings out incredible depth and complexity in the caramel and vanilla, making every bite more interesting.
Your Baking Toolbox
You don’t need fancy gear, but these tools help:
- Three 8-inch round cake pans
- Stand mixer or hand mixer
- Large and medium mixing bowls
- Whisk and silicone spatula
- Wire cooling racks
- Offset spatula for frosting
- Toothpick or cake tester
How to Keep Your Cake Happy (Storage Tips)
If you have leftovers (a big if!), store the cake in an airtight cake carrier or under a dome at room temperature for up to 2 days. The buttercream seals in moisture beautifully.
For longer storage, you can refrigerate it for up to 5 days. The flavors actually meld and get even better! Let it sit at room temperature for about 30 minutes before serving to soften the buttercream to its creamy best.
You can also freeze individual slices. Wrap them tightly in plastic wrap and then foil. Thaw in the fridge overnight. It’s a wonderful trick for having a ready-made treat anytime. For more tips on keeping desserts fresh, proper refrigerator organization as recommended by food safety experts can make a big difference.
My Best Tips and Advice
- Room Temp is Key: Using room temperature eggs, butter, and milk ensures your batter emulsifies smoothly and bakes evenly.
- Cool Your Coffee: Adding hot coffee can melt the butter and cook the eggs. Always let it cool.
- Don’t Overfill Pans: Filling them only 2/3 full prevents overflow and wonky layers.
- Level Your Cakes: If your cakes dome a bit, use a serrated knife to slice off the top for a perfectly flat stacking surface.
Presentation Ideas to Wow Your Guests
- Drizzle extra caramel sauce over the top just before serving.
- Pipe swirls of leftover buttercream on top and sprinkle with sea salt flakes.
- Adorn the bottom edge with chopped, toasted pecans or hazelnuts.
- Serve each slice with a side of fresh whipped cream and a single espresso bean.
Love This Cake? Try These Healthier Twists!
This recipe is wonderfully adaptable. Here are six variations to try:
- Whole Wheat Wonder: Substitute half the all-purpose flour with whole wheat pastry flour for added fiber.
- Reduced Sugar: Cut the granulated sugar in the cake by 1/4 cup and use a sugar-free caramel sauce.
- Greek Yogurt Swap: Replace 1/2 cup of the butter in the cake with plain Greek yogurt for a lighter, protein-rich crumb.
- Vegan Delight: Use plant-based butter, flax eggs, and non-dairy milk/cream. It’s just as decadent!
- Gluten-Free Version: Use a 1:1 gluten-free flour blend. I’ve had great success with this simple swap.
- Mini Layer Cakes: Bake the batter in a sheet pan and use a round cutter to make individual mini cakes. Perfect for portion control!
If you’re looking for more inspiration, you must try my decadent Triple Chocolate Fudge Bundt Cake or the always-popular Classic Vanilla Bean Cupcakes. For something fruity, my Lemon Raspberry Layer Cake is a summer hit, and this Caramel Coffee Buttercream Cake pairs beautifully with the spices in my Salted Caramel Apple Pie.
Common Mistakes to Avoid for a Perfect Cake
Mistake 1: Using Cold Ingredients
This is the number one reason cakes turn out dense or don’t rise properly. Cold butter doesn’t cream well with sugar, and cold eggs or milk can cause the batter to curdle. It also leads to uneven baking. Always take your butter, eggs, and milk out of the fridge at least an hour before you start. Your butter should be soft but not greasy. This simple step makes the whole process smoother and your cake much lighter.
Mistake 2: Overmixing the Batter
Once you add the flour, gluten development begins. Mixing too much or too vigorously creates a strong gluten network, which gives you a tough, chewy cake instead of a tender, soft crumb. As soon as you add the dry ingredients, mix on low speed and stop the moment the last streaks of flour disappear. A few small lumps are perfectly fine—they will work themselves out in the oven.
Mistake 3: Frosting a Warm Cake
I know it’s tempting to put that gorgeous buttercream on right away! But frosting a cake that’s even slightly warm is a disaster. The heat will melt the buttercream, causing it to slide right off and soak into the cake layers. It creates a greasy, messy appearance. Be patient. Let the layers cool completely on a wire rack. You can even wrap them and pop them in the fridge for 30 minutes to speed things up and ensure they’re firm.
Mistake 4: Not Measuring Flour Correctly
Scooping flour directly from the bag with your measuring cup packs it down, leading to up to 25% more flour than the recipe calls for. This results in a dry, dense cake. The right way is to “spoon and level.” Use a spoon to lightly fill your measuring cup, then level off the top with a straight edge like a knife. For ultimate accuracy, I recommend using a kitchen scale.
Mistake 5: Opening the Oven Door Too Early
We all want to peek! But opening the oven door in the first 20 minutes of baking lets out a rush of hot air. This can cause the delicate cake structure to collapse before it’s set, leading to a sunken center. Trust the process. Use the oven light to check on color, and only open the door to do the toothpick test in the last 5 minutes of the suggested bake time.
This cake is a true celebration of flavor, and I assure you, once you master it, it will become a staple in your recipe box. For more incredible cake and cupcake recipes that will delight your family, our main category page is full of sweet inspiration.
Your Caramel Coffee Buttercream Cake Questions, Answered
Can I make this cake a day ahead?
Absolutely! In fact, I often do. Baking the cake layers a day ahead is a fantastic time-saver. Once they are completely cool, wrap each layer tightly in plastic wrap and store them at room temperature overnight. You can even make the buttercream, cover it, and refrigerate it. Let the buttercream sit at room temperature for an hour to soften, then give it a quick re-whip before frosting. The assembled cake holds up beautifully for a day, making it perfect for stress-free entertaining.
What kind of coffee should I use in the recipe?
Use a coffee you enjoy drinking! The flavor directly translates into your cake. Regular brewed coffee from a drip machine works perfectly. If you love a stronger flavor, use espresso or very strong brewed coffee. I love using cold brew for its smooth, low-acidity profile. Avoid flavored coffees (like hazelnut or vanilla) as they can create an artificial taste. Instant coffee is a fine substitute—just dissolve 1-2 tablespoons in one cup of hot water and let it cool completely.
My buttercream is too runny. How can I fix it?
Don’t worry, this is an easy fix! A runny buttercream usually means the butter was too soft or the kitchen was very warm. First, try popping the entire bowl of buttercream into the refrigerator for 15-20 minutes to firm up the butter. Then, whip it again. If it’s still soft, you can gradually add a little more powdered sugar, about 1/4 cup at a time, until it reaches a spreadable consistency. Be sure not to add too much, or it can become overly sweet.
Can I use salted butter instead of unsalted?
You can, but I strongly recommend sticking with unsalted butter. Different brands of salted butter contain different amounts of salt. Using unsalted butter gives you complete control over the seasoning of your cake and frosting. The recipe already includes a measured amount of salt to balance the sweetness perfectly. If you only have salted butter, simply omit the added salt in both the cake and the buttercream.
How do I get my cake layers perfectly flat for stacking?
Even with perfect batter, cakes can dome a little. For bakery-style flat layers, use a long serrated bread knife or a cake leveler. Once the cakes are completely cool, place one on a flat surface. Hold the knife parallel to the counter and gently slice off the domed top. Repeat with the other layers. Don’t throw those scraps away! They make amazing cake pops or a chef’s snack.
Can I make cupcakes instead of a layer cake?
Yes, this recipe adapts wonderfully to cupcakes! Line your muffin tins with paper liners. Fill each liner about 2/3 full. Bake at the same temperature (350°F) for 18-22 minutes, or until a toothpick comes out clean. This batch should make about 24 standard cupcakes. The buttercream recipe is enough to frost them all generously. They’re perfect for parties or lunchbox treats.
Why did my cake sink in the middle?
A sunken cake usually points to too much leavening, underbaking, or opening the oven door too early. Ensure your baking powder and soda are fresh (check the expiration date!). Don’t over-leaven the batter beyond the recipe. Most importantly, bake until a toothpick truly comes out clean, not just with wet batter. The center should be fully set. Resist the urge to open the oven until the minimum bake time has passed.
How can I make a dairy-free version?
You can create a delicious dairy-free cake! Use a high-quality plant-based butter stick (not spread) for both the cake and buttercream. Replace the whole milk with unsweetened almond, oat, or soy milk. For the heavy cream in the buttercream, use a full-fat coconut cream or a plant-based heavy whipping cream alternative. The caramel sauce will need to be dairy-free as well—many store-bought options are, or you can make your own with coconut cream.
What’s the best way to transport this frosted cake?
Transporting a layer cake can be nerve-wracking! My foolproof method is to place the fully frosted cake on a cardboard cake round. Then, place it in a cake carrier with a secure lid. If you don’t have a carrier, use two large cans or jars in a box. Put the cake (on its round) in the box, then gently slide the cans in on either side to keep the box from pressing on the cake. Drive carefully and keep the car cool!
Can I freeze the frosted cake?
You can freeze the unfrosted cake layers very successfully. Wrap them individually in plastic wrap and then foil. They’ll keep for up to 3 months. Thaw in the refrigerator overnight. I don’t recommend freezing the fully assembled frosted cake, as the buttercream can become slightly gritty upon thawing. It’s best to freeze the components separately and assemble and frost the cake when you’re ready to serve it.
There you have it—my heart and soul poured into this recipe for the most Irresistible Caramel Coffee Buttercream Cake. I truly hope it brings as much joy to your kitchen as it has to mine. Remember, baking is about love, not perfection. So even if a layer crumbles a bit or the frosting isn’t utterly smooth, it will still taste incredible. Gather your ingredients, put on some music, and have fun creating this beautiful, flavorful cake. Don’t forget to share a slice with someone you love. Happy baking!
Equipment
- Trois moules à gâteau ronds de 8 pouces
- Mixeur sur socle ou mixeur à main
- Grand bol
- Fouet
- Spatule en silicone
- Grilles de refroidissement
- Toothpick ou testeur de gâteau
Ingredients
- 2 tasses farine tout usage
- 1.5 tasses sucre granulé
- 1/2 tasse sucre brun
- 1 tasse beurre non salé, ramolli
- 1 tasse café infusé, refroidi
- 1/2 tasse lait entier
- 4 œufs
- 2 cuil. à café poudre à lever
- 1 cuil. à café bicarbonate de soude
- 1/2 cuil. à café sel
- 2 cuil. à café extrait de vanille
- 1 tasse beurre non salé, ramolli (pour le beurre crémeux)
- 4 tasses sucre en poudre
- 1/4 tasse crème épaisse
- 1/4 tasse sauce caramel (acheté ou fait maison)
- 2 cuil. à soupe café infusé, refroidi (pour le beurre crémeux)
- 1 cuil. à café extrait de vanille (pour le beurre crémeux)
- q.s. cacao en poudre (pour la garniture)
Instructions
- Préchauffez le four à 175°C (350°F) et préparez trois moules à gâteau ronds de 8 pouces en les graissant et en les farcissant.
- Dans un grand bol, crémez ensemble le beurre ramolli, le sucre granulé et le sucre brun pendant 3-4 minutes jusqu'à ce que le mélange soit léger et crémeux.
- Ajoutez les œufs un à un en battant bien après chaque ajout, puis incorporez l'extrait de vanille.
- Dans un autre bol, tamisez ensemble la farine, la poudre à lever, le bicarbonate de soude et le sel.
- Incorporez progressivement les ingrédients secs au mélange de beurre, en alternant avec le café refroidi et le lait, jusqu'à ce que le tout soit juste combiné.
- Répartissez la pâte uniformément dans les trois moules préparés et lissez le dessus.
- Faites cuire dans le four préchauffé pendant 25-30 minutes ou jusqu'à ce qu'un cure-dent en ressorte propre.
- laissez les gâteaux refroidir dans les moules pendant 10 minutes avant de les démouler sur des grilles de refroidissement pour qu'ils refroidissent complètement.
- Pour faire le beurre crémeux, battez le beurre ramolli jusqu'à ce qu'il soit crémeux, puis incorporez progressivement le sucre en poudre, la crème épaisse, la sauce caramel, le café infusé et la vanille, en battant jusqu'à obtenir une texture légère et aérée.
- Assemblez le gâteau en superposant le beurre crémeux entre les couches de gâteau refroidies et recouvrez l'ensemble du gâteau avec le reste du beurre crémeux.
- Poudrez le dessus de cacao en poudre pour la garniture.
Notes
Nutrition

Hi, I’m Olivia Parker, the founder of BakingSecret.com and a lifelong lover of all things sweet and homemade. I grew up in a small town in Oregon, where the smell of fresh cookies in my family’s kitchen sparked my passion for baking. Over the years, I turned that passion into a mission: to help home bakers feel confident, inspired, and creative.
After studying food science and working in several artisan bakeries across the U.S., I decided to create a space where everyone from beginners to seasoned bakers can find reliable recipes, expert tips, and a warm, welcoming community. BakingSecret.com is my way of sharing the magic of baking with the world. When I’m not testing new recipes, you’ll find me exploring farmers’ markets, collecting vintage cookbooks, or perfecting my sourdough technique.