
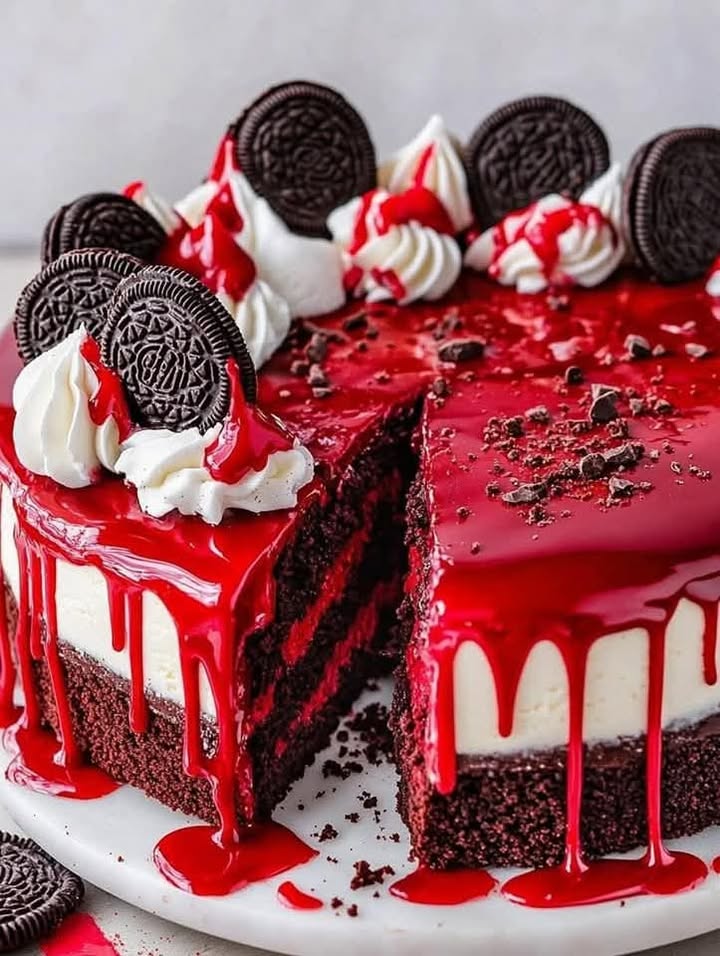
My Ultimate Red Velvet Oreo Cheesecake Recipe
Ever have one of those dessert dreams that just won’t quit? For me, it was the fantasy of my two favorite treats—red velvet cake and Oreo cheesecake—having a delicious baby. After more attempts than I’d like to admit (my husband’s coworkers were very happy taste-testers), I finally nailed it. This Red Velvet Oreo Cheesecake isn’t just a dessert; it’s a celebration on a plate, and I’m so excited to share it with you.
A Sweet Mashup Story: Where Red Velvet Meets Oreo
Red velvet cake has a rich history, often linked to fancy hotel dining and the iconic Waldorf Astoria. Its secret was always the subtle cocoa and buttermilk tang. Oreos, on the other hand, are the ultimate childhood cookie. Bringing them together in a cheesecake felt like a fun, modern twist. This recipe honors the classic Red Velvet Cheesecake Delight vibe but adds that irresistible crunch and chocolatey punch from the Oreos. It’s tradition and playfulness in every bite.
Why You’ll Fall in Love With This Cheesecake
Let me count the ways! First, the flavor is insane—creamy, chocolaty, and just a little tangy. Second, it’s actually simpler than it looks. No fancy decorating skills needed! That gorgeous red and black swirled filling does most of the work for you. Plus, it’s a total crowd-pleaser. Whether it’s for a birthday, holiday, or just a Tuesday night treat, this dessert makes everyone feel special.
The Perfect Moments for a Red Velvet Cheesecake Delight
This cheesecake isn’t shy—it loves to be the star of the show. It’s perfect for Valentine’s Day (that red color!), Christmas, birthdays, or any potluck where you want to be the hero. I love making it for my book club; it always sparks a happy conversation. It’s also a fantastic “wow factor” dessert after a cozy family dinner, much like the stunning finish you’d get with a Molten Chocolate Cake.
What You’ll Need to Make It
Gather these simple ingredients. Having everything at room temperature is the secret to a smooth, crack-free filling!
For the Crust:
- 2 cups Oreo crumbs (about 24 whole Oreos, cream filling included)
- ½ cup unsalted butter, melted
For the Cheesecake Filling:
- 24 oz (680g) cream cheese, softened
- 1 cup granulated sugar
- 1 cup sour cream, room temperature
- 1 tsp pure vanilla extract
- 3 large eggs, room temperature
- 2 tbsp natural cocoa powder (not Dutch-processed)
- 1 tsp red gel food coloring (liquid works, but gel gives a richer color)
- ½ cup roughly crushed Oreos
For the Chocolate Drip & Decoration:
- 1 cup semi-sweet chocolate chips
- ½ cup heavy cream
- Whipped cream, mini Oreos, red velvet cake crumbs, and sprinkles for topping
Handy Ingredient Swaps
Don’t stress if you’re missing something! Here are easy swaps:
- Oreo Crumbs: Use any chocolate sandwich cookie. For a gluten-free version, try gluten-free chocolate cookies.
- Sour Cream: Full-fat plain Greek yogurt is a great substitute and adds a nice protein boost.
- Gel Food Coloring: You can use liquid, but you may need more (1-2 tablespoons) for a vibrant red.
- Heavy Cream: For the ganache, you can use full-fat coconut milk for a dairy-free drip.
How to Make Your Red Velvet Oreo Cheesecake
Step 1: The Chocolatey Crust Foundation
First, preheat your oven to a cozy 325°F (163°C). Take all that wonderful Oreo sand—crumbs and cream filling together—and mix it with the melted butter. It should feel like wet sand and hold together when you pinch it. Press this mixture firmly and evenly into the bottom of your springform pan. I use the bottom of a glass to really tamp it down. Bake this for just 10 minutes. This quick bake sets the crust, so it doesn’t get soggy later. Let it cool completely on a wire rack. The smell is already amazing!
Step 2: Creating the Velvety Red Filling
Now, for the magic. In a large bowl, beat the softened cream cheese until it’s completely smooth and creamy. No lumps allowed! Add the sugar, sour cream, and vanilla, beating until everything is silky. Crack in the eggs, one at a time, mixing on low speed just until each yolk disappears. Overbeating the eggs adds too much air, which can cause cracks. Now, sift in the cocoa powder and add your red gel coloring. Watch as the pale mixture transforms into a deep, romantic red. Finally, gently fold in those crushed Oreos with a spatula. Pro tip: If you want defined red and black swirls, reserve a cup of plain red batter before adding the Oreos, then swirl them together in the pan.
Step 3: Baking to Creamy Perfection
Pour your stunning batter over the cooled crust. Smooth the top with your spatula. Place the pan on a baking sheet (this catches any drips) and slide it into the oven. Bake for 60-70 minutes. The cheesecake is done when the edges are set but the center still has a slight, gentle wobble—like Jell-O. Do not overbake! Turn off the oven, crack the door open, and let the cheesecake cool inside for one full hour. This slow cooling is the #1 trick to prevent major cracks. After that, chill it in the fridge for at least 4 hours, but overnight is truly best.
Step 4: Crafting the Shiny Chocolate Drip
Just before serving, make your easy ganache. Place the chocolate chips in a heatproof bowl. Heat the heavy cream in a saucepan until it just starts to simmer, then pour it over the chips. Let it sit for 2 minutes, then whisk until you have a glossy, smooth chocolate waterfall. Let it cool for 5 minutes so it thickens slightly. Then, starting at the center of the cheesecake, pour a little ganache and gently push it to the edges with a spoon, letting it drip down the sides naturally.
Step 5: The Grand Finale of Decorations
This is the fun part! Pipe on swirls of whipped cream. Tuck in mini Oreos and shower the top with red velvet cake crumbs (you can crumble a store-bought cupcake!) and colorful sprinkles. Let your inner artist play. Chef’s tip: For a cleaner slice, dip your knife in hot water and wipe it dry between each cut.
Your Cheesecake Timeline
- Prep Time: 30 minutes (active fun)
- Cook Time: 70 minutes (aroma therapy)
- Cooling Time: 1 hour (in the oven)
- Chilling Time: 4 hours minimum (overnight is gold)
- Total Time: About 6 hours (mostly hands-off)
- Calories: Approximately 520 kcal per generous slice.
My Secret Weapon for the Silkiest Filling
My absolute non-negotiable secret? Room temperature everything. I take my cream cheese, eggs, and sour cream out of the fridge at least 2 hours before I start. Cold ingredients don’t blend smoothly, leading to a lumpy batter that makes you overmix. Overmixing incorporates air, and that air expands in the oven, causing the dreaded cheesecake crack. Patience here makes for a perfectly smooth, creamy texture.
A Fun Oreo Fact
Did you know the Oreo cookie was introduced in 1912? That’s over 110 years of “twist, lick, and dunk”! The name’s origin is a mystery, but some think “Oreo” comes from the French word for gold, “Or,” because the early packaging was gold-colored. Now, we’re using them in a glorious cheesecake—talk about an upgrade!
Kitchen Tools You’ll Need
- 9-inch springform pan (the MVP for easy release)
- Electric hand mixer or stand mixer
- Large mixing bowls
- Measuring cups and spoons
- Rubber spatula
- Baking sheet
- Fine mesh sieve (for sifting cocoa powder)
How to Keep Your Cheesecake Fresh
Once decorated, your cheesecake is best enjoyed within 24 hours. Keep it covered in the refrigerator. The crust may soften a bit over time, but it will still taste incredible.
For longer storage, you can freeze it. Wrap the undecorated cheesecake (after chilling) tightly in plastic wrap, then in foil. It will keep for up to 2 months. Thaw it overnight in the fridge before adding your drip and decorations.
If you have leftovers (rare in my house!), just cover the cut edges with plastic wrap and store the whole cake in a cake carrier in the fridge. It’s good for up to 5 days. For a lighter, fruit-based treat with similar make-ahead convenience, check out this Fruit and Cottage Cheese Jelly Dessert.
My Top Tips for Cheesecake Success
- Prevent Cracks: The water bath is the classic method, but my lazy-girl hack is to place a pan of hot water on the rack below the cheesecake in the oven. The steam works wonders!
- No Lumps: Ensure your cream cheese is very soft. Beat it alone for a full 2 minutes before adding anything else.
- Clean Cuts: For picture-perfect slices, use a sharp, thin-bladed knife. Dip it in very hot water, wipe it clean, and cut. Repeat for each slice.
Making It Look Like a Million Bucks
- Serve on a plain white cake stand to let the colors pop.
- Add a dusting of powdered sugar right before serving for a snowy effect.
- Drizzle with white chocolate in addition to the dark chocolate drip.
- Garnish each plate with a single, perfect strawberry for a fresh touch.
Try These Other Delicious Cheesecake Twists
Love this recipe? Here are 6 fun ways to mix it up:
- Red Velvet Cheesecake Bars: Press the crust into a 9×13 pan, add the batter, and bake for 35-40 minutes. Cut into squares for easy sharing.
- White Chocolate Raspberry: Omit the cocoa and red coloring. Swirl in ½ cup of seedless raspberry jam and use white chocolate in the ganache.
- Pumpkin Spice Oreo: Replace the sour cream with canned pumpkin puree and add 2 tsp of pumpkin pie spice. Use Golden Oreos for the crust.
- Mini Jar Cheesecakes: Layer the crust and batter in 8 oz mason jars. Bake for 25-30 minutes for adorable personal desserts.
- Mint Chocolate Chip: Use Mint Oreos, add ½ tsp peppermint extract to the filling, and fold in mini chocolate chips.
- Lemon Berry: Skip the cocoa and red coloring. Add 2 tbsp lemon zest and ¼ cup lemon juice to the batter. Top with a mixed berry compote instead of ganache, similar to the topping on a classic Strawberry Cheesecake.
Common Mistakes to Avoid
Mistake 1: Using Cold Ingredients
This is the biggest culprit for lumps and cracks. Cold cream cheese and eggs don’t blend smoothly. You end up overbeating to try to fix it, which adds too much air. This air expands in the oven, making the cheesecake puff up and then fall, leading to cracks. Always plan ahead and let your dairy and eggs sit on the counter for a few hours.
Mistake 2: Overbaking the Cheesecake
We want creamy, not dry and cakey. A cheesecake continues to cook as it cools. If you bake it until the center is completely firm in the oven, it will be overdone by the time it chills. Pull it out when the edges are puffed and set, but the center (about a 3-inch circle) still has a distinct, gentle jiggle. It will set up perfectly in the fridge.
Mistake 3: Not Cooling Gradually
Going from a hot oven straight to a cold counter is a thermal shock. This sudden temperature change makes the cheesecake contract rapidly, almost guaranteeing a large crack down the middle. Always use the “turn off the oven and crack the door” method for at least an hour. This slow cooldown is your best defense.
Mistake 4: Using the Wrong Pan
A regular cake pan won’t work for this. You absolutely need a springform pan—the sides unclasp, letting you remove the cheesecake without flipping it over and destroying it. Also, using a dark-colored pan can cause the crust to over-brown. If you only have a dark pan, consider lowering your oven temperature by 25°F.
Food Safety Note
Because this dessert contains dairy and eggs, proper handling is key. Always refrigerate it within two hours of baking to prevent the growth of foodborne bacteria. This is especially important if you’re serving it at an outdoor event on a warm day.
For more creamy, dreamy inspiration, be sure to explore all of our other favorite cheesecake recipes that are perfect for any skill level.
Your Red Velvet Cheesecake Questions, Answered
Can I make this recipe without a springform pan?
While a springform pan is highly recommended, you can use a 9-inch deep-dish pie plate in a pinch. You will need to serve it directly from the plate, as removing slices cleanly will be tricky. The baking time may also be slightly less, so start checking at 50 minutes.
Why did my cheesecake crack on top?
Cracks usually happen from overmixing (adding too much air), overbaking, or cooling too quickly. Don’t worry! It’s still delicious. Just cover the crack with your chocolate ganache and whipped cream toppings. No one will ever know.
Can I use liquid food coloring instead of gel?
Yes, you can. However, gel food coloring is more concentrated and provides a vibrant red without adding extra liquid to your batter. If using liquid, you may need 1-2 tablespoons to achieve a similar color, which could slightly affect the texture.
How do I get really white Oreo crumbs for the crust?
You don’t need to! For this crust, you use the entire Oreo—cookie and cream filling together. The filling actually helps bind the crust with the butter. Just toss whole Oreos into a food processor and pulse until you have fine crumbs.
Can I freeze Red Velvet Oreo Cheesecake?
Absolutely! Freeze it before adding the drip and toppings. Wrap the chilled, bare cheesecake tightly in plastic wrap, then in foil. It will keep for up to 2 months. Thaw overnight in the refrigerator before decorating and serving.
My ganache is too thick/thin. How do I fix it?
Ganache is easy to adjust. If it’s too thick to drip, warm it for 5 more seconds in the microwave or stir in a teaspoon of warm cream. If it’s too thin and runny, let it sit at room temperature to thicken, or add a few more chocolate chips and gently re-warm.
What’s the difference between Dutch-process and natural cocoa here?
Natural cocoa powder (like Hershey’s) is acidic and helps activate the baking soda in cakes. Our cheesecake has no baking soda, so you can use either. Dutch-process is milder and darker. I prefer natural for a more traditional “red velvet” tang.
How far in advance can I make this?
This is a fantastic make-ahead dessert. You can bake and chill it up to 2 days in advance. Add the chocolate drip and final decorations the day you plan to serve it for the freshest look and best texture.
Can I use low-fat cream cheese and sour cream?
I don’t recommend it. Full-fat dairy gives the cheesecake its rich, creamy, and stable texture. Low-fat versions have more water and additives, which can lead to a softer, less set filling that’s more prone to cracking or weeping.
Do I need to use a water bath?
Not for this recipe! The sour cream in the batter adds moisture and helps prevent cracks. Combined with the slow cooling method, you can achieve a beautifully smooth top without the fuss of wrapping your pan in foil and setting it in a water bath.
Ready to Make Some Magic?
There you have it—my tried-and-true recipe for the most spectacular Red Velvet Oreo Cheesecake. It’s a labor of love that’s totally worth every minute. Seeing the joy on my friends’ faces when I bring this out is the best part. So, tie on your apron, put on some good music, and get ready to bake a dessert that’s sure to become a new family favorite. Happy baking!
Equipment
- Grand bol
- Fouet
- Spatule
- Plaque à pâtisserie
- Papier sulfurisé
Ingredients
- 24 Oreos entiers comprenant la garniture en crème
- 240 g fromage à la crème ramolli
- 200 g sucre granuleux
- 240 ml crème aigre à température ambiante
- 3 œufs gros, à température ambiante
- 2 cuil. à soupe cacao en poudre naturel, pas traité à l'alkali
- 1 cuil. à café colorant alimentaire rouge gel de préférence
- 120 g Oreos écrasés grossièrement
- 180 g pépites de chocolat mi-sucrées
- 120 ml crème épaisse
- 1 tasse crème fouettée pour garnir
- q.s. vermicelles décoratifs pour décorer
Instructions
- Préchauffez votre four à 163°C.
- Mélangez les miettes d'Oreo avec le beurre fondu jusqu'à obtenir une consistance de sable humide, puis pressez dans le fond d'un moule à ressort.
- Faites cuire la croûte pendant 10 minutes et laissez refroidir sur une grille.
- Battez le fromage à la crème jusqu'à ce qu'il soit lisse ; ajoutez le sucre, la crème aigre et la vanille, mélangez jusqu'à obtenir une texture soyeuse.
- Ajoutez les œufs un par un, en mélangeant à basse vitesse jusqu'à incorporation.
- Tamisez la poudre de cacao et ajoutez le colorant alimentaire rouge, puis incorporez les Oreos écrasés.
- Versez la pâte sur la croûte refroidie et lissez le dessus.
- Faites cuire pendant 60-70 minutes jusqu'à ce que les bords soient pris et que le centre ait un léger tremblement.
- Éteignez le four, entrouvrez la porte et laissez refroidir le cheesecake dans le four pendant 1 heure.
- Réfrigérez pendant au moins 4 heures ou toute la nuit.
- Pour le ganache, chauffez la crème jusqu'à ébullition, versez sur les pépites de chocolat, laissez reposer, puis fouettez jusqu'à obtenir une texture lisse.
- Versez le ganache sur le cheesecake, en laissant couler sur les côtés.
- Décorez avec de la crème fouettée, des mini Oreos, des miettes de gâteau au velours rouge et des vermicelles.
Notes
Nutrition

Hi, I’m Olivia Parker, the founder of BakingSecret.com and a lifelong lover of all things sweet and homemade. I grew up in a small town in Oregon, where the smell of fresh cookies in my family’s kitchen sparked my passion for baking. Over the years, I turned that passion into a mission: to help home bakers feel confident, inspired, and creative.
After studying food science and working in several artisan bakeries across the U.S., I decided to create a space where everyone from beginners to seasoned bakers can find reliable recipes, expert tips, and a warm, welcoming community. BakingSecret.com is my way of sharing the magic of baking with the world. When I’m not testing new recipes, you’ll find me exploring farmers’ markets, collecting vintage cookbooks, or perfecting my sourdough technique.