
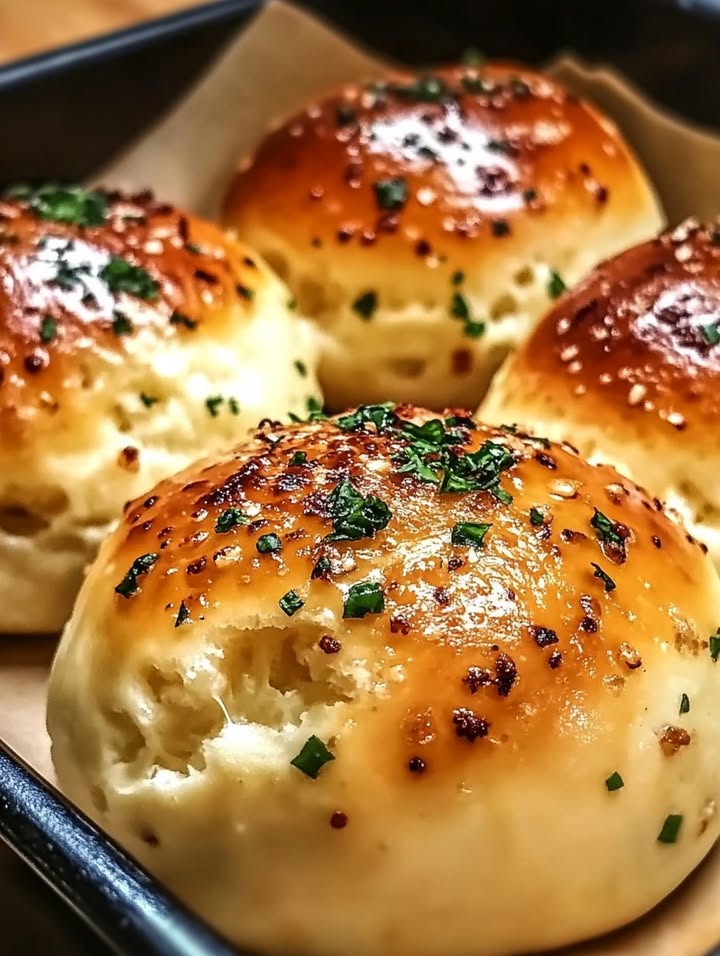
Get Ready to Savor the Burst of Flavor with Pillsbury Biscuit Garlic Butter Cheese Bombs
Imagine a warm, gooey, and utterly delicious treat that feels like a hug in your mouth. That’s exactly what you get with these Cheesy Garlic Bombs. I first tried this recipe at a friend’s potluck, and it was an instant hit. The combination of buttery, garlicky biscuits and melty mozzarella is simply irresistible. Let me share how you can make this delightful dish and why it’s become a staple in my kitchen.
A Brief History and Background of Cheesy Garlic Bombs
While the exact origins of Cheesy Garlic Bombs are hard to pinpoint, they seem to have evolved from the love for garlic bread and cheese. In many cultures, combining bread and cheese is a no-brainer. This modern twist on a classic comfort food has taken the internet by storm, and it’s easy to see why. Whether you call them Cheesy Garlic Bombs or Garlic Butter Cheese Biscuits, they are a crowd-pleaser at any gathering.
Why You’ll Love These Cheesy Garlic Bombs
These Cheesy Garlic Bombs are a perfect blend of simple ingredients and rich flavors. The Pillsbury Grands! biscuits provide a soft, pillowy base, while the mozzarella cheese adds a creamy, melty center. The garlic butter brings a savory, aromatic touch, making every bite a delectable experience. Plus, they’re incredibly easy to make, requiring just a few basic steps. Trust me, once you try them, you’ll be hooked!
Perfect Occasions to Prepare This Recipe
These Cheesy Garlic Bombs are versatile and perfect for various occasions. They make a fantastic appetizer for a dinner party, a fun snack for movie night, or even a delicious side dish for a family dinner. I’ve served them at potlucks, holiday gatherings, and even as a special treat for my kids. They always disappear in no time!
Ingredients You’ll Need
- 1 can (16 oz) Pillsbury Grands! biscuits
- 8 oz mozzarella cheese, cut into 1-inch cubes
- 4 tablespoons butter, melted
- 2 garlic cloves, minced
- 1 teaspoon Italian seasoning (optional)
- 1 tablespoon fresh parsley, chopped (optional)
- ½ cup grated Parmesan cheese (optional)
Substitution Options
If you don’t have mozzarella, feel free to use cheddar or Gouda. For the biscuits, any large, flaky biscuit dough will work well. You can also use dried herbs if you don’t have fresh parsley, and adding a pinch of red pepper flakes can give it a nice kick.
Preparation Steps
Step 1: Preheat the Oven
Preheat your oven to 375°F (190°C). Line a baking sheet with parchment paper or lightly grease it. This step ensures that your biscuits bake evenly and come out golden brown.
Step 2: Prepare the Biscuits
Open the Pillsbury Grands! biscuit can and separate the biscuits. Flatten each biscuit slightly with your hands. This makes it easier to wrap the cheese and helps the biscuits bake evenly.
Step 3: Add the Cheese Filling
Place a cube of mozzarella cheese in the center of each biscuit. Wrap the dough around the cheese, pinching the seams tightly to seal it completely. Place each cheese-filled biscuit, seam side down, on the prepared baking sheet. This step is crucial to ensure the cheese stays inside and doesn’t ooze out while baking.
Step 4: Make the Garlic Butter
In a small bowl, mix the melted butter, minced garlic, and Italian seasoning (if using). The aroma of garlic and herbs will fill your kitchen, making your mouth water in anticipation.
Step 5: Brush the Tops
Brush the tops of the biscuit bombs with the garlic butter mixture. This not only adds flavor but also helps the biscuits achieve a beautiful golden color.
Step 6: Bake
Bake the biscuits in the preheated oven for 10-12 minutes, or until golden brown. The smell of baking biscuits and melting cheese is pure heaven. Keep an eye on them to prevent overbaking.
Step 7: Garnish and Serve
Once the biscuits are out of the oven, brush them with any remaining garlic butter. Sprinkle with fresh parsley and grated Parmesan cheese (optional) for extra flavor. Serve them hot and watch them disappear!
Timing
Prep Time: 10 minutes
Cooking Time: 10-12 minutes
Total Time: 22-24 minutes
Chef’s Secret
To enhance the flavor, add a pinch of red pepper flakes to the garlic butter. This gives the biscuits a subtle heat that complements the creamy cheese perfectly.
Extra Info
Did you know that using high-quality, whole foods can make a big difference in your recipes? For the best results, opt for fresh, high-quality ingredients. It’s all about the little details that elevate your dishes. Check out this article for more tips on selecting the best whole foods.
Necessary Equipment
- Baking sheet
- Parchment paper or non-stick spray
- Small mixing bowl
- Pastry brush
Storage
Store these Cheesy Garlic Bombs in an airtight container in the refrigerator for up to 3 days. To reheat, place them in a preheated 350°F (175°C) oven for 5-7 minutes, or until they are warm and the cheese is melty again. If you want to freeze them, wrap them individually in plastic wrap and place them in a freezer bag. They can be frozen for up to 2 months. When you’re ready to enjoy them, let them thaw in the refrigerator overnight and reheat as described above.
Tips and Advice
To ensure the cheese stays inside, make sure to pinch the edges of the dough tightly. Also, don’t skip the garlic butter; it adds a ton of flavor. If you find the biscuits are browning too quickly, cover them loosely with aluminum foil during the last few minutes of baking.
Presentation Tips
Arrange the Cheesy Garlic Bombs on a platter with a sprinkle of fresh herbs and a side of marinara sauce for dipping. You can also serve them on a bed of arugula for a pop of color and freshness.
Healthier Alternative Recipes
For those looking for a healthier twist, here are some variations you might enjoy:
- Whole Wheat Biscuits: Use whole wheat biscuit dough for added fiber and nutrients. The texture will be a bit different, but the flavor is still amazing.
- Zucchini and Mozzarella: Add finely grated zucchini to the cheese filling for a hidden serving of veggies. It’s a great way to sneak in some nutrition without sacrificing taste.
- Honey Garlic Glaze: Substitute the garlic butter with a honey garlic glaze for a sweet and savory twist. It’s less traditional but equally delicious.
- Spicy Jalapeño: Replace the mozzarella with a pepper jack cheese and add a few slices of jalapeño for a spicy kick. It’s perfect for those who like a bit of heat.
- Veggie-Packed: Mix in some finely chopped spinach and sun-dried tomatoes for a burst of color and flavor. This version is not only tasty but also packed with antioxidants.
- Herbed Cream Cheese: Instead of mozzarella, use herbed cream cheese for a rich and creamy filling. It’s a luxurious alternative that’s perfect for special occasions.
Common Mistakes to Avoid
Mistake 1: Overfilling the Biscuits
One common mistake is overstuffing the biscuits with too much cheese. This can cause the cheese to leak out during baking, making a mess and ruining the presentation. To avoid this, use a 1-inch cube of cheese and make sure to pinch the edges tightly.
Mistake 2: Skipping the Parchment Paper
Using parchment paper or greasing the baking sheet is essential. If you skip this step, the biscuits can stick to the pan, making them difficult to remove. This can also affect the shape and texture of your Cheesy Garlic Bombs.
Mistake 3: Not Brushing Enough Garlic Butter
The garlic butter is what gives these biscuits their incredible flavor. If you don’t brush enough on top, the biscuits may lack that rich, garlicky goodness. Make sure to brush on a generous amount before and after baking for the best results.
Mistake 4: Overbaking
Overbaking the biscuits can result in a tough, dry texture. Keep a close eye on them and remove them from the oven when they are golden brown and the cheese is just starting to melt. This ensures a soft, gooey center and a perfectly baked exterior.
Mistake 5: Not Sealing the Dough Properly
Improper sealing can lead to cheese oozing out during baking. Take the time to carefully pinch the edges of the dough together, ensuring there are no gaps. This will help keep the cheese inside where it belongs, giving you perfectly filled biscuits.
FAQ
Can I use other types of cheese for these Cheesy Garlic Bombs?
Yes, you can use other types of cheese like cheddar, Gouda, or even pepper jack for a spicy twist. Just make sure the cheese melts well and is cut into 1-inch cubes.
How do I store leftover Cheesy Garlic Bombs?
Store leftovers in an airtight container in the refrigerator for up to 3 days. To reheat, place them in a preheated 350°F (175°C) oven for 5-7 minutes, or until warm and the cheese is melty again.
Can I freeze these Cheesy Garlic Bombs?
Absolutely! Wrap them individually in plastic wrap and place them in a freezer bag. They can be frozen for up to 2 months. Thaw them in the refrigerator overnight and reheat as described above.
What can I use instead of Italian seasoning?
If you don’t have Italian seasoning, you can use a mix of dried basil, oregano, and thyme. A pinch of red pepper flakes can also add a nice kick.
Can I make these Cheesy Garlic Bombs ahead of time?
Yes, you can prepare the biscuits up to the point of baking and store them in the refrigerator for a few hours. Just make sure to brush them with garlic butter right before baking.
Are these Cheesy Garlic Bombs suitable for vegetarians?
Yes, these Cheesy Garlic Bombs are vegetarian-friendly. Just make sure to use a vegetarian-friendly Parmesan cheese if you are using it as a garnish.
Can I make these without the garlic butter?
While the garlic butter adds a lot of flavor, you can make these without it. However, the biscuits will be less flavorful. If you prefer, you can use a simple butter and herb mix instead.
What kind of biscuits should I use?
I recommend using Pillsbury Grands! biscuits for the best results. They are large and flaky, providing a perfect base for the cheese. You can also use other large, flaky biscuit doughs available in your local store.
Can I add other ingredients to the filling?
Sure! You can add finely chopped spinach, sun-dried tomatoes, or even small pieces of cooked bacon to the cheese filling for extra flavor and variety.
How do I know when the biscuits are done?
The biscuits are done when they are golden brown and the cheese is fully melted. This usually takes about 10-12 minutes in a preheated 375°F (190°C) oven. Keep an eye on them to prevent overbaking.
For more delicious and easy-to-make recipes, check out our collection of baking secrets. From Fluffy Hot Cross Buns to Zero Carb Bread, we have a variety of treats to satisfy your cravings.
Conclusion
These Cheesy Garlic Bombs are a delightful and comforting treat that’s perfect for any occasion. With their simple preparation and rich, savory flavors, they are sure to become a favorite in your home, just as they have in mine. So, roll up your sleeves, grab your ingredients, and get ready to create a batch of these heavenly bites. Happy baking!
Equipment
- Baking sheet
- Parchment paper or non-stick spray
- Small mixing bowl
- Pastry brush
Ingredients
- 1 can Pillsbury Grands! biscuits 16 oz
- 8 oz mozzarella cheese cut into 1-inch cubes
- 4 tbsp butter melted
- 2 cloves garlic minced
- 1 tsp Italian seasoning optional
- 1 tbsp fresh parsley chopped, optional
- ½ cup grated Parmesan cheese optional
Instructions
- Preheat your oven to 375°F (190°C) and line a baking sheet with parchment paper or lightly grease it.
- Open the Pillsbury Grands! biscuit can and separate the biscuits. Flatten each biscuit slightly with your hands.
- Place a cube of mozzarella cheese in the center of each biscuit, then wrap the dough around the cheese and pinch the seams tightly.
- In a small bowl, mix the melted butter, minced garlic, and Italian seasoning (if using).
- Brush the tops of the biscuit bombs with the garlic butter mixture.
- Bake the biscuits in the preheated oven for 10-12 minutes, or until golden brown.
- Once out of the oven, brush with any remaining garlic butter and sprinkle with fresh parsley and grated Parmesan cheese (optional) before serving.
Notes
Nutrition

Hi, I’m Olivia Parker, the founder of BakingSecret.com and a lifelong lover of all things sweet and homemade. I grew up in a small town in Oregon, where the smell of fresh cookies in my family’s kitchen sparked my passion for baking. Over the years, I turned that passion into a mission: to help home bakers feel confident, inspired, and creative.
After studying food science and working in several artisan bakeries across the U.S., I decided to create a space where everyone from beginners to seasoned bakers can find reliable recipes, expert tips, and a warm, welcoming community. BakingSecret.com is my way of sharing the magic of baking with the world. When I’m not testing new recipes, you’ll find me exploring farmers’ markets, collecting vintage cookbooks, or perfecting my sourdough technique.