
The Ultimate Decadent Cherry Chocolate Cake
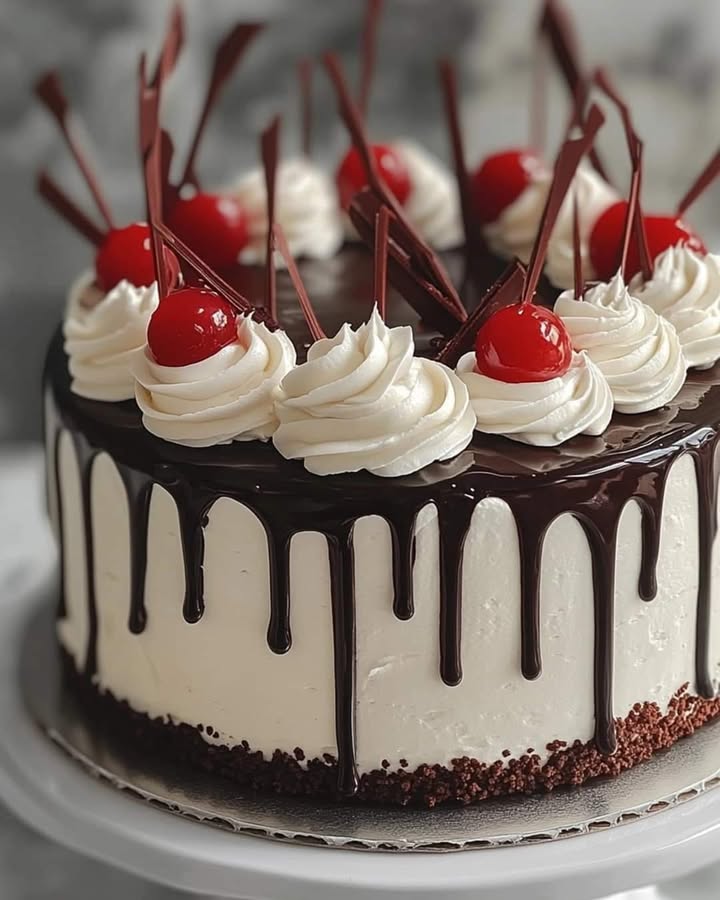
Picture this: a rich, dark chocolate cake soaked with cherry syrup, piled high with whipped cream, and crowned with gleaming chocolate shavings. That’s the magic of Black Forest Cake. It’s not just a dessert; it’s a celebration on a plate. My family begs for it every birthday, and I love making it because it feels like wrapping everyone in a warm, chocolatey hug.
A Slice of German Tradition
This cake, known in Germany as ‘Schwarzwälder Kirschtorte,’ hails from the Black Forest region. The original recipes often feature Kirschwasser, a clear cherry schnapps. My version uses cherry pie filling for simplicity and that beloved sweet-tart punch. Whether you stick to tradition or adapt it like I did, the soul of the cake remains: the perfect marriage of decadent cherry chocolate flavors.
Why You’ll Love This Decadent Cherry Chocolate Recipe
First, it’s stunning. Layers of dark cake, red cherries, and white cream create a showstopper. Second, the taste is unreal. Moist chocolate, bright fruit, and silky cream dance together in every bite. Finally, it’s a joyful baking project. Mixing the batter, watching it rise, and assembling the layers is pure kitchen happiness.
Perfect Occasions for This Treat
This cake is your secret weapon for special moments. It’s perfect for birthdays, anniversaries, or holiday dinners. It turns a simple Sunday family meal into a feast. Any time you want to say “I love you” with sugar and chocolate, this is the answer.
Ingredients for Your Decadent Cherry Chocolate Cake
- 2 cups all-purpose flour
- 2 cups granulated sugar
- 3/4 cup unsweetened cocoa powder
- 2 tsp baking powder
- 1 tsp baking soda
- 1 tsp salt
- 2 large eggs
- 1 cup milk
- 1/2 cup vegetable oil
- 2 tsp vanilla extract
- 1 cup boiling water
- 1 can cherry pie filling
- Whipped cream (for frosting)
- Chocolate shavings (for garnish)
Simple Substitution Options
You can tweak this recipe easily. Use a gluten-free flour blend if needed. Swap the milk for almond or oat milk. If you don’t have cherry pie filling, use canned cherries in light syrup and a dash of almond extract. For a boozy traditional touch, brush the cake layers with a little Kirsch before assembling.
Step 1: Preheat and Prepare
Start by heating your oven to 350°F (175°C). Grease two 9-inch round cake pans well. A light dusting of flour over the grease helps the cakes release beautifully later. This step sets the stage for success.
Step 2: Combine the Dry Ingredients
In a large bowl, whisk together the flour, sugar, cocoa powder, baking powder, baking soda, and salt. Watching the white flour disappear into the deep brown cocoa is exciting. You can already smell the chocolate promise. Pro tip: Sifting the cocoa powder prevents little lumps in your batter.
Step 3: Bring in the Wet Team
Add the eggs, milk, oil, and vanilla to the dry mix. Beat everything until it’s smooth and glossy. The batter will be thick and rich. The vanilla aroma mixes wonderfully with the dark chocolate scent.
Step 4: The Magic of Boiling Water
Now, slowly stir in the boiling water. The batter will suddenly become thin and liquid. Don’t panic! This is what makes the cake incredibly moist and light. Pour the batter evenly into your prepared pans.
Step 5: Bake to Perfection
Place the pans in the oven. Bake for 30-35 minutes. A toothpick inserted in the center should come out clean. The cakes will rise, crack slightly on top, and smell like a chocolate factory. Let them cool in the pans for 10 minutes before moving them to a wire rack.
Step 6: The Grand Assembly
Once completely cool, place one cake layer on your serving plate. Spread the entire can of cherry pie filling over it. The glossy red cherries and thick syrup look amazing against the dark cake. Carefully place the second layer on top.
Step 7: Frost and Garnish
Frost the entire cake generously with whipped cream. Cover the top and sides in a fluffy white blanket. Finally, shower the top with chocolate shavings. You can use a knife on a chocolate bar to make them. This final touch adds texture and intense chocolate flavor.
Step 8: Chill and Serve
Refrigerate the cake for at least an hour before serving. This chilling time lets the flavors marry and the cream set. Slice with a clean knife and serve big, beautiful pieces. The layers will hold together perfectly, revealing your masterpiece.
Timing Your Creation
Prep Time: 20 minutes
Bake Time: 35 minutes
Cool & Assemble Time: 20 minutes
Chill Time: 1 hour
Total Time: About 2 hours 15 minutes
Servings: 12
Chef’s Secret: The Cherry Syrup Soak
My secret for extra moistness and flavor? Before adding the cherry filling, I sometimes spoon a little syrup from the can over the bottom cake layer. It seeps into the cake, making it even more tender and infusing it with cherry goodness from the inside.
A Sweet Fact About Chocolate and Cherries
The combination of chocolate and cherries isn’t just delicious; it’s historical. Cherries were one of the first fruits paired with chocolate in European confections centuries ago. Their tartness cuts through chocolate’s richness, creating a balance our taste buds adore.
Necessary Equipment
- Two 9-inch round cake pans
- Large mixing bowl
- Whisk or electric mixer
- Measuring cups and spoons
- Wire cooling rack
- Serving plate or cake stand
- Knife for chopping chocolate
Storing Your Decadent Cherry Chocolate Cake
Because of the whipped cream, this cake must be stored in the refrigerator. Cover it loosely with plastic wrap or place it in a cake keeper. It will stay fresh for up to 3 days. The cake may absorb some cherry syrup over time, making it even more flavorful.
For longer storage, you can freeze the unfrosted cake layers separately. Wrap them tightly in plastic wrap and foil. Thaw in the refrigerator before assembling and frosting. The whipped cream and fresh filling should always be added just before serving.
If you need to transport the cake, keep it cold. Use an insulated carrier or a cooler with ice packs. The chilled cake will travel well and be ready to impress at your destination.
Tips and Advice for Success
- Use good quality cocoa powder for the deepest chocolate flavor.
- Ensure your cake layers are completely cool before frosting. Warm cake will melt the whipped cream.
- For clean slices, dip your knife in hot water and wipe it dry between cuts.
- If your whipped cream is too soft, stabilize it with a tablespoon of powdered sugar while beating.
Presentation Ideas
- Serve on a vintage cake stand for a classic look.
- Garnish each slice with a single whole cherry on top.
- Use a piping bag to create decorative whipped cream swirls on the cake surface.
- Add a ring of fresh dark cherries around the base of the cake.
Healthier Alternative Twists
You can adapt this beloved recipe in many ways. Here are six inspired variations:
- Black Forest Cupcakes: Bake the batter in cupcake tins. Top each with a dollop of cherry filling and whipped cream.
- Yogurt Frosted Version: Substitute the whipped cream with a thickened Greek yogurt sweetened with a little honey.
- Sugar-Free Adaptation: Use a sugar substitute blend in the cake and a no-sugar-added cherry compote for the filling.
- Mini Layer Cakes: Bake the cake in square pans and cut into small squares. Stack two squares per person for individual servings.
- Vegan Black Forest Cake: Use plant-based milk, oil instead of butter, and egg substitutes. Frost with coconut cream.
- Black Forest Brownie Trifle: Chop the chocolate cake into chunks. Layer in a bowl with cherries and cream for a deconstructed dessert.
More Dessert Inspiration
If you love baking special treats, our site has many ideas. You might enjoy making savory Taco Ranch Bites for a party, or a quick Honey Garlic Glazed Salmon for dinner. For another decadent dessert, try this Banana Caramel Peanut Butter Cheesecake. If you prefer no-bake options, this Creamy Pineapple Cheesecake is refreshing and easy.
Common Mistakes to Avoid
Mistake 1: Using Cold Ingredients
Using cold eggs or milk can cause your batter to seize up and not blend smoothly. This can lead to a dense, uneven cake. Always let your eggs and milk sit at room temperature for about 30 minutes before baking. They will incorporate into the dry ingredients much better, giving you a uniform, airy batter.
Mistake 2: Overmeasuring the Flour
Scooping flour directly from the bag with your measuring cup packs it down. You end up with too much flour, making the cake dry and heavy. Instead, spoon the flour lightly into your measuring cup and level it off with a knife. This “spoon and level” method guarantees the perfect amount.
Mistake 3: Skipping the Chilling Step
It’s tempting to slice the cake right after frosting. But if you don’t chill it, the whipped cream will be soft and may slide off. The layers won’t have settled together. Refrigerating for that hour firms up the cream, sets the structure, and lets the cherry syrup meld into the cake, creating a cleaner slice and better taste.
Mistake 4: Overbeating the Batter After Adding Water
Once you add the boiling water, the batter is thin. Beating it too vigorously can incorporate too many air bubbles that collapse in the oven. This might cause the cake to fall or become gummy. Just stir gently until the water is fully combined. A few lumps are okay; they will dissolve during baking.
A Note on Enjoying Sweet Treats
Indulgent desserts like this are part of a joyful life. Enjoying them mindfully is key. For general guidance on balancing indulgence with health, the CDC offers helpful information on portion control as part of a healthy diet.
If you’re looking for more cake recipes to try, explore our full collection of cake and cupcake recipes for every occasion.
Frequently Asked Questions
Can I make this cake without cherry pie filling?
Yes, you can. Use about 2 cups of fresh or frozen pitted cherries. Cook them with a half cup of sugar and a tablespoon of lemon juice until they soften and create a syrup. Let this compote cool before using it as your filling. The flavor will be fresher and less sweet than the canned pie filling.
How can I make the whipped cream frosting stable?
Whipped cream can wilt, especially on a warm day. To stabilize it, add 1 tablespoon of powdered sugar or 1 teaspoon of cornstarch to your cold cream before whipping. Whip until stiff peaks form. This little trick helps the cream hold its shape for days in the fridge.
My cake layers sunk in the middle. What went wrong?
This usually means there was too much liquid in the batter, or the oven temperature was too low. Ensure you measure the boiling water accurately. Also, check your oven temperature with a standalone thermometer. An oven that runs cool won’t set the cake structure quickly enough, causing it to collapse.
Can I use a different type of chocolate?
The classic recipe uses unsweetened cocoa powder. You can use Dutch-processed cocoa for a milder, darker color. Do not substitute with sweetened drinking chocolate or hot cocoa mix. Those contain sugar and milk powder and will alter the recipe’s balance, likely making it too sweet and dry.
Is there a way to make this cake ahead of time?
Absolutely. Bake the cake layers up to 2 days ahead. Cool them completely, wrap tightly in plastic wrap, and store at room temperature. Make the cherry filling and whipped cream the day you plan to serve. Assemble and frost the cake a few hours before your event, then chill.
What’s the best way to create chocolate shavings?
Use a slightly warm, dry chocolate bar. A room-temperature bar is too hard to shave easily. Hold a chef’s knife at a shallow angle against the flat side of the bar and push forward gently. Long, curled shavings will come off. For smaller shavings, use a vegetable peeler on the edge of the bar.
Can I add alcohol to this cake like the traditional version?
You can. The traditional German cake uses Kirschwasser (cherry schnapps). After baking, you can sprinkle 2-3 tablespoons over the cooled cake layers before assembling. The alcohol will add a subtle, authentic flavor and keep the cake extra moist.
Why do I need to add boiling water to the batter?
The boiling water “blooms” the cocoa powder. This process releases its full flavor and deep color. It also helps dissolve the sugar fully and creates a thin batter that, paradoxically, bakes up into a very moist and light cake. Don’t skip this step; it’s a chemical magic trick!
My cake stuck to the pan. How do I prevent that?
Proper pan preparation is crucial. After greasing the pan with butter or oil, dust it with a light coat of flour or cocoa powder. Tap out the excess. This creates a barrier between the pan and the batter. Also, let the cake cool for exactly 10 minutes in the pan before trying to remove it. It will have set enough to hold together.
Can I freeze the assembled cake?
I don’t recommend freezing the fully assembled cake with whipped cream. The cream will not thaw well. Instead, freeze the unfrosted cake layers individually as described. The cherry filling can also be frozen separately. Thaw both in the fridge, then assemble with freshly made whipped cream.
Your Decadent Cherry Chocolate Masterpiece
Creating a Black Forest Cake is a baking adventure worth taking. Each step builds toward a breathtaking result. The deep chocolate, the burst of cherry, the cloud of cream—it’s pure happiness on a plate. Share it with people you love, and watch their faces light up. That’s the real reward. Now, grab your bowls and get baking. Your delicious celebration awaits.
Equipment
- Grand bol
- Fouet
- Racloir
- Deux moules à gâteau ronds de 9 pouces
- Papier sulfurisé
Ingredients
- 2 tasses farine tout usage
- 2 tasses sucre
- 3/4 tasse cacao en poudre non sucré
- 2 cuil. à café poudre à lever
- 1 cuil. à café bicarbonate de soude
- 1 cuil. à café sel
- 2 oeufs
- 1 tasse lait
- 1/2 tasse huile végétale
- 2 cuil. à café extrait de vanille
- 1 tasse eau bouillante
- 1 boîte compote de cerises
- q.s. crème fouettée pour le glaçage
- q.s. copeaux de chocolat pour la garniture
Instructions
- Préchauffez le four à 175°C (350°F) et graissez deux moules à gâteau ronds de 9 pouces.
- Dans un grand bol, fouettez ensemble la farine, le sucre, le cacao en poudre, la poudre à lever, le bicarbonate de soude et le sel.
- Ajoutez les œufs, le lait, l'huile végétale et l'extrait de vanille aux ingrédients secs et mélangez jusqu'à obtenir une consistance lisse.
- Incorporez lentement l'eau bouillante jusqu'à ce que tout soit bien mélangé.
- Divisez la pâte également entre les moules préparés et faites cuire au four pendant 30 à 35 minutes.
- Laissez les gâteaux refroidir dans les moules pendant 10 minutes, puis transférez sur une grille pour refroidir complètement.
- Placez une couche de gâteau sur un plat de service et étalez la compote de cerises dessus.
- Ajoutez la seconde couche de gâteau, glacer avec de la crème fouettée et garnir de copeaux de chocolat.
- Réfrigérez le gâteau pendant au moins 1 heure avant de servir.
Notes
Nutrition

Hi, I’m Olivia Parker, the founder of BakingSecret.com and a lifelong lover of all things sweet and homemade. I grew up in a small town in Oregon, where the smell of fresh cookies in my family’s kitchen sparked my passion for baking. Over the years, I turned that passion into a mission: to help home bakers feel confident, inspired, and creative.
After studying food science and working in several artisan bakeries across the U.S., I decided to create a space where everyone from beginners to seasoned bakers can find reliable recipes, expert tips, and a warm, welcoming community. BakingSecret.com is my way of sharing the magic of baking with the world. When I’m not testing new recipes, you’ll find me exploring farmers’ markets, collecting vintage cookbooks, or perfecting my sourdough technique.